Log Data Center Traffic That Matches No Interzone Rules
Table of Contents
Log Data Center Traffic That Matches No Interzone Rules
By default, the firewall denies traffic between data
center zones (interzone traffic) that matches no Security policy
allow rule. Log and examine this traffic to identify attempted attacks
and also traffic you may want to allow.
Traffic that doesn’t match any of the Security
policy rules you configure matches the predefined interzone-default
block rule at the bottom of the rulebase and is denied. To gain
visibility into traffic that doesn’t match a rule you explicitly
configured, enable logging on the interzone-default rule. Logging
this traffic gives you the opportunity to examine access attempts
that you have not explicitly allowed, which may identify attack
attempts or traffic for which you want to modify an allow rule.
- Select the interzone-default row in the rulebase and click Override to enable editing the rule.Select the interzone-default rule name to edit the rule.On the Actions tab, select Log at Session End and click OK.Create a custom report to monitor traffic that hits this rule.
- Select .
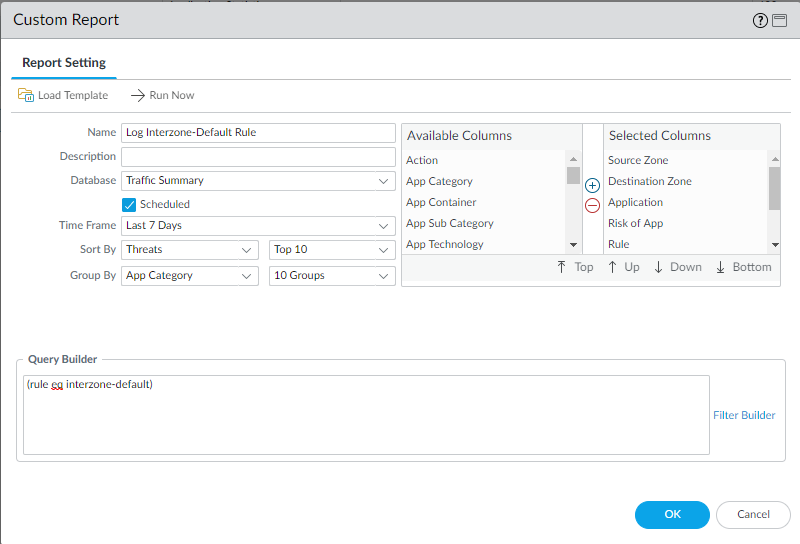
- Add a report and give it a descriptive Name. In this example, the name is Log Interzone-Default Rule.
- Set the Database to Traffic Summary.
- From Available Columns, add Source Zone, Destination Zone, Sessions, Bytes, Application, Risk of App, Rule, and Threat to the Selected Columns list. If there are other types of information you want to monitor, select those as well.
- Select the Scheduled box.
- Set the desired Time Frame, Sort By, and Group By values. In this example, the selected values are Last 7 Days, Threats and App Category, respectively.
- Define the query to match traffic that matches the interzone-default rule:
(rule eq interzone-default)
The resulting custom report settings look like this:![]()
- Commit the changes.