CN-Series
Deploy the CN-Series from the AWS Marketplace
Table of Contents
Deploy the CN-Series from the AWS Marketplace
| Where Can I Use This? | What Do I Need? |
|---|---|
|
|
You can license your CN-Series Firewall as
a Kubernetes Service deployed on AWS EKS through the AWS Marketplace. The CN-Series
can be licensed for one month, one year, two years, or three years
and deployed on EKS 1.19 and later or Redhat Openshift 4.7 and later.
This
product is in Preview.
Using this license requires
that you update the IAM policy attached to your Kubernetes worker
node.
If you are using a PAYG license
purchased through the AWS Marketplace for your CN-Series deployment,
do not add an authorization code to the Panorama plugin for Kubernetes.
- Complete the following prerequisites.
- Create your EKS or Redhat OpenShift cluster.
- Deploy Panorama and install the Kubernetes Plugin.Skip these steps if you already have a licensed Panorama instance deployed on AWS.
- Install Panorama on an Amazon EC2 instance.
- Once Panorama is installed, please email the CN-Series team at cn-series-aws-marketplace@paloaltonetworks.com to request a license for your Panorama. Please include your Full Name, Company Email, Company Name, Purchase Order Number, AWS Account Name, and AWS Account ID.
- Apply your serial number and license to Panorama.
- Log in to the Panorama web interface.
- Select and click the edit icon.
![]()
- Enter the Panorama Serial Number (included in the order fulfillment email) and click OK.
- Select
- Click Activate feature using authorization code.
- Enter the firewall management license authorization code and click OK to activate the license.
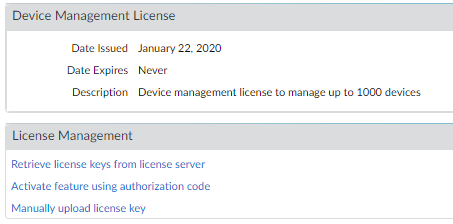
- Verify the firewall management license is activated. The Device Management License section now appears displaying the date the license was issued, when the license expires, and a description of the firewall management license.
![]()
- Update your IAM policies and attach the policy to your
Kubernetes worker node.
- Log in to the AWS Management Console and open the IAM console.
- Select Policies.
- From the list of policies, select AWSLicenseManagerConsumptionPolicy and AWSMarketplaceMeteringRegisterUsage.
- Select Actions and then choose Attach.
- Select your worker node identity to attach the policy to. After selecting the identity, click Attach policy.
- Download the plugin-serviceaccount.yaml and
apply the yaml before deploying the Helm charts.kubectl apply -f plugin-serviceaccount.yaml
- Access the AWS Marketplace and locate the CN-Series for AWS Marketplace listing.
- Click Continue to Subscribe.
- Enter the number of licenses you want to purchase. Each
license entitlement is equivalent to one vCPU used by your CN-Series
deployment.Refer to CN-Series System Requirements and CN-Series Performance and Scaling for guidance on the number of vCPUs required to meet the needs of your deployment.
- Click Continue to Configuration.
This adds the licenses to your AWS account.
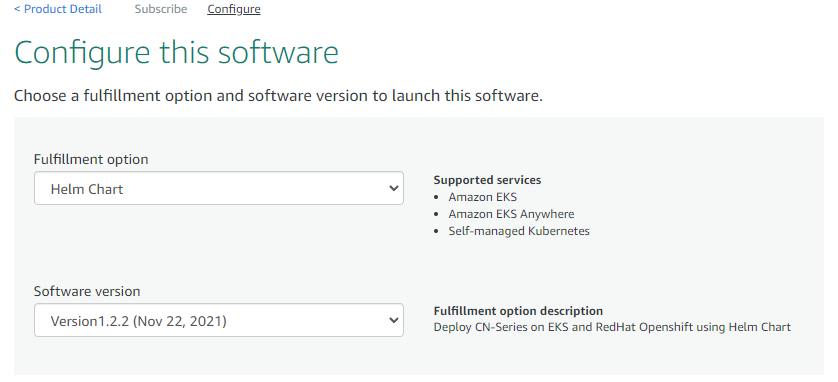
- Select Helm Chart as the Fulfillment option.
- Select the latest version for Software version.
![]()
- Click Continue to Launch.
- Select your Launch target—Amazon-managed Kubernetes or Self-managed Kubernetes. Self-managed mode is deployed on Redhat OpenShift.
- Follow the Launch Instruction displayed
in the AWS Marketplace listing. The instructions differ depending
on your launch target.
- Amazon-managed Kubernetes
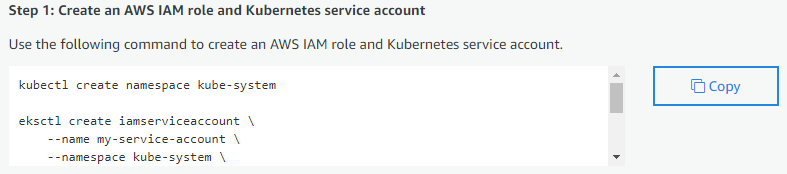
- Copy the commands from Step 1 of the Launch instructions.
- Update the copied commands to add you cluster name.--cluster <ENTER_YOUR_CLUSTER_NAME_HERE>
- Execute the copied command on your EKS cluster.
![]()
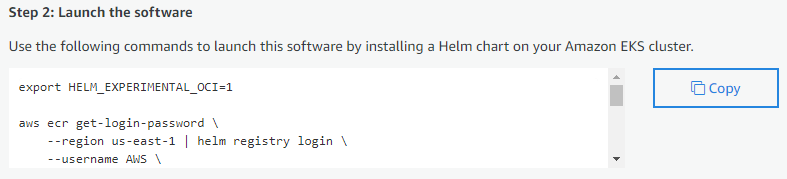
- Copy the Helm chart commands from Step 2 of the Launch instructions.
- Update the Helm install information to include your Panorama IP, Panorama auth key, device group name, template stack name, and collect group name. Set cluster.deployTo to eks.
helm install cn-series-helm \ --namespace kube-system ./awsmp-chart/* \ --set serviceAccount.create=false \ --set serviceAccount.name=my-service-account \ --set cluster.deployTo=eks \ --set panorama.ip=Panorama-IP \ --set panorama.ip2=Panorama-IP2 \ --set panorama.authKey=000xxxxxxxx \ --set panorama.deviceGroup=Panorama-DG \ --set panorama.template=Panorama-TS \ --set panorama.cgName=Panorama-CG \ --set imagePullSecrets=awsmp-image-pull-secret![]()
- Execute the helm install command on your EKS cluster after updating the values listed above.
- Self-managed Kubernetes
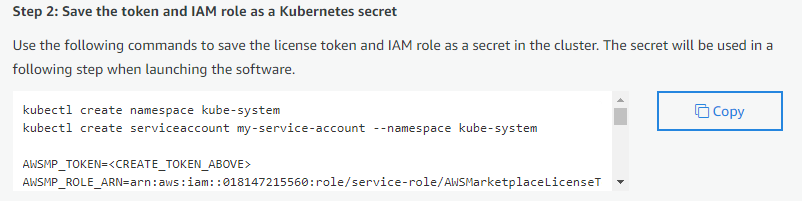
- Complete Step 1 in the Launch instructions to create a license token and IAM role.
![]()
- Copy the commands from Step 2 of the Launch instructions.
- Update the copied commands to add the token value.AWSMP_TOKEN=<CREATE_TOKEN_ABOVE>
- Execute the copied command on your OpenShift cluster.
![]()
- Copy the Helm chart commands from Step 3 of the Launch instructions.
- Update the Helm install information to include your Panorama IP, Panorama auth key, device group name, template stack name, and collect group name. Set cluster.deployTo to openshift.
helm install cn-series-helm \ --namespace kube-system ./awsmp-chart/* \ --set serviceAccount.create=false \ --set serviceAccount.name=my-service-account \ --set cluster.deployTo=eks|openshift \ --set panorama.ip=Panorama-IP \ --set panorama.ip2=Panorama-IP2 \ --set panorama.authKey=000xxxxxxxx \ --set panorama.deviceGroup=Panorama-DG \ --set panorama.template=Panorama-TS \ --set panorama.cgName=Panorama-CG \ --set imagePullSecrets=awsmp-image-pull-secret![]()
- Execute the helm install command on your OpenShift cluster after updating the values listed above.
- Verify that the license has been successfully added to
your account.
- Navigate to the AWS License Manager.
- Select Granted Licenses and locate the CN-Series for AWS Marketplace listing.
- Under Entitlements, you can
see the total number of licenses and the number of licenses consumed.
![]()
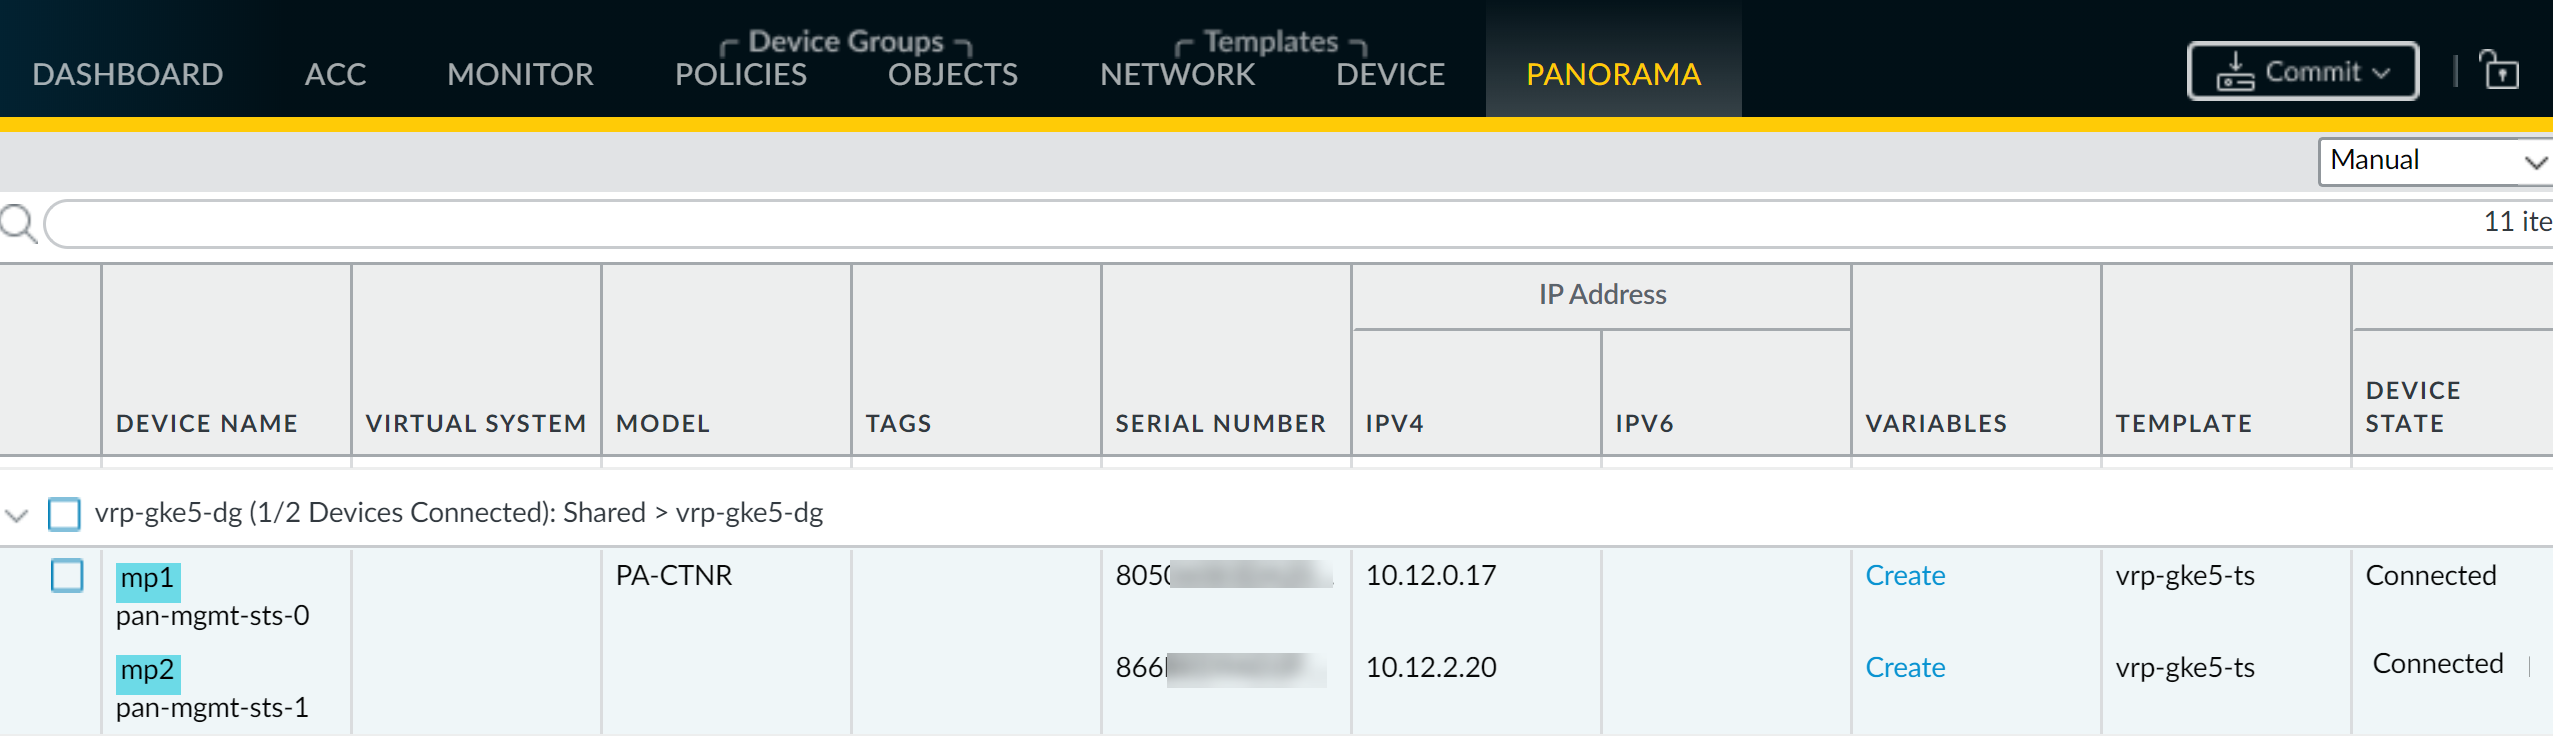
- Verify that the CN-Series firewalls appear in Panorama.
- Log in to Panorama.
- To view the CN-MGMT pods, select .
![]()
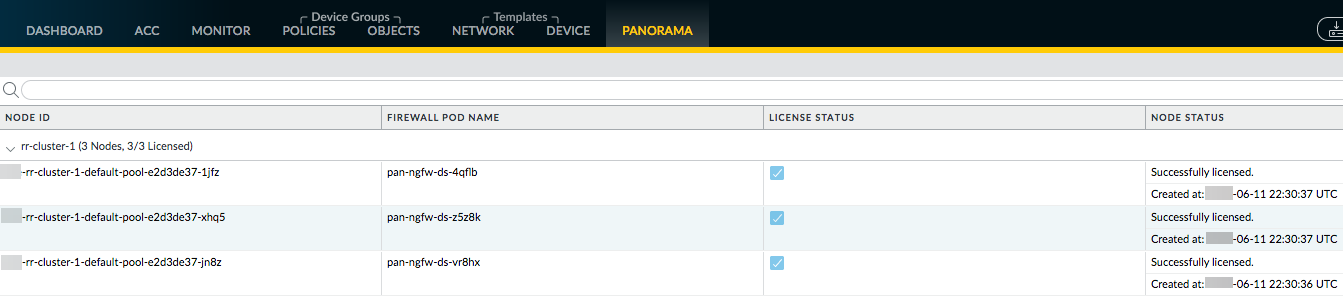
- To verify that the CN-NGFW pods are licensed, select and
verify that each pod has been allocated a license token.
![]()