CN-Series
Install the Kubernetes Plugin and Set up Panorama for CN-Series
Table of Contents
Install the Kubernetes Plugin and Set up Panorama for CN-Series
Install the Kubernetes plugin on Panorama and set it
up to monitor your Kubernetes clusters.
| Where Can I Use This? | What Do I Need? |
|---|---|
|
|
You can deploy the Panorama appliance on-premises
or in the cloud, as long as the Panorama appliance can connect with
the Kubernetes clusters where you want to deploy the CN-Series firewalls.
This workflow takes you through the process of installing the Kubernetes
plugin, activating the auth code and setting up the Kubernetes plugin
to monitor your clusters.
You must carefully plan the
number of credits you want to allocate to Panorama. After changing
the number of credits, you need not redeploy the CN-Series firewall
on Panorama OS 11.0.
For more information, see License the CN-Series Firewall and Software NGFW Credit Estimator.
- Deploy a Panorama with software version 11.0 and install the minimum content version.
- Go to for the minimum content release version on PAN-OS 11.0.See PAN-OS Release Notes.Go to for the software version.Locate and download the model-specific file for the release version to which you are upgrading. For example, to upgrade an M-Series appliance to Panorama 11.0, download the Panorama_m-11.0.0 image; to upgrade a Panorama virtual appliance to Panorama 11.0.0, download the Panorama_pc-11.0.0 image.After a successful download, the Action column changes from Download to Install for the downloaded image.Verify that your Panorama is in Panorama mode, if you want Panorama to collect the firewall logs.Install the Kubernetes plugin on Panorama. If your Panorama appliances are deployed as an HA pair, you must install the Kubernetes plugin on the primary (active) peer first.
- Log in to the Panorama Web Interface, select and click Check Now to get the list of available plugins.Select Download and Install the Kubernetes pluginAfter you successfully install, Panorama refreshes and the Kubernetes plugin displays on the Panorama tab.If Panorama is deployed in an HA pair, install the Kubernetes plugin on the secondary (passive) Panorama following the above steps described in Step 3.
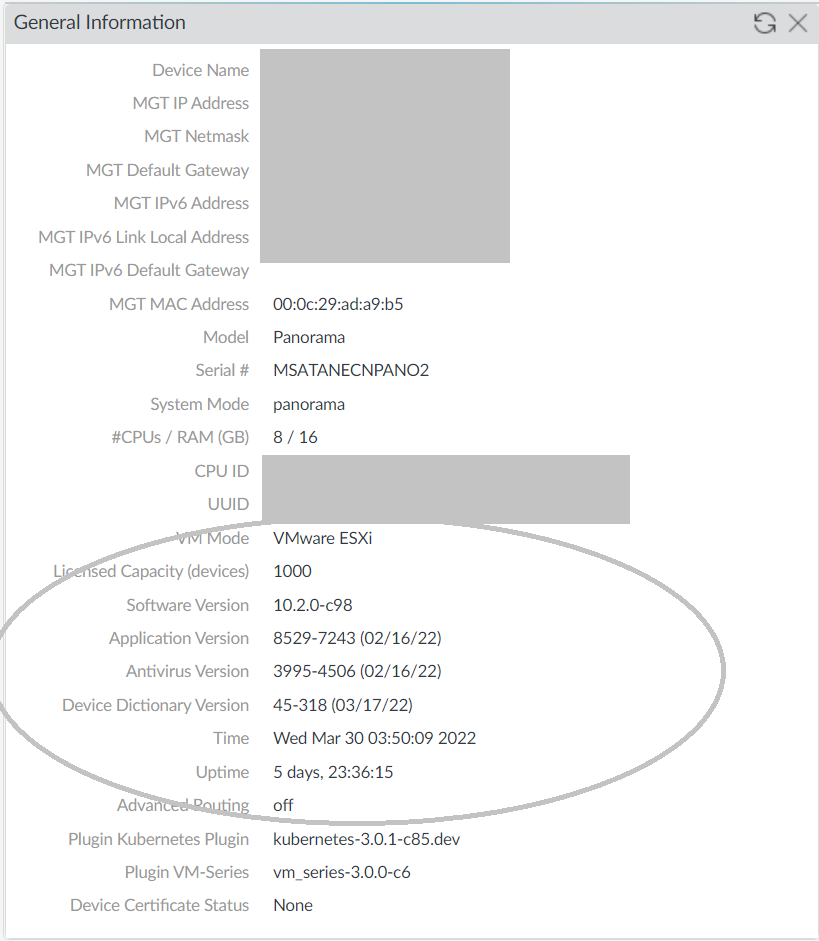
![]() You can also verify the General Information widget on the Panorama Dashboard.
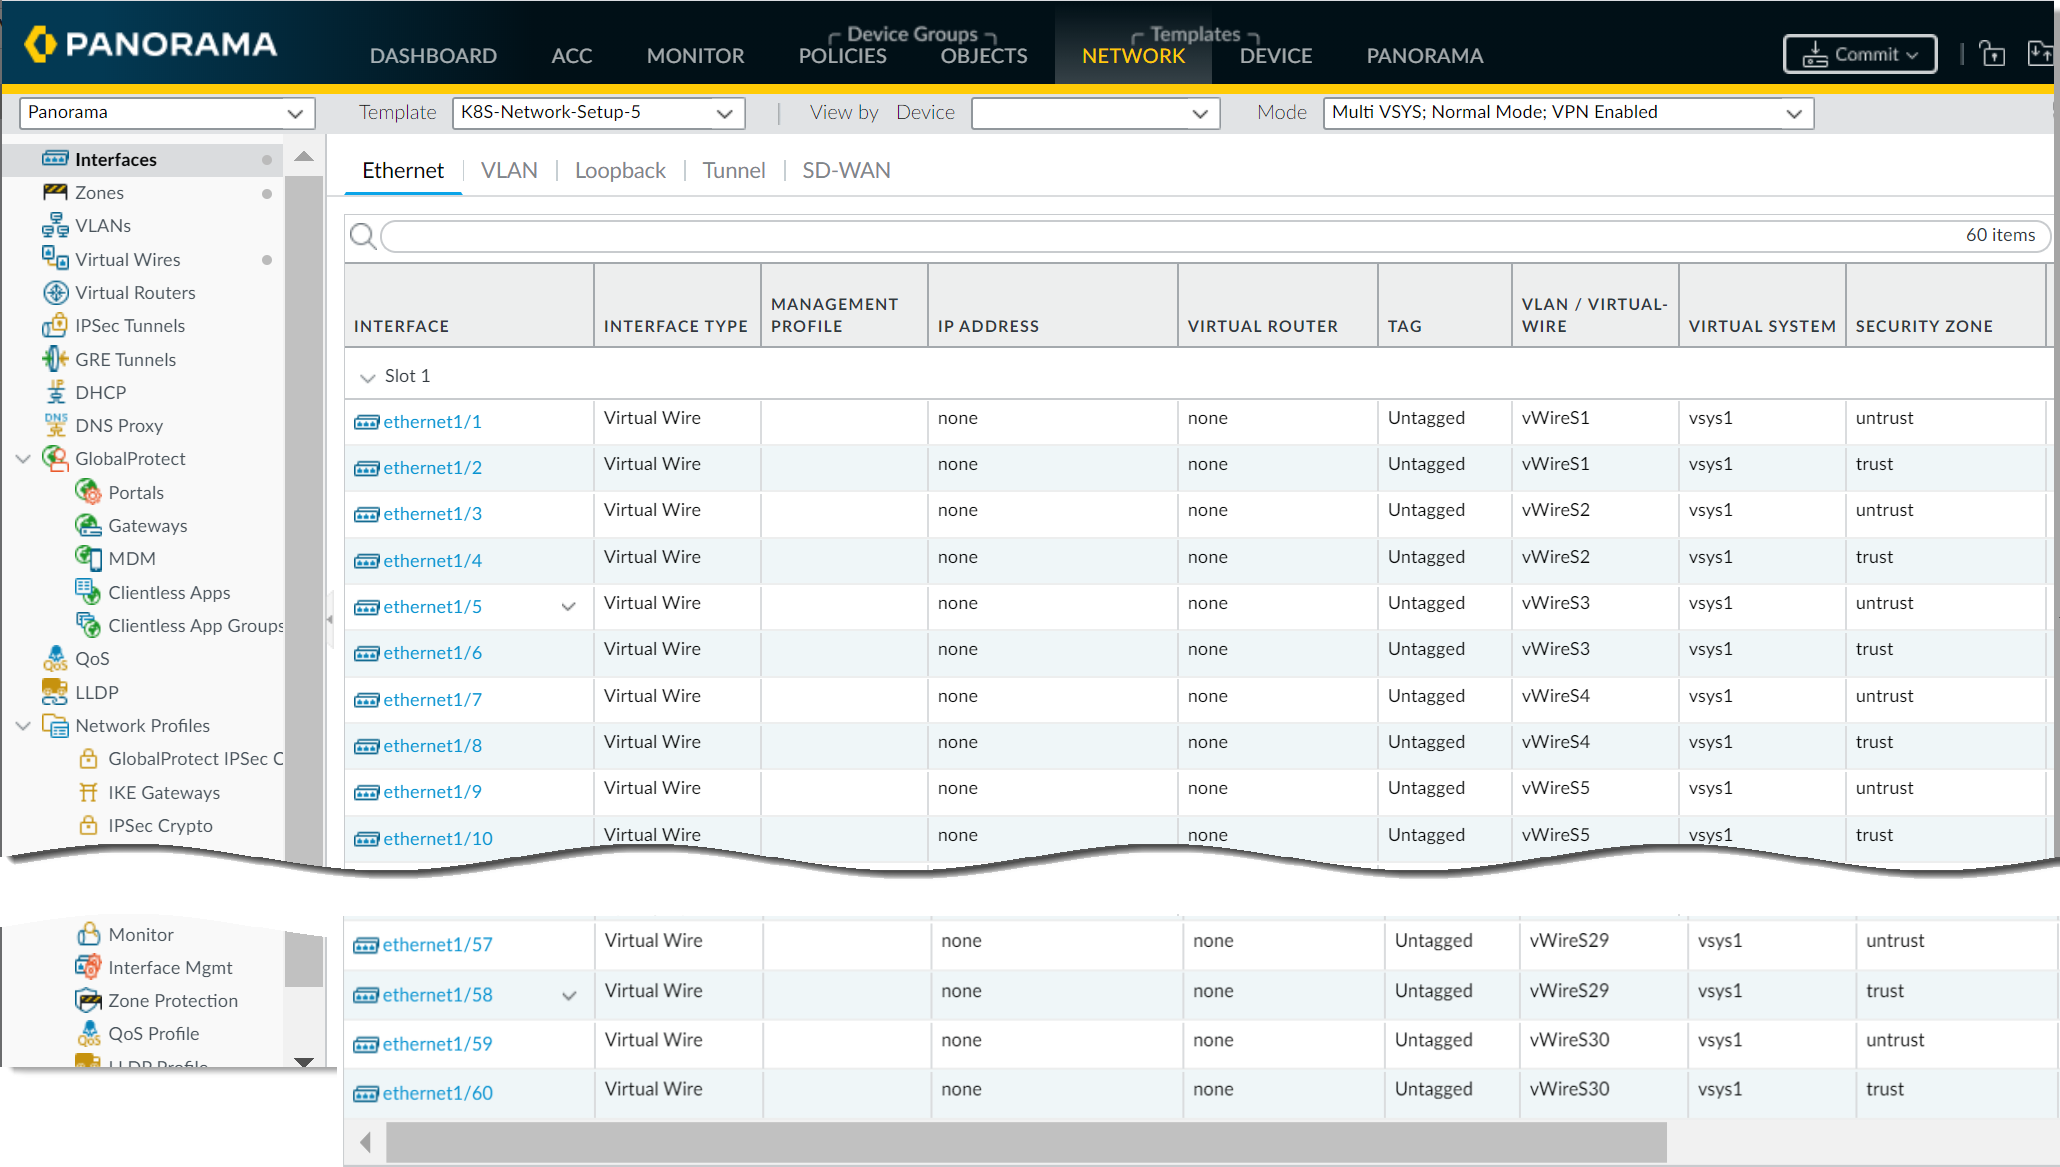
You can also verify the General Information widget on the Panorama Dashboard.![]() Commit your changes on Panorama.Click Commit to Panorama. The commit creates four templates—K8S-Network-Setup, K8S-Network-Setup-V2, K8S-Network-Setup-V3, and K8S-Network-Setup-V3-HA. It can take up to one minute for the interfaces to display on Panorama.
Commit your changes on Panorama.Click Commit to Panorama. The commit creates four templates—K8S-Network-Setup, K8S-Network-Setup-V2, K8S-Network-Setup-V3, and K8S-Network-Setup-V3-HA. It can take up to one minute for the interfaces to display on Panorama.- K8S-Network-Setup is for use with the CN-Series as a DaemonSet and has 30 virtual wires; a pair of interfaces that are part of a virtual wire to secure an application. Therefore, the CN-NGFW as a DaemonSet can secure a maximum of 30 application pods on a node.
![]()
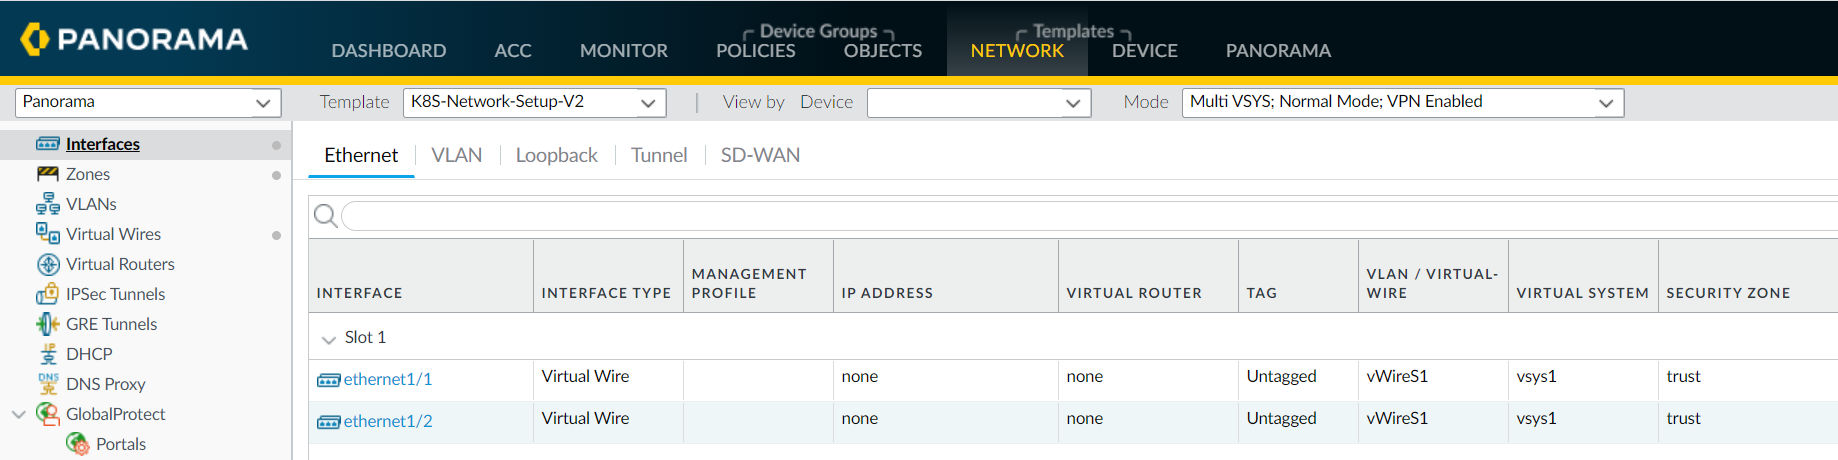
- K8S-Network-Setup-V2 is for use with the CN-Series as a Kubernetes Service and has one virtual wire; a pair of interfaces that are part of the virtual wire to secure pod applications.
![]()
- K8S-Network-Setup-V3 template has a sample config that you can clone and you can modify it to match your desired configurations. The Kubernetes CNF mode of deployment protects both container and non-container workloads. You can deploy as a standalone layer 3 deployment.
![]()
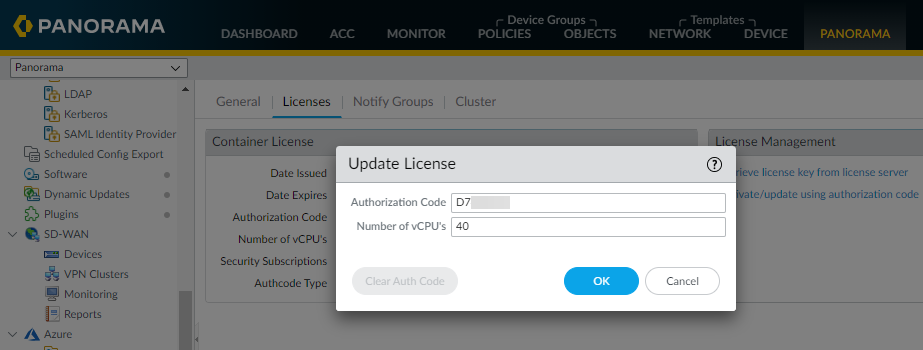
Get the CN-Series license credits on Panorama.- Select .Select Activate/update using authorization code, and enter the auth code and the total number of dataplane vCPUs needed. You must Create and Manage a Deployment Profile to activate CN-Series License to obtain your CN-Series authcode.
![]() If you deploy the CN-Series firewall without activating the license, you have a 4-hour grace period after which the firewalls stop processing traffic. After the grace period, the CN-NGFW instances will either failopen (default) or failclosed based on the (FAILOVER_MODE) defined in the pan-cn-ngfw-configmap.yaml.In fail-open mode the firewall will receive the packets and send it out without applying any security policies. Transitioning to fail-open will require a restart and cause a brief disruption of traffic during that (expected around 10-30 seconds). In fail-closed mode, the firewall will drop all the packets it receives. A fail-close will bring down the CN-NGFW Pod and release the credits to the available credits pool for licensing new CN-NGFW Pods.Verify that the number of available license credits is updated.
If you deploy the CN-Series firewall without activating the license, you have a 4-hour grace period after which the firewalls stop processing traffic. After the grace period, the CN-NGFW instances will either failopen (default) or failclosed based on the (FAILOVER_MODE) defined in the pan-cn-ngfw-configmap.yaml.In fail-open mode the firewall will receive the packets and send it out without applying any security policies. Transitioning to fail-open will require a restart and cause a brief disruption of traffic during that (expected around 10-30 seconds). In fail-closed mode, the firewall will drop all the packets it receives. A fail-close will bring down the CN-NGFW Pod and release the credits to the available credits pool for licensing new CN-NGFW Pods.Verify that the number of available license credits is updated.![]() Generate a VM Auth Key.
Generate a VM Auth Key.- Ensure the following prerequisites are met:
- You have a computer with network access to Panorama.
- You know the Panorama IP address.
- The Management interface supports SSH, which is the default setting. If an administrator disabled SSH and you want to re-enable it: select , click Management, select SSH, click OK, select , and Commit your changes to the Panorama configuration.
To access the CLI using SSH:- Enter the Panorama IP address in the SSH client and use port 22.
- Enter your administrative access credentials when prompted. After you log in, the message of the day displays, followed by the CLI prompt in Operational mode. For example:
admin@ABC_Sydney>
Use the following operational command:request bootstrap vm-auth-key generate lifetime <1-8760>For example to generate a key that is valid for 24 hrs, enter the following:request bootstrap vm-auth-key generate lifetime 24VM auth key 755036225328715 generated. Expires at: 2020/01/29 12:03:52You should ensure that you save the VM auth key somewhere as it is required for the later step.Create a parent Device Group and Template Stack.You must create a template stack and a device group, and you will later reference this template stack and device group when you edit the YAML file to deploy the CN-MGMT Pods. The Kubernetes plugin on Panorama creates a template called K8S-Network-Setup, and this template will be part of the template stack you define here.- Create a template stack and add the K8S-Network-Setup template the template stack.
- Select and Add Stack.
- Enter a unique Name to identify the stack.
- Add and select the K8S-Network-Setup template for daemonset, K8S-Network-Setup-V2 for kubernetes as a service deployment, K8S-Network-Setup-V3 for standalone CNF deployment, or K8S-Network-Setup-V3-HA for CNF HA deployment.
- Click OK.
Create a device group.- Go to and click Add.
- Enter a unique Name and a Description to identify the device group.
- Select the Parent Device Group (default is Shared) that will be just above the device group you are creating in the device group hierarchy.
- Click OK.
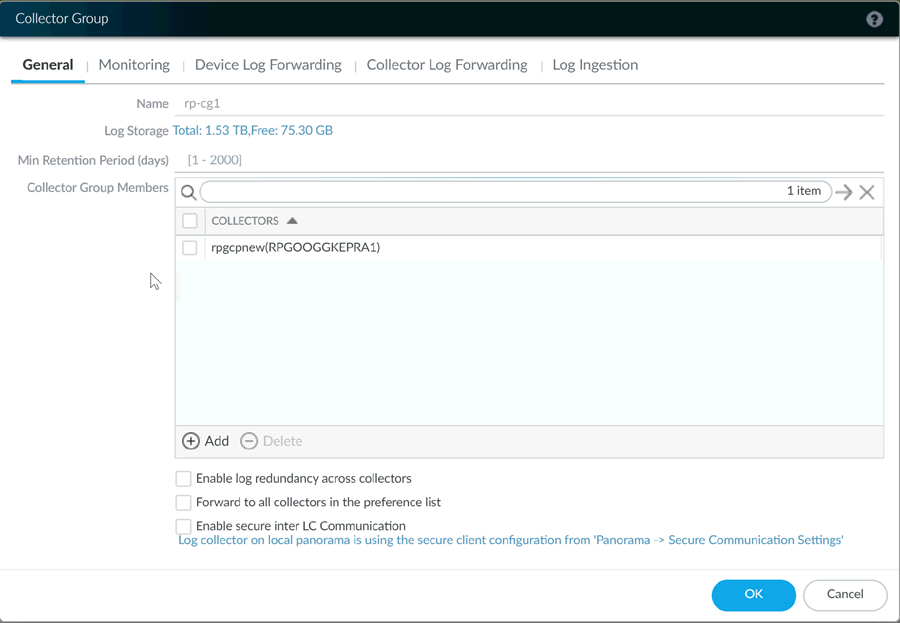
If you are using a Panorama virtual appliance, you can create a Log Collector and add it to a Log Collector Group.- Go to and Add a Collector Group.
- Enter a Name for the Collector Group.
- Enter the Minimum Retention Period in days (1 to 2,000) for which the Collector Group will retain firewall logs.By default, the field is blank, which means the Collector Group retains logs indefinitely.
- Add Log Collectors (1 to 16) to the Collector Group Members list.
![]()
- Select and then Commit and Push your changes to Panorama and the Collector Group you configured.
If you are using Advanced Routing, enable it.- Go to .
- In the Management tab, select Advanced Routing (This is applicable to the kubernetes CNF mode of deployment only).
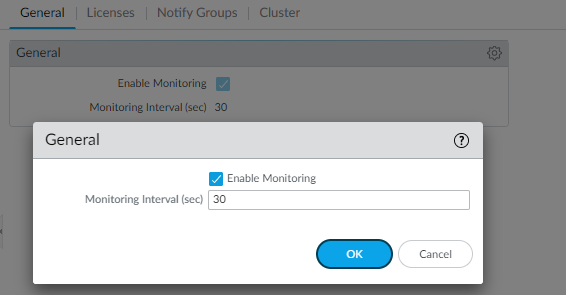
Set up the Kubernetes plugin for monitoring the clusters.The next step in the process is to add Kubernetes cluster information to Panorama to ensure that the two can communicate with each other.Panorama supports up to 32 Kubernetes clusters.To ensure that the plugin and the Kubernetes clusters are in sync, the plugin polls the Kubernetes API server at a configured interval and listens for notifications from the Kubernetes Watch API at a predefined interval.After you add the cluster information, Panorama always retrieves the service, node, replica set, and then creates tags for them to enable you to gain visibility and to control traffic to and from these clusters. Optionally, you can specify whether you want Panorama to retrieve information on the Kubernetes labels and create tags for these also. See IP-Address-to-Tag Mapping of Kubernetes Attributes for a list of supported attributes.- Check the monitoring interval.The default interval at which Panorama polls the Kubernetes API server endpoint is 30 seconds.
- Select .
- Verify that Enable Monitoring is selected.
- Click the gear icon to edit the Monitoring Interval and change to a range of 30-300 seconds.
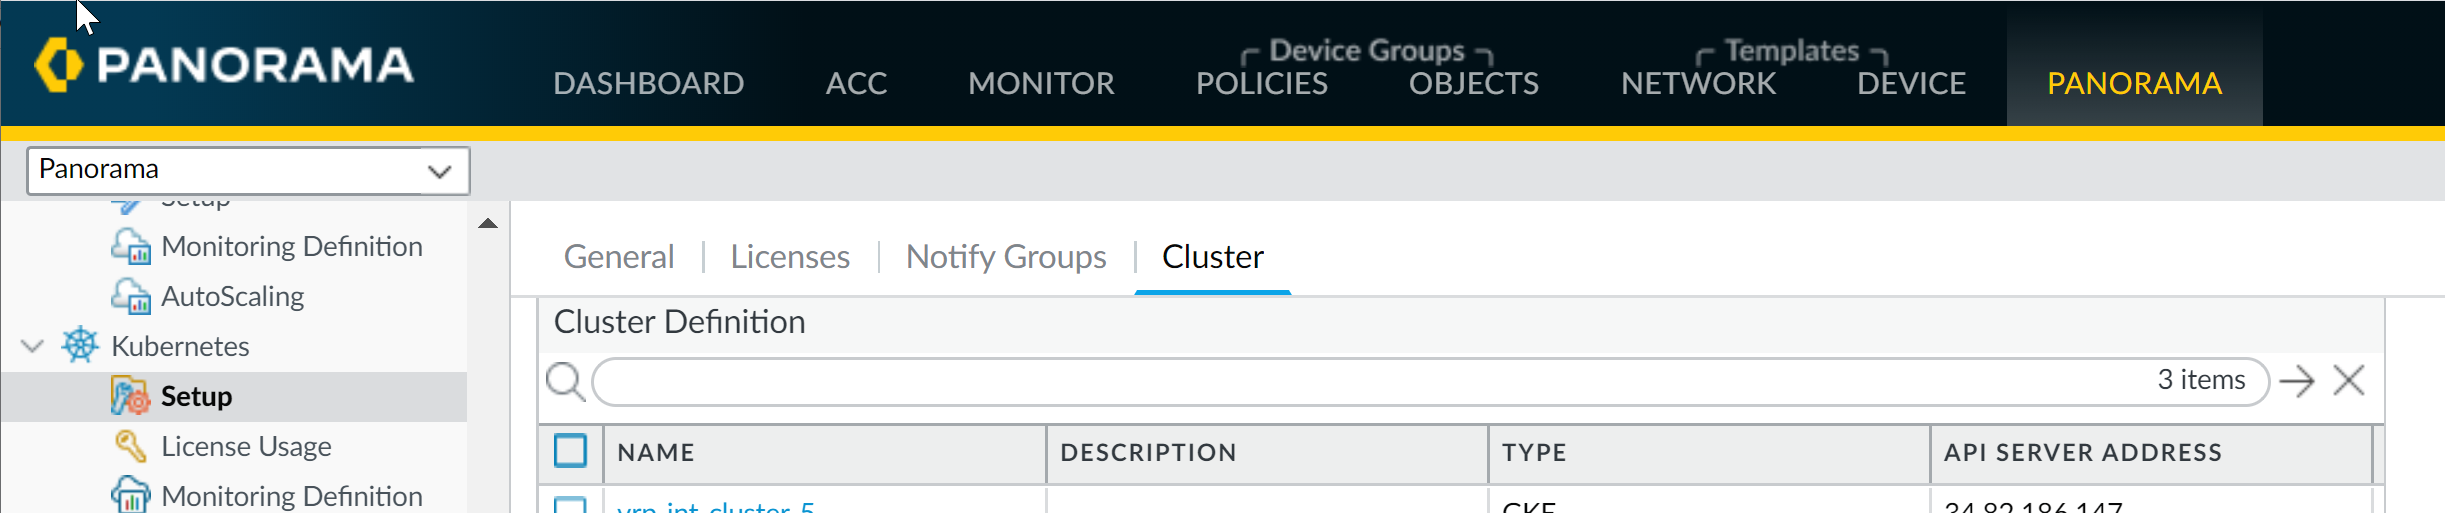
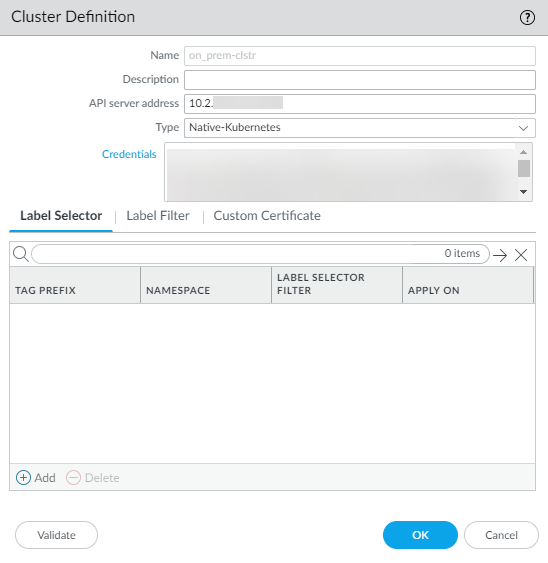
![]() Select , and Add Cluster.Make sure that you do not add the same Kubernetes cluster to more than one Panorama (single instance or HA pair) appliance because you may see inconsistencies in how the IP-address-to mappings are registered to the device groups.Enter a Name and the API Server Address.This is the Endpoint IP address for the cluster that you must get from your Kubernetes deployment. Enter a name, up to 20 characters, to uniquely identify the name of the cluster. You cannot modify this name because Panorama uses the cluster name when it creates tags for the pods, nodes, services it discovers within the cluster.The format of the API server address can be a hostname or an IP address:port number, and you do not need to specify the port if you are using port 443, which is default port.Select the Type of environment on which your cluster is deployed.The available options are AKS, EKS, GKE, Native Kubernetes, OpenShift, and Other.Upload the service account Credential that Panorama requires to communicate with the cluster. As described in the create service accounts for cluster authentication workflow, the filename for this service account is plugin-svc-acct.json.If you are uploading the service credentials via CLI/API then you must gzip the file and then do a base64 encoding of the compressed file before you upload or paste the contents of the file into the Panorama CLI or API. These steps are not required if you are uploading the service credential file on the GUI.Click OK.You can leave the Label Filter and Label Selector configuration for later. This is an optional task that enables you to retrieve any custom or user-defined labels for which you want Panorama to create tags.
Select , and Add Cluster.Make sure that you do not add the same Kubernetes cluster to more than one Panorama (single instance or HA pair) appliance because you may see inconsistencies in how the IP-address-to mappings are registered to the device groups.Enter a Name and the API Server Address.This is the Endpoint IP address for the cluster that you must get from your Kubernetes deployment. Enter a name, up to 20 characters, to uniquely identify the name of the cluster. You cannot modify this name because Panorama uses the cluster name when it creates tags for the pods, nodes, services it discovers within the cluster.The format of the API server address can be a hostname or an IP address:port number, and you do not need to specify the port if you are using port 443, which is default port.Select the Type of environment on which your cluster is deployed.The available options are AKS, EKS, GKE, Native Kubernetes, OpenShift, and Other.Upload the service account Credential that Panorama requires to communicate with the cluster. As described in the create service accounts for cluster authentication workflow, the filename for this service account is plugin-svc-acct.json.If you are uploading the service credentials via CLI/API then you must gzip the file and then do a base64 encoding of the compressed file before you upload or paste the contents of the file into the Panorama CLI or API. These steps are not required if you are uploading the service credential file on the GUI.Click OK.You can leave the Label Filter and Label Selector configuration for later. This is an optional task that enables you to retrieve any custom or user-defined labels for which you want Panorama to create tags.![]() (Optional) If your Kubernetes cluster API-server certificate is signed by a certificate chain, the authentication from the Kubernetes plugin for Panorama requires every certificate in the chain. If your API server uses a certificate chain, you must combine all the certificates in the chain into a single .crt file and add to the plugin.The Kubernetes plugin supports up to four certificates.
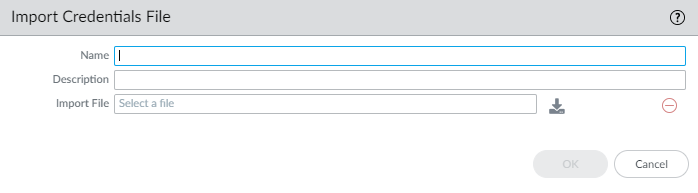
(Optional) If your Kubernetes cluster API-server certificate is signed by a certificate chain, the authentication from the Kubernetes plugin for Panorama requires every certificate in the chain. If your API server uses a certificate chain, you must combine all the certificates in the chain into a single .crt file and add to the plugin.The Kubernetes plugin supports up to four certificates.- Select to import a credentials file.Enter a descriptive Name.(Optional) Enter a Description.Click the import icon and navigate to the certificate file.Click OK.
![]() (Optional) Configure a proxy for each cluster.Unlike the other plugins, the Kubernetes plugin does not use the proxy configured under . Instead if you want to enable or bypass a proxy, you must enter the proxy for each cluster. When configured, the Kubernetes plugin uses this proxy server IP address to make all API calls to the API server for this cluster.
(Optional) Configure a proxy for each cluster.Unlike the other plugins, the Kubernetes plugin does not use the proxy configured under . Instead if you want to enable or bypass a proxy, you must enter the proxy for each cluster. When configured, the Kubernetes plugin uses this proxy server IP address to make all API calls to the API server for this cluster.- Log in to the CLI on Panorama.Enter the following CLI commands to configure the proxy server for this Kubernetes cluster.> configure> set plugins kubernetes setup cluster-credentials <cluster-name> cluster-proxy enable-proxy <yes/no> proxy-port <port> proxy-server <IP> proxy-user <username> secure-proxy-password <password>*** username and password are optional ***