Cloud NGFW for AWS
Rulestacks and Rules on Cloud NGFW for AWS
Table of Contents
Rulestacks and Rules on Cloud NGFW for AWS
Author local rulestacks when you're assigned the LocalRuleStackAdmin
role.
| Where Can I Use This? | What Do I Need? |
|---|---|
|
|
Rulestacks defines access control (App-ID, URL Filtering) and threat prevention
behavior of Cloud NGFW resources. A Cloud NGFW resource uses your rulestack
definitions to protect the traffic by a two-step process. First, it enforces your
rules on the to allow or deny your traffic. Second, it performs content inspection
on the allowed traffic based on what you specify on the Security Profiles. A
rulestack includes a set of security rules, associated objects, and profiles similar
to devices groups on Panorama. There are two
types of rulestacks.
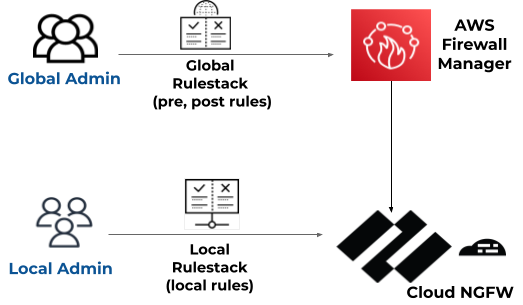
- Local rulestack—A Local rulestack consists of local rules and manages the local rules. A local account administrator can associate a local rulestack to an NGFW in their AWS account. To create and manage local rulestacks, you must have the Local rulestack admin role.
- Global rulestack—The AWS Firewall Manager administrator can author a Firewall Manager Service (FMS) policy and associate a Global rulestack with it. AWS Firewall Manager manages the Global rulestack across all these NGFWs in different AWS accounts of an AWS Organization. A Global rulestack configures pre-rules and post-rules on each NGFW. To create and manage global rulestacks, you must have the Global rulestack admin role.
- Pre-rules—Rules added to the top of the rule order. These rules are evaluated first.
- Post-rules—Rules added at the bottom of the rule order. These rules are evaluated after the pre-rules and rules defined in a local rulestack applied to an individual NGFW.
When using the AWS Firewall Manager, a combination of local and global rulestacks
allows you to create a hierarchical rules model. The pre-rules of a global
rulestacks can act as global default rules for all associated firewalls. Then you
can use a local rulestack to define rules for specific applications or users. The
post-rules can be used to allow or deny traffic that does not match any pre-rules or
those rules defined in the local rulestack.
One global rulestack and one local rulestack are applied to
each NGFW.
If you're using Multi-Account Tenant or Multi-VPC, consider the following changes to
rulestack behavior:
- when a rulestack is created, it's mapped to a specific account.
- you can now associate a rulestack with a firewall resource in any onboarded account.
- permissions are still mapped to the account associated with the rulestack; any modifications to the rulestack are done by a user with LRA permissions in the rulestacks account.
Certificates from any onboarded account are mapped to a rulestack. For example, the
certificate in account1 and the certificate in account2 are mapped to a rulestack in
account3, which could be associated with a firewall resource in account4. In this
scenario, all accounts (1-4) must be successfully onboarded.
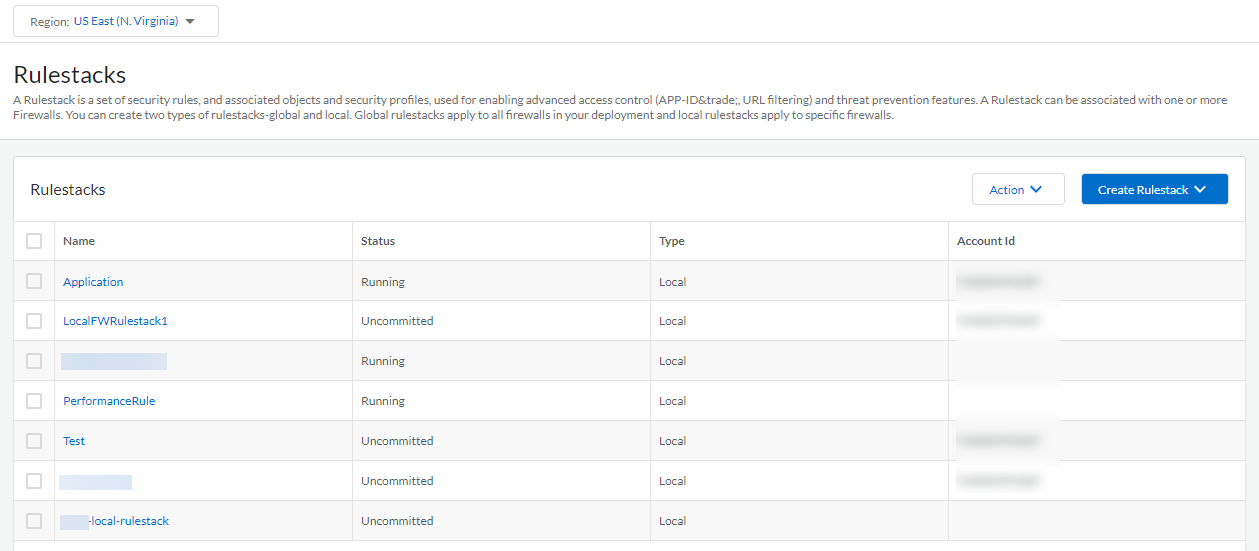
Create a Rulestack on Cloud NGFW for AWS
In the Cloud NGFW tenant, you can author rulestacks if you are you assigned the
LocalRuleStackAdmin or GlobalRulestackAdmin role. To author a global rulestack,
you must have used the AWS Firewall Manager to create your Cloud NGFW tenant.
When you create a local rulestack, you must specify an AWS account. Apply the
rulestack to NGFWs associated with that AWS account only. Complete the following
procedure to create a rulestack.
- Select .Select Local Rulestack or Global Rulestack (FMS deployment only) from the drop-down.Enter a descriptive Name for your rulestack.(Optional) Enter a Description for your rulestack.(Local rulestack only) Select an AWS Account from the drop-down.(Optional) Apply Tags.
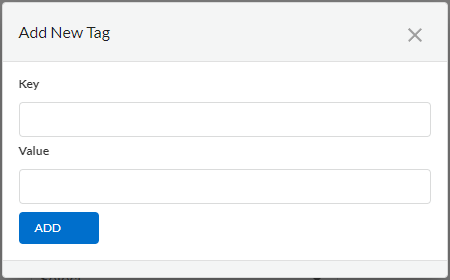
- Click theicon and select Add New.
![]() Enter a Key and Value.Click Add.
Enter a Key and Value.Click Add.![]() (Optional) Enable X-Forwarded-For for Security Policy. See X-Forwarded For for more information.Click Save.After creating the rulestack, deploy it to the firewall.
(Optional) Enable X-Forwarded-For for Security Policy. See X-Forwarded For for more information.Click Save.After creating the rulestack, deploy it to the firewall.![]()