CN-Series
Deploy the CN-Series Firewall as a Kubernetes Service on ACK
Table of Contents
Deploy the CN-Series Firewall as a Kubernetes Service on AliCloud (ACK)
| Where Can I Use This? | What Do I Need? |
|---|---|
|
|
After you review the CN-Series Core building blocks and the
high-level overview of the workflow in Secure Kubernetes workloads with
CN-Series, you can start deploying the CN-Series firewall on AliCloud ACK
platform to secure traffic between containers within the same cluster, as well as
between containers and other workload types such as virtual machines and bare-metal
servers.
You must ensure that you apply the plugin-serviceaccount.yaml
file. For more information, see Create service account for cluster
authentication.
-
When you deploy CN-Series firewall as a Kubernetes Service on ACK, the pan-plugin-cluster-mode-secret must be present.
Before you begin, ensure the CN-Series YAML file version is compatible with
the PAN-OS version. For more information, see CN-Series YAML.
Complete the following procedure to deploy the CN-Series firewall as a Kubernetes
Service on ACK platform:
- Set up your Kubernetes cluster.To create a cluster in ACK, do the following:
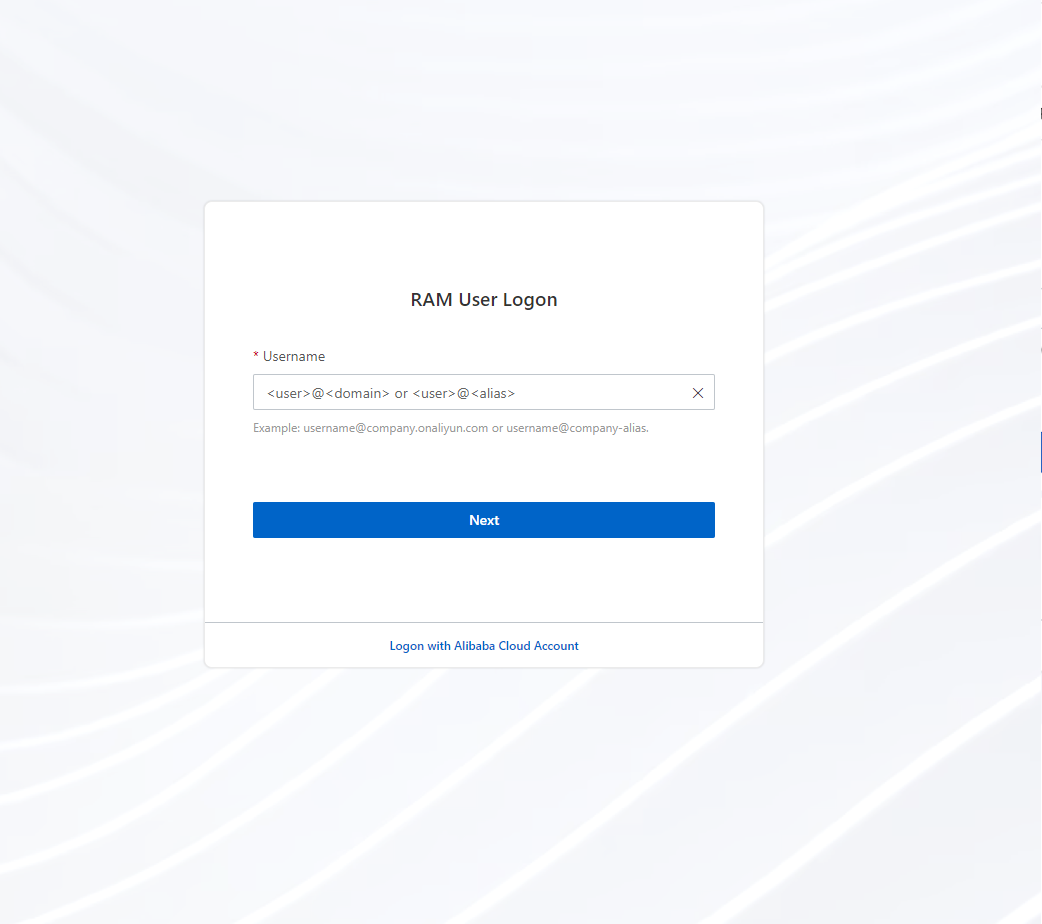
- Log
on to the RAM User Logon using your
RAM login credentials.
![]()
- In the top navigation bar, select the region where you want
to create a cluster and select a resource group based on your business
requirements.
- The region of a cluster cannot be changed after the cluster is created.
- All resource groups within your account are displayed by default.
- Search for Container Service for Kubernetes on Search
bar menu.
![]()
- Click Create Kubernetes Cluster.
![]()
- To create a cluster, you must configure software parameters,
hardware parameters, and basic parameters as guided by the wizard.
For more information on configuring these required parameters, see Create a Cluster on ACK.
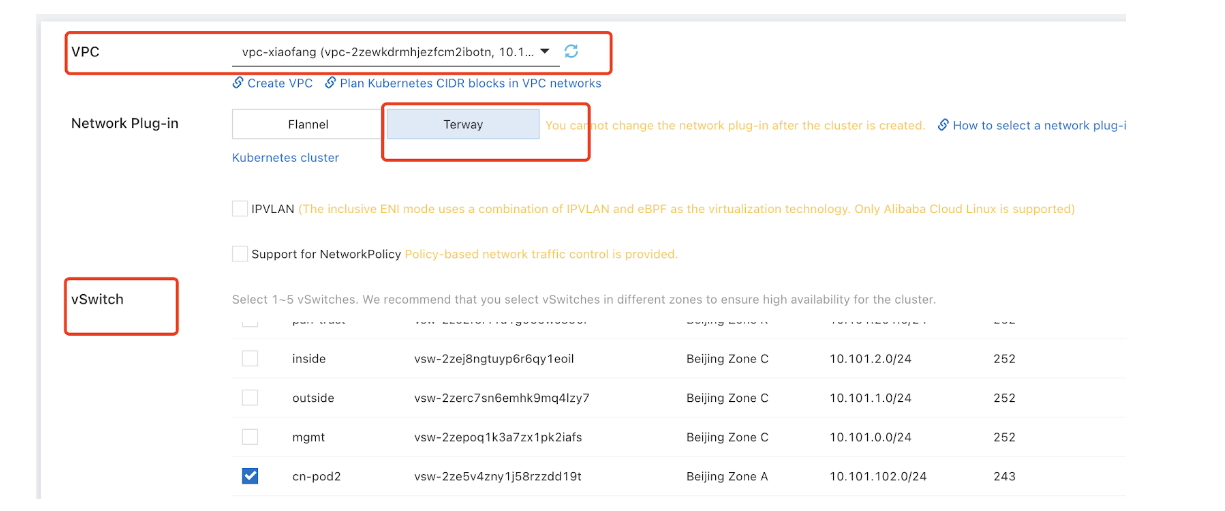
The following steps represent a sample cluster creation on ACK platform:CN-Series on Alibaba cloud ACK supports only the Terway Network Plug-in.
- Select VPC, Network Plugin, and vSwitch.
![]()
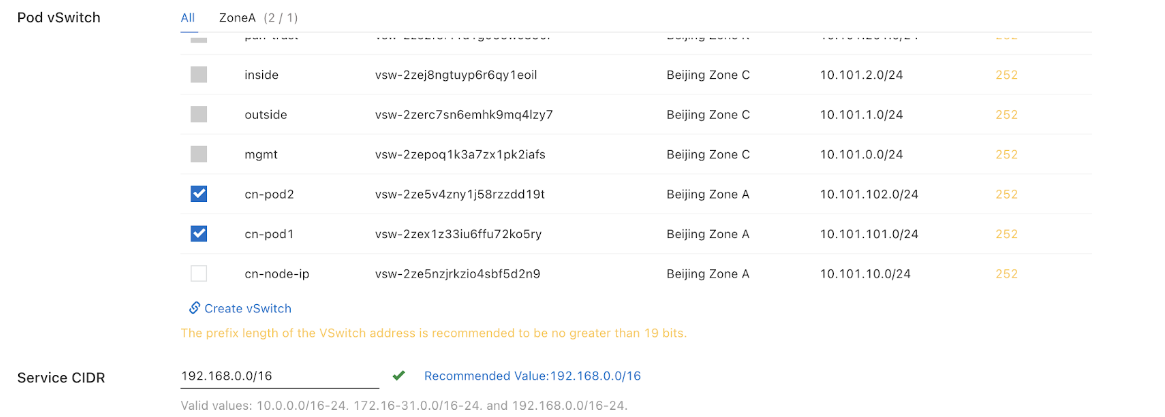
- Select POD v Switch.
![]()
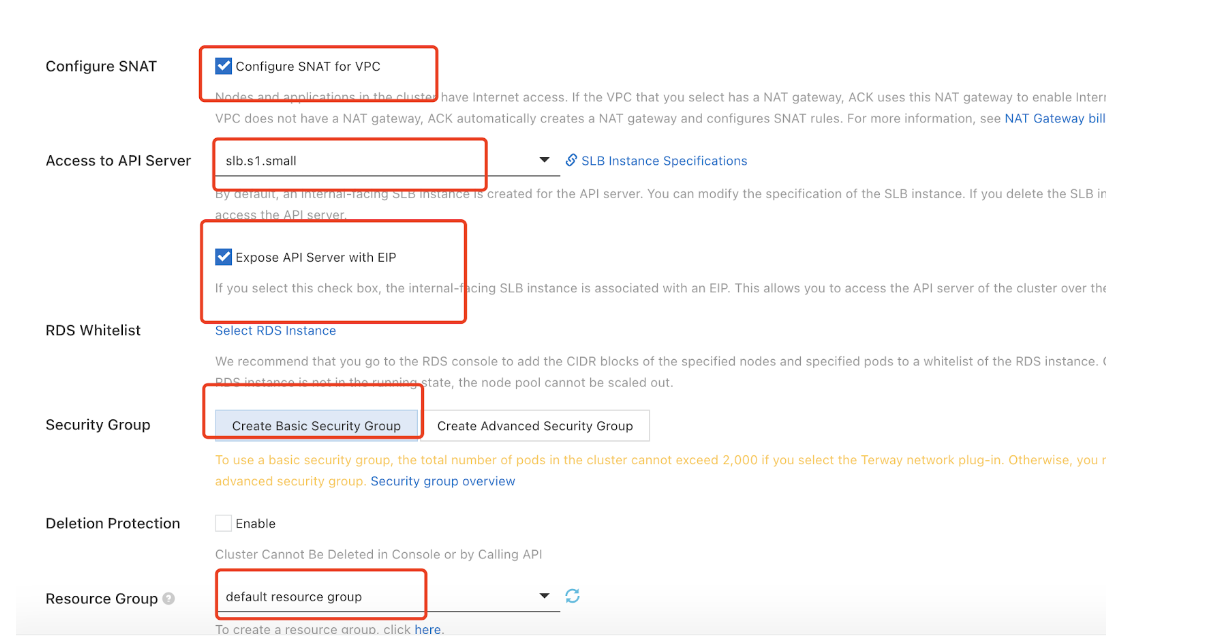
- Select Configure SNAT, Access to API Server, Security Groups,
and Resource Group.
![]()
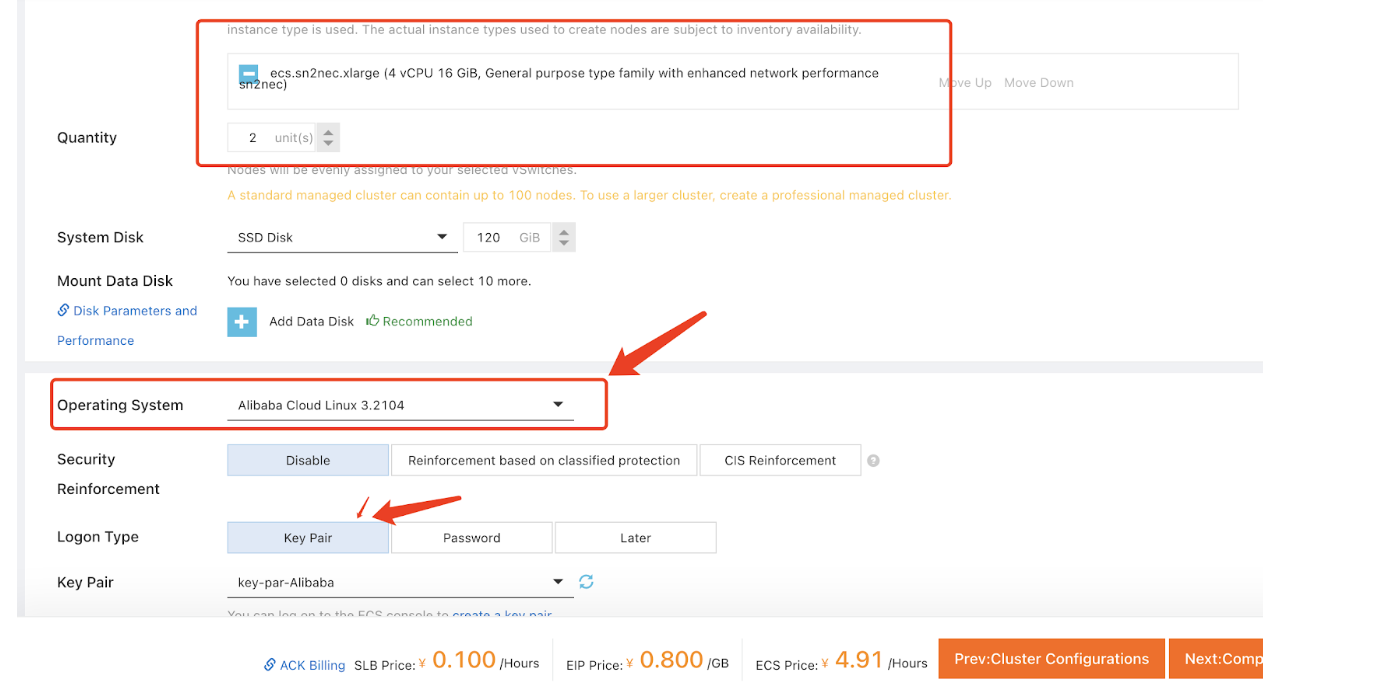
- Select Quantity, Operating System, and Logon Type for
Node Pool Configurations.
![]()
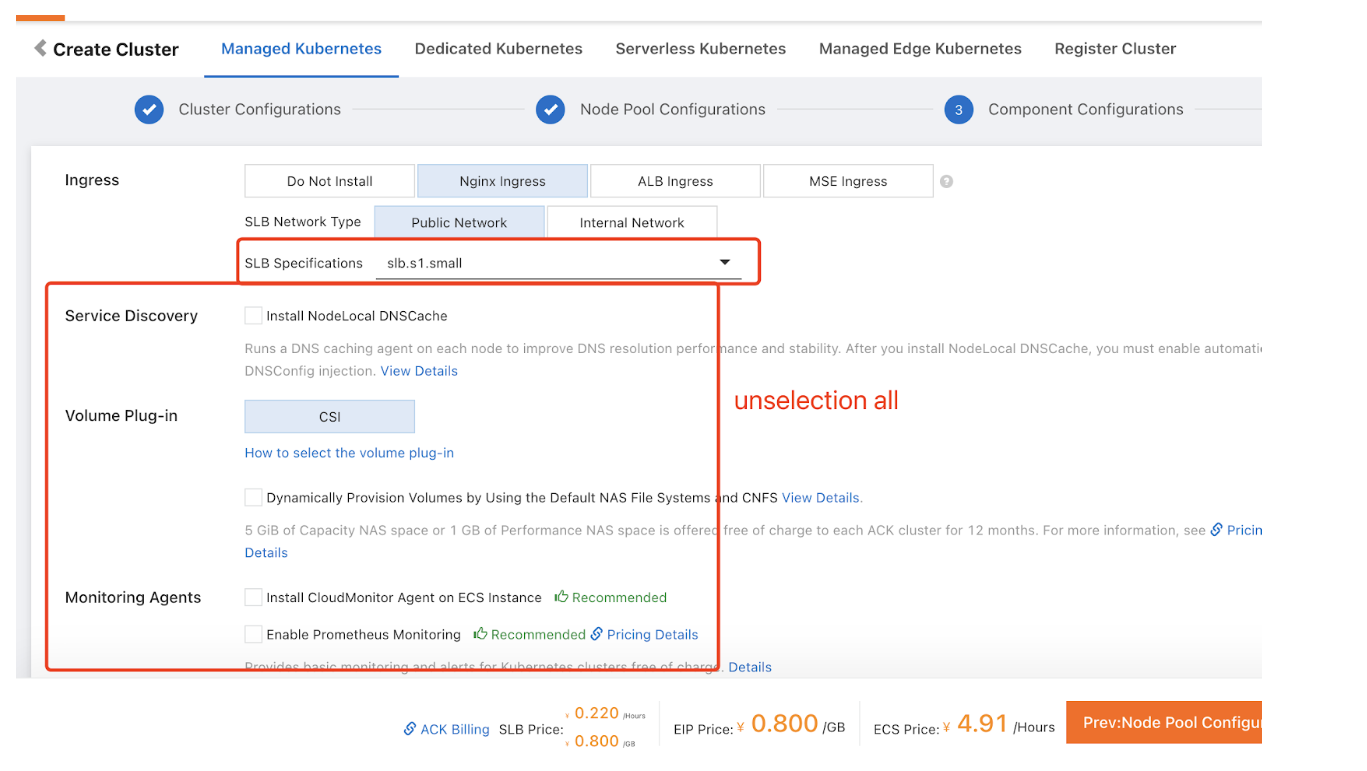
- Go to Public Network tab, uncheckService Discovery, Volume
Plug-in, and Monitoring Agents checkbox.
![]()
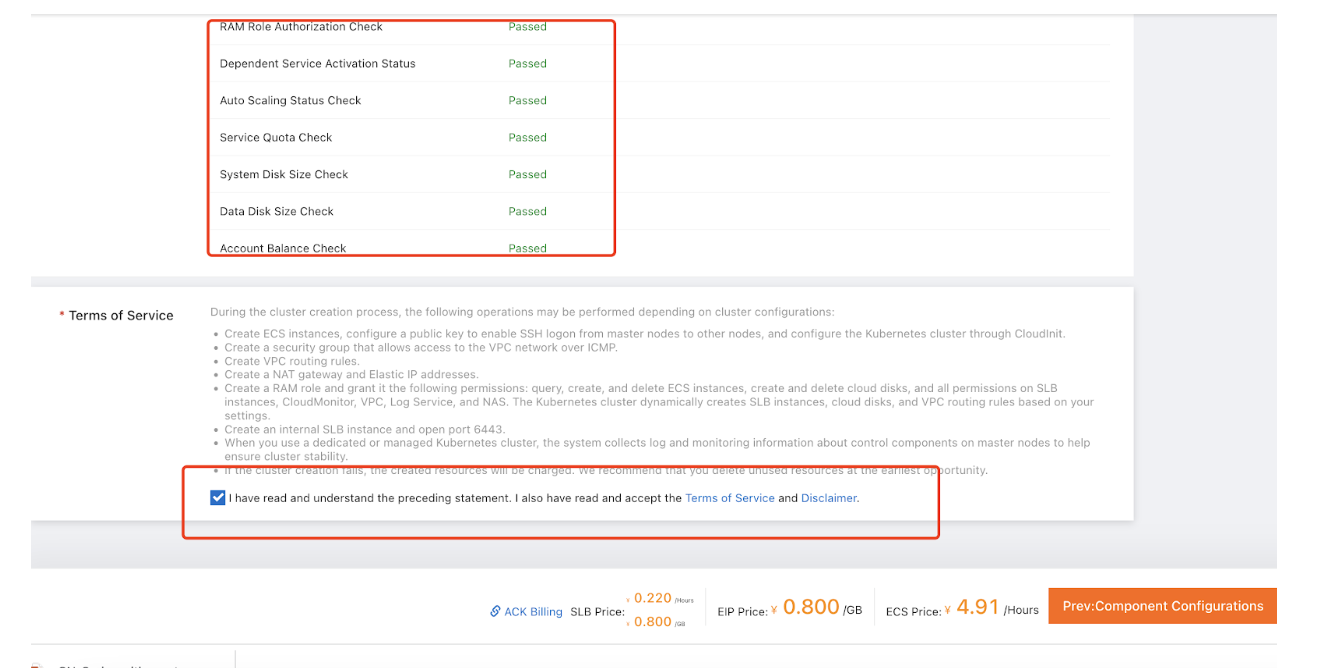
- Select Terms of Service checkbox.
![]()
- Click Create Cluster.
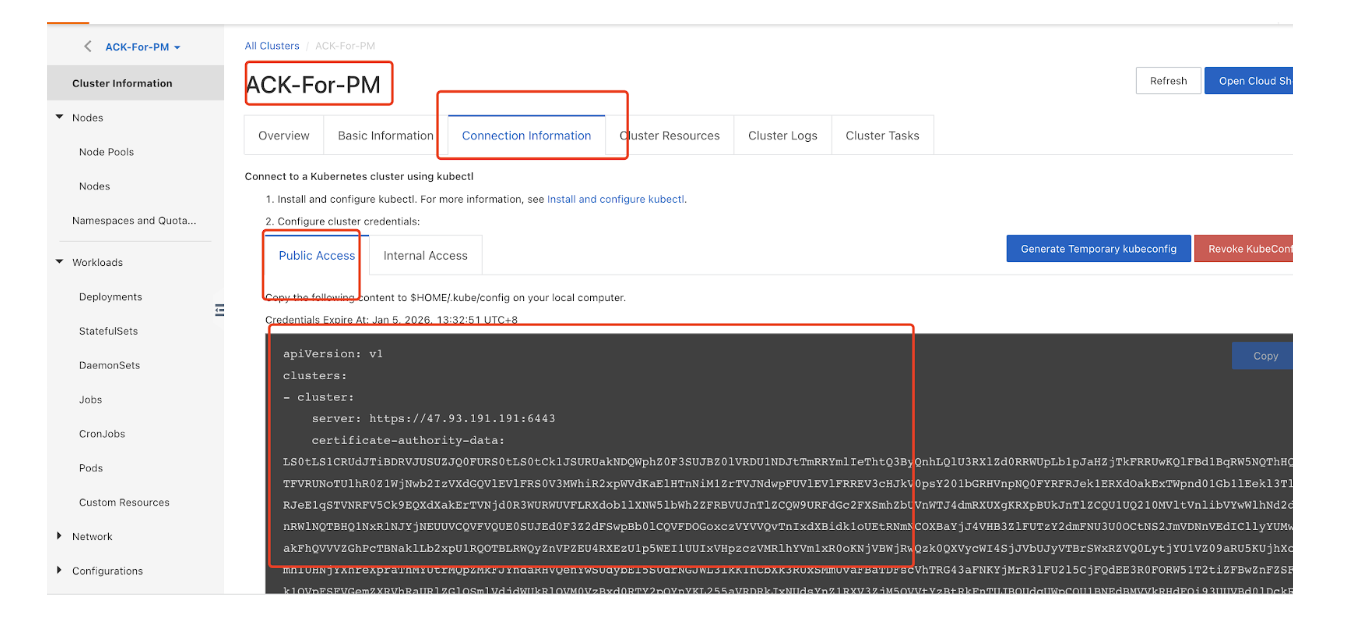
- Check the API server Key to login to the ACK cluster and copy
the following content to $HOME/.kube/config on
your local computer.
![]()
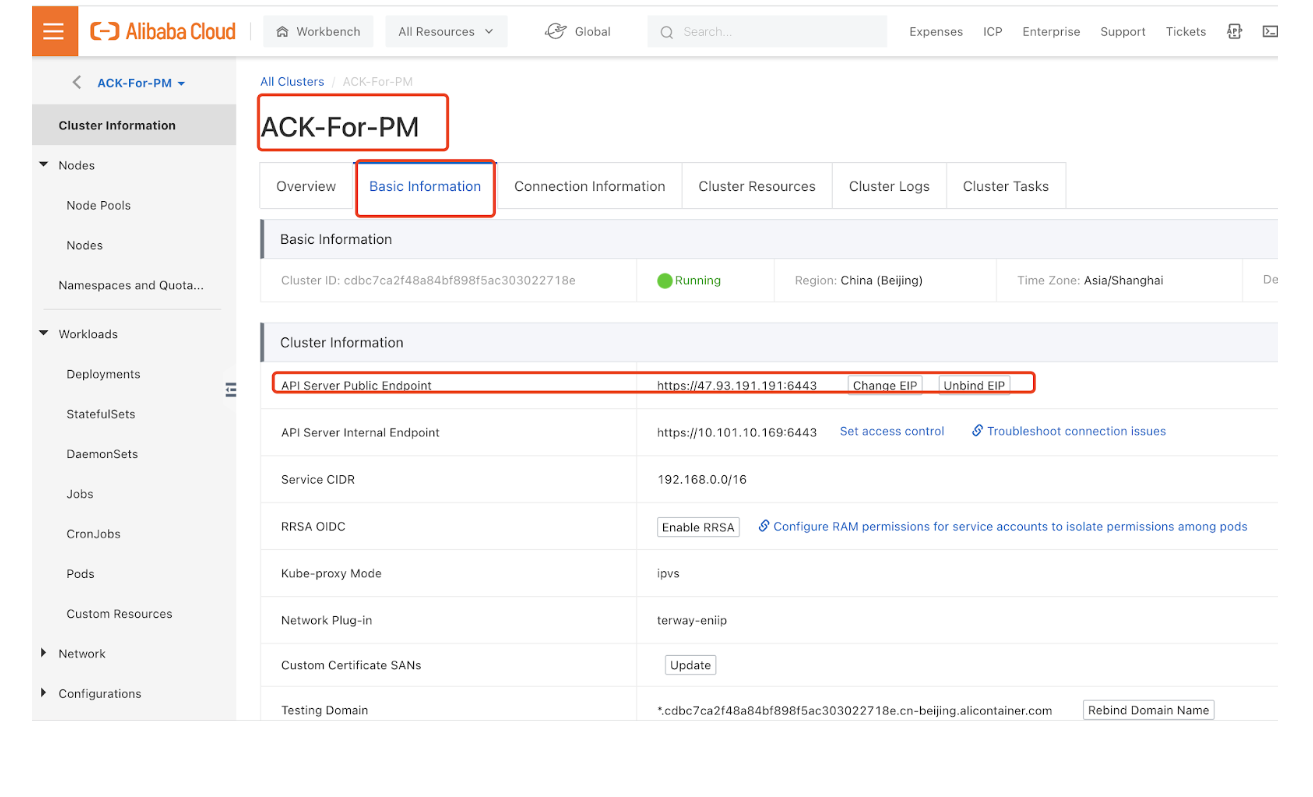
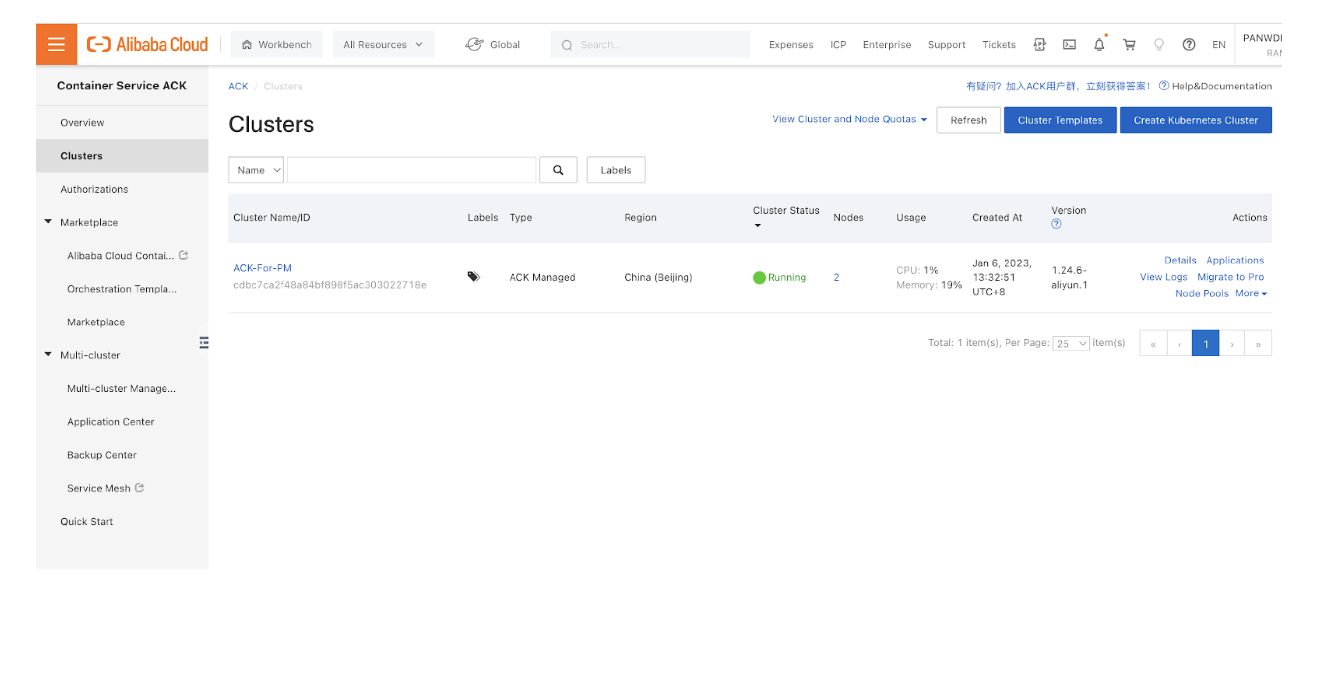
- Get the ACK cluster API server public endpoint address.
![]()
![]()
Verify that the cluster has adequate resources. The default GKE node pool specification is not adequate for the CN-Series firewall. You must ensure that cluster has the CN-Series Prerequisites resources to support the firewall:kubectl get nodeskubectl describe node <node-name>View the information under the Capacity heading in the command output to see the CPU and memory available on the specified node.The CPU, memory and disk storage allocation will depend on your needs. See CN-Series Performance and Scalability.You must ensure that you have the following information:- Collect the Endpoint IP address for setting up the API server on Panorama.
![]() Panorama uses this IP address to connect to your Kubernetes cluster.
Panorama uses this IP address to connect to your Kubernetes cluster. - Collect the template stack name, device group name, Panorama IP address, and optionally the Log Collector Group Name from Panorama.
![]() For more information, see Create a parent device group and template stack.
For more information, see Create a parent device group and template stack. - Collect the VM Auth Key and auto-registration PIN ID and value.
- The location of the container image repository to which you downloaded the images.
- Log
on to the RAM User Logon using your
RAM login credentials.
- (optional) If you configured a custom certificate
in the Kubernetes plugin for Panorama, you must create the cert
secret by executing the following command. Do not change the file
name from ca.crt. The volume for custom certificates in pan-cn-mgmt.yaml
and pan-cn-ngfw.yaml is optional.kubectl -n kube-system create secret generic custom-ca --from-file=ca.crt
- Edit the YAML files to provide the details required to
deploy the CN-Series firewalls.apiVersion: v1 kind: ConfigMap metadata: name: pan-mgmt-config namespace: kube-system data: PAN_SERVICE_NAME: pan-mgmt-svc PAN_MGMT_SECRET: pan-mgmt-secret # Panorama settings PAN_PANORAMA_IP: "<panorama-IP>" PAN_DEVICE_GROUP: "<panorama-device-group>" PAN_TEMPLATE_STACK: "<panorama-template-stack>" PAN_CGNAME: "<panorama-collector-group>" PAN_CTNR_MODE_TYPE: "k8s-service"apiVersion: v1 kind: Secret metadata: name: pan-mgmt-secret namespace: kube-system type: Opaque stringData: # Panorama Auth Key PAN_PANORAMA_AUTH_KEY: "<panorama-auth-key>" # Thermite Certificate retrieval CN-SERIES-AUTO-REGISTRATION-PIN-ID: "<PIN Id>" CN-SERIES-AUTO-REGISTRATION-PIN-VALUE: "<PIN-Value>"You must ensure that the value of PAN_PANORAMA_IP parameter on your YAML file matches with your actual Panorama IP address as shown in the diagram below:
![]() The latest version of the YAML files is available on Repository for Palo Alto Networks Kubernetes Security - CN Series. You can select the latest branches or tags from the Switchbranches/tags dropdown menu.You must ensure that the parameter value of PAN_DEVICE_GROUP and PAN_TEMPLATE on your YAML file matches with the name of the device group and template stack that you created on Panorama as shown in the diagram below:
The latest version of the YAML files is available on Repository for Palo Alto Networks Kubernetes Security - CN Series. You can select the latest branches or tags from the Switchbranches/tags dropdown menu.You must ensure that the parameter value of PAN_DEVICE_GROUP and PAN_TEMPLATE on your YAML file matches with the name of the device group and template stack that you created on Panorama as shown in the diagram below:![]() You must ensure that the parameter value of PAN_PANORAMA_CG_NAME is same as the log collector name that you created.
You must ensure that the parameter value of PAN_PANORAMA_CG_NAME is same as the log collector name that you created.![]() For more information, see editable parameters for CN-Series yaml files for details.
For more information, see editable parameters for CN-Series yaml files for details.- Deploy the CN-NGFW service. Perform the following steps:
When deployed as a Kubernetes Service, instances of the CN-NGFW can be deployed on security nodes and application pod traffic is redirected to an available CN-NGFW instance for inspection and enforcement.- Verify that you have created the service account using the pan-cni-serviceaccount.yaml.
- Use Kubectl to run the pan-cni-configmap.yaml.kubectl apply -f pan-cni-configmap.yaml
- Use kubectl to run the pan-cn-ngfw-svc.yaml.kubectl apply -f pan-cn-ngfw-svc.yamlThis yaml must be deployed before pan-cni.yaml.
- Use Kubectl to run the pan-cni.yaml.kubectl apply -f pan-cni.yaml
- Verify that you have modified the pan-cni-configmap and pan-cni YAML files.
- Run the following command and verify that your output
is similar to the following example.
![]() Alicloud ACK supports only standard metrics based autoscaling.
Alicloud ACK supports only standard metrics based autoscaling.
- Deploy the CN-MGMT StatefulSet.
By default, the management plane is deployed as a StatefulSet that provides fault tolerance. Up to 30 firewall CN-NGFW pods can connect to a CN-MGMT StatefulSet.- (Required for statically provisioned
PVs only) Deploy the Persistent Volumes (PVs) for the CN-MGMT
StatefulSet.
- Create the directories to match the local volume names defined in the pan-cn-pv-local.yaml.You need six (6) directories on at least 2 worker nodes. Log in to each worker node on which the CN-MGMT StatefulSet will be deployed to create the directories. For example, to create directories named /mnt/pan-local1 to /mnt/pan-local6, run the following commandmkdir -p /mnt/pan-local1 /mnt/pan-local2 /mnt/pan-local3 /mnt/pan-local4 /mnt/pan-local5 /mnt/pan-local6Modify pan-cn-pv-local.yaml.Match the hostname under nodeaffinity, and verify that you have modified the directories you created above in spec.local.path then deploy the file to create a new storageclass pan-local-storage and local PVs.In pan-cn-mgmt.yaml file you must add the storage class name as alicloud-disk-available when creating volumeClaimTemplates.For example:storageClassName: alicloud-disk-availableThe storage size should be minimum 20G for all PVs.
- Verify that you have modified the pan-cn-mgmt-configmap and
pan-cn-mgmt YAML files.Sample pan-cn-mgmt.yamlinitContainers: - name: pan-mgmt-init image: <your-private-registry-image-path>containers: - name: pan-mgmt image: <your-private-registry-image-path> terminationMessagePolicy: FallbackToLogsOnError
- Use Kubectl to run the yaml files.
kubectl apply -f pan-cn-mgmt-configmap.yamlkubectl apply -f pan-cn-mgmt-slot-crd.yamlkubectl apply -f pan-cn-mgmt-slot-cr.yamlkubectl apply -f pan-cn-mgmt-secret.yamlkubectl apply -f pan-cn-mgmt.yamlYou must run the pan-mgmt-serviceaccount.yaml, only if you had not previously completed the Create service account for cluster authentication.- Verify that the CN-MGMT pods are up by running the following command:
kubectl get pods -l app=pan-mgmt -n kube-systemIt takes about 5-6 minutes.- Deploy the CN-NGFW pods.
- Verify that you have modified the YAML files
as detailed in PAN-CN-NGFW-CONFIGMAP and PAN-CN-NGFW.containers: - name: pan-ngfw-container image: <your-private-registry-image-path>
- Use Kubectl apply to run the pan-cn-ngfw-configmap.yaml.kubectl apply -f pan-cn-ngfw-configmap.yaml
- Use Kubectl apply to run the pan-cn-ngfw.yaml.kubectl apply -f pan-cn-ngfw.yaml
- Verify that the CN-NGFW Pods are running. kubectl get pods -n kube-system -l app=pan-ngfw -o wide
- Verify that you can see CN-MGMT, CN-NGFW and the PAN-CNI on the Kubernetes cluster.
kubectl -n kube-system get pods- Annotate the application yaml or namespace so that the traffic from their new pods is redirected to the firewall.
You need to add the following annotation to redirect traffic to the CN-NGFW for inspection:
For example, for all new pods in the “default” namespace:annotations: paloaltonetworks.com/firewall: pan-fwkubectl annotate namespace default paloaltonetworks.com/firewall=pan-fw- Deploy your application in the cluster.
- Use Kubectl to run the yaml files.
- Deploy the CN-NGFW service. Perform the following steps: