GlobalProtect
User-Initiated Pre-Logon Connection
Table of Contents
User-Initiated Pre-Logon Connection
Enable end users to initiate the GlobalProtect pre-logon connection manually on Windows
10 endpoints.
| Where Can I Use This? | What Do I Need? |
|---|---|
|
|
Enable end users to initiate the GlobalProtect Remote Access VPN with Pre-Logon connection manually on Windows 10
endpoints. User-initiated pre-logon requires that you Use Single
Sign-On in your portal configuration. In this deployment, users can
initiate the pre-logon connection only when their endpoint requires access to the
corporate network before login, such as when new employees connect to the network
remotely for the first time or when administrators must remotely connect and
troubleshoot issues on the endpoint. To initiate the pre-logon connection, users
must Start GlobalProtect Connection from the GlobalProtect
credential provider logon screen after the endpoint boots up.
If users are
unable to establish the pre-logon connection using this option,
the pre-logon connection status remains Disconnected.
When
users log out of their endpoint, the VPN tunnel is not renamed from
the user tunnel back to the pre-logon tunnel. Instead, the tunnel
disconnects.
Use the following steps to enable users
to initiate the pre-logon connection manually:
You can
configure this option only in the Windows Registry. This configuration
can be done either manually after GlobalProtect is installed or
pre-deployed as part of the Windows image that includes the GlobalProtect
software.
- Configure remote access VPN with pre-logon.Use one of the following options to configure remote access VPN with pre-logon:
- If your end user will be connecting to the GlobalProtect portal before using this feature (for example, an existing employee who has previously connected to GlobalProtect), you can configure remote access VPN with pre-logon in the portal configuration.To enable users to initiate the pre-logon connection manually, you must configure the following options in your portal configuration:
- Specify a portal IP address.
- Set the GlobalProtect Connect Method to Pre-logon (Always On) or Pre-logon then On-demand ().
- Set the Use Single Sign-On option to Yes to enable GlobalProtect to use Windows login credentials to automatically authenticate users upon Active Directory login ().
- If your end user will not be connecting to the GlobalProtect portal before using this feature (for example, a new employee who is connecting to the network remotely for the first time), you must pre-deploy the pre-logon settings in the Windows Registry:
- From your Windows endpoint, launch the Command Prompt.
- Enter regedit to open the Windows Registry.
- In the Windows Registry, go to: HKEY_LOCAL_MACHINE\SOFTWARE\Palo Alto Networks\GlobalProtect\PanSetup\.
- Specify a portal address:
- From the list of PanSetup options, right-click Portal and then select Modify... to update the portal address.
- Enter the portal address in the Value data field.
![]()
- Click OK to save your changes.
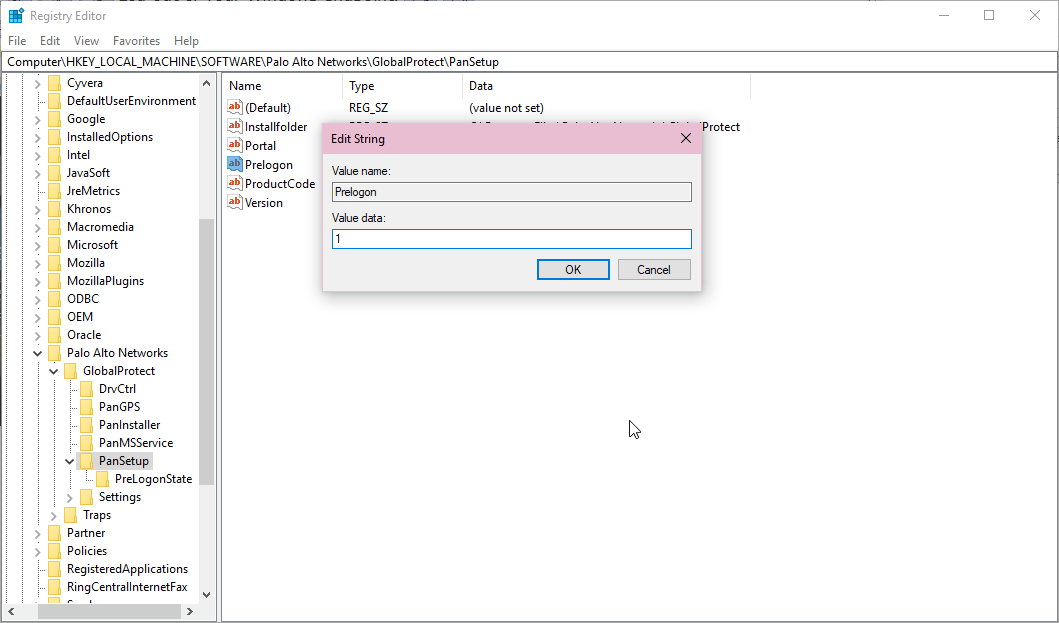
- Enable pre-logon:
- From the list of PanSetup options, right-click Prelogon and then select Modify....
- To enable pre-logon, set the Value data to 1.
![]() To disable pre-logon, set the Value data to 0.
To disable pre-logon, set the Value data to 0. - Click OK to save your changes.
- Enable single sign-on (SSO):When you enable single sign-on, GlobalProtect uses Windows login credentials to automatically authenticate users upon Active Directory login.
- Select to add the option to use single sign-on.
![]()
- When prompted, set the Name to use-sso.
- Right-click Use-SSO and then select Modify... to update the single sign-on settings.
- To enable single sign-on, set the Value data to yes
![]() To disable single sign-on, set the Value data to no.
To disable single sign-on, set the Value data to no. - Click OK to save your changes.
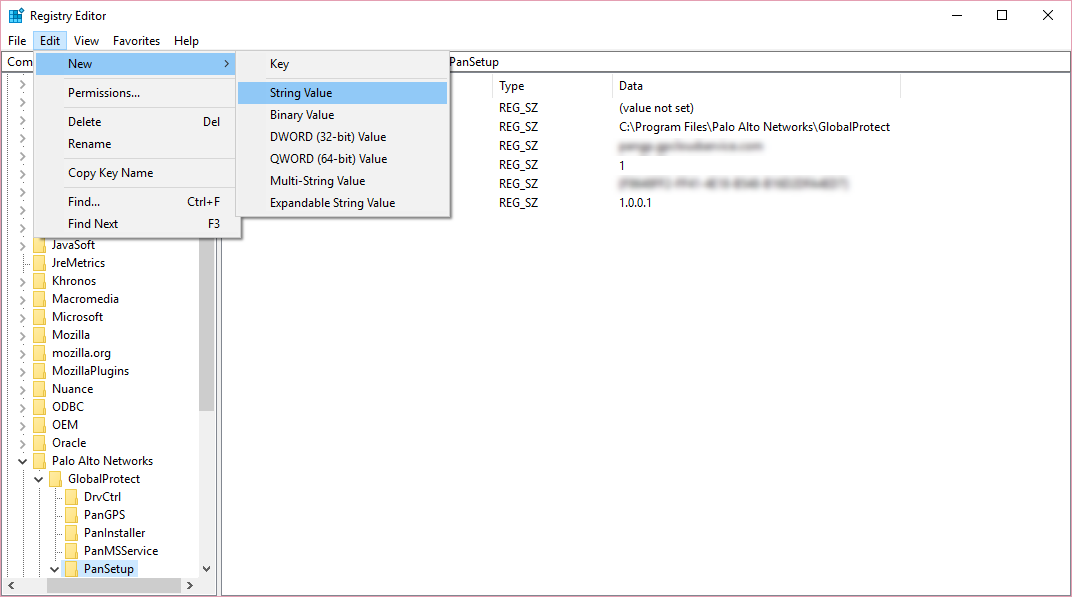
From the Windows Registry, enable the option to display the Start GlobalProtect Connection button on the GlobalProtect credential provider logon screen.- From your Windows endpoint, launch the Command Prompt.Enter regedit to open the Windows Registry.In the Windows Registry, go to: HKEY_LOCAL_MACHINE\SOFTWARE\Palo Alto Networks\GlobalProtect\PanSetup\.Select to add the button display option.
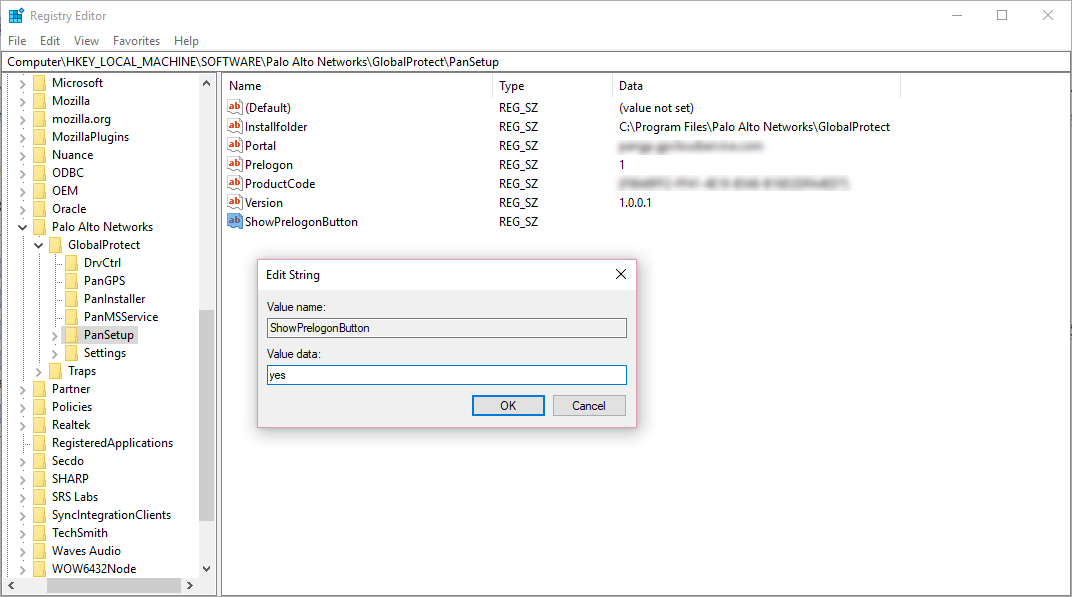
![]() When prompted, set the Name to ShowPrelogonButton.Right-click ShowPrelogonButton and then select Modify... to update the button display settings.To enable the GlobalProtect credential provider to display the Start GlobalProtect Connection button, set the Value data to yes.
When prompted, set the Name to ShowPrelogonButton.Right-click ShowPrelogonButton and then select Modify... to update the button display settings.To enable the GlobalProtect credential provider to display the Start GlobalProtect Connection button, set the Value data to yes.![]() To disable the ShowPrelogonButton option, set the Value data to no. Alternatively, you can right-click ShowPrelogonButton to Delete the option.Click OK to save your changes.Verify that the GlobalProtect credential provider displays the Start GlobalProtect Connection button so users can initiate the pre-logon connection manually.Depending on which option you used to configure remote access VPN with pre-logon (step 1), use one of the following options to verify that the GlobalProtect credential provider displays the Start GlobalProtect Connection button:
To disable the ShowPrelogonButton option, set the Value data to no. Alternatively, you can right-click ShowPrelogonButton to Delete the option.Click OK to save your changes.Verify that the GlobalProtect credential provider displays the Start GlobalProtect Connection button so users can initiate the pre-logon connection manually.Depending on which option you used to configure remote access VPN with pre-logon (step 1), use one of the following options to verify that the GlobalProtect credential provider displays the Start GlobalProtect Connection button:- If you configured remote access VPN with pre-logon on your firewall, use the following steps to verify that the button is displayed:
- From you Windows endpoint, launch the GlobalProtect app.
- Connect to GlobalProtect to download the portal agent configuration that you configured in step 1.
- Reboot your Windows endpoint.
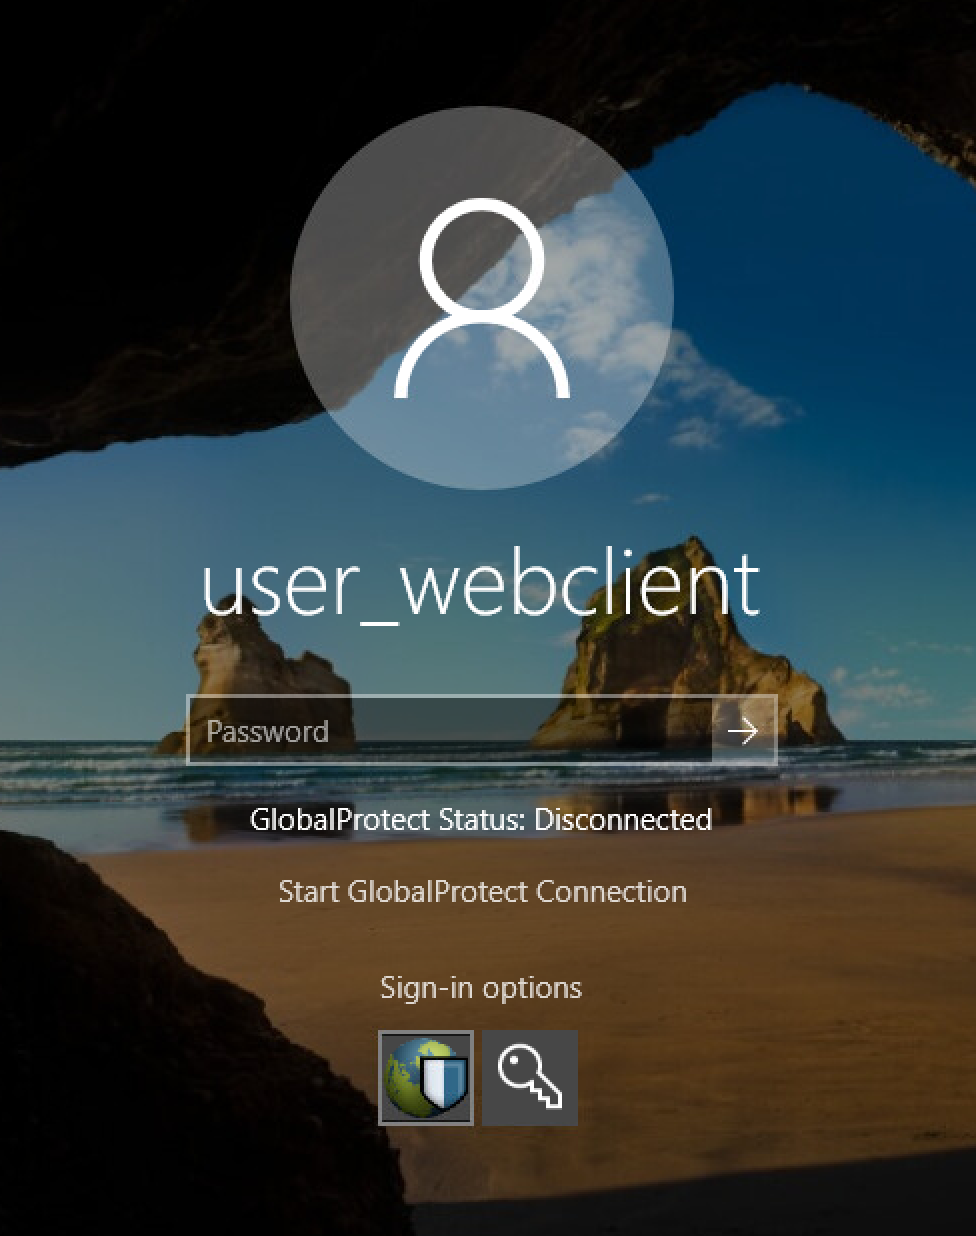
- When the GlobalProtect credential provider logon screen appears, ensure that the Start GlobalProtect Connection button is displayed and the pre-logon connection status is Disconnected.
![]()
- If you pre-deployed the pre-logon settings in the Windows Registry, use the following steps to verify that the button is displayed:
- Reboot your Windows endpoint.
- When the GlobalProtect credential provider logon screen appears, ensure that the Start GlobalProtect Connection button is displayed and the pre-logon connection status is Disconnected.
![]()