Prisma SD-WAN
Configure a VRF Profile in Prisma SD-WAN
Table of Contents
Configure a VRF Profile in Prisma SD-WAN
You can modify the default VRF Profile according to your requirements or create a new
profile and assign it to a branch or data center site in Prisma SD-WAN.
| Where Can I Use This? | What Do I Need? |
|---|---|
|
|
Prisma SD-WAN creates and associates the Global (default) Virtual Routing and
Forwarding tables (VRF) Profile and assigns it to all branch and data centers sites.
You can modify the default VRF Profile according to your requirements or create a
new profile and assign it to a branch or data center site. Specify the data center
or branch site that will be the source of the VRF traffic.
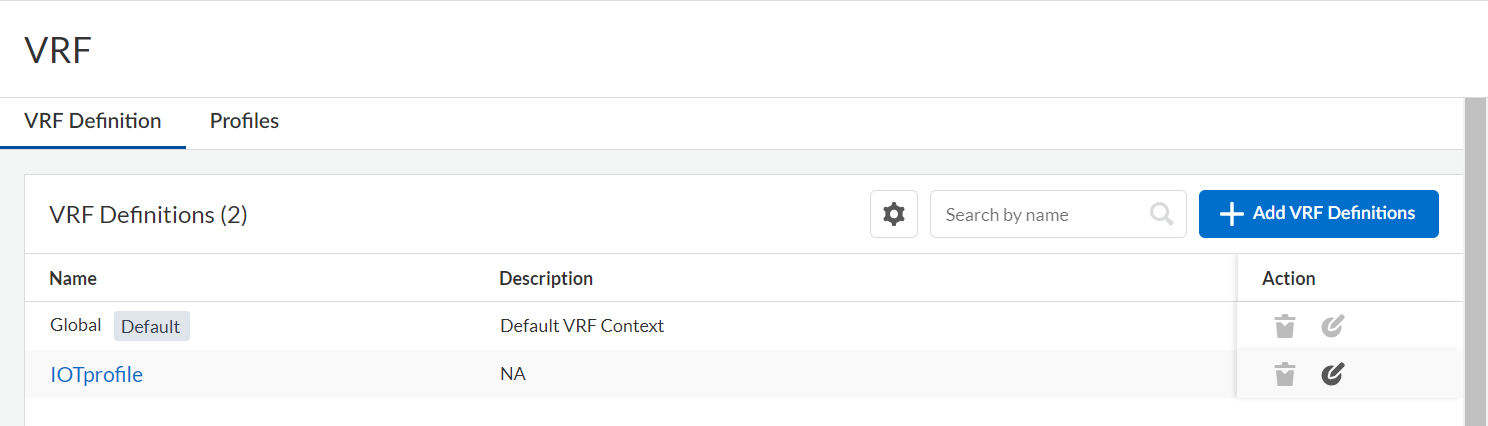
- Select to create VRF Definition and Profiles.
![]() You can also create the VRF Profile from . Select a Data Centers site. On the Configuration tab, click Create Profile and follow the steps below.
You can also create the VRF Profile from . Select a Data Centers site. On the Configuration tab, click Create Profile and follow the steps below.![]() You can also create the VRF Profile from . Select a Branch Sites site. On the Configuration tab, click Create Profile and follow the steps below.Click Add VRF Definitions to add a VRF Definition to attach it to the VRF Profiles.The system generates a Global VRF Context by default, and it does not allow updating or deleting the Global VRF Context. VRF contexts segment network traffic to apply different rules for the same profile. Note that a rule with a VRF context will always take precedence over one without a VRF context.When the associated VRF definitions of the new profile match the default VRF context, you can switch from a default VRF Profile to a newly created one. Otherwise, you are not allowed to make changes.
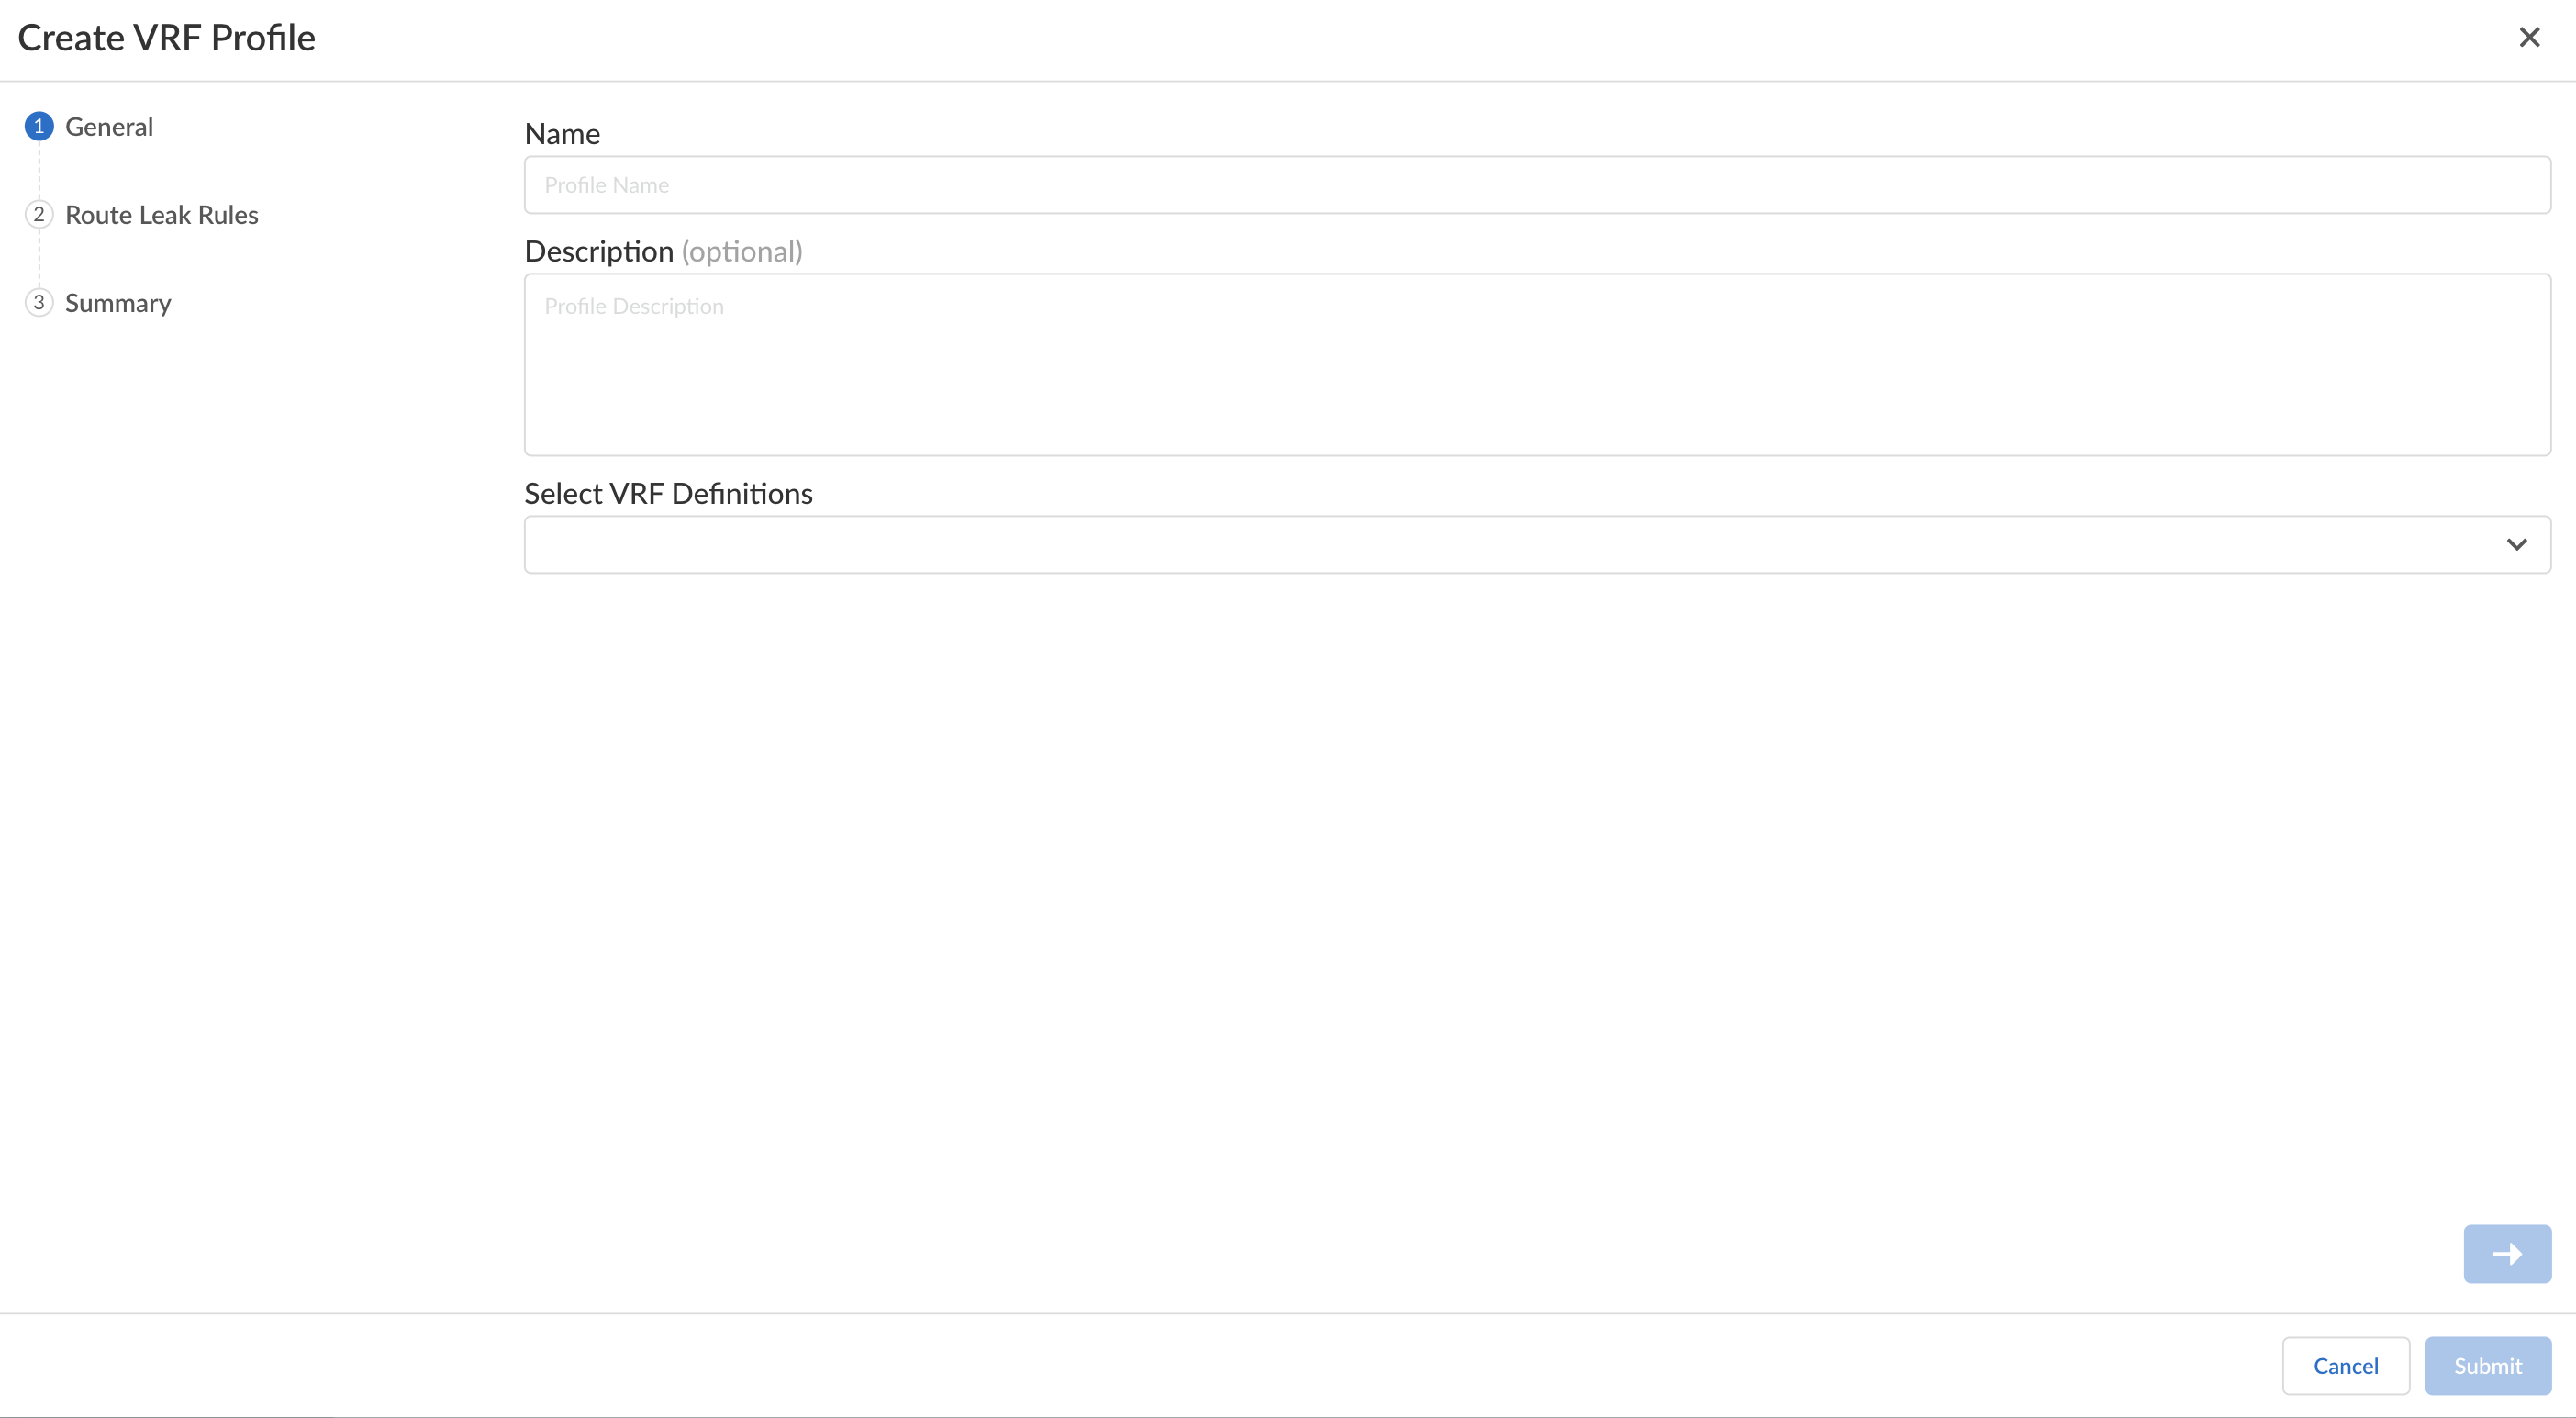
You can also create the VRF Profile from . Select a Branch Sites site. On the Configuration tab, click Create Profile and follow the steps below.Click Add VRF Definitions to add a VRF Definition to attach it to the VRF Profiles.The system generates a Global VRF Context by default, and it does not allow updating or deleting the Global VRF Context. VRF contexts segment network traffic to apply different rules for the same profile. Note that a rule with a VRF context will always take precedence over one without a VRF context.When the associated VRF definitions of the new profile match the default VRF context, you can switch from a default VRF Profile to a newly created one. Otherwise, you are not allowed to make changes.- Enter a Name and optional a Description for VRF Definition.You can update or delete the created VRF Definition under the Action column (if you have not attached it to any of the VRF Profiles).On the Profiles tab, select Create Profile to add a new VRF Profile. On the Create VRF Profile screen:
![]()
- Enter a Name, optional a Description, and Select VRF Definitions for the VRF Profile. Click Next to continue adding the Route Leak Rules or click Submit to stop the further configurations.On the Route Leak Rules, you can see the Route table with the existing rules if available. Click Add Route Leak Rules to create a new rule. Enter a Name, optional a Description, Source VRF, Destination VRF, and IPv4 Prefix. Click Next.The leaked IPv4 prefix in the route leak rule must match the prefix configured on the interface.
![]() View Summary to see the detailed information before submitting the new VRF Profile.
View Summary to see the detailed information before submitting the new VRF Profile.