Prisma SD-WAN
Connect a Single and Multiple Prisma SD-WAN Site to Prisma Access
Table of Contents
Connect a Single and Multiple Prisma SD-WAN Site to Prisma Access
Learn how to integrate a single Prisma SD-WAN site with Prisma Access and
use this workflow to onboard a single Prisma SD-WAN site to Prisma
Access.
| Where Can I Use This? | What Do I Need? |
|---|---|
|
|
Use this workflow to onboard a single Prisma SD-WAN site to
Prisma Access.
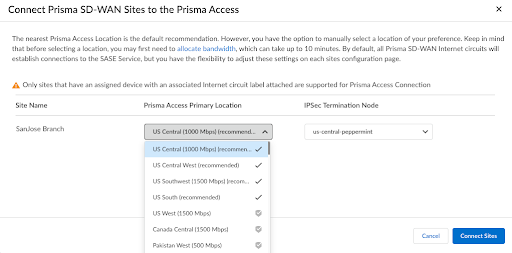
- Configure SASE connectivity.This is a one-time activity.Select .Click Connect to Prisma Access for the site that you want to connect to Prisma Access under Prisma Access Connection.Select a Prisma Access Location.
![]() Prisma Access recommends the first location in the list closest to the Prisma SD-WAN site address. The recommendation is based on the address (latitude and longitude values) entered during site creation in Prisma SD-WAN.Select the corresponding IPSec Termination Node.For every 1 Gbps of bandwidth allocated to a Prisma Access region, a new Termination Node is spun up; you can accordingly select a different termination node.(Optional) Select a Secondary Prisma Access Location and a corresponding IPSec Termination Node.Click Connect Sites.You can view the status of the connection in the SASE Connection column.
Prisma Access recommends the first location in the list closest to the Prisma SD-WAN site address. The recommendation is based on the address (latitude and longitude values) entered during site creation in Prisma SD-WAN.Select the corresponding IPSec Termination Node.For every 1 Gbps of bandwidth allocated to a Prisma Access region, a new Termination Node is spun up; you can accordingly select a different termination node.(Optional) Select a Secondary Prisma Access Location and a corresponding IPSec Termination Node.Click Connect Sites.You can view the status of the connection in the SASE Connection column.![]() For each Prisma SD-WAN circuit for a site, a corresponding tunnel to Prisma Access is created in this process. You can have a maximum of 4 circuits connecting to Prisma Access for a site.(Optional) You can view the details of the Prisma Access peer by selecting .
For each Prisma SD-WAN circuit for a site, a corresponding tunnel to Prisma Access is created in this process. You can have a maximum of 4 circuits connecting to Prisma Access for a site.(Optional) You can view the details of the Prisma Access peer by selecting .Connect Multiple Prisma SD-WAN Sites to Prisma Access
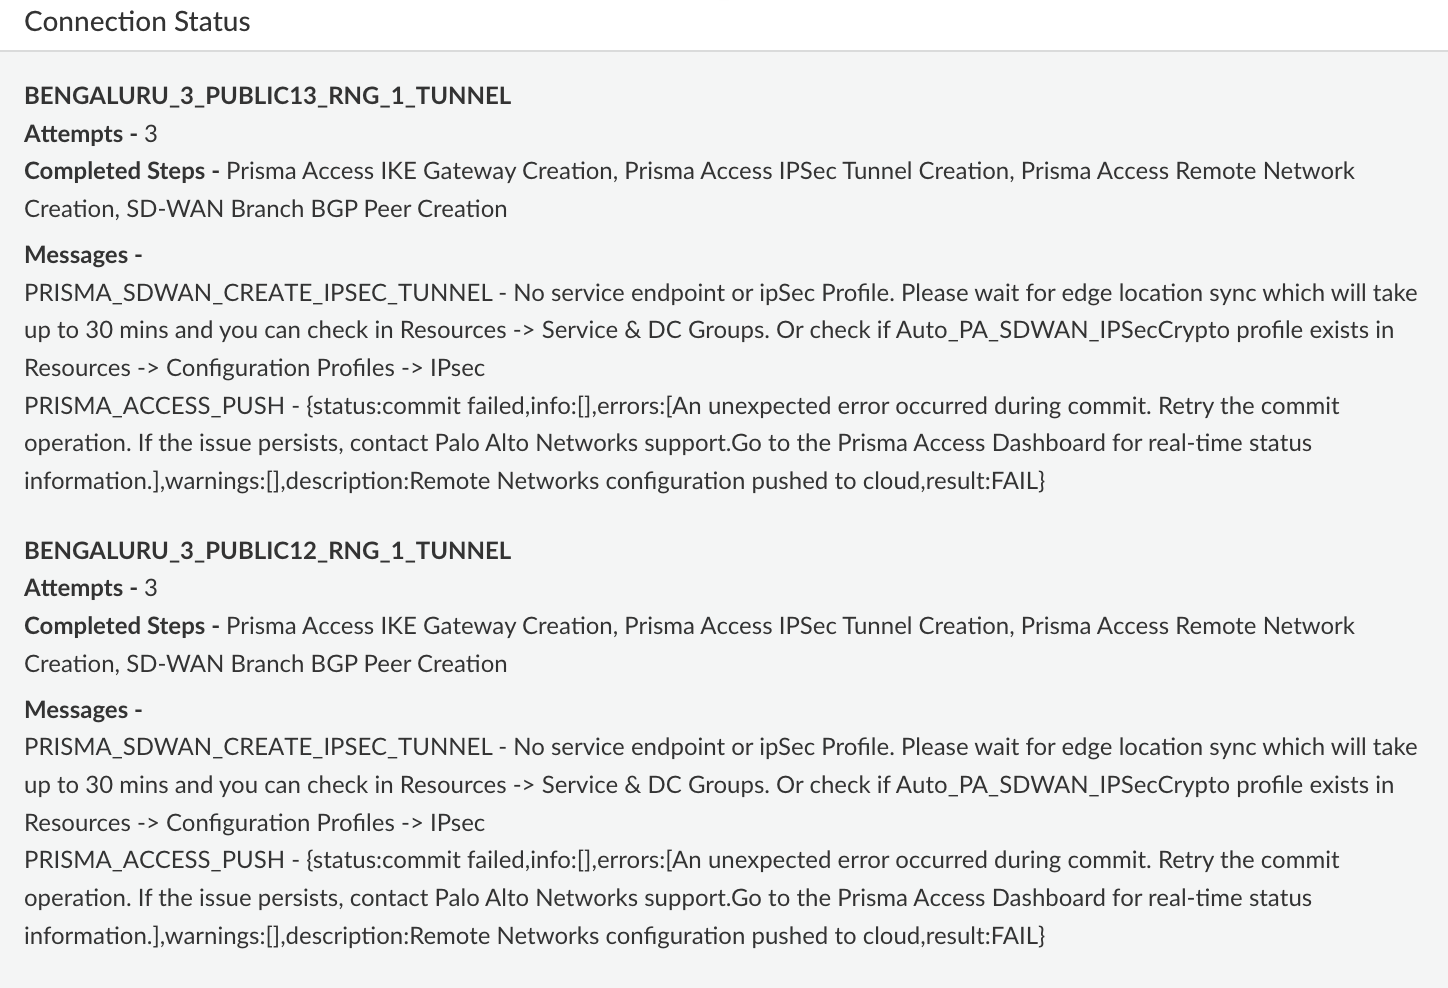
Use this workflow to connect multiple Prisma SD-WAN sites to Prisma Access.- Select .Select the sites to be integrated and click Connect to Prisma Access.Verify the appropriate Prisma Access Location and IPSec Termination Node and click Connect Sites.
![]()
Disconnect from Prisma Access
You can disconnect your site from Prisma Access. This removes the tunnel configuration between Prisma SD-WAN and Prisma Access, but it stores SASE Configuration objects such as PA locations and circuits for ease in reconnection.- Select and select a site.View details in the Prisma Access Connectivity section.
![]() Click Disconnect from Prisma Access.
Click Disconnect from Prisma Access.