Prisma SD-WAN
Configure the ION Device at a Data Center
Table of Contents
Configure the ION Device at a Data Center
Let us learn to configure the ION at a data center.
| Where Can I Use This? | What Do I Need? |
|---|---|
|
|
As you get started to configure the ION device at the data center, you must know that the ION 5200, ION 7000, ION 9000 or ION 9200
provides eight 1GE ports and six 10GE SFP+ ports for flexible configuration. Connect
at least one port to the internet and one port to peer with a network.
- Select and select the device you wish to configure.
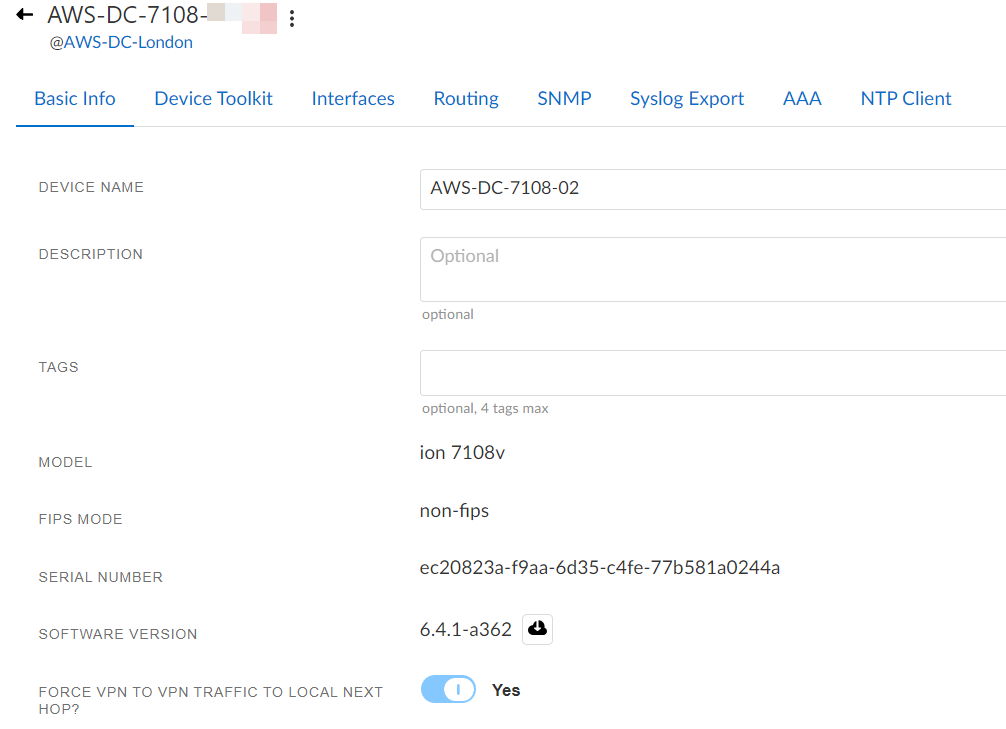
![]() On the Basic Info tab:
On the Basic Info tab:- Enter a Device Name.(Optional) Enter a Description and Tags.Set Force VPN to VPN Traffic to Local Next Hop to Yes to force traffic from one branch site to another via a local next hop within a data center site.By default, the option Force VPN to VPN Traffic to Local Next Hop is toggled to No.If you have configured a Private WAN circuit on the DC ION device and the DC ION device is peering with a WAN edge router, the DC ION device will have learnt the route to the destination from the WAN edge router. In this case, the traffic will be routed to the WAN edge router and subsequently to the destination.Configure the first port from the Interfaces tab.
- From 1GE ports, select Port 1.Leave Admin Up as the default Yes.(Optional) Enter a name, description, and tags for this port.The Interface Type displays as Port.For Use This Port For, select Connect to Internet to enable public VPNs for a branch site.For Circuit Label, select the circuit that connects to the internet.A circuit label is mandatory.For IPv4 Configuration, select DHCP or Static.
- Choose DHCP and enter NAT
Address and Port if the IP address is
dynamically assigned and if the internet port IP address is a
private IP address behind a NAT firewall.
- The External NAT address should be the public IP address NAT-translated to the ION device’s IP address on this physical port.
- The External NAT port should be the External NAT IP address UDP port forwarded to UDP 4500 on the ION device’s IP address on this physical port.
- Outside of this device configuration, if you have a firewall, you must allow protocol TCP 443 and UDP 4500 in your firewall configuration.
- If the IP address is fixed and specified manually, choose Static and specify the IP Address/Mask, Default Gateway, DNS Servers, and Secondary IPs.
Select Enable IPv6 On This Interface to configure IPv6.For IPv6 Configuration, select AutoConf or Static.Autoconf indicates the Global IP address is derived using stateless address autoconfiguration (SLAAC).Choose Static if the IP address is fixed and is manually assigned. Additionally specify the IPv6 Address/Mask, Default Gateway (IPv6), and DNS server(s)(IPv6).In Advanced Options, (optional) specify MAC, IP MTU, and Physical from the available range.Click Save Port.Proceed to configure the second port.- Leave Admin Up as the default Yes.(Optional) Enter a name, description, and tags for this port.The Interface Type displays as Port.For Use This Port For, select Peer with a Network to inject routes towards the core router.You may pair any non-hardware ports on the physical and virtual ION 7000 or ION 9000. However, ports 5/6 and ports 7/8 are hardware bypass port pairs, and therefore, must be configured as port pairs. These port pairs may be set to fail, open, or closed.For Circuit Label, select the circuit to peer with the network.For IPv4 Configuration, select DHCP or Static.In Advanced Options, (optional) specify MAC, IP MTU, and Physical from the available range.Click Save Port.Similar to configuring ports on a physical ION 7000, configure the ports on the virtual ION device. The virtual device has one controller port and nine configurable ports to connect to the internet or peer with a network.Proceed to configure Routing, SNMP, Syslog Export, and NTP Client for the ION device.