Download PDF
GlobalProtect
Configure a Per-App VPN Configuration for iOS Endpoints Using Workspace ONE
Table of Contents
Expand All
|
Collapse All
GlobalProtect Docs
-
-
-
-
- 6.3
- 6.2
- 6.1
- 6.0
-
- 6.3
- 6.2
- 6.1
- 6.0
Configure a Per-App VPN Configuration for iOS Endpoints Using Workspace ONE
| Where Can I Use This? | What Do I Need? |
|---|---|
|
|
You can enable access to internal resources from your managed mobile endpoints by configuring
GlobalProtect VPN access using Workspace ONE. In a per-app VPN configuration, you
can specify which managed apps can route traffic through the VPN tunnel. Unmanaged
apps will continue to connect directly to the internet instead of through the VPN
tunnel.
Use the following steps to configure a per-app VPN configuration for iOS endpoints using
Workspace ONE:
- Download the GlobalProtect app for iOS:
- Download the GlobalProtect app directly from the App Store.
The GlobalProtect app for iOS is also available in the Apple App Store in China.From the Workspace ONE console, modify an existing Apple iOS profile or add a new one.- Select DevicesProfiles & ResourcesProfiles, and then ADD a new profile.Select iOS from the platform list.
![]() Configure the General settings:
Configure the General settings:- Enter a Name for the profile.
- (Optional) Enter a brief Description of the profile that indicates its purpose.
- (Optional) Select the Deployment method, which indicates whether the profile will be removed automatically upon unenrollment—either Managed (the profile is removed) or Manual (the profile remains installed until it is removed by the end user).
- (Optional) Select an Assignment Type to determine how the profile is deployed to endpoints. Select Auto to deploy the profile to all endpoints automatically, Optional to enable the end user to install the profile from the Self-Service Portal (SSP) or to manually deploy the profile to individual endpoints, or Compliance to deploy the profile when an end user violates a compliance policy applicable to the endpoint.
- (Optional) Select whether or not you want to Allow Removal of the profile by the end user. Select Always to enable the end user to manually remove the profile at any time, Never to prevent the end user from removing the profile, or With Authorization to enable the end user to remove the profile with the authorization of the administrator. Choosing With Authorization adds a required Password.
- (Optional) In the Managed By field, enter the Organization Group with administrative access to the profile.
- (Optional) In the Assigned Groups field, add the Smart Groups to which you want the profile added. This field includes an option to create a new Smart Group, which can be configured with specs for minimum OS, device models, ownership categories, organization groups, and more.
- (Optional) Indicate whether you want to include any Exclusions to the assignment of this profile. If you select Yes, the Excluded Groups field displays, enabling you to select the Smart Groups that you wish to exclude from the assignment of this profile.
![]() Configure the Credentials settings:All per-app VPN configurations require certificate-based authentication.Starting with iOS 12, if you want to use client certificates for GlobalProtect client authentication, you must deploy the client certificates as part of the VPN profile that is pushed from the MDM server. If you deploy client certificates from the MDM server using any other method, the certificates cannot be used by the GlobalProtect app.
Configure the Credentials settings:All per-app VPN configurations require certificate-based authentication.Starting with iOS 12, if you want to use client certificates for GlobalProtect client authentication, you must deploy the client certificates as part of the VPN profile that is pushed from the MDM server. If you deploy client certificates from the MDM server using any other method, the certificates cannot be used by the GlobalProtect app.- To pull client certificates from Workspace ONE users:
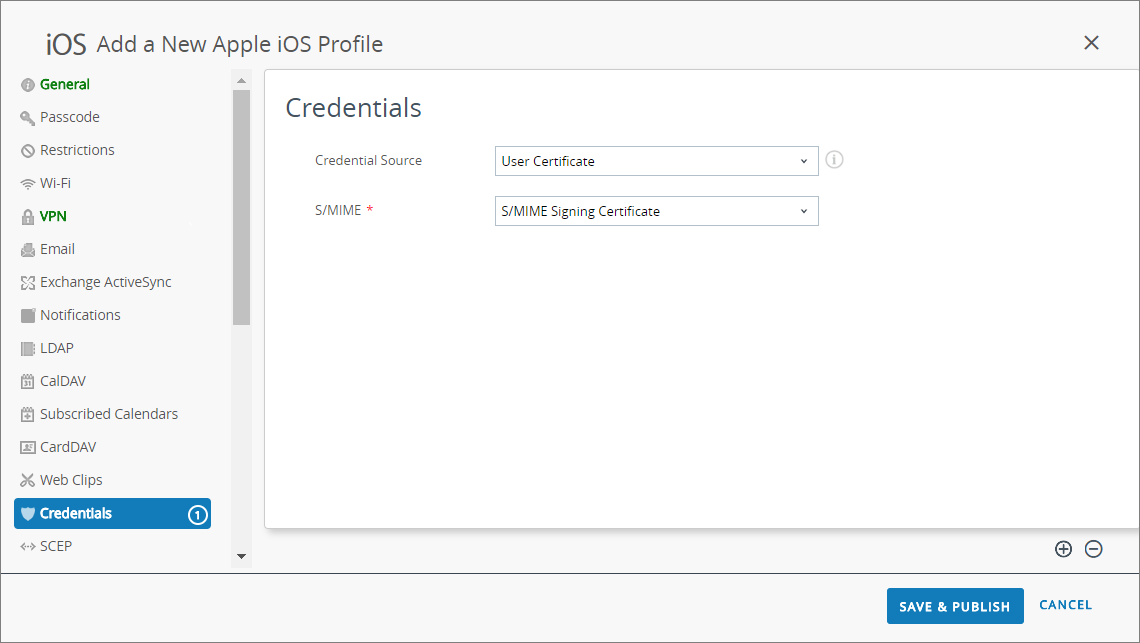
- Set the Credential Source to User Certificate.
- Select the S/MIME Signing Certificate (default).
![]()
- To upload a client certificate manually:
- Set the Credential Source to Upload.
- Enter a Credential Name.
- Click UPLOAD to locate and select the certificate that you want to upload.
- After you select a certificate, click SAVE.
![]()
- To use a predefined certificate authority and template:
- Set the Credential Source to Defined Certificate Authority.
- Select the Certificate Authority from which you want obtain certificates.
- Select the Certificate Template for the certificate authority.
![]()
Configure the VPN settings:- Enter the Connection Name that the endpoint displays.
- Select the network Connection Type:
- For GlobalProtect app 4.1.x and earlier releases, select Palo Alto Networks GlobalProtect.
- For GlobalProtect app 5.0 and later releases, select Custom.
- (Optional) If you set the Connection Type to Custom, enter the bundle ID (com.paloaltonetworks.globalprotect.vpn) in the Identifier field to identify the GlobalProtect app.If you downloaded the GlobalProtect app directly from the Apple App Store in China, enter the bundle ID (com.paloaltonetworks.globalprotect.vpncn) in the Identifier field.
![]()
- In the Server field, enter the hostname or IP address of the GlobalProtect portal to which users connect.
- (Optional) Enter the username of the VPN Account or click the add (+) button to view supported lookup values that you can insert.
- (Optional) In the Disconnect on idle field, specify the amount of time (in seconds) at which an endpoint logs out of the GlobalProtect app after the app stops routing traffic through the VPN tunnel.
- Enable Per App VPN Rules to route all traffic for managed apps through the GlobalProtect VPN tunnel.
- Enable GlobalProtect to Connect Automatically to specified Safari Domains. You can add multiple Safari Domains by clicking the add (+) button.
- Set the Provider Type to indicate how traffic will be tunneled—either at the application layer or the IP layer. Use PacketTunnel.
![]()
- In the Authentication area, set the user Authentication method to Certificate.All per-app VPN configurations require certificate-based authentication.
- When prompted, select the Identity Certificate that GlobalProtect will use to authenticate users. The Identity Certificate is the same certificate that you configured in the Credentials settings.
![]()
- (Optional) Select the Proxy type and configure the relevant settings.
(Optional) (starting with GlobalProtect app 5.0) If your GlobalProtect deployment requires HIP integration with MDM, specify the unique device identifier (UDID) attribute.GlobalProtect supports integration with MDM to obtain mobile device attributes from the MDM server for use in HIP-based policy enforcement. In order for the MDM integration to work, the GlobalProtect app must present the UDID of the endpoint to the GlobalProtect gateway. The UDID attribute enables the GlobalProtect app to retrieve and use UDID information in MDM-based deployments. If you remove the UDID attribute from the profile, you can no longer use the MDM integration. The GlobalProtect app generates a new UDID, but it cannot be used for the integration.- If you are using the Palo Alto Networks GlobalProtect network Connection Type, go to the VPN settings and enable Vendor Keys in the Vendor Configuration area. Set the Key to mobile_id and the Value to {DeviceUid}.
![]()
- If you are using the Custom network Connection Type, go to the VPN settings and ADD Custom Data in the Connection Info area. Set the Key to mobile_id and the Value to {DeviceUid}.
![]()
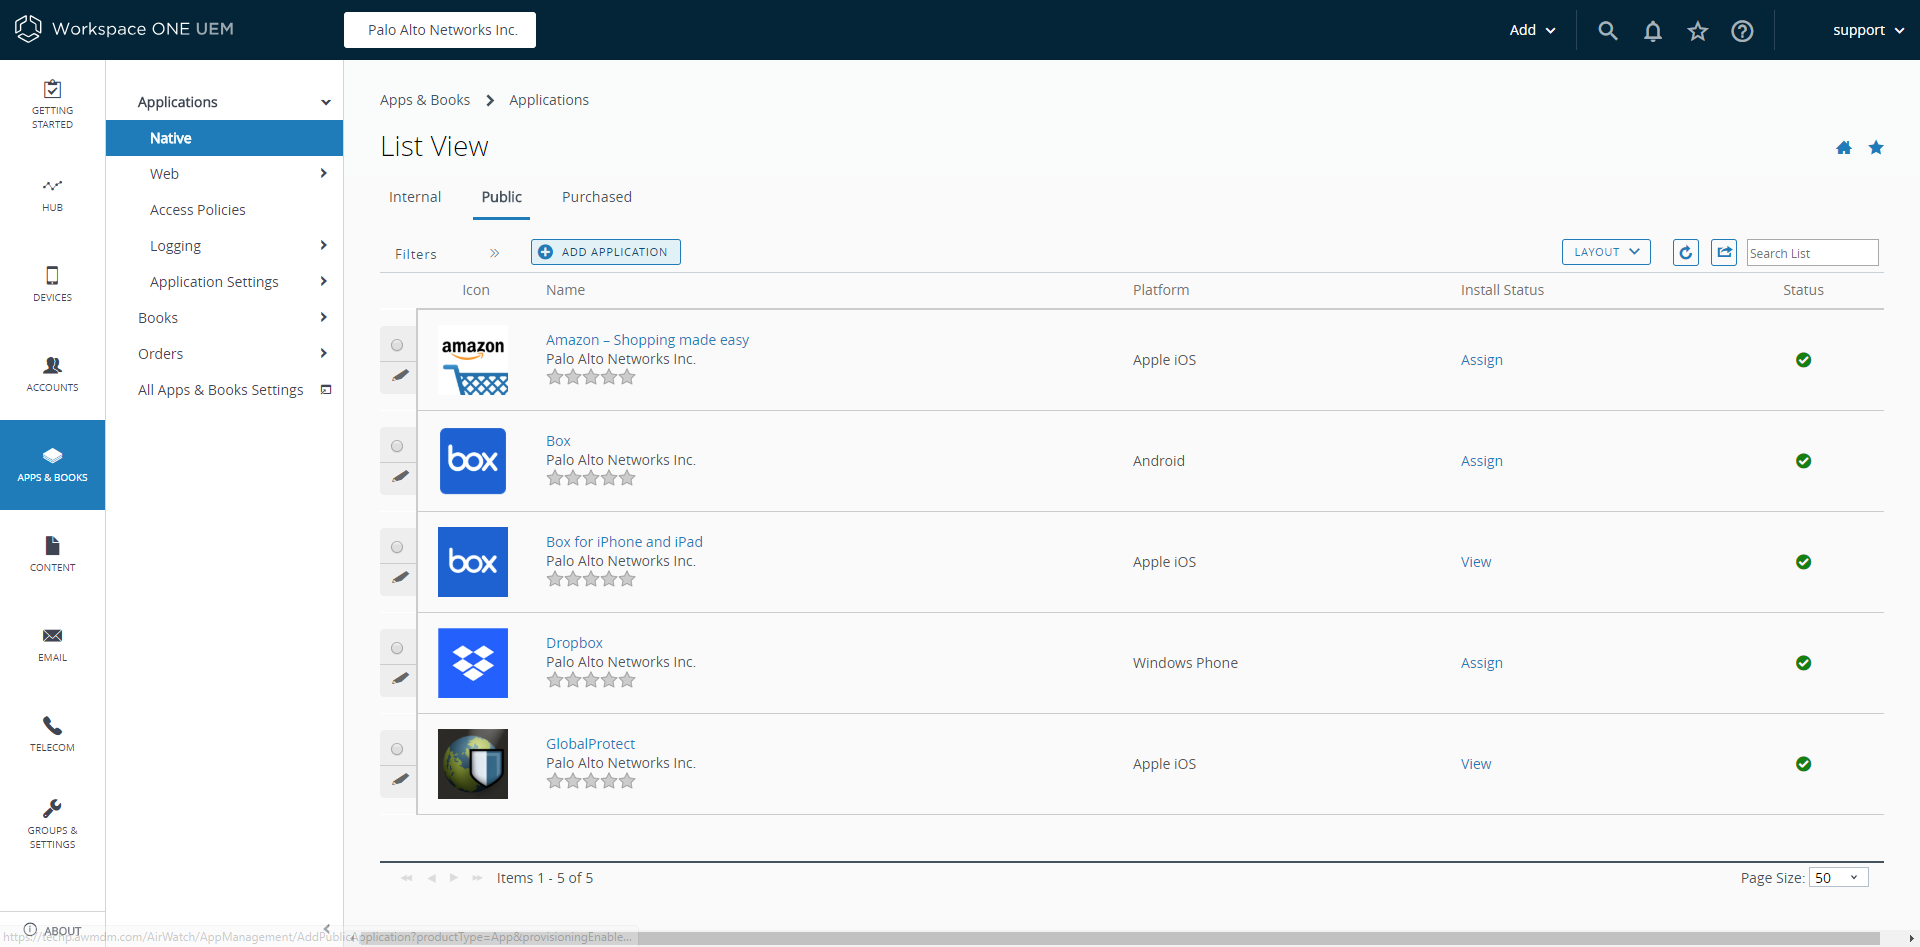
SAVE & PUBLISH your changes.Configure per-app VPN settings for a new managed app or modify the settings for an existing managed app.After configuring the settings for the app and enabling per-app VPN, you can publish the app to a group of users and enable the app to send traffic through the GlobalProtect VPN tunnel.- Select APPS & BOOKSApplicationsNativePublic.To add a new app, select ADD APPLICATION. To modify the settings for an existing app, locate the app in the list of Public apps (List View) and then select the edit () icon in the actions menu next to the row.
![]()
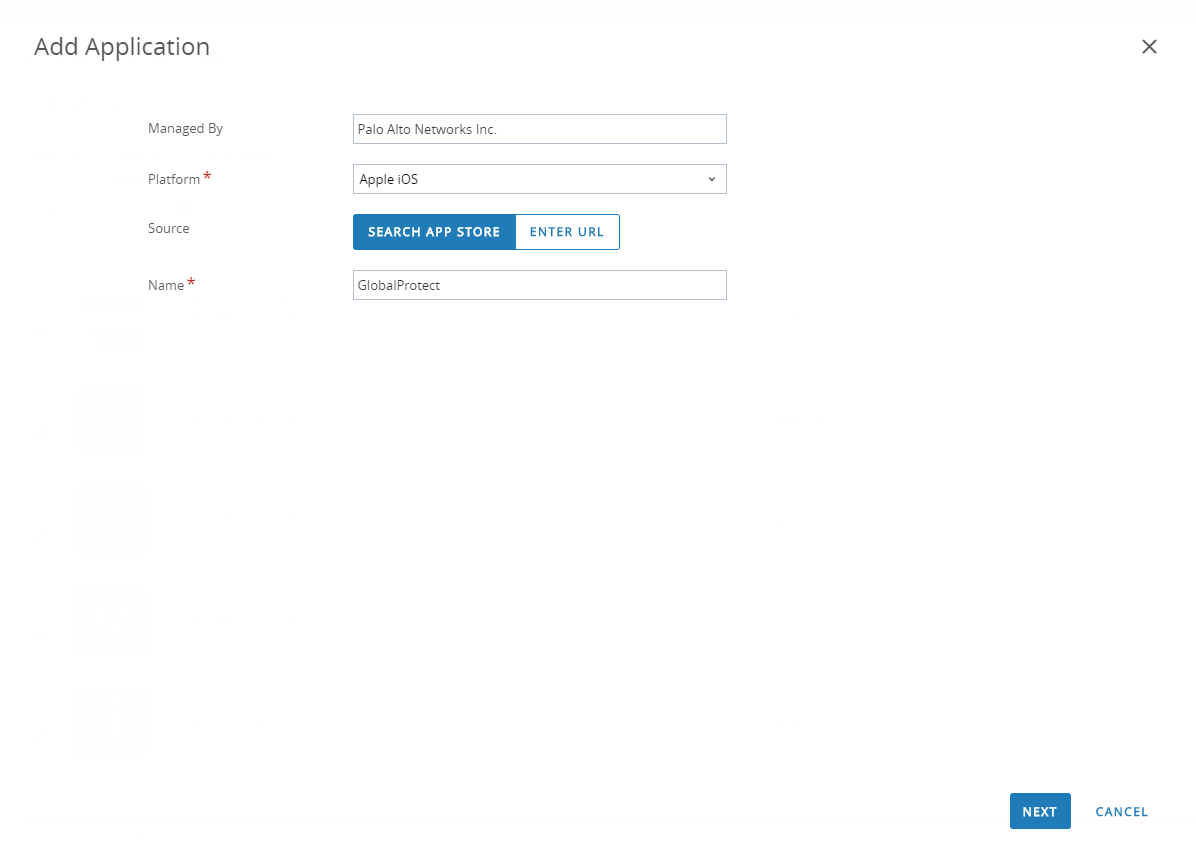
![]() In the Managed By field, select the organization group that will manage this app.Set the Platform to Apple iOS.Select your preferred Source for locating the app:
In the Managed By field, select the organization group that will manage this app.Set the Platform to Apple iOS.Select your preferred Source for locating the app:- SEARCH APP STORE—Enter the Name of the app.
- ENTER URL—Enter the App Store URL for the app (for example, to add the Box app, enter https://itunes.apple.com/us/app/box-for-iphone-and-ipad/id290853822?mt=8&uo=4).
![]() Click NEXT.If you chose to search the App Store, you must also SELECT the app from the list of search results.
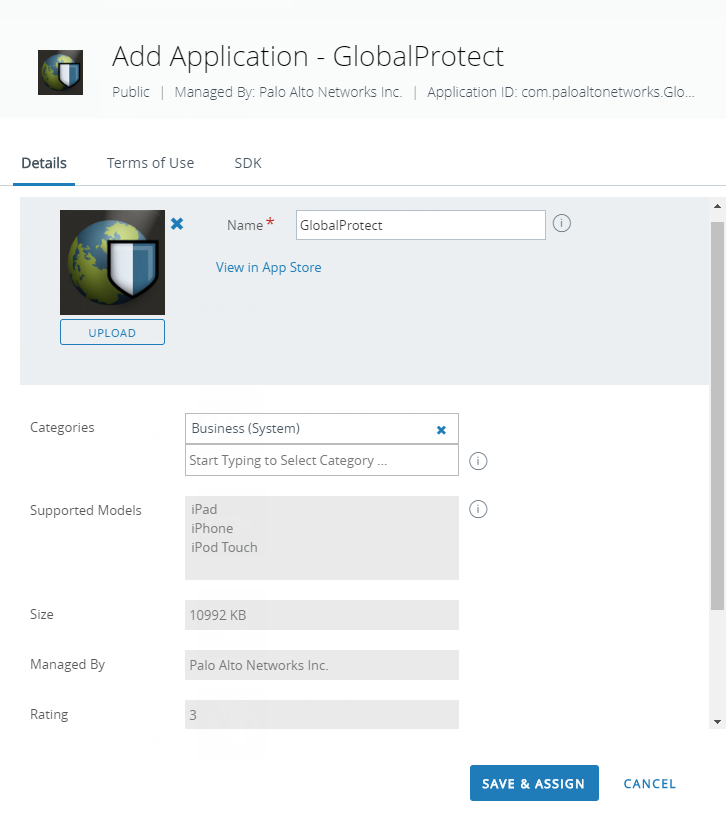
Click NEXT.If you chose to search the App Store, you must also SELECT the app from the list of search results.![]() On the Add Application dialog, ensure that the app Name is correct. This is the name that will appear in the Workspace ONE App Catalog.(Optional) Assign the app to pre-defined or custom Categories for ease-of-access in the Workspace ONE App Catalog.
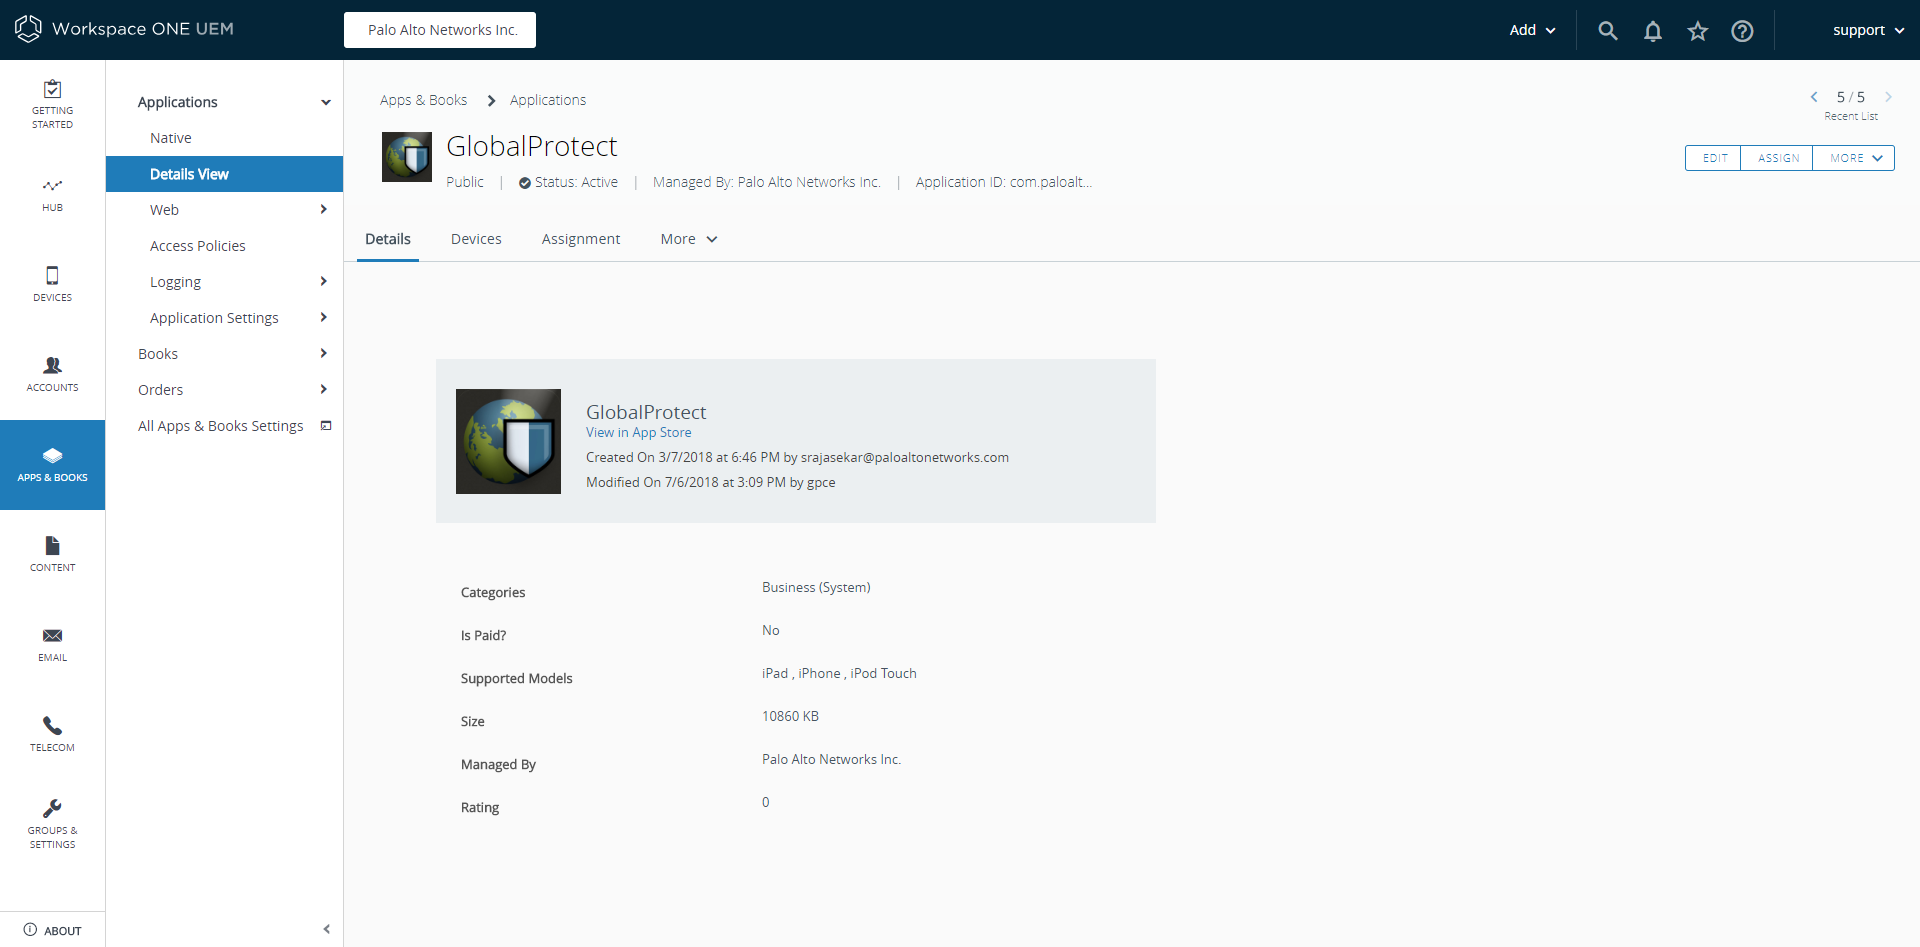
On the Add Application dialog, ensure that the app Name is correct. This is the name that will appear in the Workspace ONE App Catalog.(Optional) Assign the app to pre-defined or custom Categories for ease-of-access in the Workspace ONE App Catalog.![]() SAVE & ASSIGN the new app.Select the newly added app from the list of Public apps (List View).From the ApplicationsDetails View, click ASSIGN at the top-right corner of the screen.
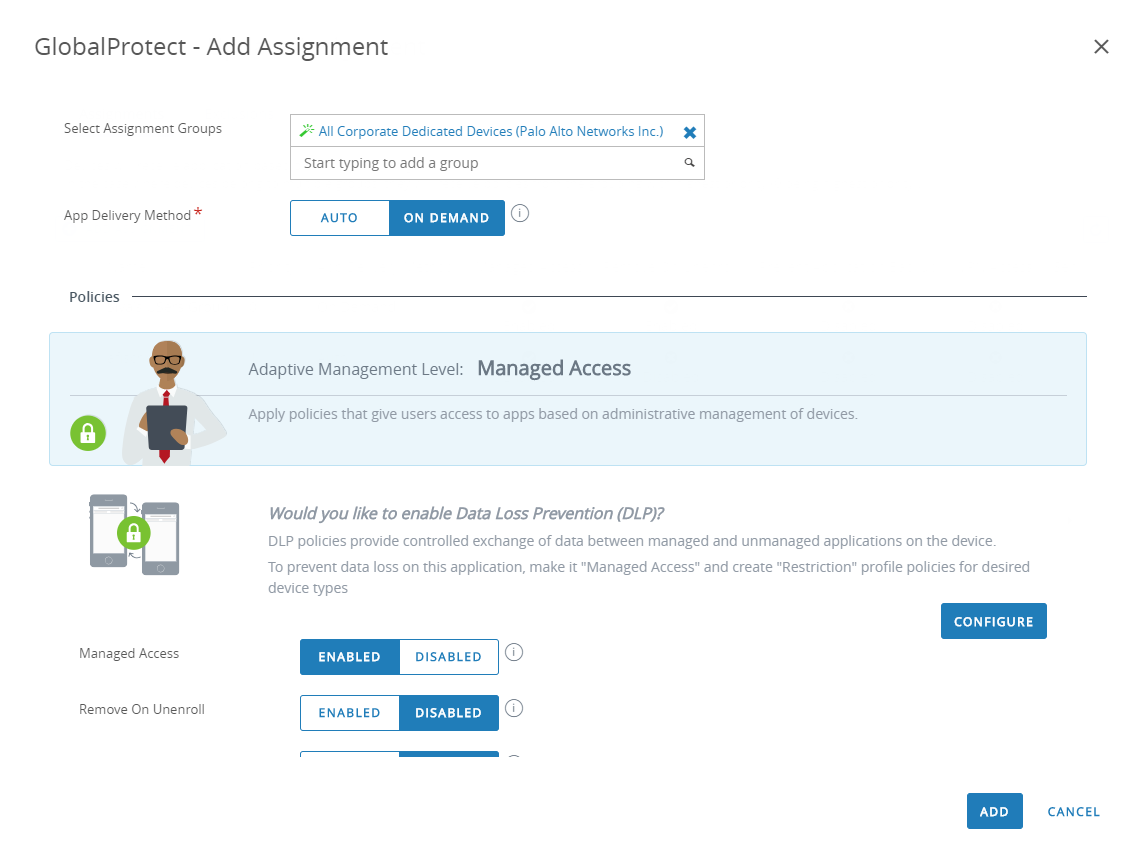
SAVE & ASSIGN the new app.Select the newly added app from the list of Public apps (List View).From the ApplicationsDetails View, click ASSIGN at the top-right corner of the screen.![]() Select Assignments and then click ADD ASSIGNMENT to add the Smart Groups that will have access to this app.
Select Assignments and then click ADD ASSIGNMENT to add the Smart Groups that will have access to this app.- In the Select Assignment Groups field, select the Smart Groups that you want to grant access to this app.
- Select the App Delivery Method. If you select AUTO, the app is automatically deployed to the specified Smart Groups. If you select ON DEMAND, the app must be deployed manually.
- Set the Managed Access option to ENABLED. This option gives users access to the app based on the management policies that you apply.
- Configure the remaining settings as needed.
- ADD the new assignment.
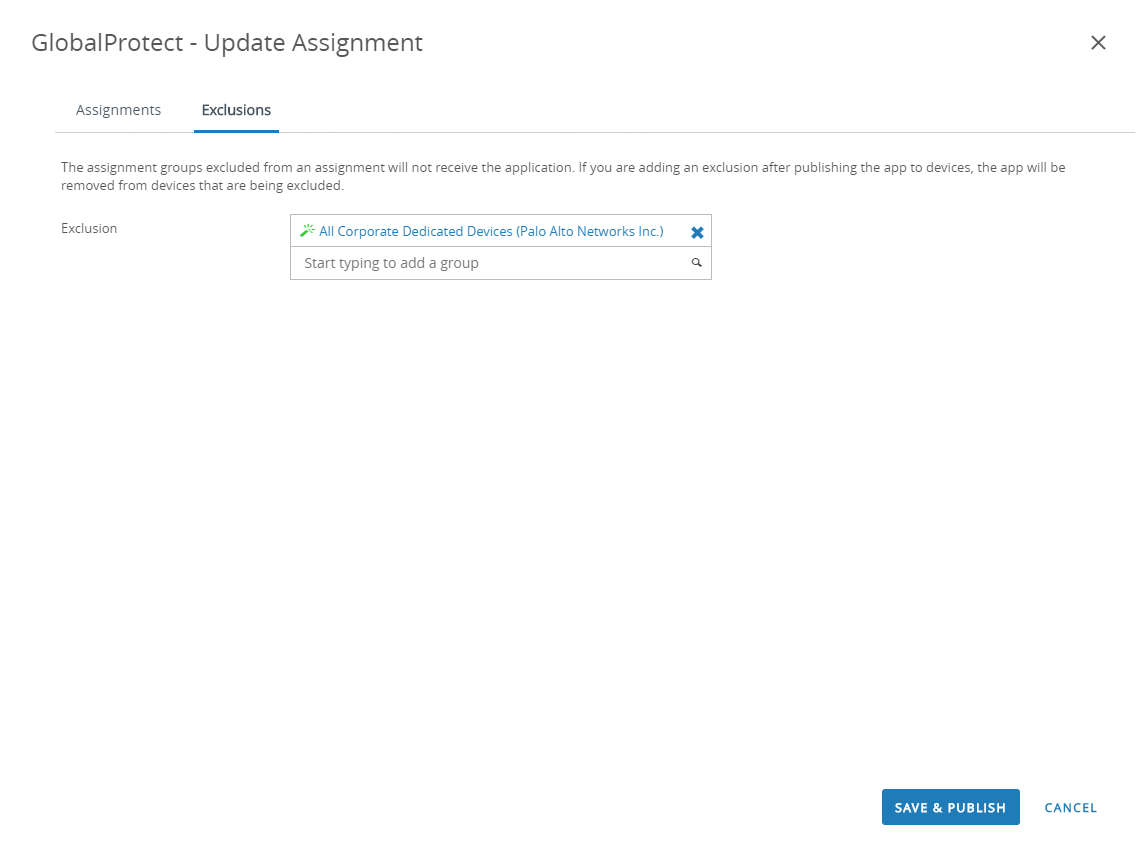
![]() (Optional) To exclude certain Smart Groups from accessing the app, select Exclusions and then select the Smart Groups that you want to exclude from the Exclusion field.
(Optional) To exclude certain Smart Groups from accessing the app, select Exclusions and then select the Smart Groups that you want to exclude from the Exclusion field.![]() SAVE & PUBLISH the configuration to the assigned Smart Groups.
SAVE & PUBLISH the configuration to the assigned Smart Groups.


