Create a New Custom Role
Table of Contents
Create a New Custom Role
Learn how to create a completely new custom role.
Create a new custom role if the role will
be completely different from any existing roles. To create a custom
role, you must have one of the Common Roles: Account,
App, or Instance Administrator.
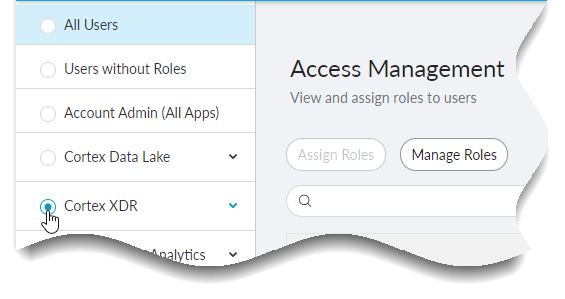
- Log in to the hub and select Access Management.
![]()
- Select the app for which you want to create the custom
role.
![]() Not all apps support custom role creation. If the app does support custom role creation, and you have administrator privileges, you will see Manage Roles when you select it.
Not all apps support custom role creation. If the app does support custom role creation, and you have administrator privileges, you will see Manage Roles when you select it. - Select Manage Roles.
- Select + Create a Role.
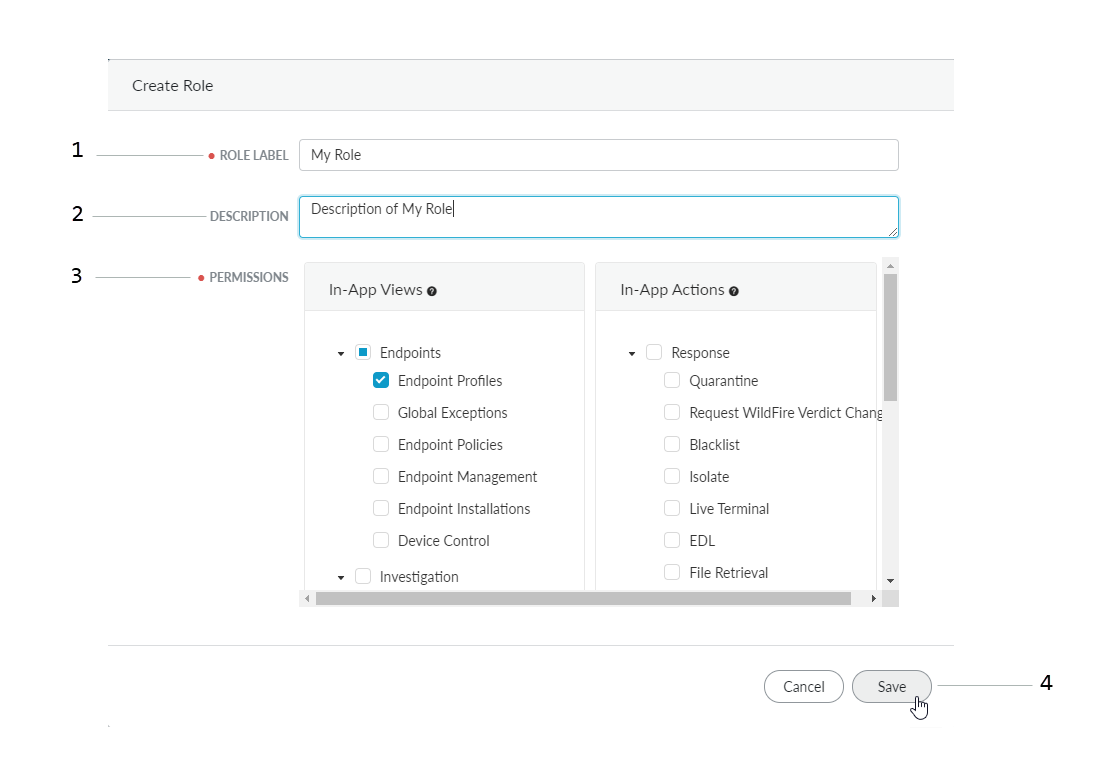
- Define your custom role.
![]()
- Enter a unique ROLE LABEL to identify the role. Duplicate labels do not work.
- (Optional) Enter a DESCRIPTION.
- Select the PERMISSIONS that you want users with this role to have.
- Save your role definition.
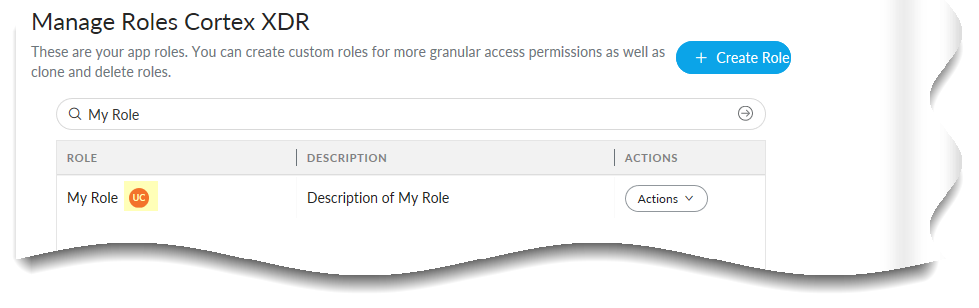
- Verify that you successfully created your role.
![]()
- On the Manage Roles page for the app , enter the name of your role in the search bar.
- Verify that your role appears.UC should appear next to the name of your role to indicate that it is user created.
- To assign your new role, select it when you assign roles for app instances.