Configure a Logical Router
Table of Contents
End-of-Life (EoL)
Configure a Logical Router
Configure a logical router to enable routing for an Advanced
Routing Engine.
In order to perform network routing, the Advanced Routing
Engine requires you to configure at least one logical router; there
is no default logical router. A logical router maintains a separate
routing information base and keeps routes from exposure to other
logical routers. The number of logical routers supported for
an Advanced Routing Engine varies based on firewall model.
Before
you can configure a logical router, you must Enable Advanced Routing.
- Select NetworkRoutingLogical Routers and Add a logical router by Name using a maximum of 31 characters. The name must start with an alphanumeric character, underscore (_), or hyphen (-), and can contain a combination of alphanumeric characters, underscore (_) or hyphen(-). No dot (.) or space is allowed.Add interfaces to the logical router.
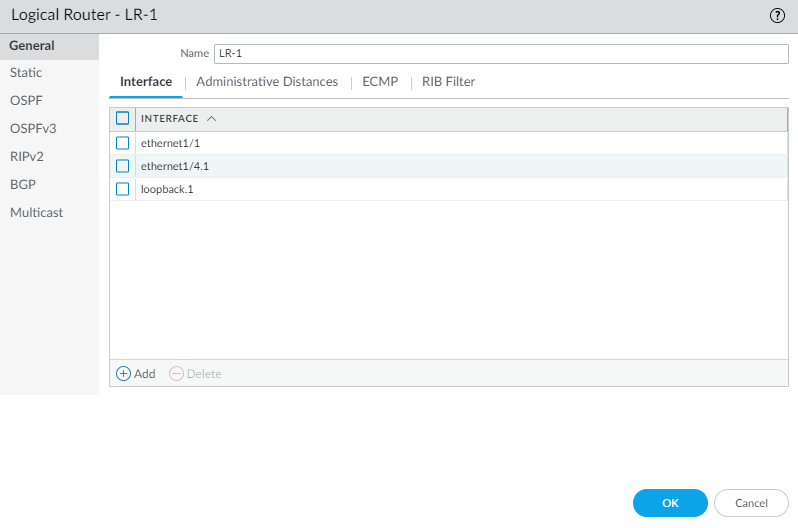
- While still on the Logical Router General tab, select the Interface tab.Add an interface to the logical router by selecting from the list of interfaces. An interface can belong to only one logical router. Repeat to add more interfaces, as in the following example for the logical router named LR-1:
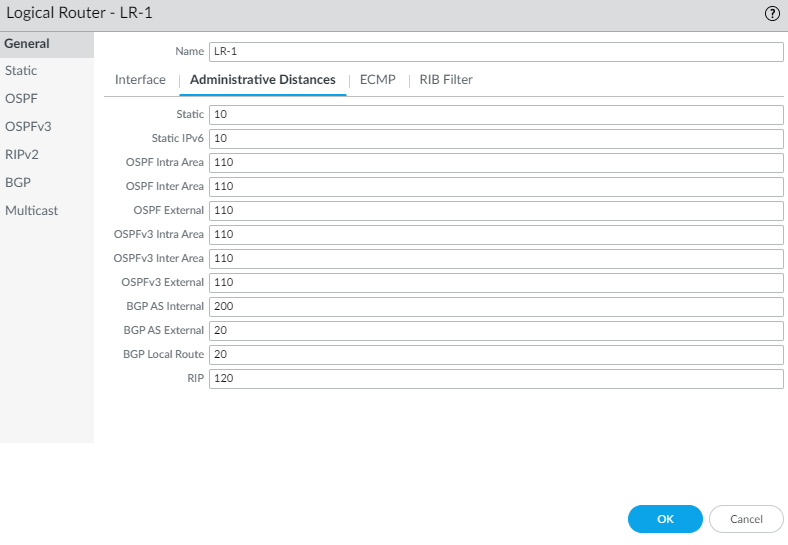
![]() (Optional) Select Administrative Distances to change the global administrative distance (from the default setting) for various types of routes.
(Optional) Select Administrative Distances to change the global administrative distance (from the default setting) for various types of routes.![]()
- Static—Range is 1 to 255; default is 10.
- Static IPv6—Range is 1 to 255; default is 10.
- OSPF Intra Area—Range is 1 to 255; default is 110.
- OSPF Inter Area—Range is 1 to 255; default is 110.
- OSPF External—Range is 1 to 255; default is 110.
- OSPFv3 Intra Area—Range is 1 to 255; default is 110.
- OSPFv3 Inter Area—Range is 1 to 255; default is 110.
- OSPFv3 External—Range is 1 to 255; default is 110.
- BGP AS Internal—Range is 1 to 255; default is 200.
- BGP AS External—Range is 1 to 255; default is 20.
- BGP Local Route—Range is 1 to 255; default is 20.
- RIP—Range is 1 to 255; default is 120.
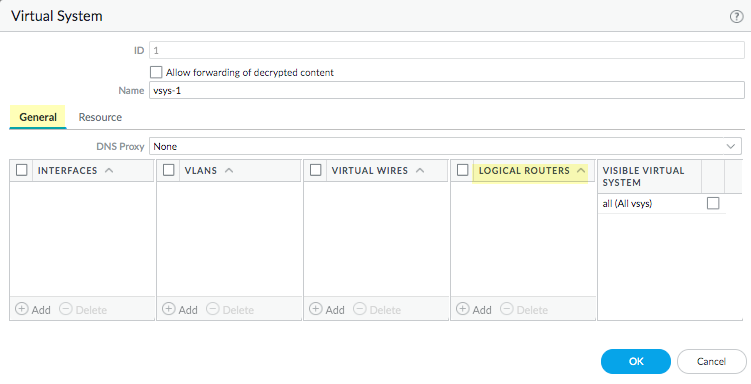
Click OK.(On a firewall supporting multiple virtual systems) Assign the logical routers to a virtual system.- Select DeviceVirtual Systems and select a virtual system and General.Add one or more Logical Routers.Click OK.
![]() Click OK.(Optional) Configure ECMP for a logical router by navigating to NetworkRoutingLogical Routers, selecting a logical router, and then GeneralECMP. Configure ECMP for a logical router much as you would for a virtual router on a legacy routing engine.ECMP is not supported for equal-cost routes where one or more of those routes has a virtual router or logical router as the next hop. None of the equal-cost routes will be installed in the Forwarding Information Base (FIB).Commit the changes.For a firewall with a pre-existing configuration, select DeviceSetupOperations and Reboot Device. Then log back into the firewall.(Optional) View Runtime Stats for a logical router.
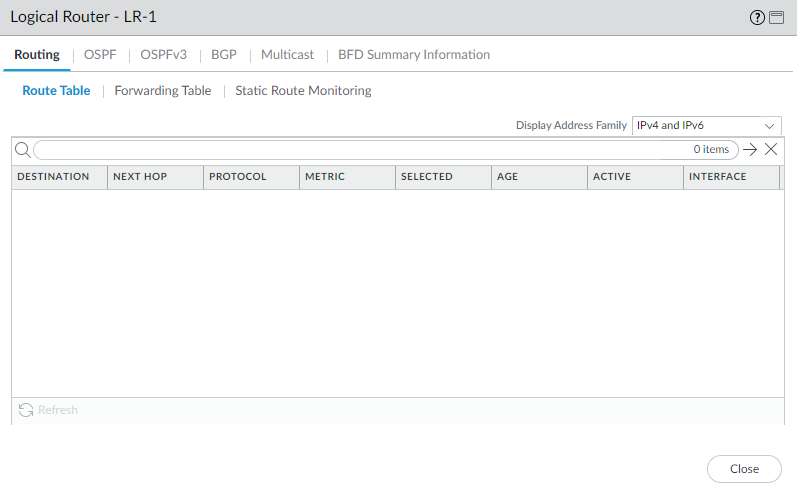
Click OK.(Optional) Configure ECMP for a logical router by navigating to NetworkRoutingLogical Routers, selecting a logical router, and then GeneralECMP. Configure ECMP for a logical router much as you would for a virtual router on a legacy routing engine.ECMP is not supported for equal-cost routes where one or more of those routes has a virtual router or logical router as the next hop. None of the equal-cost routes will be installed in the Forwarding Information Base (FIB).Commit the changes.For a firewall with a pre-existing configuration, select DeviceSetupOperations and Reboot Device. Then log back into the firewall.(Optional) View Runtime Stats for a logical router.- Select NetworkRoutingLogical Routers and for a specific logical router, select More Runtime Stats on the far right.To see the route tables for all protocols, on the Routing tab, select Route Table and Display Address Family: IPv4 and IPv6, IPv4 Only, or IPv6 Only.
![]() To see entries in the Forwarding Information Base (FIB), select Forwarding Table.Select Static Route Monitoring to see the static routes you are monitoring.Select the BGP tab and then Summary to see BGP settings.Select Peer to see BGP peer settings.Select Peer Group to see BGP peer group settings.Select Route and Display Address Family: IPv4 and IPv6, IPv4 Only, or IPv6 Only to see the attributes of BGP routes.Access the CLI to view advanced routing information. The PAN-OS CLI Quick Start lists the commands in the CLI Cheat Sheet: Networking.
To see entries in the Forwarding Information Base (FIB), select Forwarding Table.Select Static Route Monitoring to see the static routes you are monitoring.Select the BGP tab and then Summary to see BGP settings.Select Peer to see BGP peer settings.Select Peer Group to see BGP peer group settings.Select Route and Display Address Family: IPv4 and IPv6, IPv4 Only, or IPv6 Only to see the attributes of BGP routes.Access the CLI to view advanced routing information. The PAN-OS CLI Quick Start lists the commands in the CLI Cheat Sheet: Networking.


