Next-Generation Firewall
Strata Cloud Manager
Table of Contents
Strata Cloud Manager
Configure a logical router for Multicast Source Discovery Protocol (MSDP) to use with
IP multicast on Strata Cloud Manager.
Configure a logical router for Multicast Source Discovery Protocol (MSDP) to use with
IP multicast on Strata Cloud Manager.
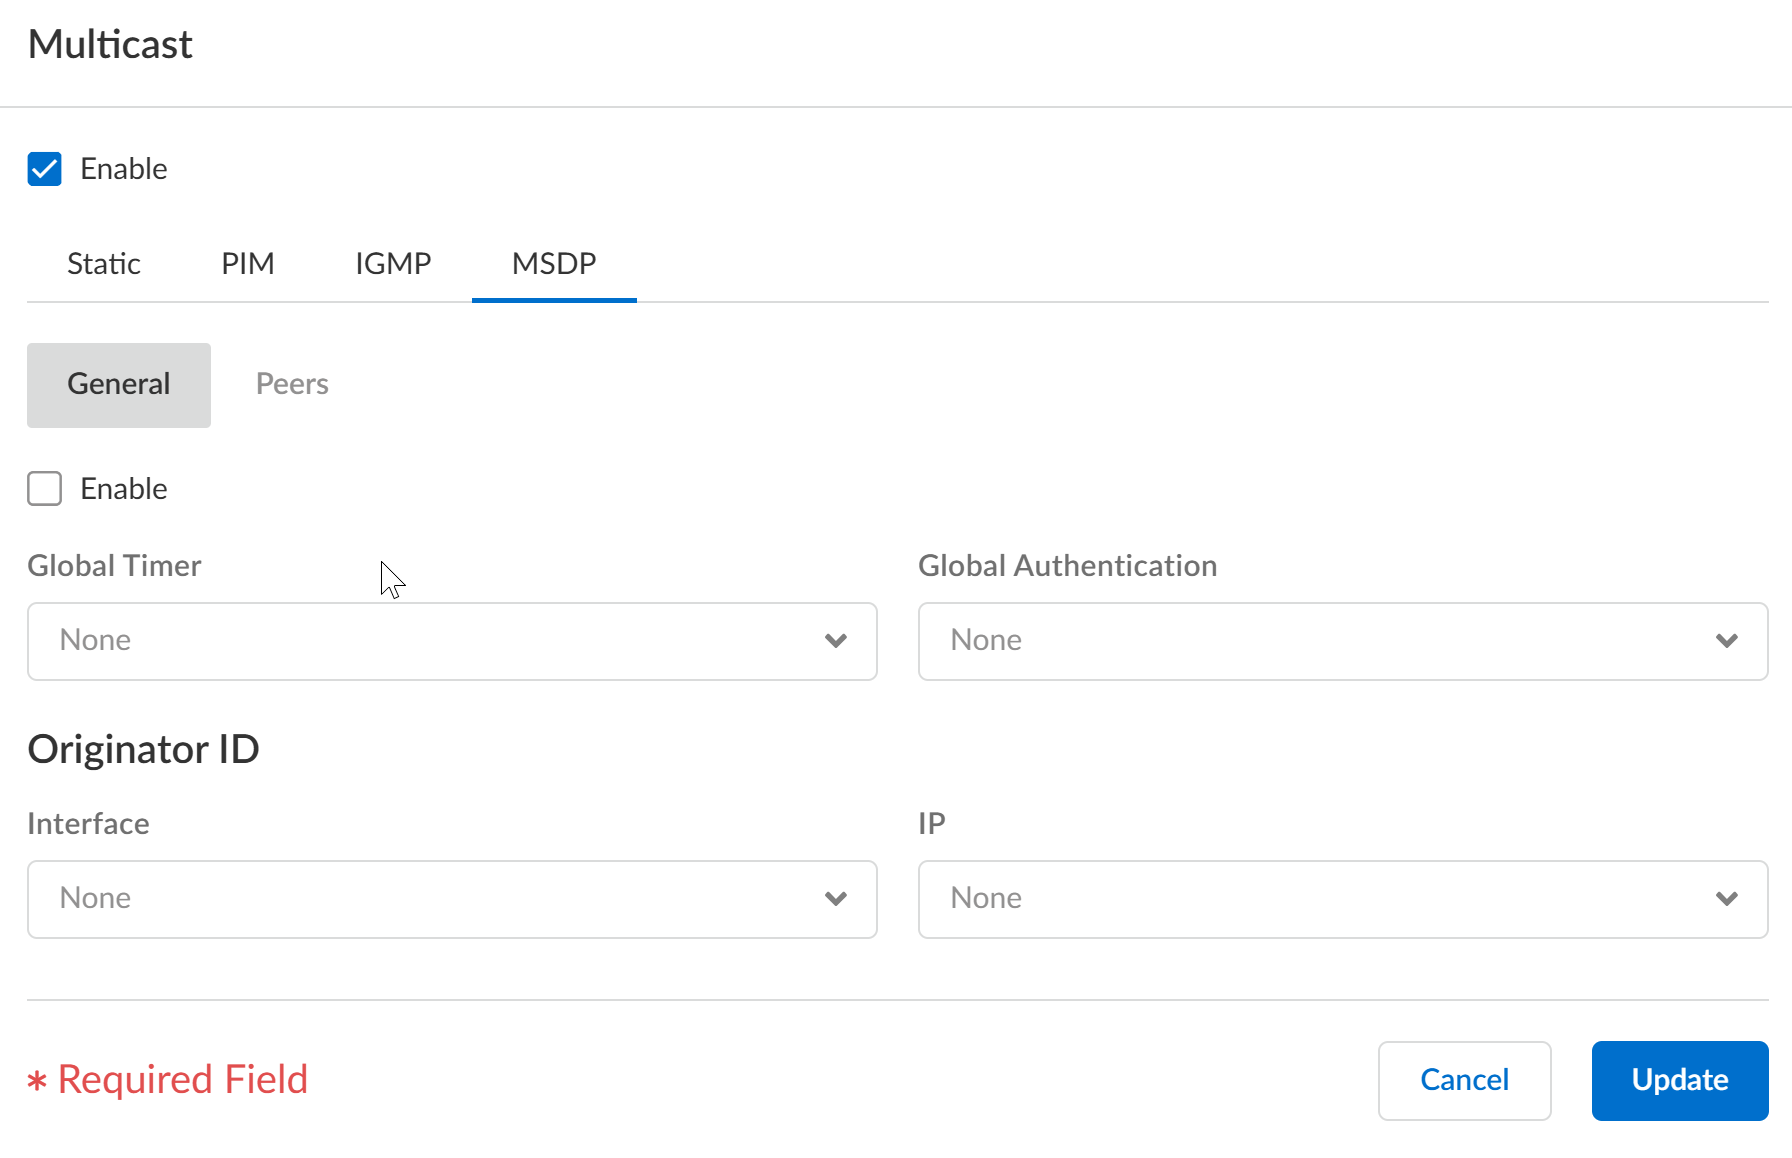
- Select .For Configuration Scope, select Folders and then select All Firewalls, a specific folder, or the specific firewalls you want to configure. (Don’t choose Global.)Select and select the logical router you're configuring.Edit the Multicast card and Enable multicast.Select the MSDP tab.On the General tab, Enable MSDP.
![]() Select the Global Timer profile, or select the default profile (this is the default setting), or create a new timer profile. If you select default, Keep Alive Interval is set to 60, Message Timeout is set to 75, and Connection Retry Interval is set to 30. If you select None, the default values apply.Select the Global Authentication profile or create a new one. The default is None.For the Originator ID, select the Interface that the logical router uses as the RP interface in Source-Active (SA) messages.Select or enter the IP Address (with prefix length) that the logical router uses as the RP address in SA messages. If no Originator IP address is configured, the logical router uses the PIM RP address to encapsulate the SA message.Select the Peers tab and Add a peer Name (maximum of 63 characters). The name must start with an alphanumeric character, underscore (_), hyphen (-), or dot (.) and can contain a combination of alphanumeric characters, underscore, or hyphen or dot. No space is allowed.
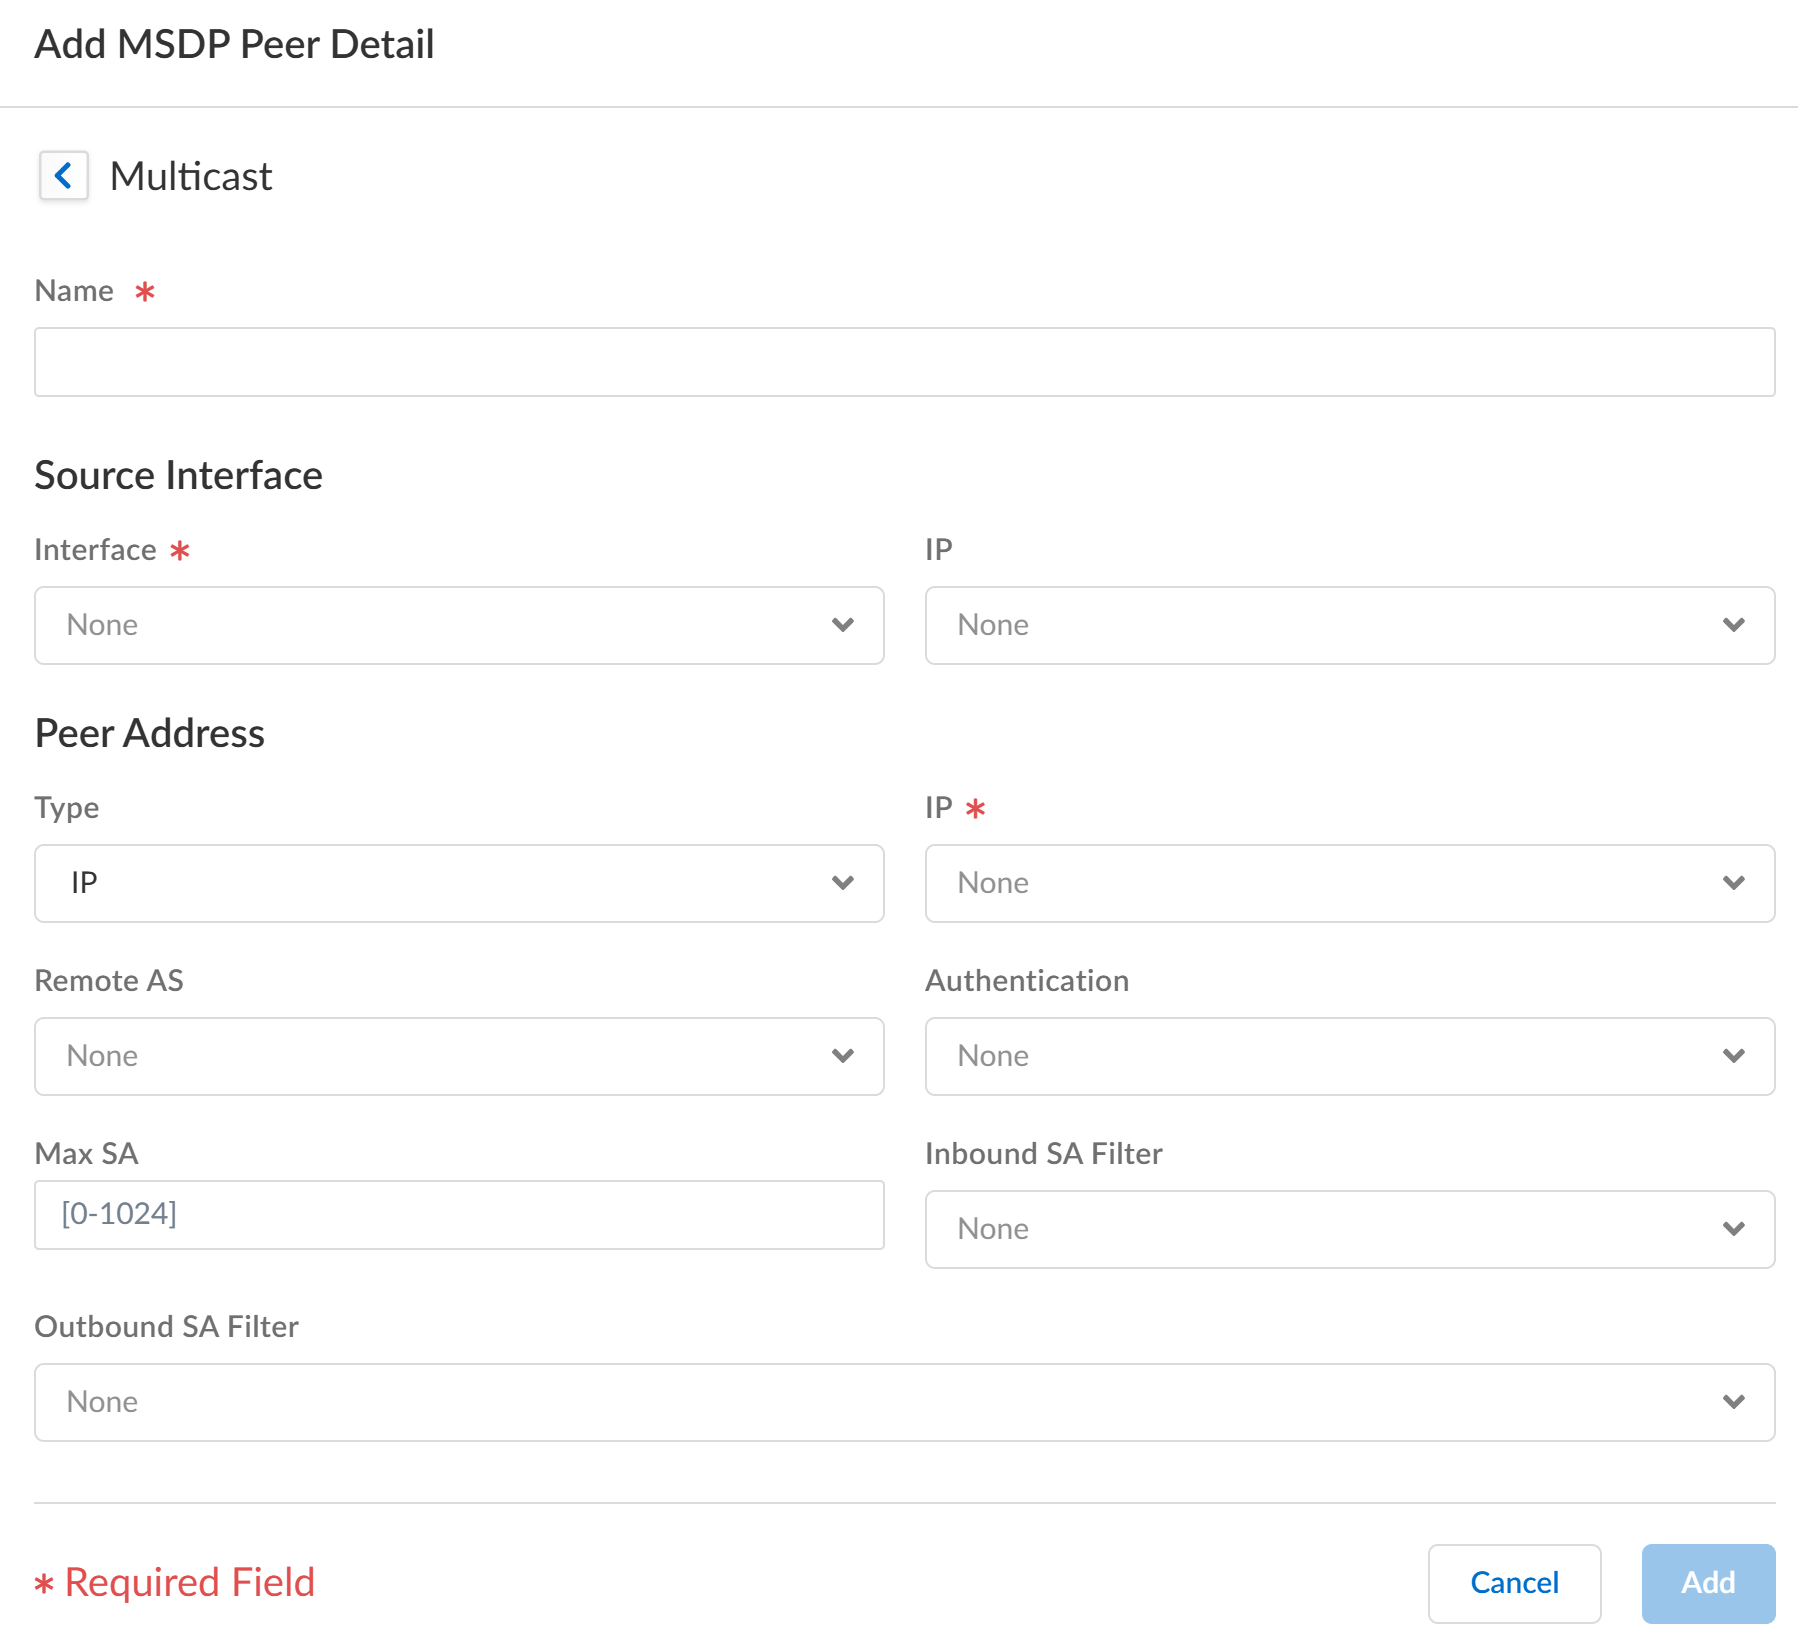
Select the Global Timer profile, or select the default profile (this is the default setting), or create a new timer profile. If you select default, Keep Alive Interval is set to 60, Message Timeout is set to 75, and Connection Retry Interval is set to 30. If you select None, the default values apply.Select the Global Authentication profile or create a new one. The default is None.For the Originator ID, select the Interface that the logical router uses as the RP interface in Source-Active (SA) messages.Select or enter the IP Address (with prefix length) that the logical router uses as the RP address in SA messages. If no Originator IP address is configured, the logical router uses the PIM RP address to encapsulate the SA message.Select the Peers tab and Add a peer Name (maximum of 63 characters). The name must start with an alphanumeric character, underscore (_), hyphen (-), or dot (.) and can contain a combination of alphanumeric characters, underscore, or hyphen or dot. No space is allowed.![]() Enter the Source Interface used to establish the MSDP connection over TCP with its MSDP peer.Select the IP address of the source interface. The default is None.Select the Type of peer address:
Enter the Source Interface used to establish the MSDP connection over TCP with its MSDP peer.Select the IP address of the source interface. The default is None.Select the Type of peer address:- IP—(the default) and select an address object or enter an IP address.
- FQDN—Select or enter the fully qualified domain name of the peer. The drop-down displays all FQDN names configured as address objects.
Enter the BGP autonomous system number of the Remote AS where the MSDP peer is located.For Authentication, do one of the following:- Select an MSDP authentication profile to apply to this peer, which overrides the Global Authentication Profile you applied to MSDP on the General page.
- inherit (Inherit from global authentication) (the default) the global authentication profile.
- Select none (Disable authentication) to disable authentication to this peer, which overrides the Global Authentication Profile.
For Max SA, enter the maximum number of Source-Active (SA) entries the SA cache will accept from this MSDP peer. The range is 0 to 1,024; the default is 0 (unlimited). After this maximum is reached, new SA messages from this peer are dropped.For Inbound SA Filter, select an access list or create a new access list to filter incoming SA messages (block unwanted groups) from this peer. The default is None.The access list can specify source addresses in an (S,G) pair to filter, or destination (group) addresses in an (S,G) pair to filter, or both.For Outbound SA Filter, select an access list or create a new access list to filter outgoing SA messages (block unwanted groups) being propagated to this peer. The default is None.The access list can specify source addresses in an (S,G) to filter, or destination (group) addresses in an (S,G) to filter, or both.Click Add and Update.Save the configuration.Create MSDP authentication and timer profiles for Strata Cloud Manager if you have not done so.Push Config and Push the configuration. Select the Admin Scope and enter a Description for the configuration. Select Push again.