Prisma Access Agent
Create an App Configuration on Android Endpoints Using Microsoft Intune
Table of Contents
Create an App Configuration on Android Endpoints Using Microsoft Intune
Create an App Configuration on Android Endpoints Using Microsoft Intune
| Where Can I Use This? | What Do I Need? |
|---|---|
|
|
You can create an app configuration in Microsoft Intune to allow administrators to
customize and manage Prisma Access Agent settings for Android devices without
requiring users to manually configure the Prisma Access Agent app themselves. This
policy enables IT admins to specify configuration settings that can control app
behavior, enable specific features, and enhance security across managed devices.
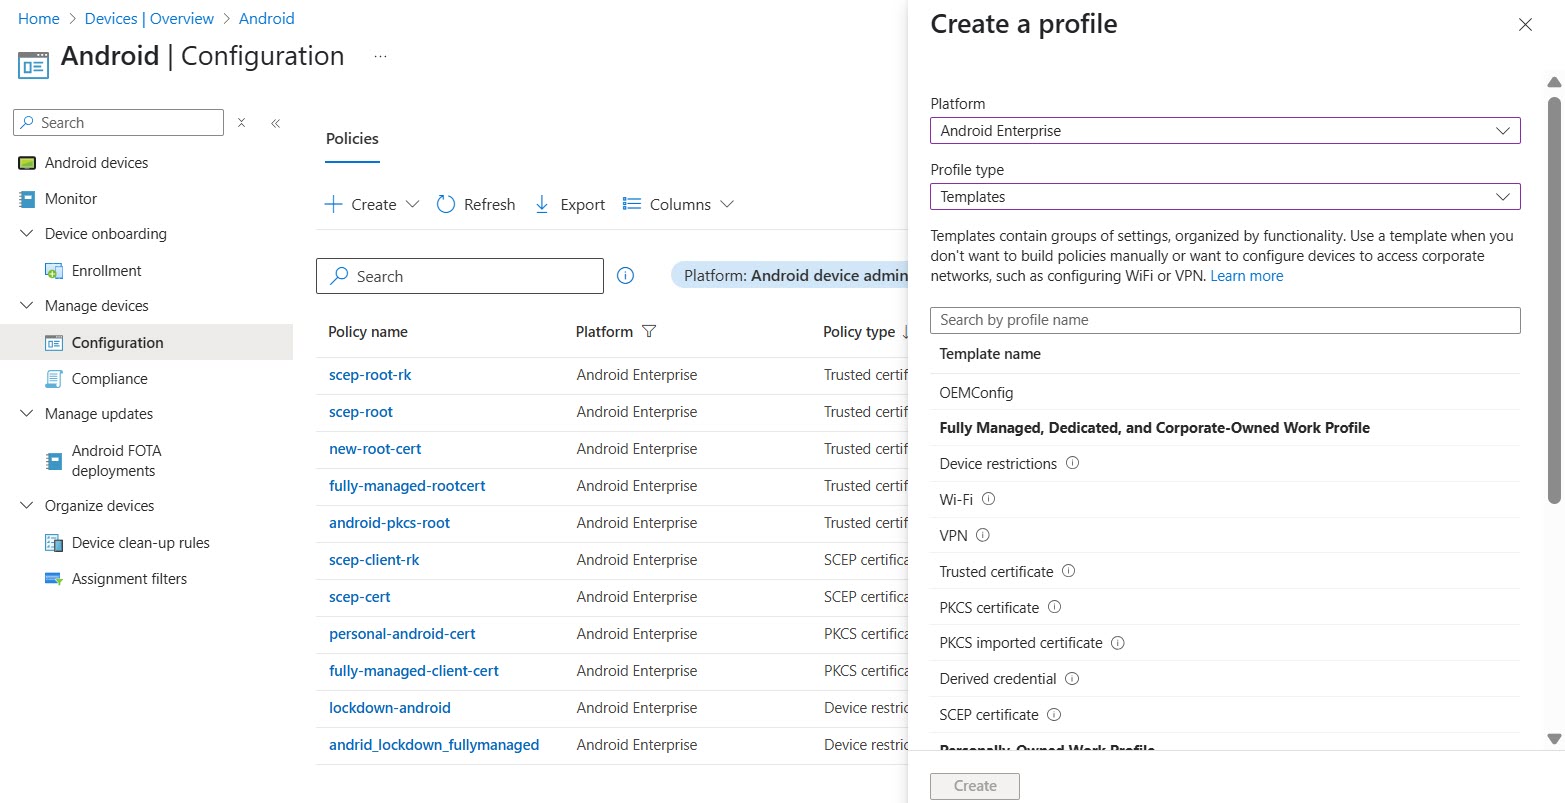
- Click AppsAndroidManage AppsConfiguration.On the Configuration page, click CreateManaged Devices.
![]() Enter a name and description for the policy and select the platform to Android Enterprise and profile type to TemplatesClick Select app next to Targeted app, select Prisma Access Agent, and click OK.Click Next.In Configuration settings format, select Use configuration designer and add configuration key for server address.
Enter a name and description for the policy and select the platform to Android Enterprise and profile type to TemplatesClick Select app next to Targeted app, select Prisma Access Agent, and click OK.Click Next.In Configuration settings format, select Use configuration designer and add configuration key for server address.- Add the Server Address key and value as “com.paloaltonetworks.prismaaccessagent” to add Prisma Access Agent as VPN agent. This is the only configuration required to add Prisma Access Agent.
KeyValue TypeDescriptionExampleserver addressRequired attribute for all configurationsStringIP address or fully qualified domain name (FQDN) of the server address.VPN Identifier: com.paloaltonetworks.prismaaccessagentEPM address: example.epm.gpcloudservice.comapp_listRequired attribute for per-app configurationsStringTo configure Per-App VPN, begin the string with either allowlist or blocklist, followed by a colon, and then by a list of app Bundle IDs separated by semicolons. End the list with a semicolon.To find a Bundle ID, refer to the app’s Google Play Store URL. The Bundle ID is embedded in the URL. For example, in the URL: https://play.google.com/store/apps/details?id=com.example.app&hl=en_USThe Bundle ID is: com.example.appTo decide if you need an Allowlist or Blocklist:- Allowlist: Only the listed applications will be tunneled through the Prisma Access Agent; all other traffic will go directly.
- Blocklist: All traffic will be tunneled through the Prisma Access Agent, except for the listed applications.
allowlist | blocklist: com.google.calendar; com.android.email; com.android.chromeDefault value: none.connect_methodString- Choose user-logon for
always-on connect method. This automatically
connects Prisma Access Agent with your
credentials.On Android devices, Prisma Access Agent does not automatically connect when you open applications configured with an allowlist or blocklist. Hence, we recommend setting the always on connect method for per-app configurations.
- Choose on-demand to ensure that users manually connect Prisma Access Agent through the application.
user-logon | on-demandDefault value: blank, in which case the connect method specified on the portal configuration is used.managedBooleanIndicates whether the device is managed by an MDM.(Applicable only for Always-On connect method. On Intune MDM, set On-demand VPN and connect VPN set to all domains.)true | falseDefault value: falsecomplianceStringTag to identify devices in security policies. You can specify any value for this parameter, it will appear in the HIP report and can be used to create security policies with.yes | notagStringTag to identify devices in security policies. You can specify any value for this parameter, it will appear in the HIP report and can be used to create security policies with.HR_DepartmentownershipStringTag to identify devices in security policies. You can specify any value for this parameter, it will appear in the HIP report and can be used to create security policies with.corp-ownedClick Next.Assign the policy to the appropriate users or groups. To deploy the policy broadly to all applicable devices, select Add all users or Add all devices.Click Next.Review your settings and click Create.

