Prisma Access Browser
Onboard the Prisma Browser
Table of Contents
Onboard the Prisma Browser
Learn how to onboard Prisma Access Secure Enterprise Browser (Prisma Browser) on the Strata Cloud Manager and integrate with Prisma Access.
| Where Can I Use This? | What Do I Need? |
|---|---|
|
|
See the prerequisites before you begin this
task.
Onboard the Prisma Browser
Welcome to the Prisma Browser
Use the onboarding step-by-step wizard to configure the essential components of
Prisma Browser. The wizard guides you through each stage of the setup,
ensuring that both the admin and end users have a complete and functional basic
configuration.
The steps that you see in your tenant depends on your Prisma Browser license; not all the onboarding steps are available for all licenses.
Onboarding users depends on the browser license.
- If you have a standalone licence, then onboardiing includes 4
steps:
- Users
- Enforce SSO applications
- Download and Distribute
- Browser Policy
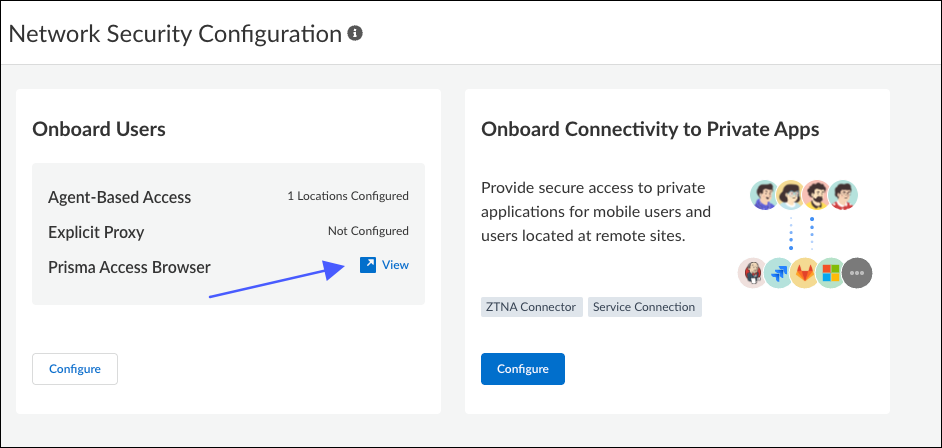
From the Strata Cloud Manager, select
In the Onboarding Users section, select Prisma Browser and click
view
If you have a standalone license, Step 1 will open. Otherwise, the Onboarding
with Strata Cloud Manager page will open.
On the Onboarding with Strata Cloud Manager page, under Onboard Users,
locate Prisma Browser, and click View.
![]()
Step 1 - Users
The first part is to determine who can log into your browser, and how.
Prerequisites
Before completing this step, configure your Cloud Identity Engine (CIE). You
can either:
- Create a local CIE directory and manually onboard a few initial end users, or
- Connect your cloud or on-premises identity provider (IdP) to onboard users at scale.
Also, you need to configure an authentication profile to enable user access.
You can configure only one authentication
profile . If you use multiple identity providers (IdP), add them all to
the same profile. To do this, select Authentication Mode:
Multiple when setting up the authentication profile.
Define the user authentication method and onboard User groups.
- From the drop-down, select the Authentication profile for the systems you plan to deploy. The choices are Prisma Browser and Prisma Browser Extension.
- Choose one or more directories from the drop-down list/ For each selected directory, select the User groups that will be able to access the Prisma Browser.
- The default primary Identification attribute is mail (email addresses). If you're using UPN (User Principal Name) as your primary identifier, make sure that you set it to UPN. For more information, refer to Manage Users.
- Next: Prisma Access Integration.
![]()

Step 2 - Prisma Access Integration
- Enable external connectivity to Prisma Access.
- Review the Explicit Proxy Review Guidelines.
- Go to the Set Up Explicit Proxy page.
- Select the tab for the Strata Cloud Manager.
- Complete steps 1- 3.
- Enable the Prisma Browser.
- Push configuration to deploy login.
- Done
- Enable the Prisma Browser in the Prisma Access Security
policy.
- Click Explicit Proxy settings.
- Add a rule that allows web traffic in your Security policy.
- Push configuration to accept the rule.
- Done.
- Create a service connection.
- Click Service connection.
- This takes you to the Add Service Connection page.
- Done.
- Next: Routing.
![]()

Step 3 - Routing
The Routing control enables you to manage the way that the Prisma Browser
handles network traffic. This feature sets up the default configuration for
Prisma Browser. If you need to adjust the granularity of the control
for a specific rule, refer to Browser Customization Controls for traffic flows .
- Choose one of the following Traffic Control options:If all browser traffic is configured to be routed through Prisma Access, this configuration is ignored.
- Only route private application traffic through Prisma Access.
- Route all traffic through Prisma Access.
- Don’t route traffic through Prisma Access.Mobile Devices: To ensure an optimal experience with Network Detection and Prisma Access, either route only Private App traffic, or exclude the Mobile device group from routing.
The Traffic Control option appears only if the Prisma Access Licensing exists. - (Optional) Ensure that the Prisma Browser traffic flows in
an optimal manner when the browser detects it's running within the
internal network. This identification is based on establishing a
connection with a host that is only available inside the internal
network.
- Enter the FQDN to resolve.
- Enter the expected IP address.
- Choose whether or not to identify the internal network by detecting if the GlobalProtect or the Prisma Access Agent is running on the device.
- Choose whether or not to enable Agent Detection on your network. Agent Detection will detect that the device is on the internal network even if GlobalProtect or Prisma Access is not connected, as long as at least one of these applications is running.
- Toggle on - Enable Agent Detection.
- Toggle off - Disable Agent Detection.
- Next: Enforce SSO applications
![]()

Step 4 - Enforce SSO Applications
It's important that the only way your users can authenticate on SSO-enabled
applications is by using the Prisma Browser. This will ensure that
external actors will have no access to your enterprise applications. Prisma
Browser offers you three ways to enforce your selected SSO option.
- Conditional access using your authentication proxy.
- Conditional access using device posture IdP (Okta).
- Conditional access using certificates (Google workspace).
- Okta
- Microsoft Azure Active Directory
- PingID
- OneLogin
- VMware workspace ONE Access
- When you configure your local settings, be sure to take note of the egress IP addresses.
- Next: Download and distribute.
![]()

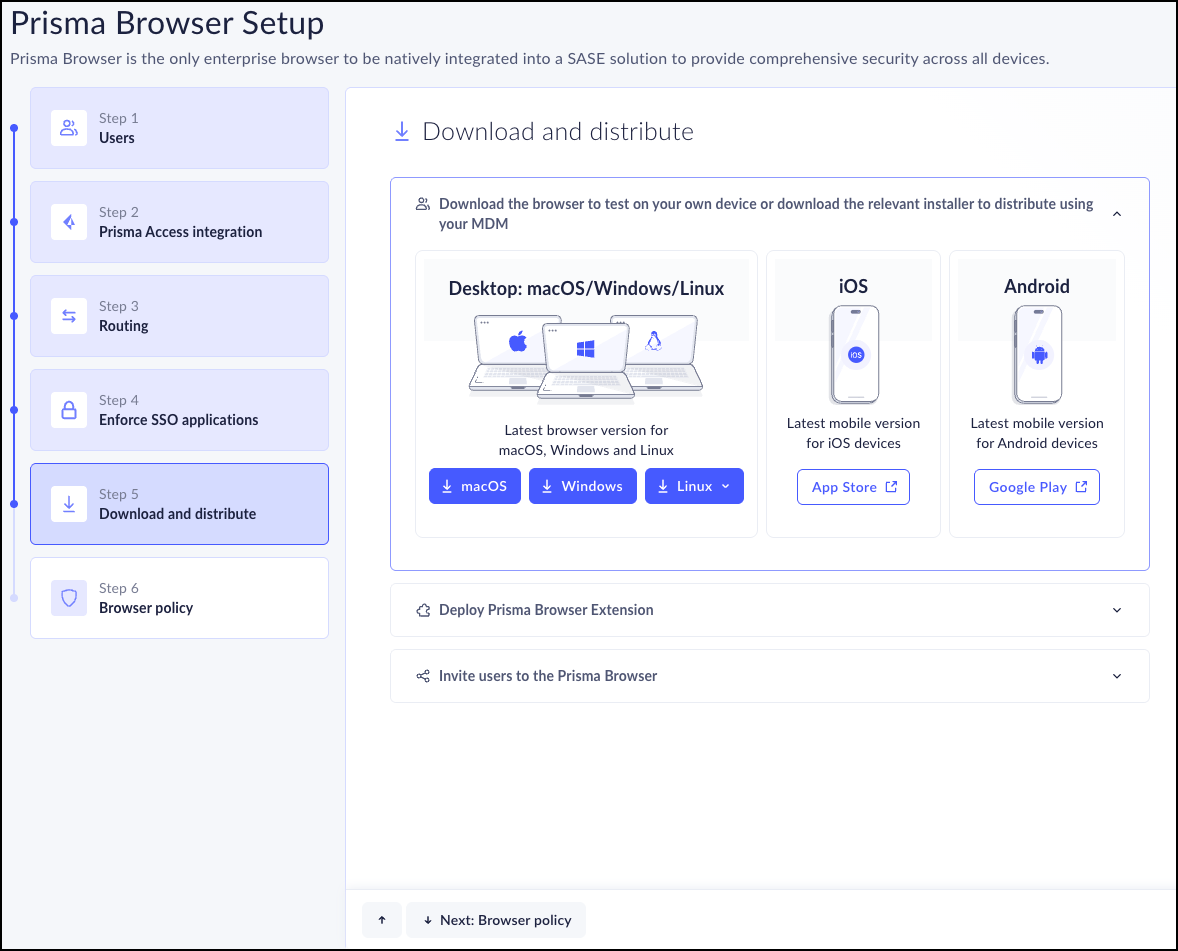
Step 5 - Download and Distribute
You can download the Prisma Browser installation files to
test on your own device before sending it out to your users. Once you're
satisfied with your tests, you can download the relevant installer to be
distributed by your mobile device management (MDM) application.
You can also send your users the download link so that they can
download the Prisma Access Browser on their own. This is a single link for
macOS, Windows and Linux users only.
- Select from the available options:
- Desktop:
- macOS
- Windows
- Linux
- Fedora
- Ubuntu
- Mobile:
- iOS
- Android
You can also send your users the download link so that they can download the Prisma Browser on their own. This is a single link for macOS, Windows, and Linux users only.If you send your users the download link, remind them that they can only log in with the email that is configured in the IdP service. - Desktop:
- Prisma Browser for IGEL is deployed via the IGEL App Portal only.
- Next: Browser Policy
![]()
Step 6 - Browser Policy
- Select Browser Policy.
- This directs you to .
- Manage Prisma Browser
Policy Rules.
![]()

New Onboard Users
The Onboarding workflow is a configurable series of windows displayed
when a new end user starts using the browser.
Based on the IT needs and requirements, you can select up to eight
individual pages that allow the end users to customize the browser with their
pictures and bookmarks, and to find out some basic information about the browser
– a sort of “Quick-Start” guide.
The Onboarding Wizard customization control configures the onboarding
workflow. You can select which windows will be displayed in your network.
You configure this in when you create or edit a Browser
Customization profile and choose Onboarding
Wizard. For configuration details, see the Browser Customization
Controls for the Onboarding Wizard.
You configure this in when you create or edit a Browser
Customization profile and choose Onboarding
Wizard. For configuration details, see the Browser Customization
Controls for the Onboarding Wizard.
Onboard Local Users
You can create a special CIE directory in the Cloud Identity Engine. This
feature enables you to create a system where the time from adding users to their
ability to log in to the browser with a password is a few minutes.
The CIE directory only supports a single Auth
Profile . This means that if you use a CIE directory, you can’t also
use your regular IdP at the same time. Innovation
This feature is mainly used when
starting a POC to avoid waiting for your IT department to integrate your
IdP.