Prisma Access
Panorama
Table of Contents
Expand All
|
Collapse All
Prisma Access Docs
-
- 6.1 Preferred and Innovation
- 6.0 Preferred and Innovation
- 5.2 Preferred and Innovation
- 5.1 Preferred and Innovation
- 5.0 Preferred and Innovation
- 4.2 Preferred
- 4.1 Preferred
- 4.0 Preferred
- 3.2 Preferred and Innovation
- 3.1 Preferred and Innovation
- 3.0 Preferred and Innovation
- 2.2 Preferred
-
-
- 4.0 & Later
- Prisma Access China
-
-
Panorama
Configure a Prisma Access remote network deployment that allocates bandwidth by
compute location.
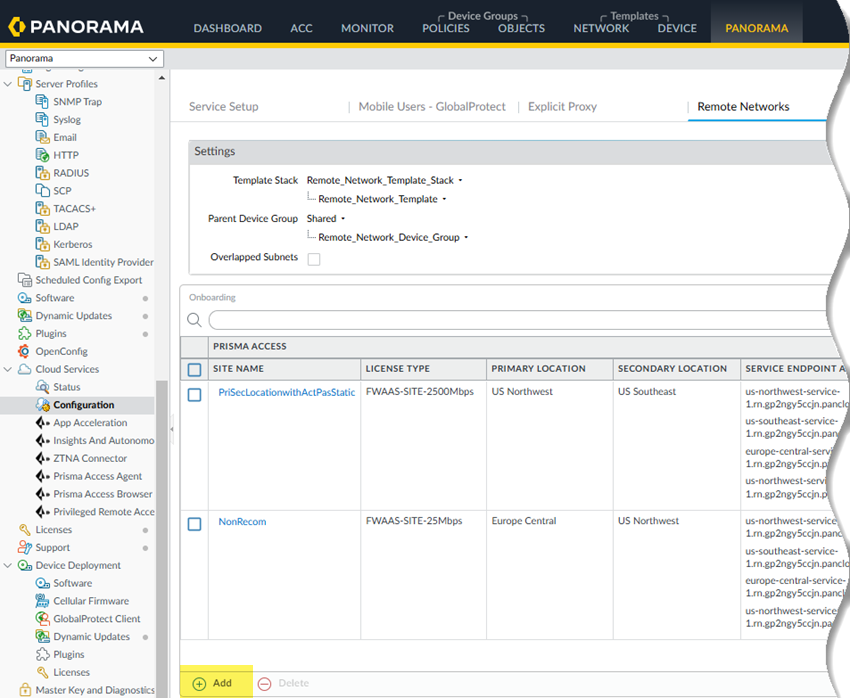
Here’s how to add a site-based remote network in Prisma Access (Managed by Panorama).
Before you start, you can check that your license includes site-based licensing by
going to PanoramaLicenses and view your Sites Capacity and check how
many sites you have remaining per site type. You can onboard any site types that
are remaining in your license.
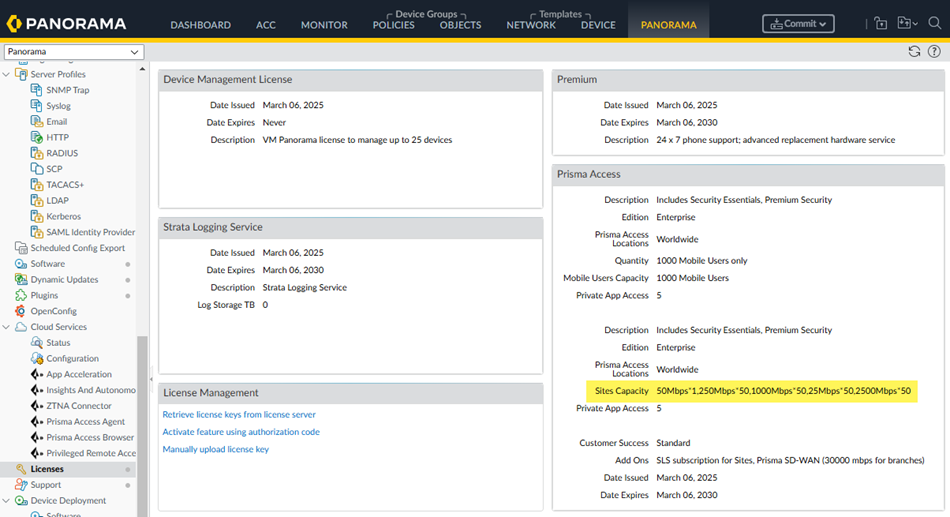
. To check:
- Define tunnel settings and, optionally, QoS settings for your remote network.During setup, you select an IPSec tunnel and a QoS profile, so you need to define those settings before you begin.
- Define IPSec tunnel settings for your remote networks by creating a new IPSec Tunnel and configuring the IKE Gateway, IPSec Crypto Profile, and Tunnel Monitoring settings.Make a note of these settings; you must match the settings on the customer premises equipment (CPE) that terminates the IPSec tunnel at your site.Be sure that you create the tunnel settings in the Remote_Network_Template.You can also use one of the predefined IPSec templates in the Remote_Network_Template; in this case, you don’t need to create a new tunnel.(Optional) Decide whether you want to add QoS settings to your remote network deployment; if you do; create a QoS Profile for your site-based remote network.Be sure that you create the profile in the Remote_Network_Template.From the Panorama that manages Prisma Access, go to Cloud ServicesConfigurationRemote Networks and Add a site.
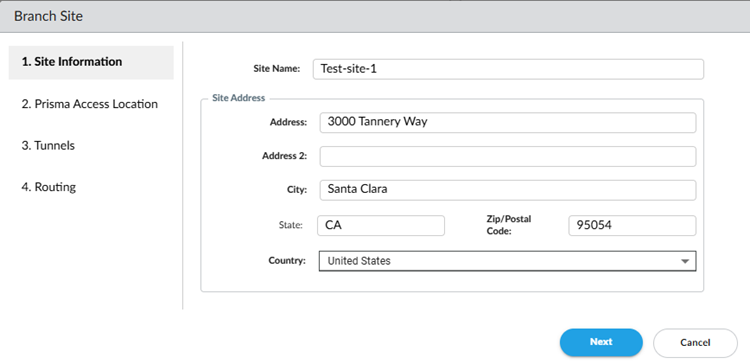
![]() Give the remote network a descriptive Site Name.Enter the site's City and Country.For more precise searches, add an address.
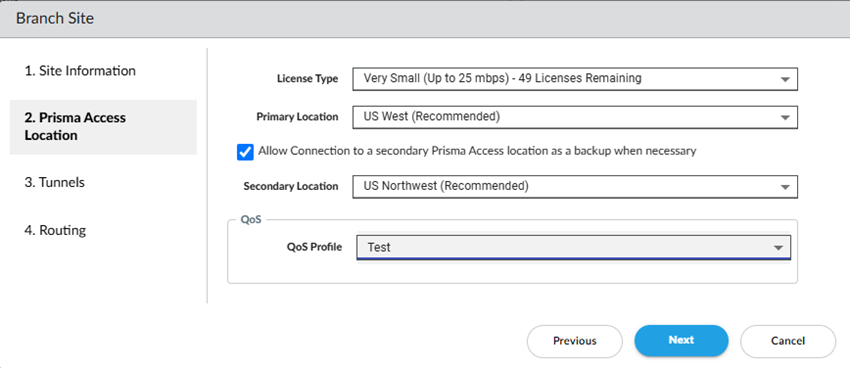
Give the remote network a descriptive Site Name.Enter the site's City and Country.For more precise searches, add an address.![]() Go to the Next screen.Select a site type, a primary location, and, optionally, a secondary location.
Go to the Next screen.Select a site type, a primary location, and, optionally, a secondary location.- Select a site type (License Type).The types are based on bandwidth.Some locations don't support X-Large sites; in this case, that choice isn’t selectable.Select a Primary Prisma Access Location.If multiple locations are Recommended in the list; select the location that works best for your deployment.(Optional) To create a secondary (backup) site, select Allow connection to a secondary Prisma Access Location as backup when necessary and then select a Secondary Prisma Access Location.If you select this choice, Prisma Access prepopulates the best secondary location or locations that are in a different compute location than the primary location. If multiple locations are Recommended; select the location that works best for your deployment.(Optional) If you want to enable QoS for your site, select the QoS Profile you created at the start of this procedure and go to the Next step.
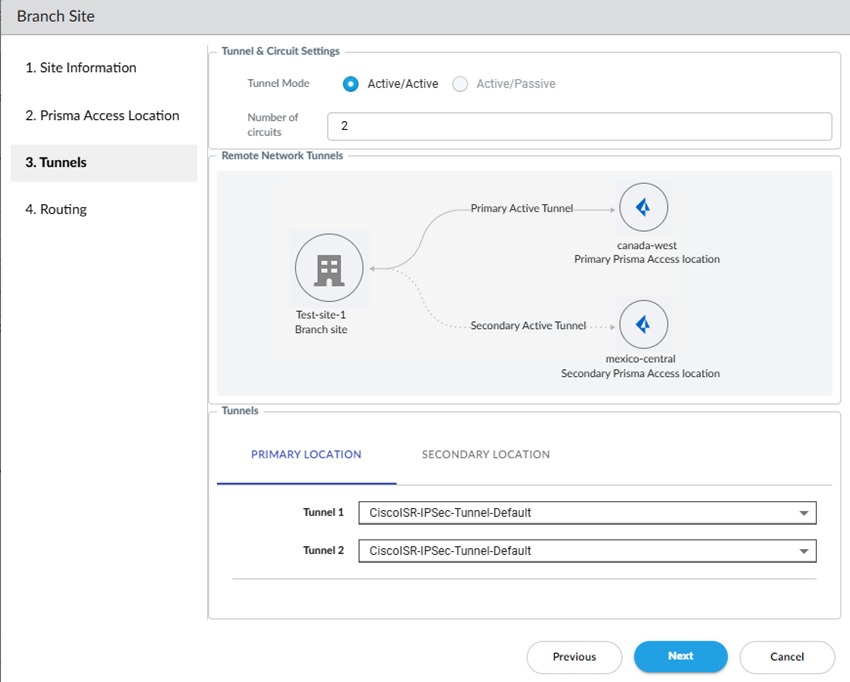
![]() Define Tunnel & Circuit Settings.
Define Tunnel & Circuit Settings.- Select a Tunnel Mode: either Active/Active or Active/Passive.The tunnel mode specifies how many of your ISP circuits you want to utilize for the remote network. Specify a minimum of one circuit and a maximum of four circuits.
- If you select Active/Passive (the default setting), Prisma Access utilizes either one or two ISP circuits to create two active tunnels. If the active tunnel goes down, the passive tunnel becomes active.
- If you select Active/Active, Prisma Access Prisma Access utilizes either two or four ISP circuits to create either two or four active tunnels, respectively.
Select the Number of circuits to use.Prisma Access assigns tunnels based on the number of circuits you specify here, and whether your deployment is Active/Active or Active/Passive, as shown in the following table.Select the IPSec tunnels to use for your primary and secondary sites by selecting either:- One of the predefined IPSec templates in the Remote_Network_Template
- An IPSec tunnel you created at the start of this procedure.
![]() Go to the Next step.Choose your Routing Settings.
Go to the Next step.Choose your Routing Settings.- Choose your Routing Settings.
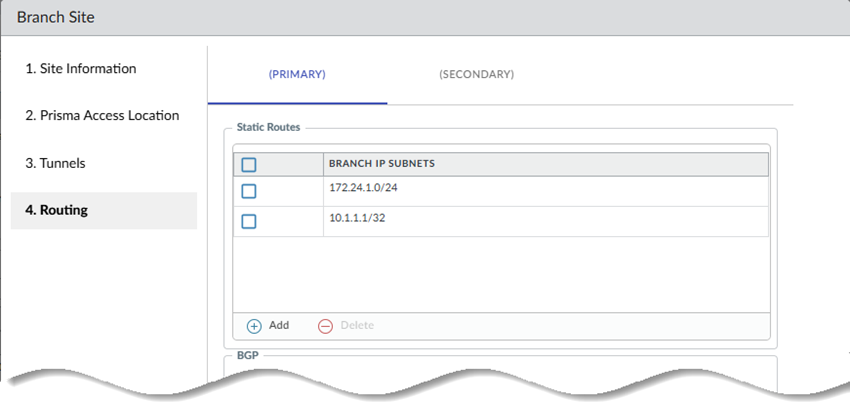
- Select the Routing Type (either
Static or
Dynamic).If you select Static routing, Add the IP subnets or IP addresses that you want to secure at the site.
![]() If you select Dynamic routing:
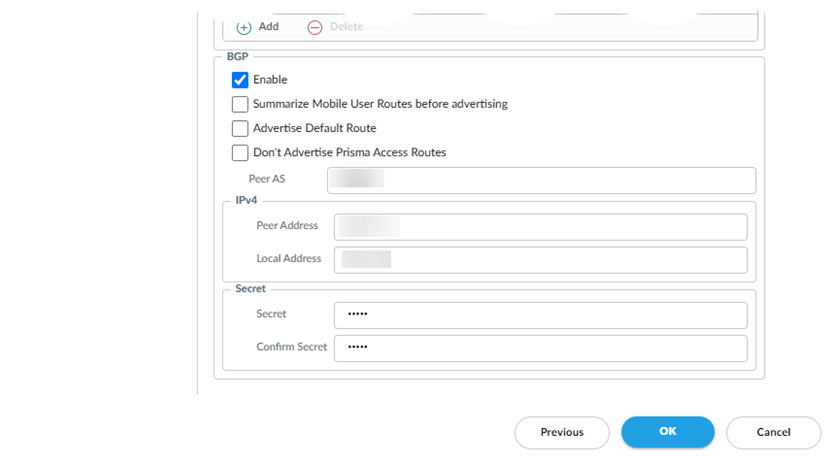
If you select Dynamic routing:- Enter the Peer As (the autonomous
system (AS) for your network). Use an RFC 6996-compliant BGP Private AS number.
- Enter the Peer IP Address assigned as the Router ID of the eBGP router on the HQ or data center network.
- (Optional) Enter a Shared Secret password to authenticate BGP peer communications.
- Enter the Local IP Address that Prisma Access uses as its Local IP address for BGP.
- (Optional) Select Summarize Mobile User Routes before advertising to reduce the number of mobile user IP subnet advertisements over BGP to your CPE by having Prisma Access summarize the subnets before it advertises them.
- (Optional) Select Advertise Default Route to have Prisma Access originate a default route advertisement for the remote network using eBGP. Be sure that your network does not have another default route advertised by BGP, or you could introduce routing issues in your network.
- (Optional) Select Don't Export Routes to prevent Prisma Access from forwarding routes into the HQ or data center.
- Enter the Peer As (the autonomous
system (AS) for your network).
If you have a secondary tunnel, the BGP settings copy over; you can use the copied-over settings for the secondary tunnel or modify those settings.![]()
- Select the Routing Type (either
Static or
Dynamic).
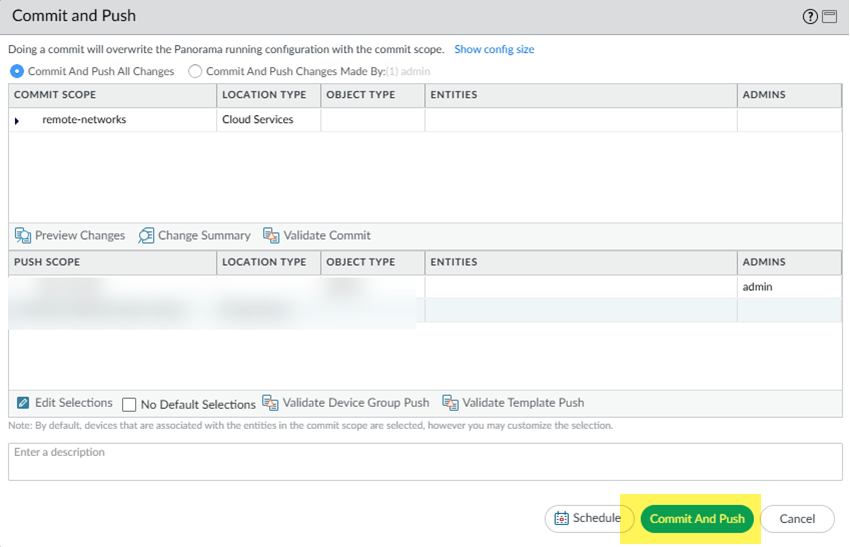
Click OK to save your changes.Go to CommitCommit and Push and Commit and Push your changes.![]() Find the Service Endpoint address (the IP or FQDN address you use on your CPE to terminate the IPSec tunnel).As a best practice, specify the FQDN instead of the IP address.
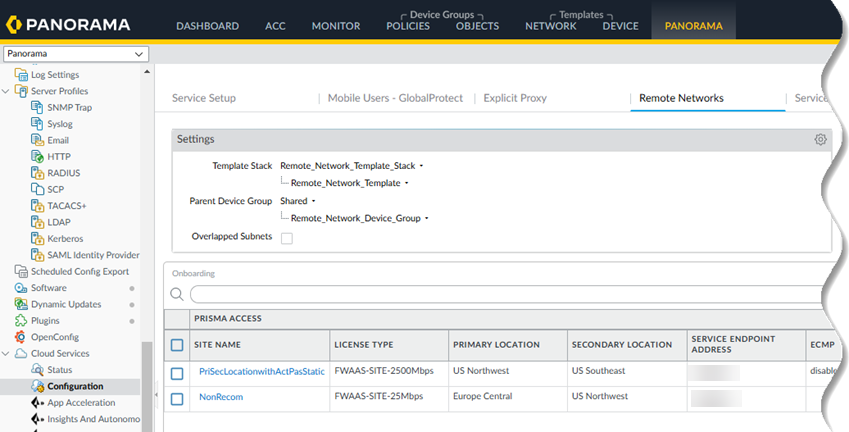
Find the Service Endpoint address (the IP or FQDN address you use on your CPE to terminate the IPSec tunnel).As a best practice, specify the FQDN instead of the IP address.- Go to Cloud ServicesConfigurationRemote NetworksPrisma Access.Find the Service Endpoint address.
![]()

