Prisma Access
Set Up a VMware ESXi Environment for SASE Private Location
Table of Contents
Expand All
|
Collapse All
Prisma Access Docs
-
- 6.1 Preferred and Innovation
- 6.0 Preferred and Innovation
- 5.2 Preferred and Innovation
- 5.1 Preferred and Innovation
- 5.0 Preferred and Innovation
- 4.2 Preferred
- 4.1 Preferred
- 4.0 Preferred
- 3.2 Preferred and Innovation
- 3.1 Preferred and Innovation
- 3.0 Preferred and Innovation
- 2.2 Preferred
-
-
- 4.0 & Later
- Prisma Access China
-
-
Set Up a VMware ESXi Environment for SASE Private Location
Prepare your VMware ESXi environment with the necessary resources and configurations
to support Prisma Access SASE private location deployment.
| Where Can I Use This? | What Do I Need? |
|---|---|
|
To activate SASE Private Location, reach out to your Palo Alto
Networks account representative, who will contact the Site
Reliability Engineering (SRE) team and submit a request.
|
Before deploying SASE private location components using Terraform, you must prepare
your VMware ESXi environment to meet the performance and connectivity requirements.
This involves configuring networking components, allocating resources, and ensuring
proper access controls. A properly configured VMware environment ensures optimal
performance and reliability for your SASE private location deployment.
Before you begin, make sure that your VMware ESXi environment has the required minimum versions and vCPU, memory, and storage
requirements.
- Configure resource pools for SASE private location components.Create dedicated resource pools to allocate vCPU and memory resources for SASE components:
- Navigate to your cluster or host in the vSphere Client.
- Right-click and select New Resource Pool.
- Name the resource pool (for example, SASE-Private-Location).
- Set vCPU and memory allocation to ensure dedicated resources with no oversubscription.
- Click OK to create the resource pool.
Create a VM folder structure for organization.Organize your SASE components in a dedicated folder structure:- Right-click on your data center in the vSphere Client.
- Select New FolderNew VM and Template Folder > .
- Name the folder (for example, SASE-Private-Location).
- Optionally, create subfolders for different components (for example, Mobile-Users).
Configure networking for SASE components.Set up the necessary virtual networking components:- Navigate to your host or cluster's Configure tab.
- Select NetworkingVirtual switches.
- Create or configure a vSwitch with sufficient bandwidth capacity (recommended 10 Gbps or higher).
- Create the following port groups:
- Management network (for component management traffic)
- Trust network (for internal traffic)
- Untrust network (for external/internet traffic)
- Configure VLAN IDs for each port group as required by your network architecture.
For optimal performance, configure the vSwitch with VMXNET3 adapters and ensure physical NICs support at least 10 Gbps.Allocate storage resources for SASE private location.Prepare storage resources that meet performance requirements:- Navigate to Storage in the vSphere Client.
- Ensure datastores have sufficient space for all SASE components (minimum 500GB recommended).
- Use datastores with low latency and high IOPS capabilities for optimal performance.
- Create a dedicated folder within the datastore for SASE components organization.
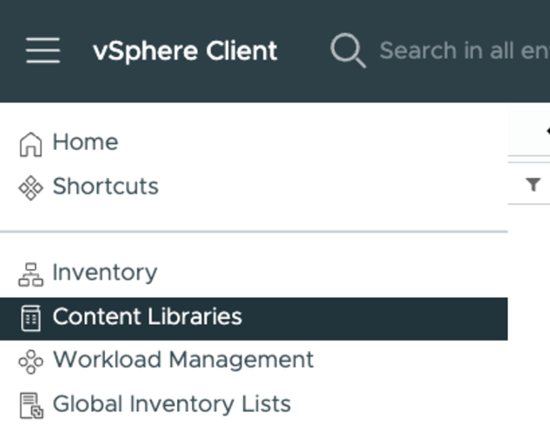
Any datastore type (Local DAS, vSAN, or NAS) is supported as long as it meets the IOPS requirements for SASE components.Create a content library.You specify the content library name when you set up the hypervisor resource profile during SASE Private Location setup.![]() Configure access control for Terraform deployment.Create a dedicated service account for Terraform to use for deployment:
Configure access control for Terraform deployment.Create a dedicated service account for Terraform to use for deployment:- Navigate to AdministrationSingle Sign OnUsers and Groups in vCenter.
- Create a new user (for example, sase-terraform-svc).
- Navigate to AdministrationAccess ControlRoles.
- Create a custom role with the minimum required permissions:
- Virtual machine: All
- Resource: Assign virtual machine to resource pool
- Datastore: Allocate space, Browse datastore
- Network: Assign network
- Global: Enable methods, Disable methods
- Assign this role to the service account for the appropriate resources (clusters, hosts, datastores, networks).
Configure outbound network connectivity.Ensure outbound connectivity from your VMware environment to Prisma Access cloud services:- Verify that your firewall allows outbound connections on TCP ports 443 and 8883 to Prisma Access cloud services.
- If your environment uses a proxy for outbound connections, configure the proxy settings to enable communication with Prisma Access services.
- Test connectivity to ensure successful communication with the Prisma Access cloud services.
Prepare IP address allocation for SASE components.Allocate IP addresses for all SASE components in advance:- Reserve IP addresses for management interfaces of all components (load balancers, gateways, PA agents).
- Reserve IP addresses for data interfaces (trust and untrust).
- If using static IP pools for mobile users, prepare the IP range to be assigned.
- If using DHCP, ensure your DHCP server is properly configured to serve the Mobile User IP range.
- Document all IP allocations for use during the Terraform deployment.
Your VMware ESXi environment is now ready to deploy SASE private location. You have created the necessary resource pools, networking components, and storage allocations, and have configured appropriate access controls. This foundation will ensure optimal performance and reliability of your SASE private location components once deployed using Terraform.Before proceeding with the Terraform deployment, verify the following:- Network connectivity between all configured port groups and external networks is working as expected.
- The service account created for Terraform has the appropriate permissions to deploy VMs and configure resources.
- DNS resolution is properly configured in your environment for both internal and external domain names.
- Time synchronization (NTP) is properly configured on all ESXi hosts to ensure consistent timestamps across the environment.
- Download the necessary .ova files from the Customer Support Portal (CSP) in preparation for the Terraform deployment.

