Prisma Access
Integrate Prisma Access with Cisco Meraki SD-WAN (Site Based Licensing)
Table of Contents
Expand All
|
Collapse All
Prisma Access Docs
-
- 6.1 Preferred and Innovation
- 6.0 Preferred and Innovation
- 5.2 Preferred and Innovation
- 5.1 Preferred and Innovation
- 5.0 Preferred and Innovation
- 4.2 Preferred
- 4.1 Preferred
- 4.0 Preferred
- 3.2 Preferred and Innovation
- 3.1 Preferred and Innovation
- 3.0 Preferred and Innovation
- 2.2 Preferred
-
-
- 4.0 & Later
- Prisma Access China
-
-
Integrate Prisma Access with Cisco Meraki SD-WAN (Site Based Licensing)
Learn to integrate Prisma Access with Cisco Meraki in the site based licensing
model.
| Where Can I Use This? | What Do I Need? |
|---|---|
|
|
For Cisco Meraki integration with Prisma Access, the site-based licensing model
changes how you onboard and manage remote sites. When enabling a Meraki network for
Prisma Access connectivity, instead of selecting an IPSec termination node (SPN),
you will now select the appropriate site type from the available options based on
your licensing. The integration service automatically handles the creation of the
necessary objects, including the Site Container, Remote Network, IKE Gateway, and
IPsec Tunnel.
Site-based licensing introduces the concept of site types with predefined
bandwidth tiers. This model allows you to purchase licenses for the number of sites
you need, categorized by these bandwidth tiers, without having to pre-allocate
bandwidth to specific regions.
- Very Small (25 Mbps)
- Small (50 Mbps)
- Medium (250 Mbps)
- Large (1 Gbps)
- X-Large (2.5 Gbps)
Ensure you meet the following requirements before you integrate Prisma
Access with Cisco Meraki in a site-based licensing model:
| Product | Requirement |
|---|---|
|
Prisma Access
|
Update your Prisma Access to version 6.x.x or later versions.
|
|
Cisco Meraki
|
|
To secure a Cisco Meraki SD-WAN with Prisma Access, complete the following steps.
- Configure the Cisco Meraki SD-WAN based on the requirements mentioned above.
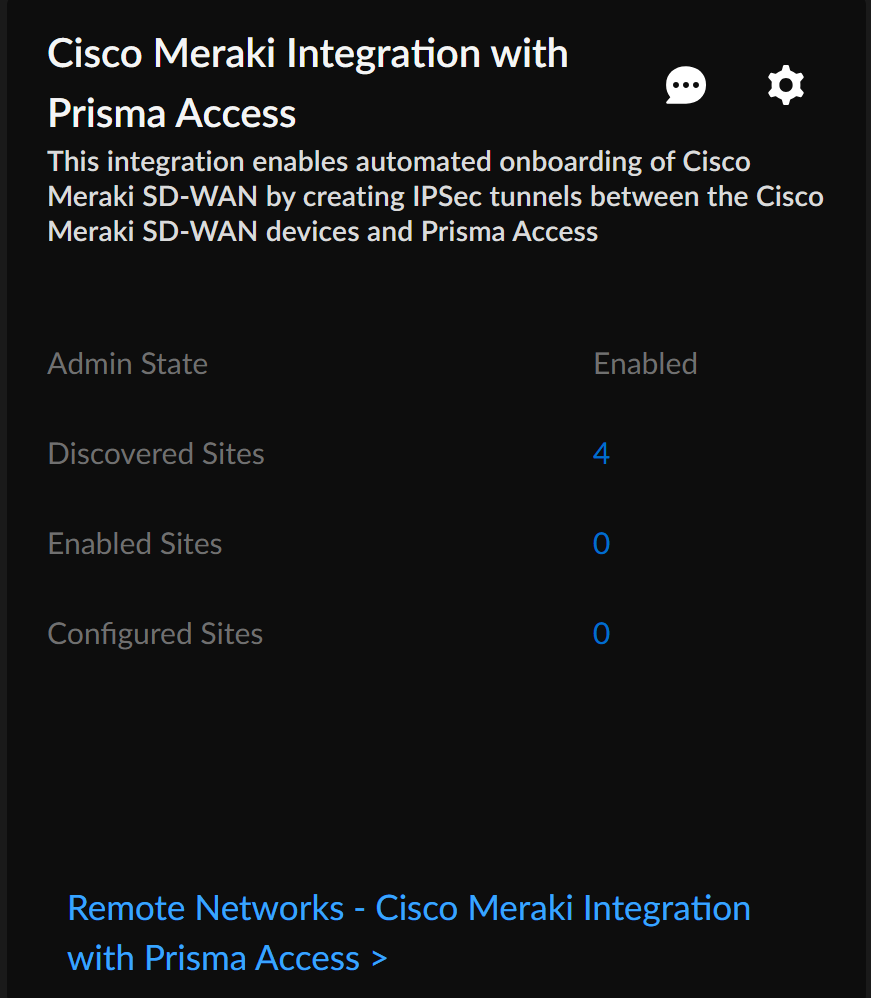
- In Strata Cloud Manager, go to System SettingsIntegrationsThird Party SD-WAN.Locate the Cisco Meraki Integration with Prisma Access application.Contact your Palo Alto Networks account team if you don’t see this integration option.
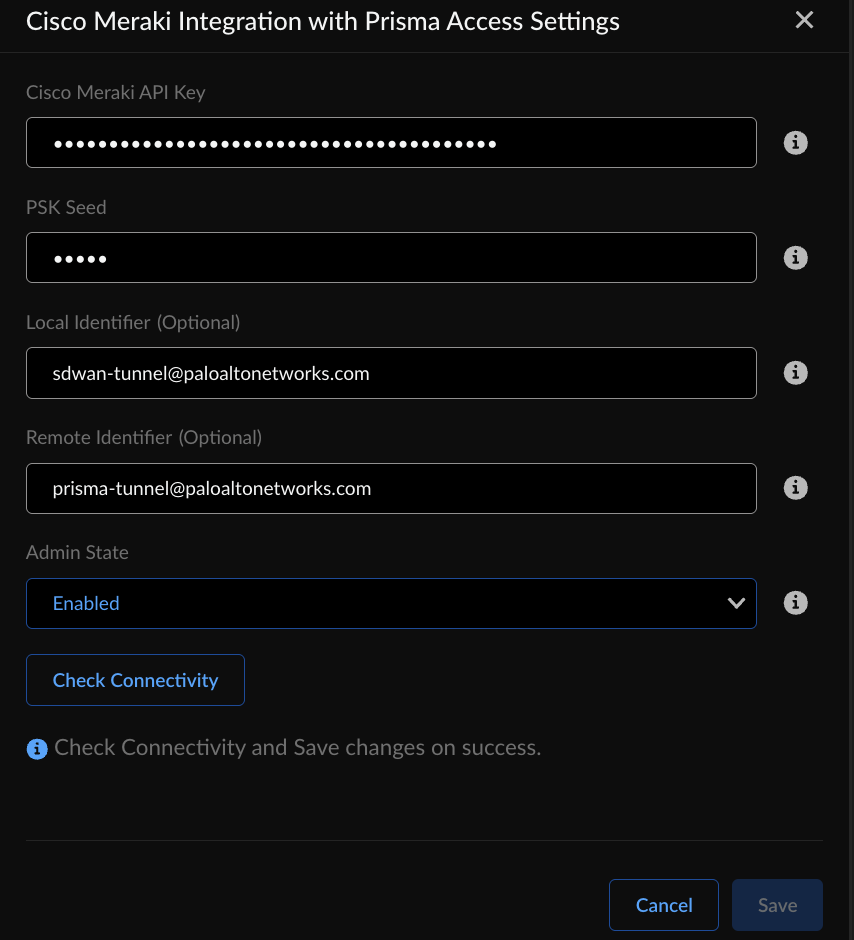
![]() Enter the information needed to establish a connection between Prisma Access and Cisco Meraki by editing the Settings.
Enter the information needed to establish a connection between Prisma Access and Cisco Meraki by editing the Settings.![]()
- Generate Cisco Meraki API Key in Cisco Meraki dashboard, and enter the key information.Enter the PSK Seed, which is a string used to derive pre-shared keys (PSKs) per tunnel.(Optional) Enter an FQDN IKE identifier as the Local Identifier in the following syntax: name@domain.com.This identifier acts as a template to generate a unique ID per tunnel.Set the Admin State as Enabled.You can set Admin State in the following modes:
- Enabled: Enables the integration to discover new networks on Cisco Meraki that are eligible for tunnel formation with Prisma Access. Additionally, this verifies current configurations.
- Disabled: Disable the integration to
remove all configurations created, in Prisma Access as well as
in Cisco Meraki, when a connection was set up between them.Upon disabling, the system will initiate a complete teardown of all configurations and objects on both Prisma Access and Cisco Meraki.
- Paused: When you pause the integration, you can no longer add new networks or remove any unconfigured networks. However, the current configurations don't change.
Check Connectivity to verify the connection.Save the changes.You can Save changes only after you Check Connectivity every time you change settings or configurations.After you save the changes, you can see the Cisco Meraki networks eligible for tunnel formation with Prisma Access in Discovered Sites. Cisco Meraki networks are displayed as sites here. It might take some time to view the discovered sites.![]() Establish the tunnel setup between Prisma Access and Cisco Meraki devices.
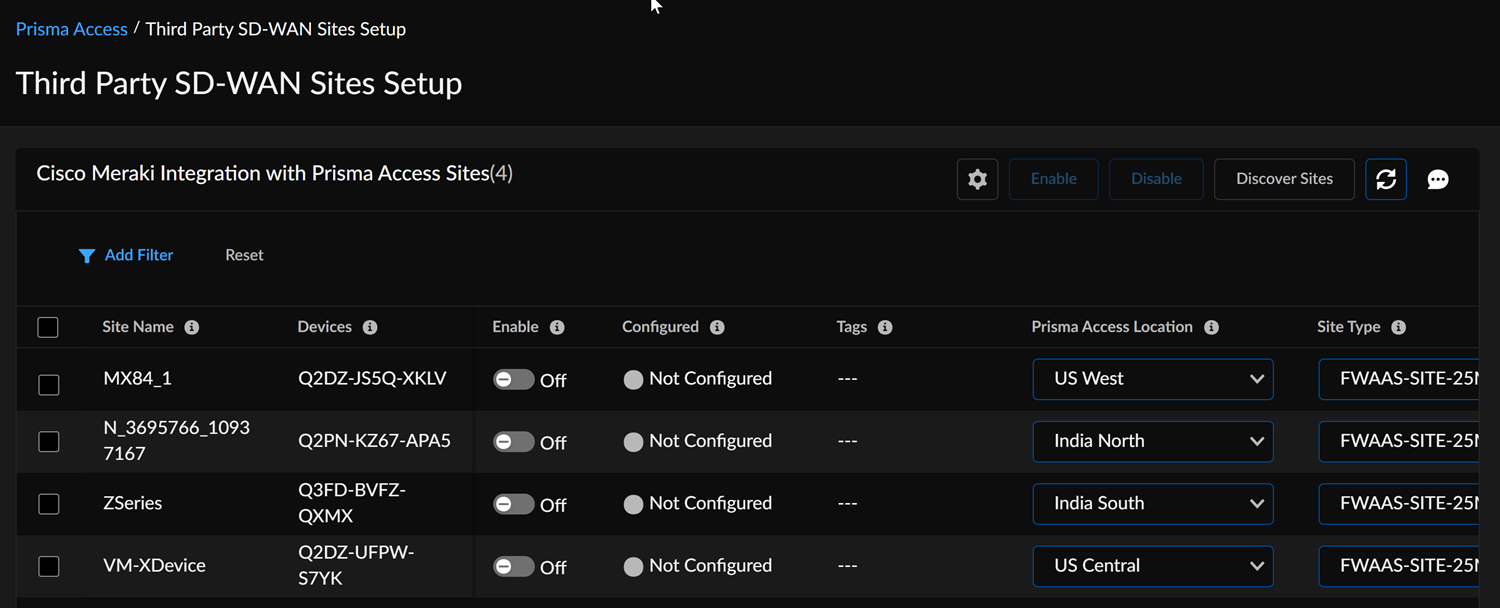
Establish the tunnel setup between Prisma Access and Cisco Meraki devices.- View the discovered Cisco Meraki networks and their information by clicking the site count.The integration checks every 3 hours for new Cisco Meraki networks. You can also initiate an on-demand site discovery.(Optional) Select the nearest Prisma Access Location for the networks.
![]() The first 50 regions in the list are automatically sorted by closest proximity to the network's latitude and longitude. You can scroll down to find other regions if needed.Select the appropriate site type from the drop-down menu, based on your purchased licenses.
The first 50 regions in the list are automatically sorted by closest proximity to the network's latitude and longitude. You can scroll down to find other regions if needed.Select the appropriate site type from the drop-down menu, based on your purchased licenses.![]() The smallest available site type is selected by default, but you can change it.You can use the filter options to search for sites by site name, devices, or tags.
The smallest available site type is selected by default, but you can change it.You can use the filter options to search for sites by site name, devices, or tags.![]() If using the aggregate bandwidth SPN model, the user interface will render the previous UI. This version requires you to select an IPsec termination node, and only shows regions where you have already allocated compute resources.Select the Cisco Meraki network and toggle the Enable option to establish a tunnel formation with Prisma Access.Update the changes.
If using the aggregate bandwidth SPN model, the user interface will render the previous UI. This version requires you to select an IPsec termination node, and only shows regions where you have already allocated compute resources.Select the Cisco Meraki network and toggle the Enable option to establish a tunnel formation with Prisma Access.Update the changes.![]() You can view all the Enabled Sites and Configured Sites in the Cisco Meraki Integration with Prisma Access application.Verify the changes in Prisma Access.
You can view all the Enabled Sites and Configured Sites in the Cisco Meraki Integration with Prisma Access application.Verify the changes in Prisma Access.- Go to System SettingsIntegrationsThird Party SD-WAN.Locate the Cisco Meraki Integration with Prisma Access and select Remote Networks - Cisco Meraki Integration with Prisma Access.In the Branch Sites Management screen, you can:
![]()
- View the number of site licenses purchased (acquired) and how many of those are currently in use (allocated) for different bandwidth tiers.
- Verify the tunnel status for sites where the Config Status of Cisco Meraki networks shows configured.
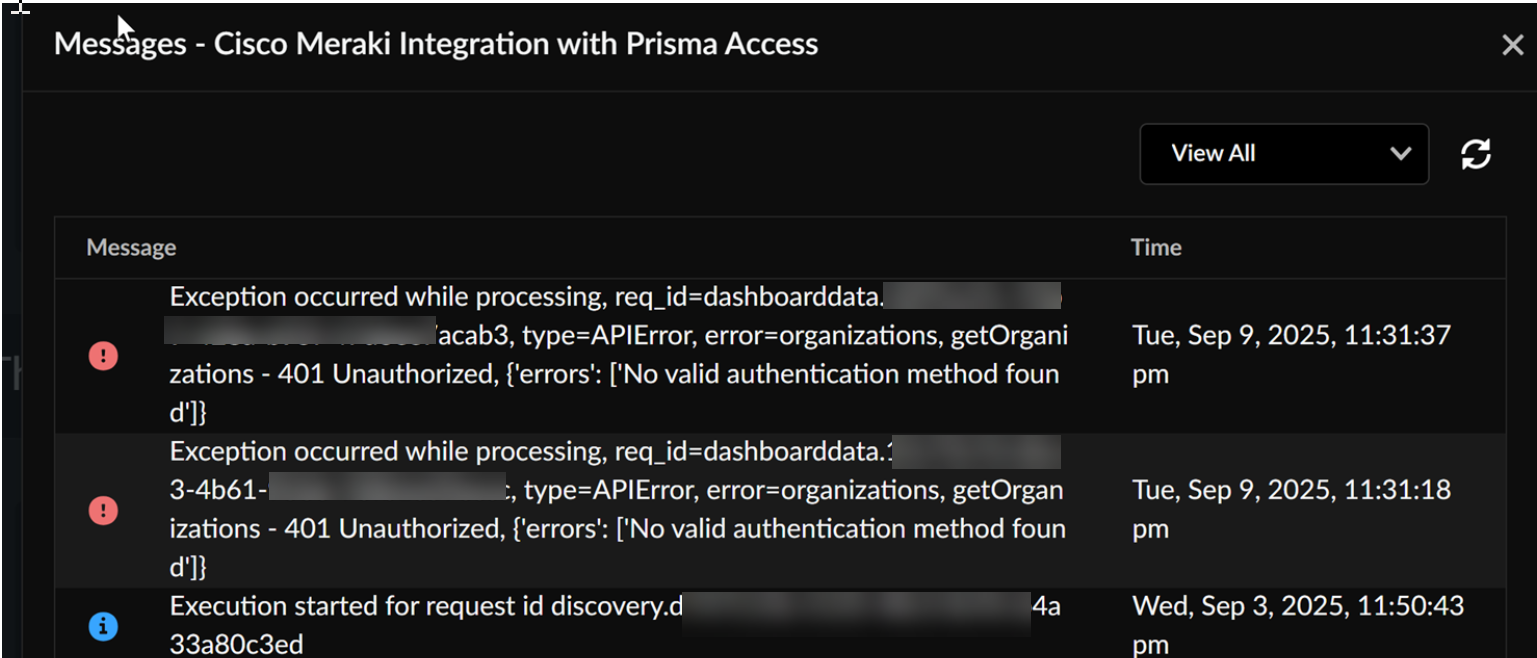
Select Log ViewerCommonAudit to view Cisco Meraki Integration with Prisma Access logs.![]() The Log Source specifies if the changes were made in Prisma Access or in the Cisco Meraki dashboard.(Optional) View errors or warnings in Messages.
The Log Source specifies if the changes were made in Prisma Access or in the Cisco Meraki dashboard.(Optional) View errors or warnings in Messages.![]() Verify the tunnel status in the Cisco Meraki dashboard.
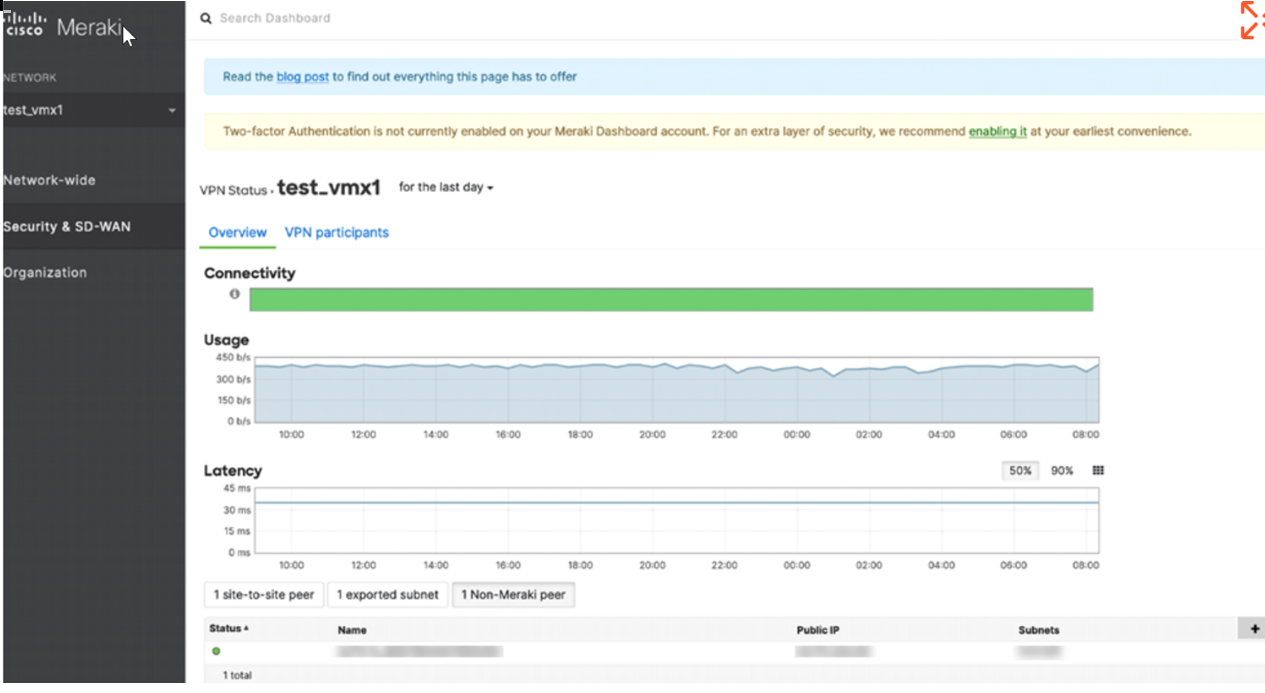
Verify the tunnel status in the Cisco Meraki dashboard.- Log in to the dashboard, and select Security & SD-WANMonitorVPN Status.Check the status for non-Meraki peers.
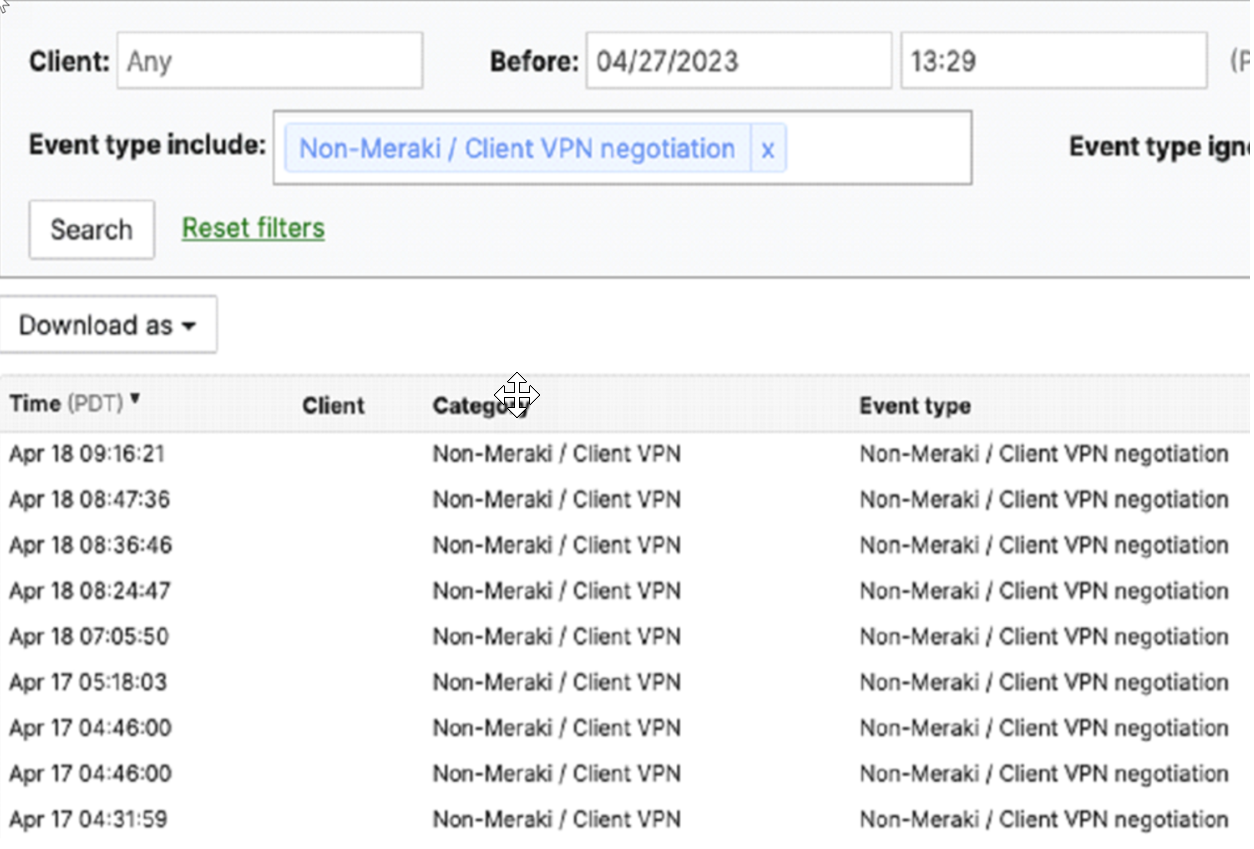
![]() View the logs under Network-wideEvent Log for non-Meraki event types.
View the logs under Network-wideEvent Log for non-Meraki event types.![]() Contact Cisco Systems support for any errors you see in the Cisco Meraki networks and dashboard.
Contact Cisco Systems support for any errors you see in the Cisco Meraki networks and dashboard.On-Demand Site Discovery
You can initiate network discoveries anytime to view new networks added in the Cisco Meraki dashboard. You can also initiate network discoveries to resolve any misconfiguration in the integration-created objects. To initiate on-demand network discovery, perform the following steps: - Select SettingsIntegrationsThird Party SD-WAN.Locate the Cisco Meraki Integration with Prisma Access application.View the discovered Meraki networks and their information by clicking the site count.Discover Sites to identify new eligible Cisco Meraki networks when required.

