Prisma SD-WAN
Onboard Branch Sites to Prisma Access
Table of Contents
Expand All
|
Collapse All
Prisma SD-WAN Docs
-
-
- Prisma SD-WAN Controller
-
- CloudBlade Integrations
- CloudBlades Integration with Prisma Access
-
-
-
-
- 6.5
- 6.4
- 6.3
- 6.1
- 5.6
- Prisma SD-WAN Controller
- Prisma SD-WAN On-Premises Controller
- Prisma SD-WAN CloudBlades
- Prisma Access CloudBlade Cloud Managed
- Prisma Access CloudBlade Panorama Managed
Onboard Branch Sites to Prisma Access
Learn how to connect Prisma SD-WAN branch sites to Prisma Access.
| Where Can I Use This? | What Do I Need? |
|---|---|
|
|
Prisma Access supports two licensing models for remote
networks:
- Aggregate Bandwidth - Bandwidth allocated per compute location.
- Site-based Licensing - Under the site-based licensing, remote sites are categorized into five distinct, predefined bandwidth tiers:
- 25 Mbps (Very Small)
- 50 Mbps (Small)
- 250 Mbps (Medium)
- 1 Gbps (Large)
- 2.5 Gbps (X-Large)
Prisma Access also offers two types of infrastructure
deployments:
- Remote Networks that offer up to 1 Gbps bandwidth per remote site.
- Remote Networks High Performance (New Infrastructure) offers:
- Up to 2 Gbps bandwidth per remote site
- Prisma SD-WAN per-tunnel LQM visibility (available with ION software version 6.4.2)
- Prisma SD-WAN packet duplication for enhanced reliability (available with ION software version 6.6.1)
Customers using the Site-based licensing model are
automatically onboarded to the Remote Networks High Performance (RN-HP)
infrastructure. If you are use the Aggregate Bandwidth model, there are plans to
transition you to the RN-HP infrastructure in the future to align with new SASE
capabilities.
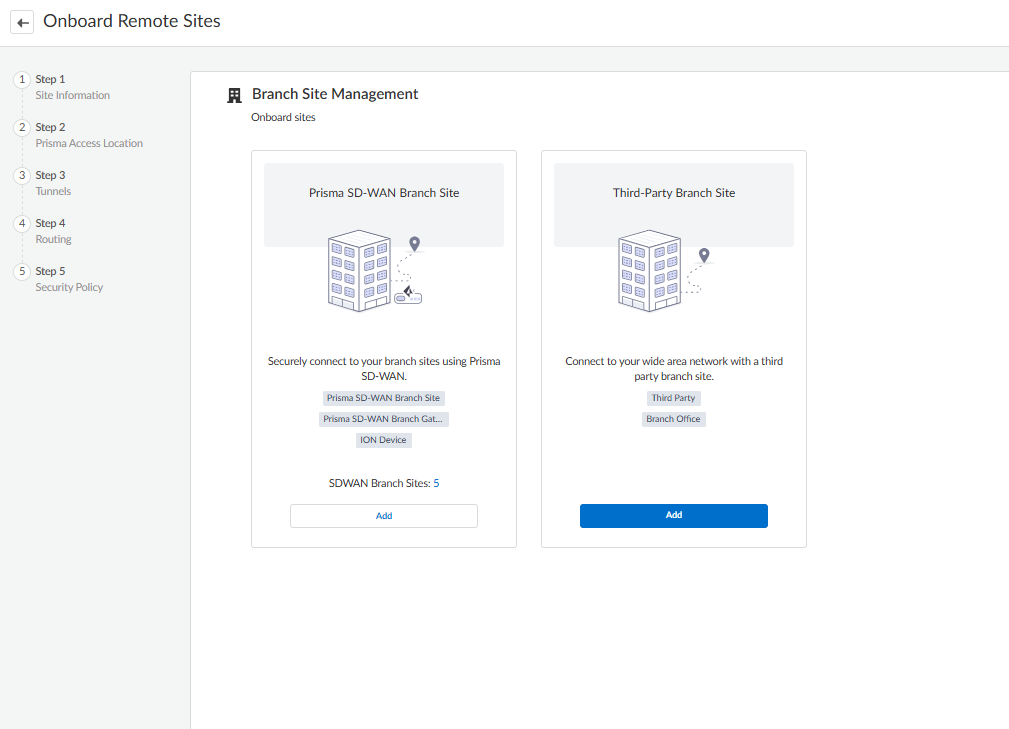
- To onboard a site, from Strata Cloud Manager, navigate to ConfigurationOnboarding Onboard Branch SitesConfigure.On Branch Site Management, select Add Prisma SD-WAN Branch Site.
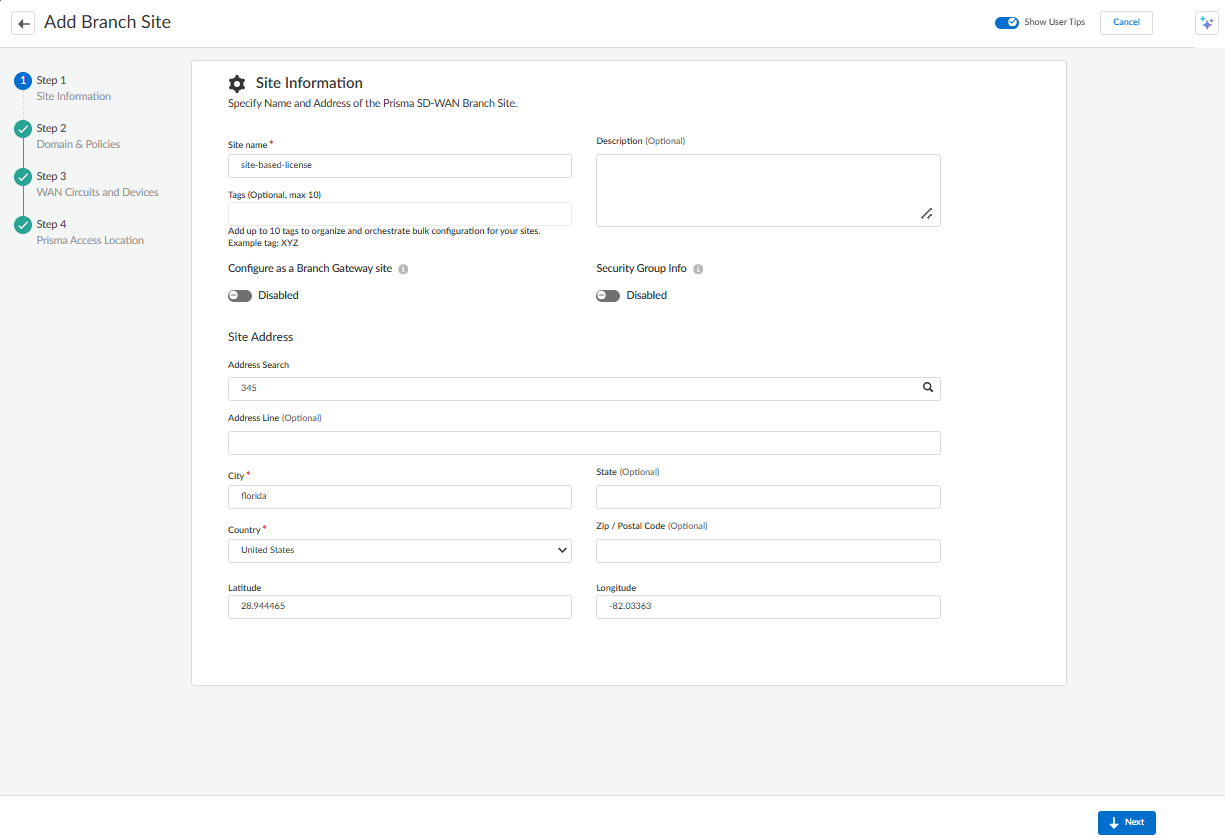
![]() On Step 1 Site Information, enter the basic information:
On Step 1 Site Information, enter the basic information:![]()
- Enter the Site Name for the site.
- Enter Description and Tags.
- Enable Configure as a Branch Gateway site to convert an existing branch site to a branch gateway site. This provides the policy transit and LQM server capabilities of a data center site, along with the visibility and path selection of a branch site.
- Verify the Static SGI value to be between 1 and 65533 for the ION-generated traffic. The Security Group Information option is enabled by default for Static tag configuration.
- Enter the Site address (Using address search is recommended).
- Enter City, State, and Countryof the site.
- Click Next.
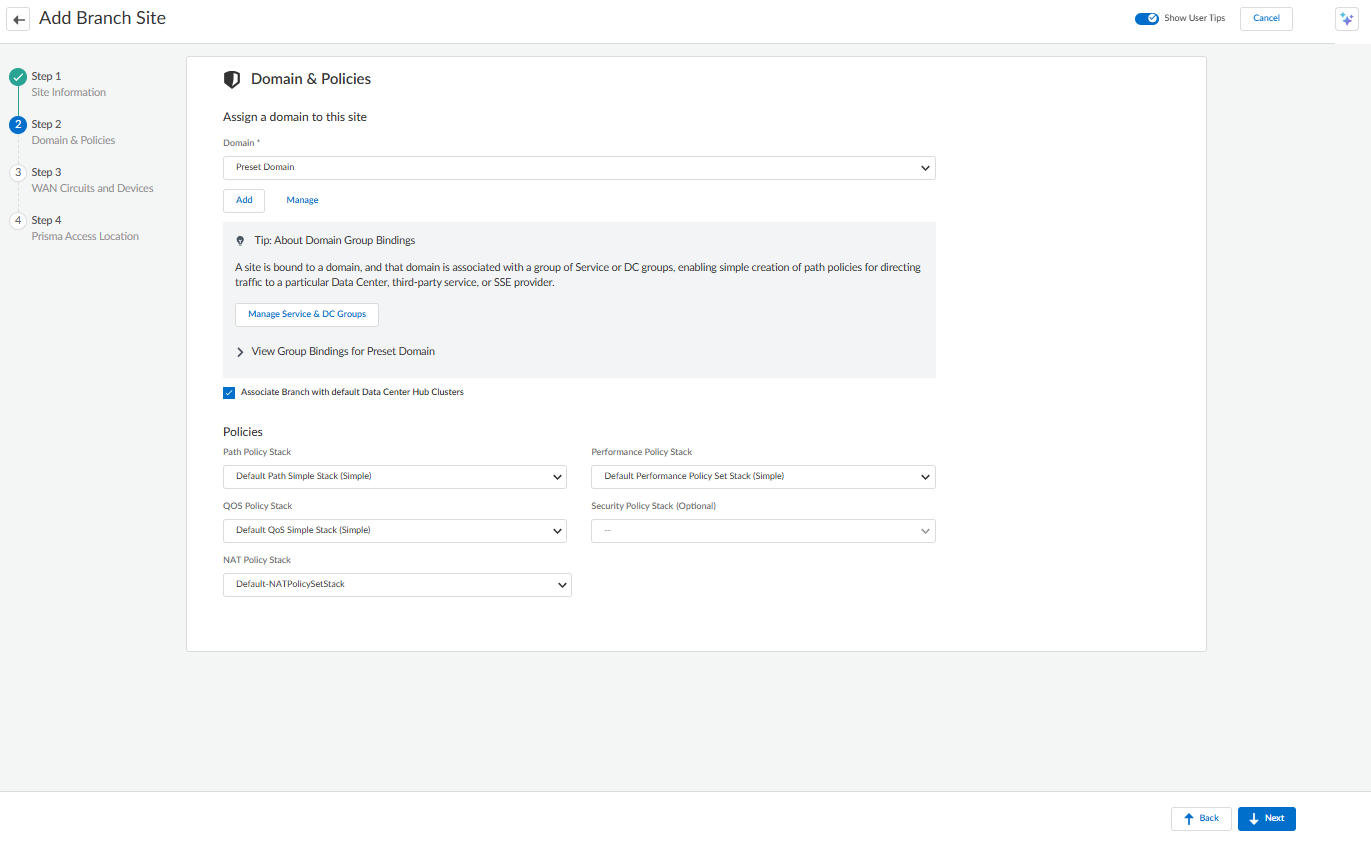
On Step 2 Domain & Policies, select a Domain from the drop-down. Or Add a Domain or Manage a Domain.By default, a preset domain is displayed for a branch site.![]()
- Select Associate Branch With Default Data Center Hub
Clusters to associate the newly created branch with the
default cluster. It will be checked (by default) and unchecked to choose a different cluster from the list.
- Configure Policies and click
Next. Ensure that the default Path Policy Stack, Performance Policy Stack, QoS Policy Stack, Security Policy Stack, and NAT Policy Stack are selected.
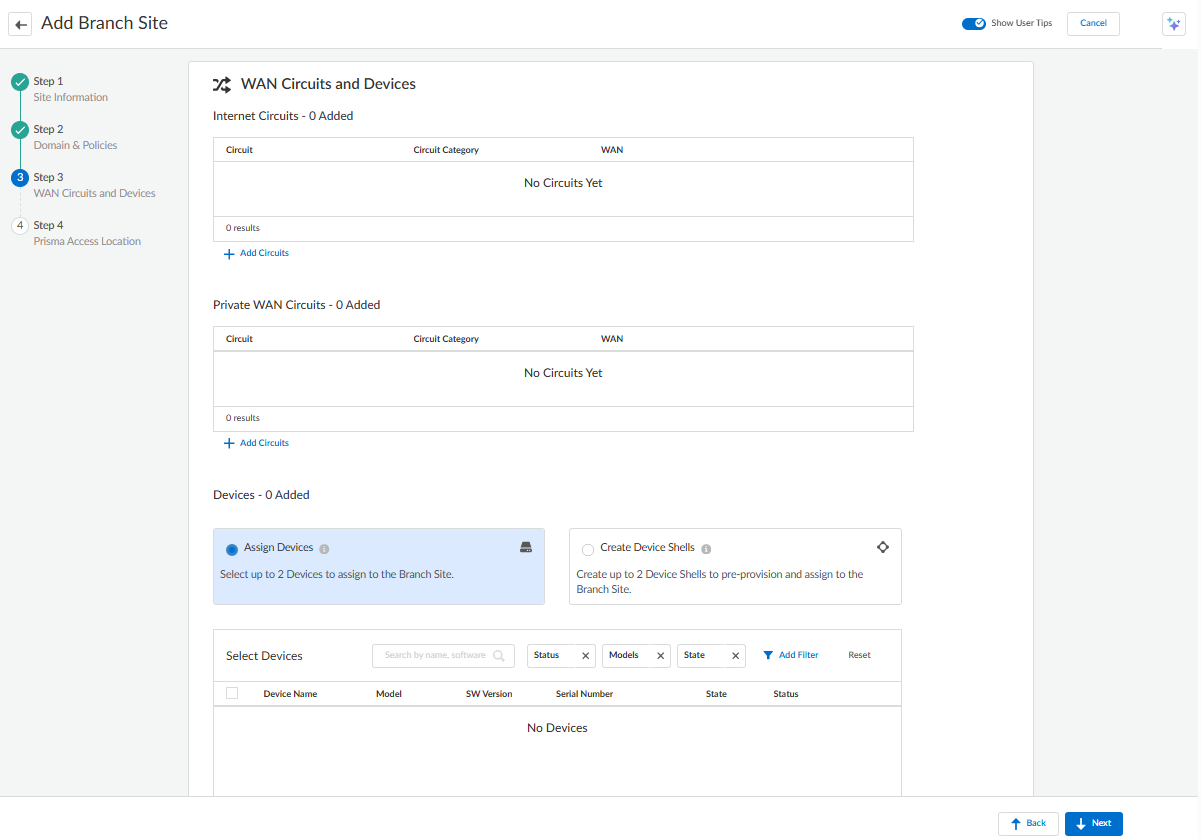
On Step 3 WAN Circuits and Devices:![]()
- Click Add Circuits to add Internet
Circuits and Private WAN Circuits.By default, the system includes a few predefined configured circuits that you can use when configuring the site. You can edit these labels or rename any remaining categories through Circuit Categories under Stacked Policies.
- On the Devices tab, select Assign Devices, select from the available devices to assign or Create Device Shells to create up to two Device Shells to preprovision and assign to the Data Center site, depending on your requirement.
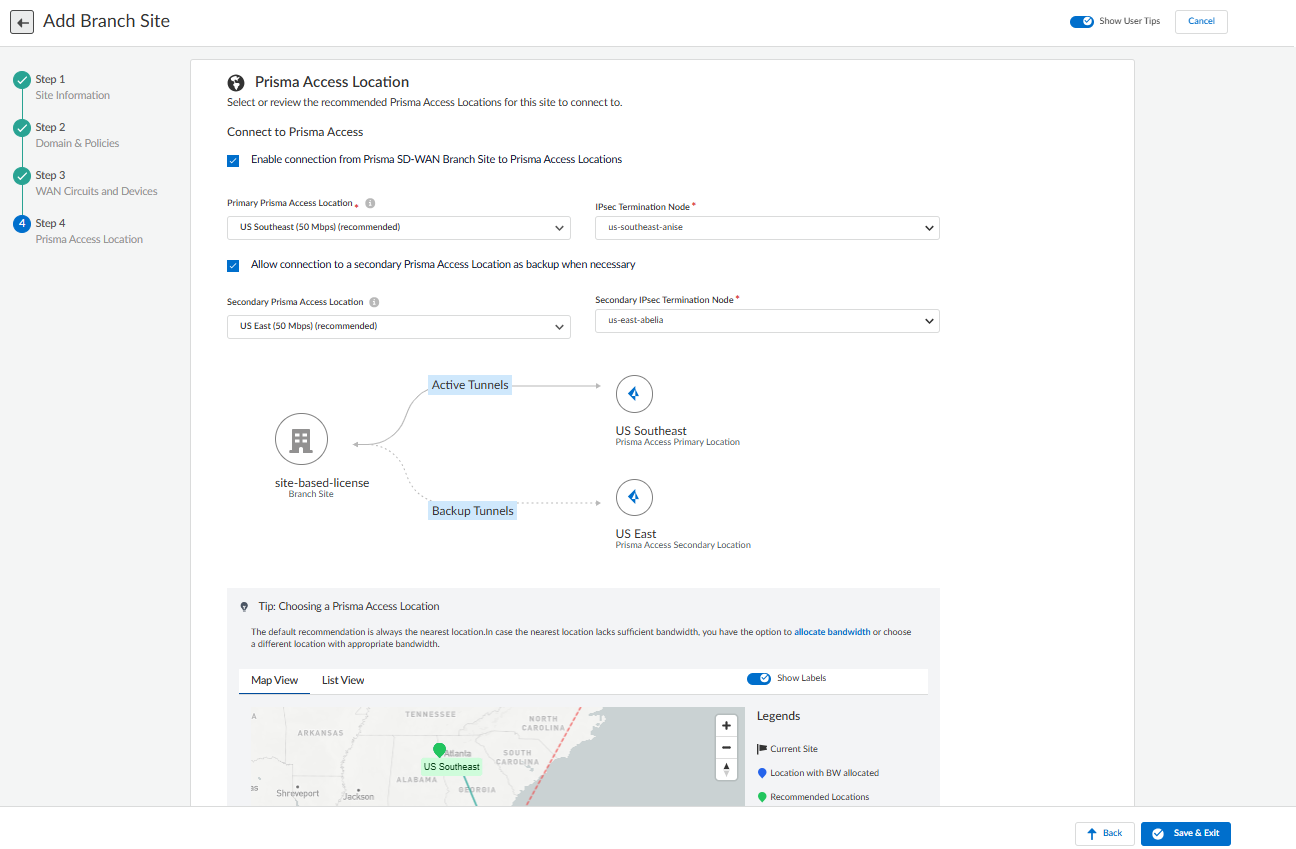
On Step 4 Prisma Access Location, select a Prisma Access Location for this site to connect to.For Aggregate bandwidth:![]()
- Enable connection from Prisma SD-WAN Branch site to
Prisma Access Location to connect to Prisma Access
location, to automatically configure BGP and tunnels. You can uncheck the box to create a site without connecting to the Prisma Access remote network. However, you can add the Prisma Access connection later from the Branch Sites page by selecting the Connect to Prisma Access option.
- Select the Primary Prisma Access Location and the IPsec Termination Node.
- Optionally, select the Secondary Prisma Access Location and the Secondary IPsec Termination Node.
For Site-Based License:![]()
- Enable connection from Prisma SD-WAN Branch site to
Prisma Access Location to connect to Prisma Access
location, to automatically configure BGP and tunnels.You can uncheck the box to create a site without connecting to the Prisma Access remote network. However, you can add the Prisma Access connection later from the Branch Sites page by selecting the Connect to Prisma Access option.
- Select Site Type from the available options:
- 25 Mbps (Very Small)
- 50 Mbps (Small)
- 250 Mbps (Medium)
- 1 Gbps (Large)
- 2.5 Gbps (X-Large)
- Select the Primary Prisma Access Location.
- Select the option Allow connection to a secondary Prisma Access Location as backup when necessary to connect to a secondary PA location for backup.
- Select the Secondary Prisma Access Location.
Save & Exit.

