Prisma SD-WAN
Configure NTP for Prisma SD-WAN
Table of Contents
Expand All
|
Collapse All
Prisma SD-WAN Docs
-
-
-
- CloudBlade Integrations
- CloudBlades Integration with Prisma Access
-
-
-
-
- 6.5
- 6.4
- 6.3
- 6.2
- 6.1
- 5.6
- New Features Guide
- On-Premises Controller
- Prisma SD-WAN CloudBlades
- Prisma Access CloudBlade Cloud Managed
- Prisma Access CloudBlade Panorama Managed
Configure NTP for Prisma SD-WAN
The ION device acts as an NTP Client and synchronizes its time with the configured NTP
Servers. This involves several packet exchanges, each exchange consists of a request and
reply.
| Where Can I Use This? | What Do I Need? |
|---|---|
|
|
Network Time Protocol (NTP) is used to synchronize
time between distributed time servers and clients.
NTP Client
has the capability to receive time from one or more time sources
(NTP servers) using Network Time Protocol (NTP). An NTP Client can
synchronize time by polling an NTP server. The ION device acts as
an NTP Client and synchronizes its time with the configured NTP
Servers. Synchronizing a client with an NTP server involves several
packet exchanges, wherein each exchange consists of a request and
a reply. NTP uses UDP/IP packets for data transfer due to faster
connection and response times.
In addition to NTP configuration,
the Prisma SD-WAN web interface provides NTP configuration templates
at the tenant level. When you claim a device, it creates an NTP
configuration by default. The NTP configuration will have the following
pre-configured set of time sources. The maximum number of time sources
or NTP servers supported per ION device is 10.
| Host | Version | Minpoll | Maxpoll |
|---|---|---|---|
| 0.cloudgenix.pool.ntp.org | 4 | 9 | 10 |
| 1.cloudgenix.pool.ntp.org | 4 | 9 | 10 |
| 2.cloudgenix.pool.ntp.org | 4 | 9 | 10 |
| 3.cloudgenix.pool.ntp.org | 4 | 9 | 10 |
| time.nist.gov | 4 | 13 | 15 |
Prisma SD-WAN also provides an implicit Controller
Time Source (CTS) which is available for use as a system fail-safe
in cases where there is no time source. This is because the accuracy
of time from the Controller is very low compared to typical Stratum
1 or Stratum 2 clocks that can supply time using NTP.
Create NTP Configuration Templates
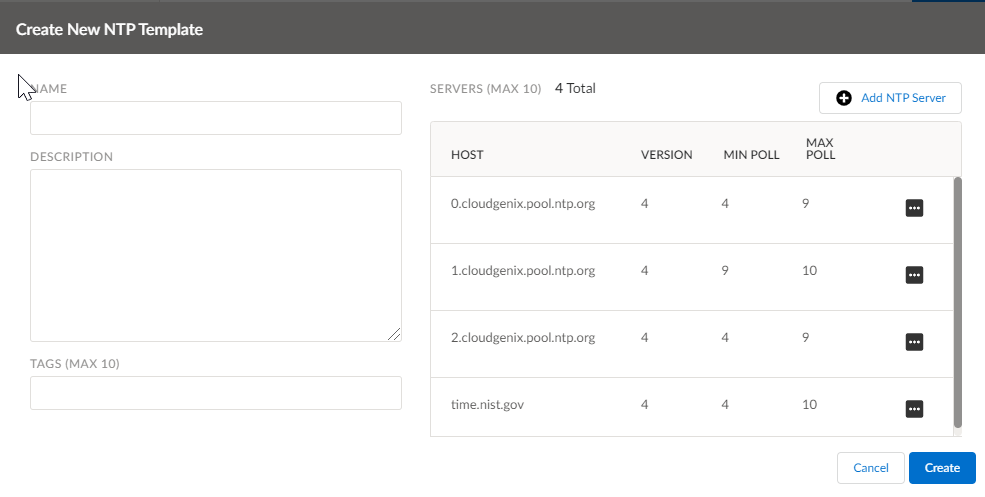
- Select ConfigurationPrisma SD-WANProfiles and TemplatesNTP .Click Create NTP Template.On the Create New NTP Template screen, enter a Name, (Optional) Description, and (Optional) add a Tag.You may add new NTP servers or edit information for existing NTP servers.Click Save.
![]()
Add or Edit NTP Server Configuration
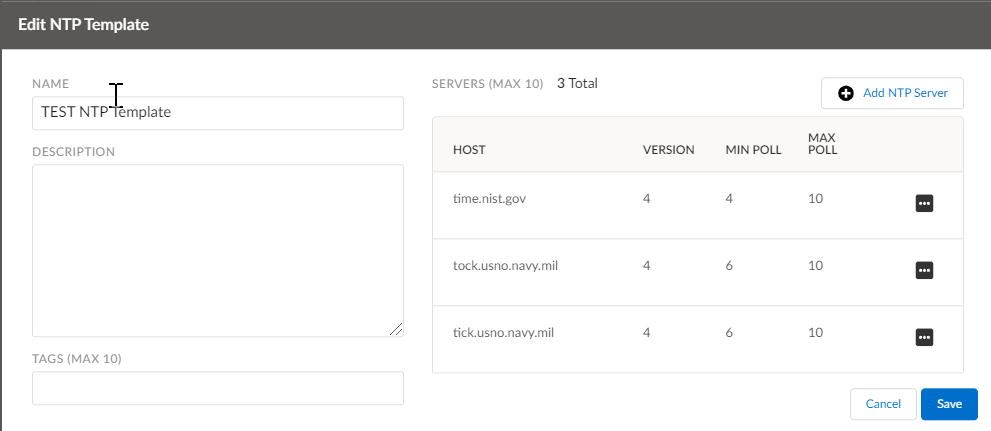
- Select ConfigurationPrisma SD-WANION DevicesClaimed, select a device and select the option Configure the device from the ellipsis menu.Select ConfigurationPrisma SD-WANProfiles and TemplatesNTP .On the Create New NTP Template screen, click Add NTP Server to add a new NTP server, or click Edit for an NTP server record to change information for an existing NTP server.You can remove a time source by clicking Remove at the time source record.On the Edit NTP Server screen, you can add or change the host IP address or domain name in the Host field.Change the NTP versions if needed in the Version field.NTP versions 2, 3 and 4 are supported.Enter values for minimum polling interval in the Min Poll field and maximum polling interval in the Max Poll field.The Min Poll and Max poll values specify the minimum and maximum polling intervals for NTP messages in seconds as a power of two.For example, a Min Poll value of 4 indicates a polling interval of 16 seconds. The values of Min Poll and Max Poll can be set between 4 and 17.You can force an NTP client to poll an NTP server instantly by clicking the refresh button on the NTP Client screen. This is an on-demand synchronization, after which polling will continue as per the values set in the Min Poll and Max Poll fields.Click Save.
![]()
Configure NTP Servers
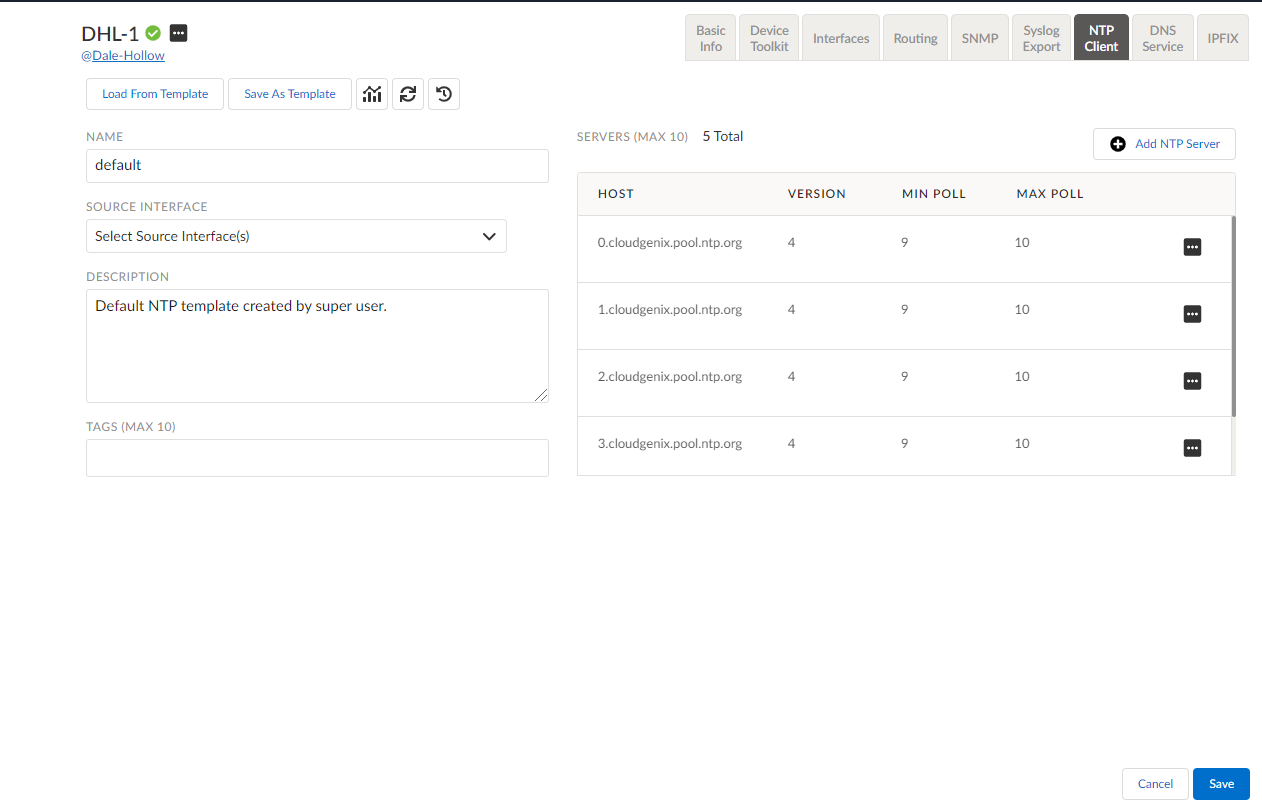
- Select ConfigurationPrisma SD-WANION DevicesClaimed, select a device and select the option Configure the device from the ellipsis menu.Select ConfigurationPrisma SD-WANProfiles and TemplatesNTP .Enter a name for the NTP configuration in the Name field.You can create NTP configuration from an existing template by clicking Load from Template.(Optional) Select one or more source interfaces from the Source Interfaces drop-down. You can now select the associated VRF interfaces (global or custom).A source interface is the interface used for sending a request to an NTP server. A source interface can include PPPoE or sub-interfaces with IP addresses. This does not include VPN interfaces. Up to 10 source interfaces are supported.You cannot delete a sub-interface or PPPoE that is configured as a source interface. If a port is configured as a member of a bypass pair, it cannot be used as a source interface for NTP.Add a (Optional) Description and enter a (Optional) Tag in the respective fields.Add additional NTP sources by clicking Add NTP Server.To Edit information for an NTP Server, select NTP Server Record from the ellipsis menu. You may also view the status of the configured NTP servers.Click Save.You may save the created NTP client configuration as a template by clicking Save As Template. This template can be used to create an NTP configuration by using the Load from Template option.
![]()
Load NTP Configuration from a Template
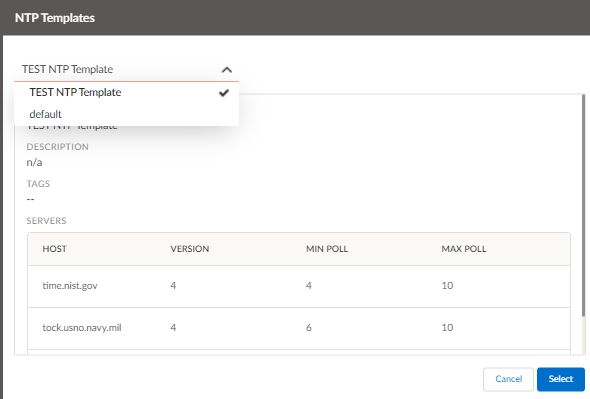
- Select ConfigurationPrisma SD-WANION DevicesClaimed, select a device and select the option Configure the device from the ellipsis menu.Select ConfigurationPrisma SD-WANProfiles and TemplatesNTP .Select the required template from the drop-down.Information from the selected NTP template is displayed in the NTP configuration.
![]() Click Save.
Click Save.


