Prisma AIRS
AWS
Table of Contents
Expand All
|
Collapse All
Prisma AIRS Docs
AWS
Complete the deployment workflow in Strata Cloud Manager to generate the Prisma AIRS AI Runtime Firewall Terraform template.
Learn how to automatically deploy the AI Runtime Firewall to protect your AWS cloud
resources.
In this page, you will configure Prisma AIRS AI Runtime
Firewall in Strata Cloud Manager and deploy it in your AWS environment. This
workflow integrates the AI Runtime Firewall or VM-Series in your cloud network
architecture, enabling comprehensive monitoring and protection of your assets.
After onboarding the cloud account, the Prisma AIRS Cloud Asset Map
displays which regions have unprotected applications and VPCs. Unprotected regions
and partially protected regions, and the internet are marked in red and orange until
you add firewall protection.
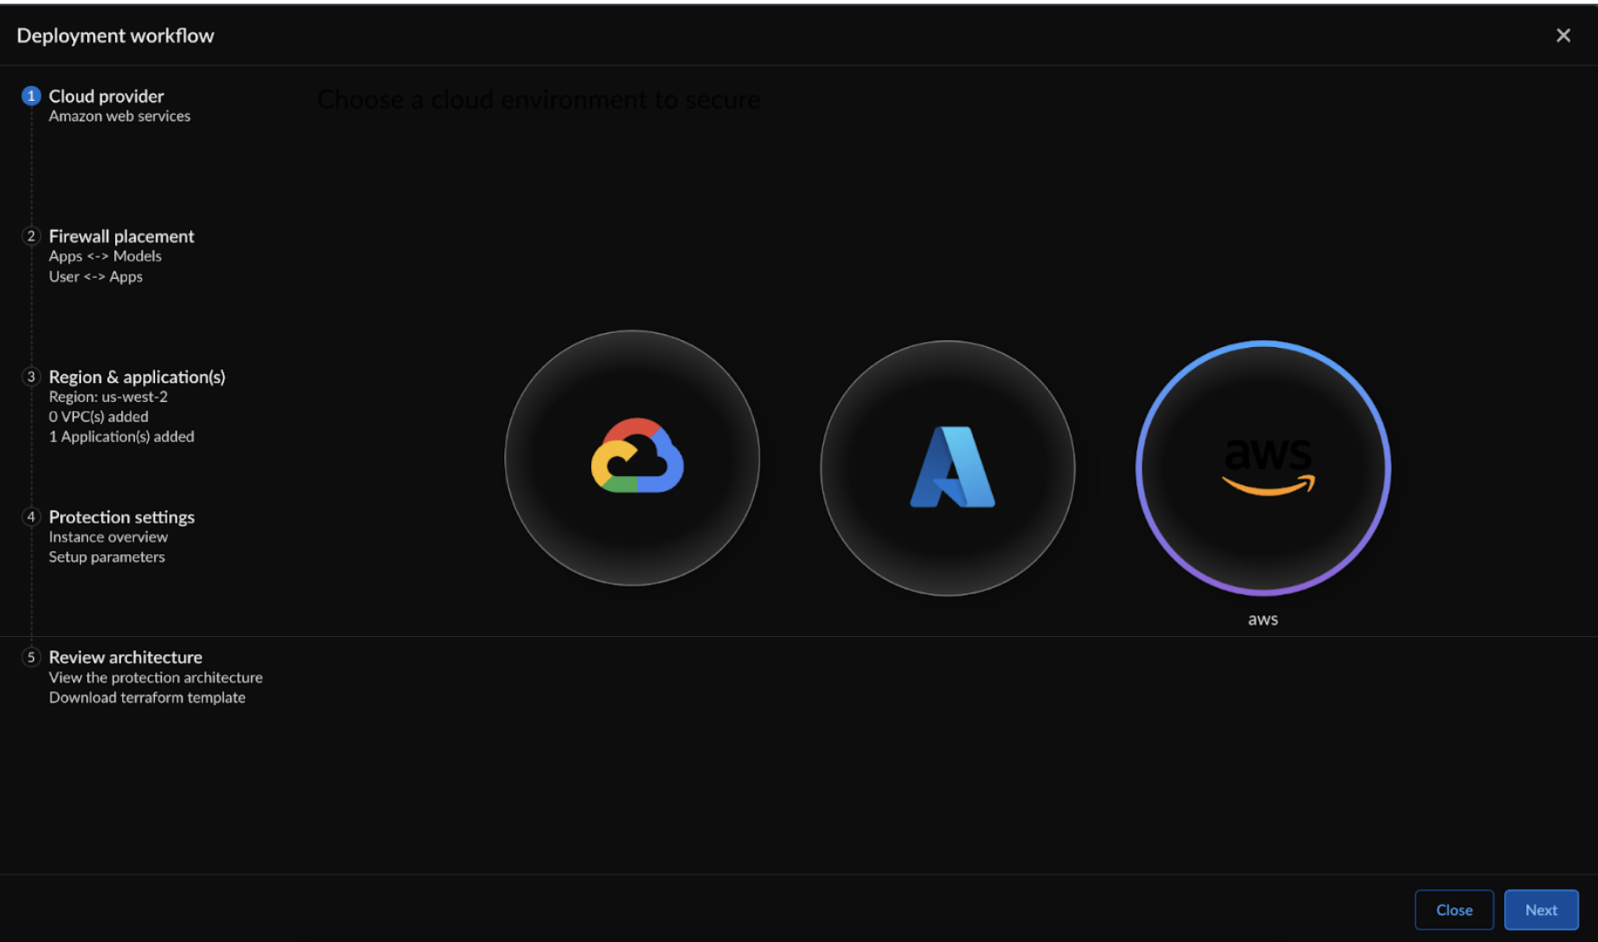
- Log in to Strata Cloud Manager.Navigate to AI Security AI Runtime Firewall.Select Add Protections ("+" icon).Select Cloud Service Provider as AWS and choose Next.If you arrived at the Firewall Deployment wizard from the Cloud Asset Map, the cloud service is already selected.
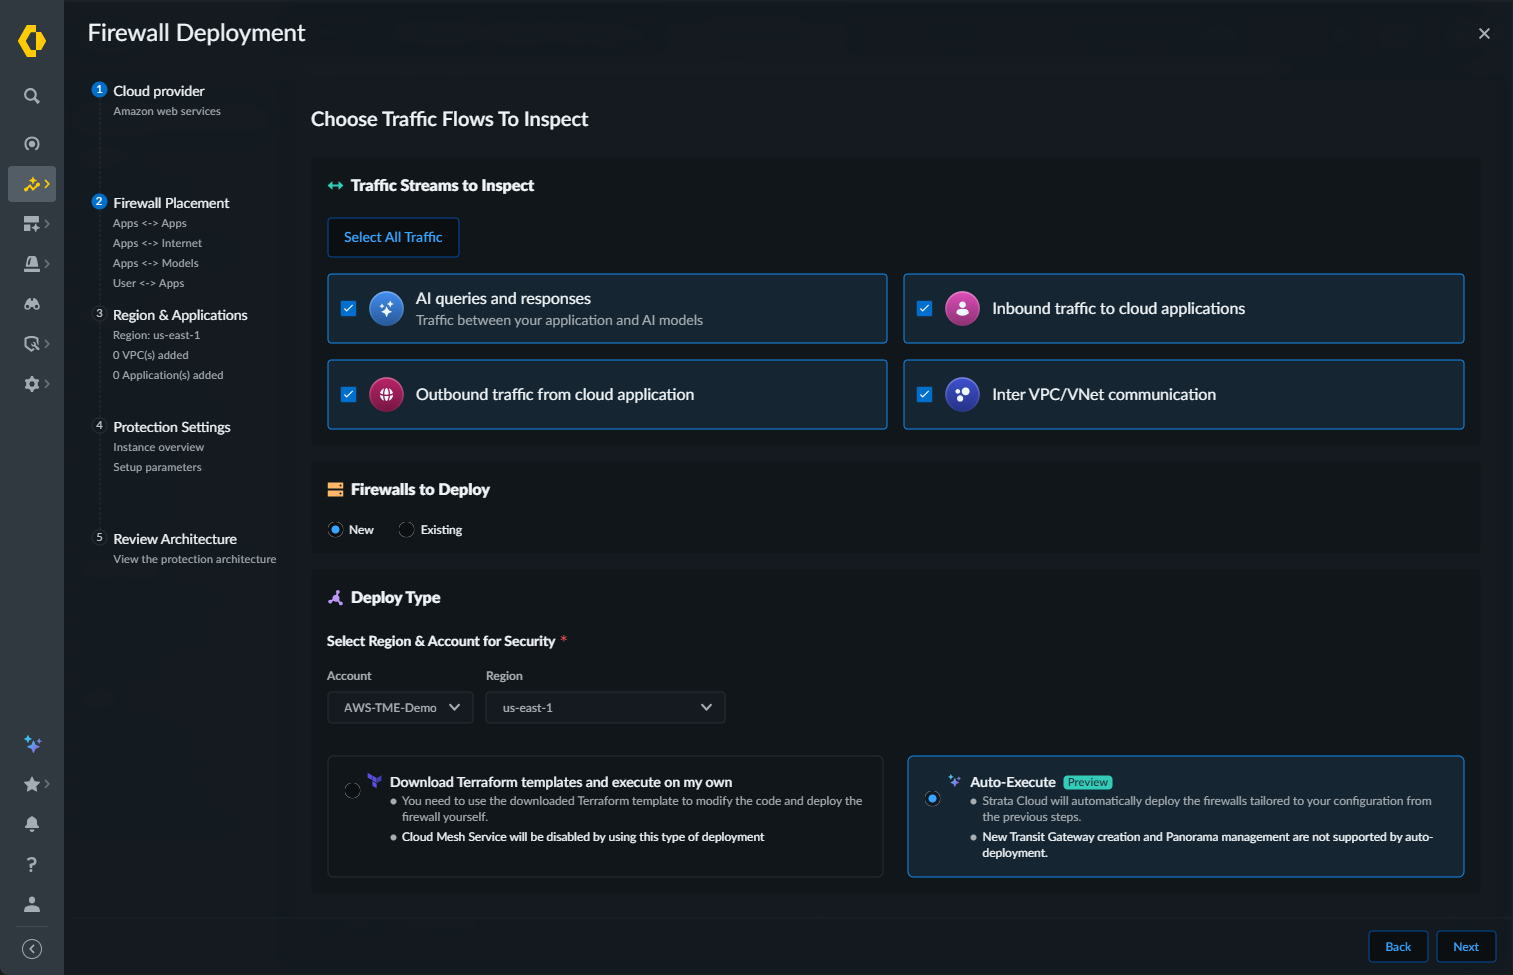
![]() In Firewall Placement, select:
In Firewall Placement, select:- Select the Traffic Streams to Inspect:
- AI queries and responses: traffic between your applications and AI models
- Inbound traffic to cloud applications: user to application traffic
- Outbound traffic from cloud applications: application to the internet traffic
- Inter VPC/VNet communication: application to application traffic
- Select All Traffic: select this option to inspect all traffic streams.
Select your AWS Account and the Region.Select Auto-Execute as your Deploy Type.Click Next.![]() Choose Applications to Protect. Specify which discovered applications you want to secure with this firewall cluster.
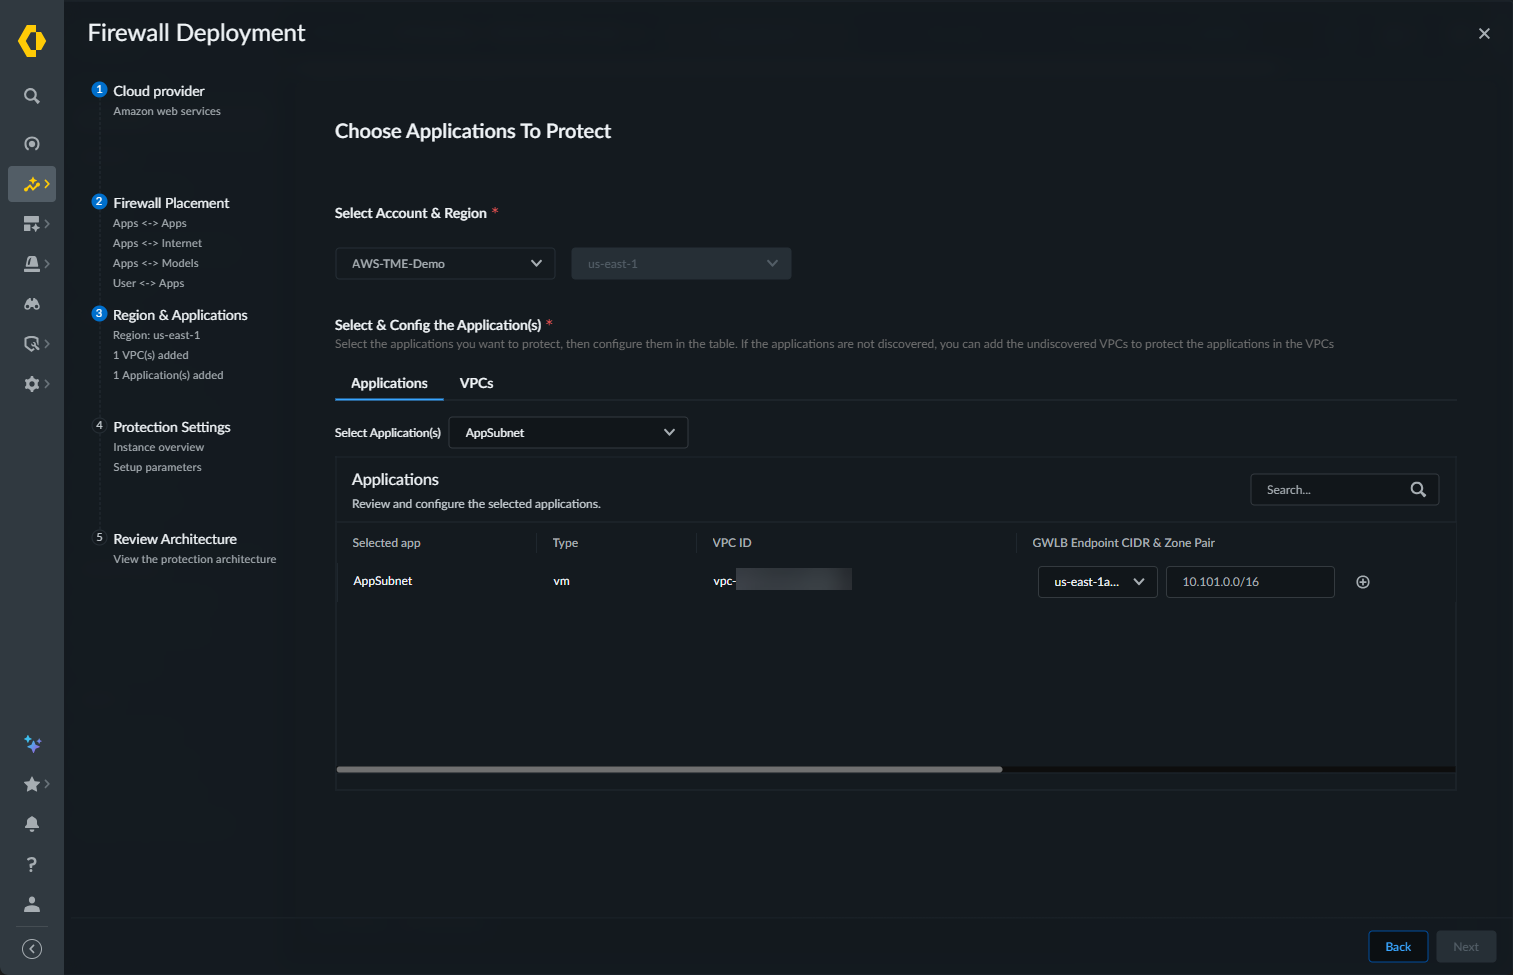
Choose Applications to Protect. Specify which discovered applications you want to secure with this firewall cluster.![]()
- On the Applications tab, use the Select Application(s) drop-down to specify the discovered applications to secure. The selected application appears in the Applications list.The available applications are determined by the application definition criteria you configured during cloud account onboarding in the “Application Definition” step.Set the gateway load balancer (GWLB) endpoint CIDR and zone. Click theicon to add the second zone and GWLB endpoint CIDR.
![]() Optional Select discovered VPCs. The VPC list is prepopulated with the VPCs associated with any applications you specified in the previous step.
Optional Select discovered VPCs. The VPC list is prepopulated with the VPCs associated with any applications you specified in the previous step.- Select the VPC(s). This action adds the selected VPC to the VPC list.
- Select the first zone from the drop-down under GWLB Endpoints CIDR & Zone Pair. Then enter the CIDR of each subnet in the specified VPC. Prisma AIRS uses the CIDR(s) entered here to create new subnets in the VPC. Do not pre-create the subnets as doing so causes an error that prevents the configuration from passing the pre-deployment check.
- Click the icon to repeat this process for additional zones.
![]() The GWLB endpoints will be created in this CIDR IP address. (Go to AWS management console, select your application VPC name, and record the IPV4 CIDR address range. Ensure to include the CIDR for the GWLB endpoint to be created only within this IPV4 CIDR range within your subnet.
The GWLB endpoints will be created in this CIDR IP address. (Go to AWS management console, select your application VPC name, and record the IPV4 CIDR address range. Ensure to include the CIDR for the GWLB endpoint to be created only within this IPV4 CIDR range within your subnet.
Click Next.Configure the Deployment Parameters. The Auto-Execute deployment option supports AI Runtime Security; not VM-Series. The Firewall Type option is pre-selected based on the traffic types you previously selected on the Choose Traffic Flows to Inspect screen. If you select AI queries and responses, the Firewall Type is pre-selected and cannot be changed.- Specify the Number of Firewall Instances.Specify the Deployment Zones. The selected zones should consist of all availability zones of the applications you want to protect.Select the AWS Instance Type used by the deployed firewalls.Optional Enable Deploy NAT Gateway through security VPC IGW through a NAT gateway (Enable this option to create a NAT gateway).Optional Enable Overlay Routing. Overlay routing, when integrated with your Prisma AIRS AI Runtime Firewall and the AWS Gateway Load Balancer (GWLB), lets you use a two-zone policy to inspect egress traffic from your AWS environment. This allows packets to leave the Prisma AIRS firewall through a different interface than the one they entered through.For a summary of different configurations for handling egress traffic, refer to the Egress Traffic Handling Scenarios on AWSThis feature is only supported on PAN-OS version 11.2.8 or later.Optional Enable Cloud Mesh.Configure the IP Addressing Scheme.
- Enter the CIDR IP address of an unused VPC. (Go to AWS Management Console > VPC, select your VPC, and get the CIDR for your VPC).Enter your TGW information. When using the Auto-Execute deployment option, you must select an existing TGW; you cannot create one as part of your firewall deployment.
- From the TGW Cloud Account drop-down, select your AWS account.
- Select the TGW ID from the drop-down.
RAMEnable Cross-Zone load balancing to distribute incoming traffic evenly across targets in multiple availability zones.Enter your Licensing information.- PAN-OS Software Version for your image from the available list.
- Flex authentication code (Copy AUTH CODE for the deployment profile you created for AI Runtime Security Firewall in Customer Support Portal).
- Enter your Device Certificate PIN ID and Device Certificate PIN Value associated with Customer Support Portal account.
Configure your Management Parameters. Firewalls deployed using the Auto-Execute workflow must be managed by Strata Cloud Manager; Panorama management is not supported.- Enter the CIDRs that can access the management interface of the firewall under Allowed Management Access.
- The SSH key to be used for login (see how to Create SSH keys).
- Manage by SCM and then select the SCM folder to group the
Prisma AIRS AI Runtime Firewall. For Multi-Cloud Mesh to be deployed, you must select the folder that contains the required Auto-VPN configuration.
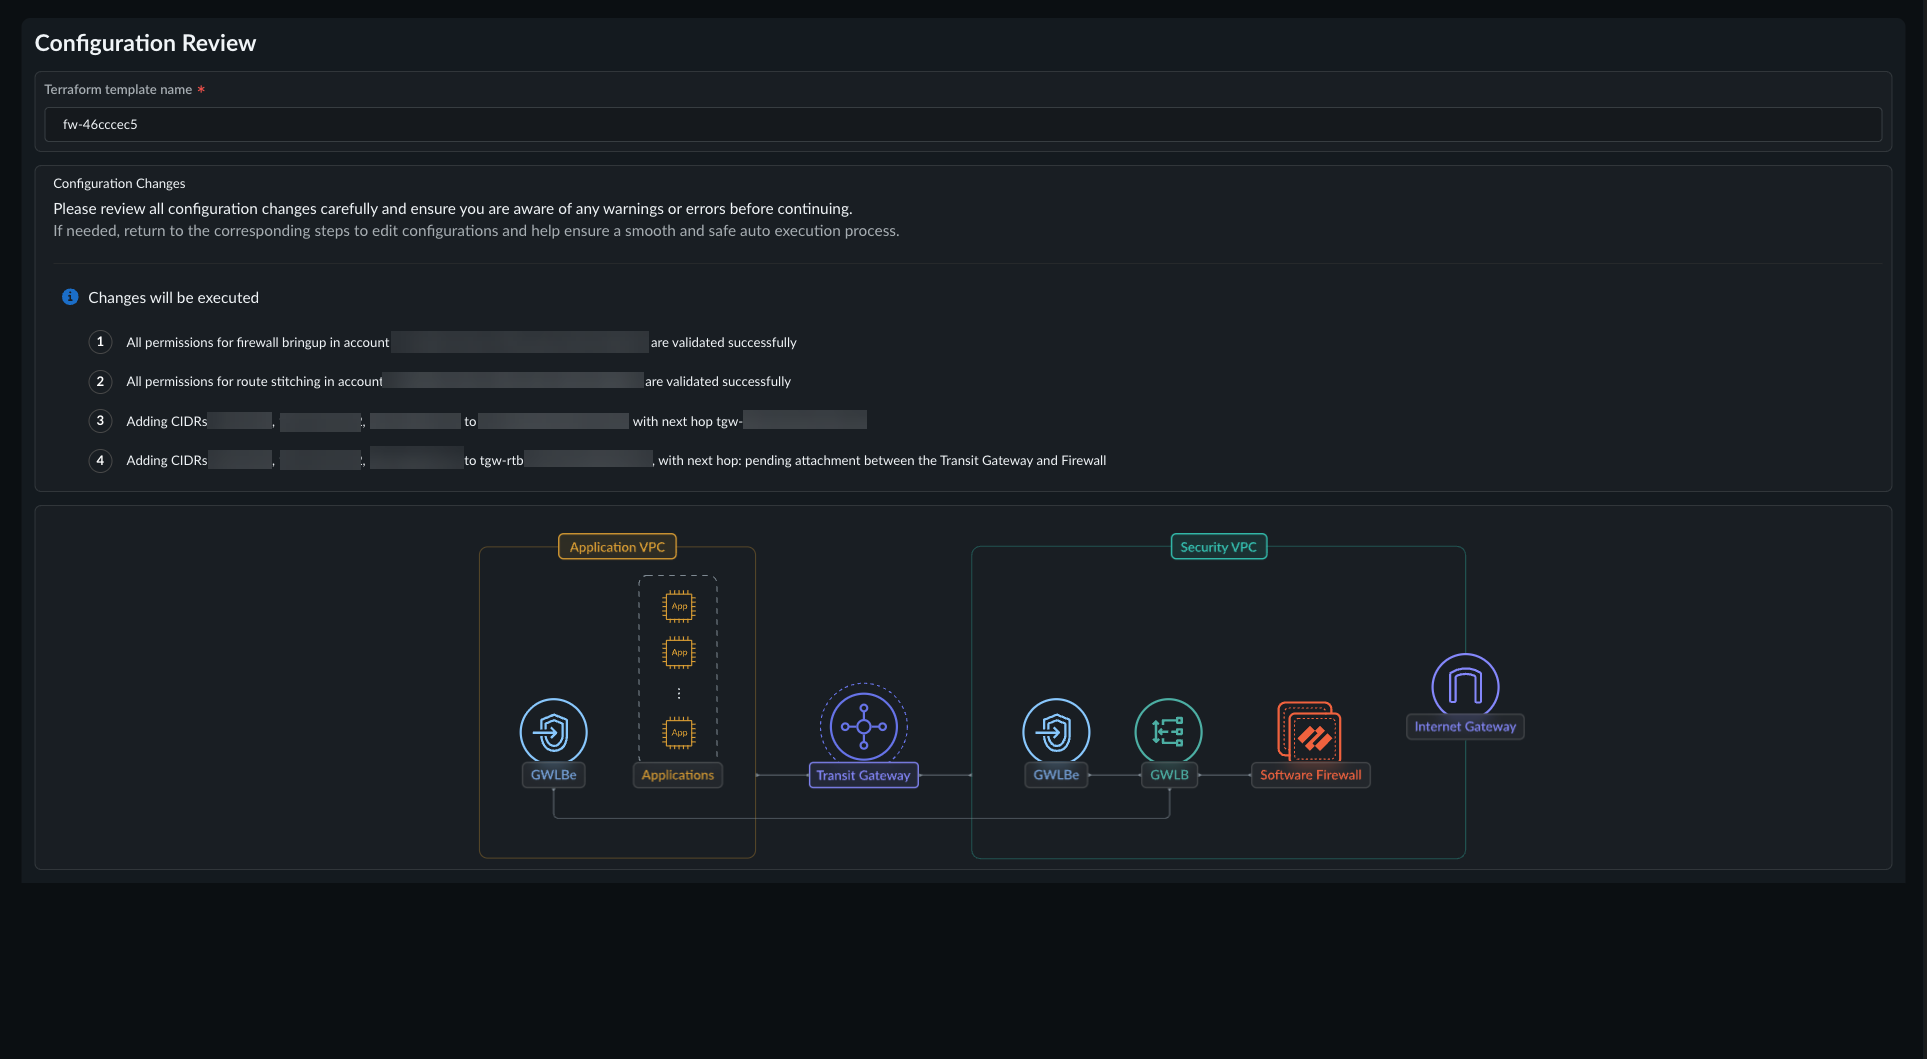
Select Next.In Review architecture:![]()


