Map a Tenant for Authorization Through Common Services
Table of Contents
Map a Tenant for Authorization Through Common Services
Learn how to map a tenant for authorization through the Common Services.
If you want to grant authorization to your users by passing the login information
through your Security Assertion Markup Language (SAML) provider, you can map your
identity federation to a tenant or tenant service group (TSG) hierarchy. By using
the tenant mapping, you no longer have to add users and access directly through
Common Services, but that option is still available.
After you add an identity federation and
add an identity federation owner, the federation owner can
map tenants for authorization. In addition to adding an admin as a federation owner,
you must also give that admin a role that has permissions to
assign and remove access policies on the given tenant, such as the following:
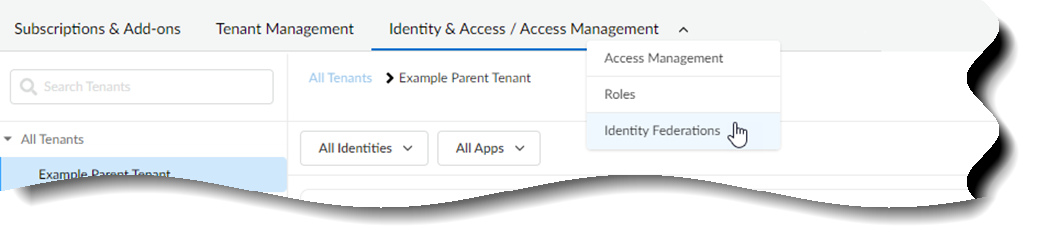
- Use one of the various ways to access Identity & Access. Only one way is shown here.Select
![]() Scroll or search to find your identity federation.Select Edit Tenant Mapping for Authorization.
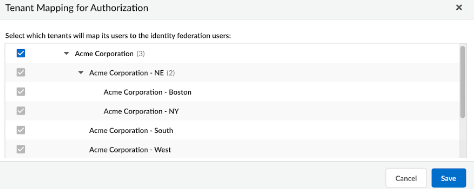
Scroll or search to find your identity federation.Select Edit Tenant Mapping for Authorization.![]() Select which tenants can map users to the identity federation users and Save.Inheritance applies the same way as it does in access management. If you map a tenant at the top level of the hierarchy, the child tenants nested below it will inherit the mapping so that the parent can manage them.
Select which tenants can map users to the identity federation users and Save.Inheritance applies the same way as it does in access management. If you map a tenant at the top level of the hierarchy, the child tenants nested below it will inherit the mapping so that the parent can manage them.![]() The identity federation owner can now manage the user access for all the selected tenant Service Groups.Configure user access policies using one of the following methods:
The identity federation owner can now manage the user access for all the selected tenant Service Groups.Configure user access policies using one of the following methods:![]()