Manually Configure a SAML Identity Provider Through the Common Services
Table of Contents
Manually Configure a SAML Identity Provider Through the Common Services
Learn how to manually configure a SAML identity provider
through Common Services.
After you add an identity federation and
you choose to configure a Security Assertion Markup Language (SAML)
provider manually, you complete the following steps.
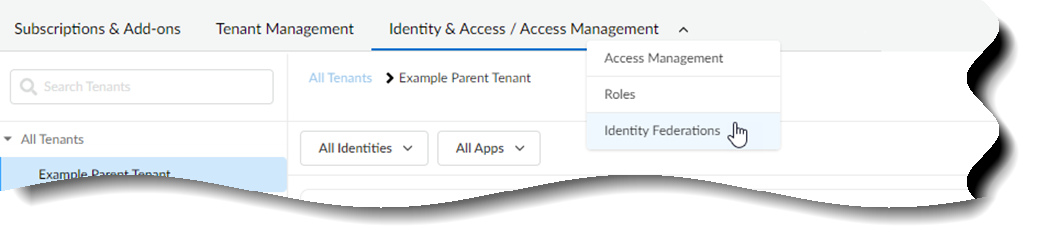
- Use one of the various ways to access .Manually configure a SAML provider from .
![]() Select Configure Identity Provider.
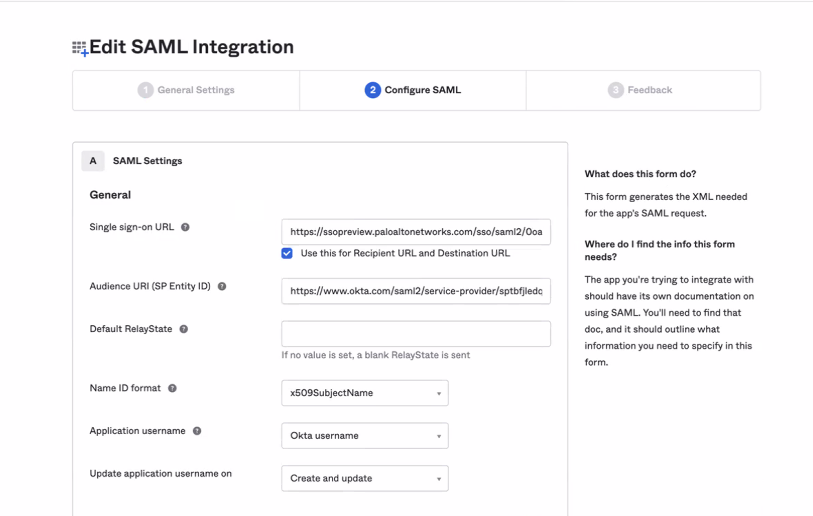
Select Configure Identity Provider.![]() Select .Go to your identity provider’s console, download the certificate, and take note of all the provider’s details. The console details look similar to the following, but all providers are slightly different.
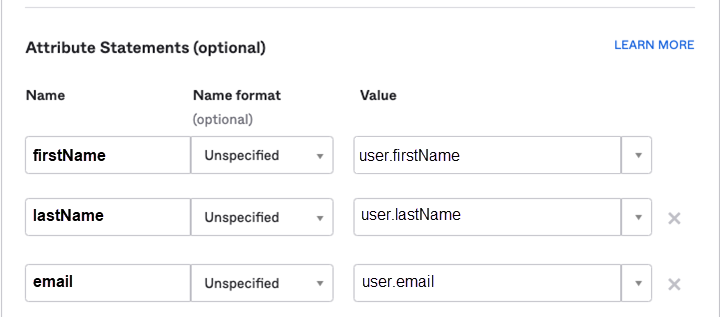
Select .Go to your identity provider’s console, download the certificate, and take note of all the provider’s details. The console details look similar to the following, but all providers are slightly different.![]() In your identity provider’s console, set up the Attribute Statements for firstName of user.firstName, lastName of user.lastName, and email of user.email. Without them, you will only see a blank name in the hub or Strata Cloud Manager. The console details look similar to the following, but all providers are slightly different.
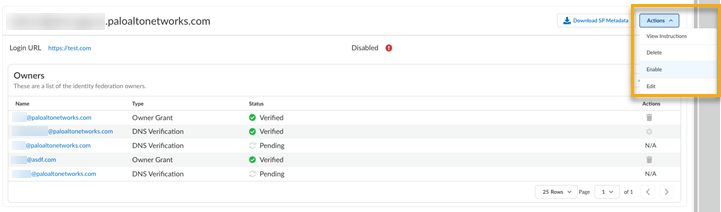
In your identity provider’s console, set up the Attribute Statements for firstName of user.firstName, lastName of user.lastName, and email of user.email. Without them, you will only see a blank name in the hub or Strata Cloud Manager. The console details look similar to the following, but all providers are slightly different.![]() Upload Certificate for your identity provider certificate. Use .crt files only.Enter your Identity Provider ID.Enter your Identity Provider SSO URL.Select Next.The Configure Identity Provider button is replaced with the Login URL that you configured. The Login URL is how Palo Alto Networks knows where to send the user when they log in. This is disabled by default. Select .
Upload Certificate for your identity provider certificate. Use .crt files only.Enter your Identity Provider ID.Enter your Identity Provider SSO URL.Select Next.The Configure Identity Provider button is replaced with the Login URL that you configured. The Login URL is how Palo Alto Networks knows where to send the user when they log in. This is disabled by default. Select .![]()