Device Security
Set up Infoblox for Integration
Table of Contents
Set up Infoblox for Integration
Set up Infoblox for IPAM integration with Device Security
through Cortex XSOAR.
| Where Can I Use This? | What Do I Need? |
|---|---|
|
One of the following subscriptions:
One of the following Cortex XSOAR setups:
|
When an XSOAR engine connects to an Infoblox
Grid Master, it must authenticate itself by presenting a valid username
and password belonging to a user account with API access and read-only
privileges. It can either use an existing user account or one that
you can create specifically for it.
- Create a user group with read-only access to the local Grid Master API.
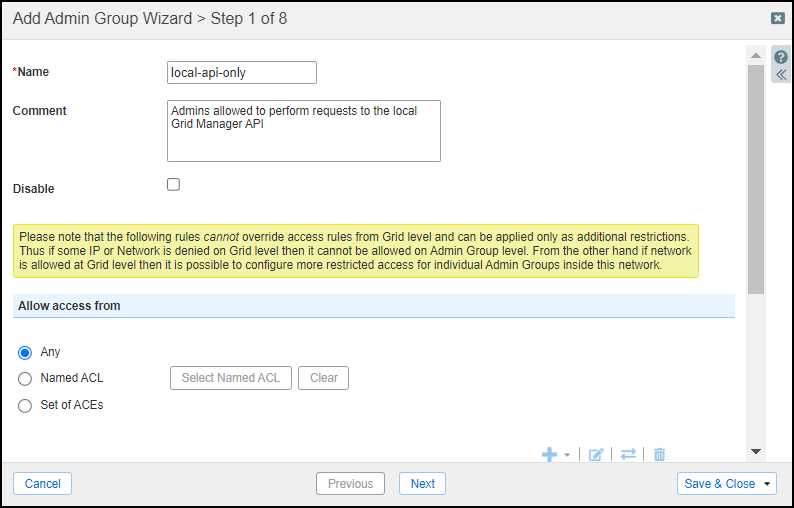
- Log in to the Infoblox Grid Manager UI on the Grid Master with which you want Cortex XSOAR to connect.
- Select (Add) and then, in the General section, enter a name for the group and, optionally, a comment for future reference.
![]()
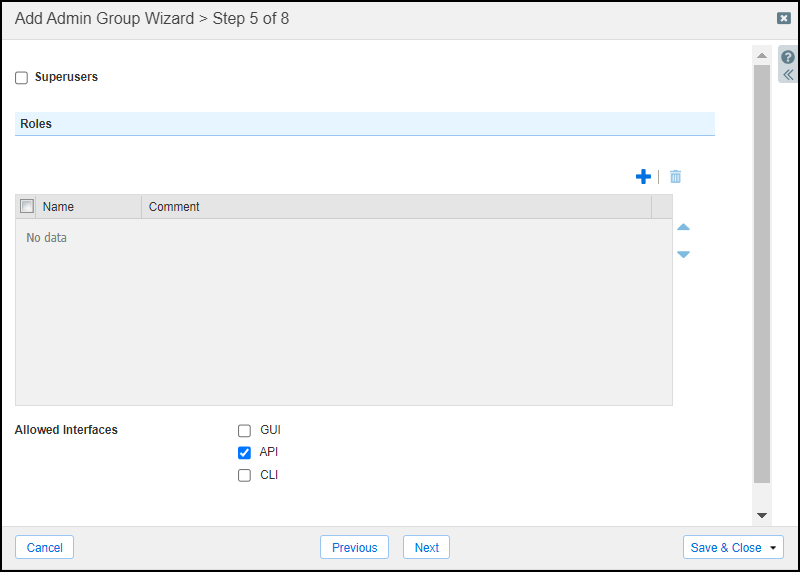
- Click Next four times to reach step 5 of 8 and then select API as an allowed interface.
![]()
- Save & Close.
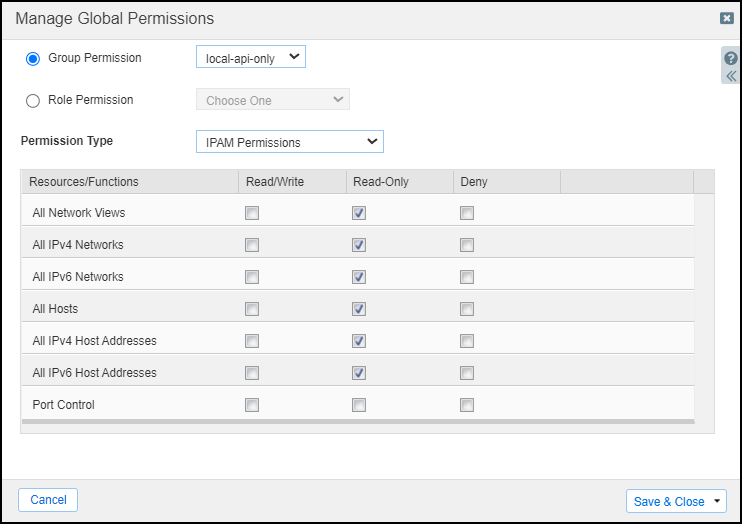
- Select (Add), select Group Permission, choose the name of the user group you just created, choose IPAM Permissions as the Permission Type, and then select Read-Only for the following resources:All Network ViewsAll IPv4 NetworksAll IPv6 NetworksAll HostsAll IPv4 Host AddressesAll IPv6 Host Addresses
![]()
- Save & Close.
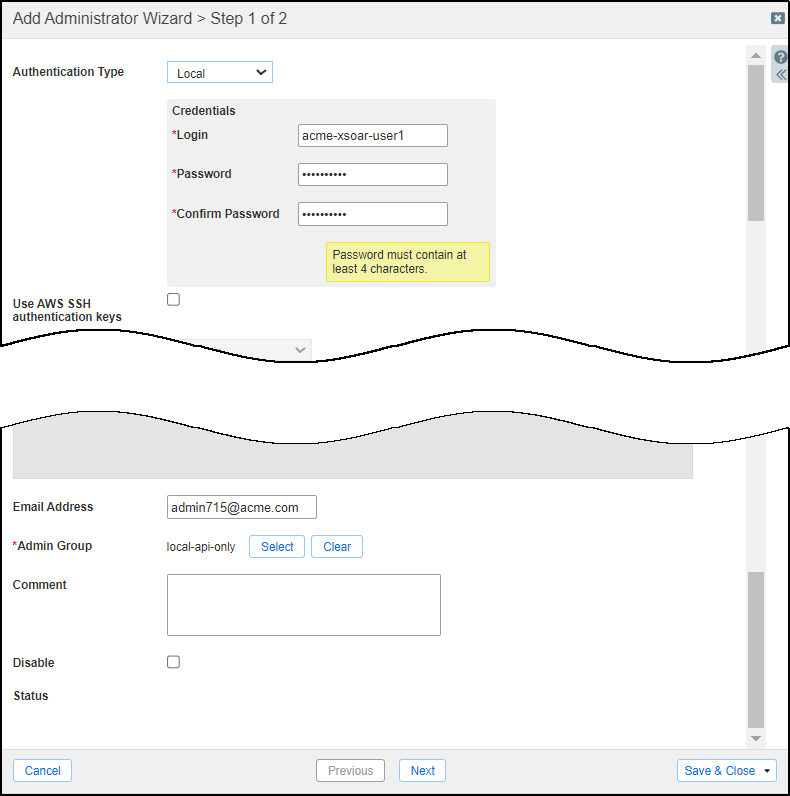
Create a user for the XSOAR engine to use when connecting to the Infoblox API and add it to the group.- Select (Add) and then enter the following:Authentication Type: LocalLogin: Enter a username for the XSOAR engine to use when connecting to the Infoblox API.Password and Confirm Password: Enter a password for the XSOAR engine to use.Email Address: (Optional) Enter the email address of someone who’s responsible for the integration in case any issues arise in the future.Admin Group: Choose the name of the admin group you created to access the API.
![]()
- Save & Close.