Device Security
Set up Tenable Vulnerability Management for Integration
Table of Contents
Set up Tenable Vulnerability Management for Integration
Set up Tenable Vulnerability Management for integration with Device Security through
Cortex XSOAR.
| Where Can I Use This? | What Do I Need? |
|---|---|
|
One of the following subscriptions:
One of the following Cortex XSOAR setups:
|
Before integrating Device Security with Tenable Vulnerability Management (formerly known as
Tenable.io), make sure you have a working Tenable Vulnerability Management setup.
It’s assumed that you’ve already installed
a Tenable Nessus vulnerability scanner on your network so that it
can reach the hosts you intend to scan, made a Tenable Vulnerability Management account,
and associated the scanner with your account.
After completing
those steps, you must generate two API keys that will allow Cortex XSOAR to access the Tenable API and then copy and paste them into
your XSOAR integration instance configuration.
- Generate two API keys.
- Log in to your Tenable Vulnerability Management account.
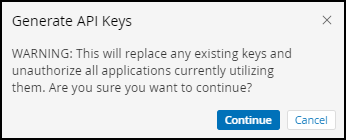
- To generate the two API keys you need, click .A warning appears that explains how generating API keys will invalidate any existing keys and unauthorize applications currently using them.
![]()
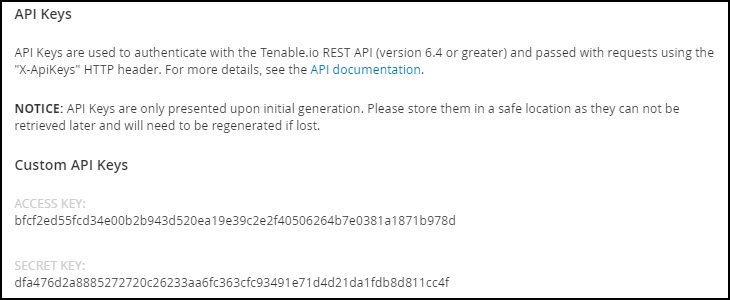
- To continue, click Generate.The two API keys appear on the page:Access Key: This key authenticates Cortex XSOAR and Tenable.io to each other and permits XSOAR to access Tenable API resources.Secret Key: This key encrypts and decrypts communications between Tenable.io and Cortex XSOAR.
![]()
Record the two API keys.Because Tenable only displays the keys immediately after generating them, do not navigate away from this page until you have copied the text strings for both keys, pasted them into a text file, and saved the file in a secure location. You will enter these when configuring the Tenable integration instance in Cortex XSOAR.