Next-Generation Firewall
Set Up a Basic Security Policy (PAN-OS)
Table of Contents
Expand All
|
Collapse All
Next-Generation Firewall Docs
-
-
-
-
-
-
-
- PAN-OS 12.1
- PAN-OS 11.2
- PAN-OS 11.1
- PAN-OS 11.0 (EoL)
- PAN-OS 10.2
- PAN-OS 10.1
- PAN-OS 10.0 (EoL)
- PAN-OS 9.1 (EoL)
- PAN-OS 9.0 (EoL)
- PAN-OS 8.1 (EoL)
-
- PAN-OS 12.1
- PAN-OS 11.2
- PAN-OS 11.1
- PAN-OS 10.2
- PAN-OS 10.1
Set Up a Basic Security Policy (PAN-OS)
Leanr about how to set up a basic security policy in PAN-OS.
- (Optional) Delete the default Security policy rule.By default, the NGFW includes a Security policy rule named rule1 that allows all traffic from Trust zone to Untrust zone. You can either delete the rule or modify the rule to reflect your zone-naming conventions.Allow access to your network infrastructure resources.
- Select PoliciesSecurity and click Add.In the General tab, enter a descriptive Name for the rule.In the Source tab, set the Source Zone to Users.In the Destination tab, set the Destination Zone to IT Infrastructure.As a best practice, use address objects in the Destination Address field to enable access to specific servers or groups of servers only, particularly for services such as DNS and SMTP that are commonly exploited. By restricting users to specific destination server addresses, you can prevent data exfiltration and command and control traffic from establishing communication through techniques such as DNS tunneling.In the Applications tab, Add the applications that correspond to the network services you want to safely enable. For example, select dns, ntp, ocsp, ping, and smtp.In the Service/URL Category tab, keep the Service set to application-default.In the Actions tab, set the Action Setting to Allow.Set Profile Type to Profiles and select the following security profiles to attach to the policy rule:
- For Antivirus, select default
- For Vulnerability Protection, select strict
- For Anti-Spyware, select strict
- For URL Filtering, select default
- For File Blocking, select basic file blocking
- For WildFire Analysis, select default
Verify that Log at Session End is enabled. Only traffic that matches a Security policy rule will be logged.Click OK.![]() Enable access to general internet applications.This is a temporary rule that allows you to gather information about the traffic on your network. After you have more insight into which applications your users need to access, you can make informed decisions about which applications to allow and create more granular application-based rules for each user group.
Enable access to general internet applications.This is a temporary rule that allows you to gather information about the traffic on your network. After you have more insight into which applications your users need to access, you can make informed decisions about which applications to allow and create more granular application-based rules for each user group.- Select PoliciesSecurity and Add a rule.In the General tab, enter a descriptive Name for the rule.In the Source tab, set the Source Zone to Users.In the Destination tab, set the Destination Zone to Internet.In the Applications tab, Add an Application Filter and enter a Name. To safely enable access to legitimate web-based applications, set the Category in the application filter to general-internet and then click OK. To enable access to encrypted sites, Add the ssl application.In the Service/URL Category tab, keep the Service set to application-default.In the Actions tab, set the Action Setting to Allow.Set Profile Type to Profiles and select the following security profiles to attach to the policy rule:
- For Antivirus, select default
- For Vulnerability Protection, select strict
- For Anti-Spyware, select strict
- For URL Filtering, select default
- For File Blocking, select strict file blocking
- For WildFire Analysis, select default
Verify that Log at Session End is enabled. Only traffic that matches a security rule will be logged.Click OK.![]() Enable access to data center applications.
Enable access to data center applications.- Select PoliciesSecurity and Add a rule.In the General tab, Enter a descriptive Name for the rule.In the Source tab, set the Source Zone to Users.In the Destination tab, set the Destination Zone to Data Center Applications.In the Applications tab, Add the applications that correspond to the network services you want to safely enable. For example, select activesync, imap, kerberos, ldap, ms-exchange, and ms-lync.In the Service/URL Category tab, keep the Service set to application-default.In the Actions tab, set the Action Setting to Allow.Set Profile Type to Profiles and select the following security profiles to attach to the policy rule:
- For Antivirus, select default
- For Vulnerability Protection select strict
- For Anti-Spyware select strict
- For URL Filtering select default
- For File Blocking select basic file blocking
- For WildFire Analysis select default
Verify that Log at Session End is enabled. Only traffic that matches a security rule will be logged.Click OK.![]() Save your policy rules to the running configuration on the NGFW.Click Commit.To verify that you have set up your basic policies effectively, test whether your Security policy rules are being evaluated and determine which Security policy rule applies to a traffic flow.For example, to verify the policy rule that will be applied for a client in the user zone with the IP address 10.35.14.150 when it sends a DNS query to the DNS server in the data center:
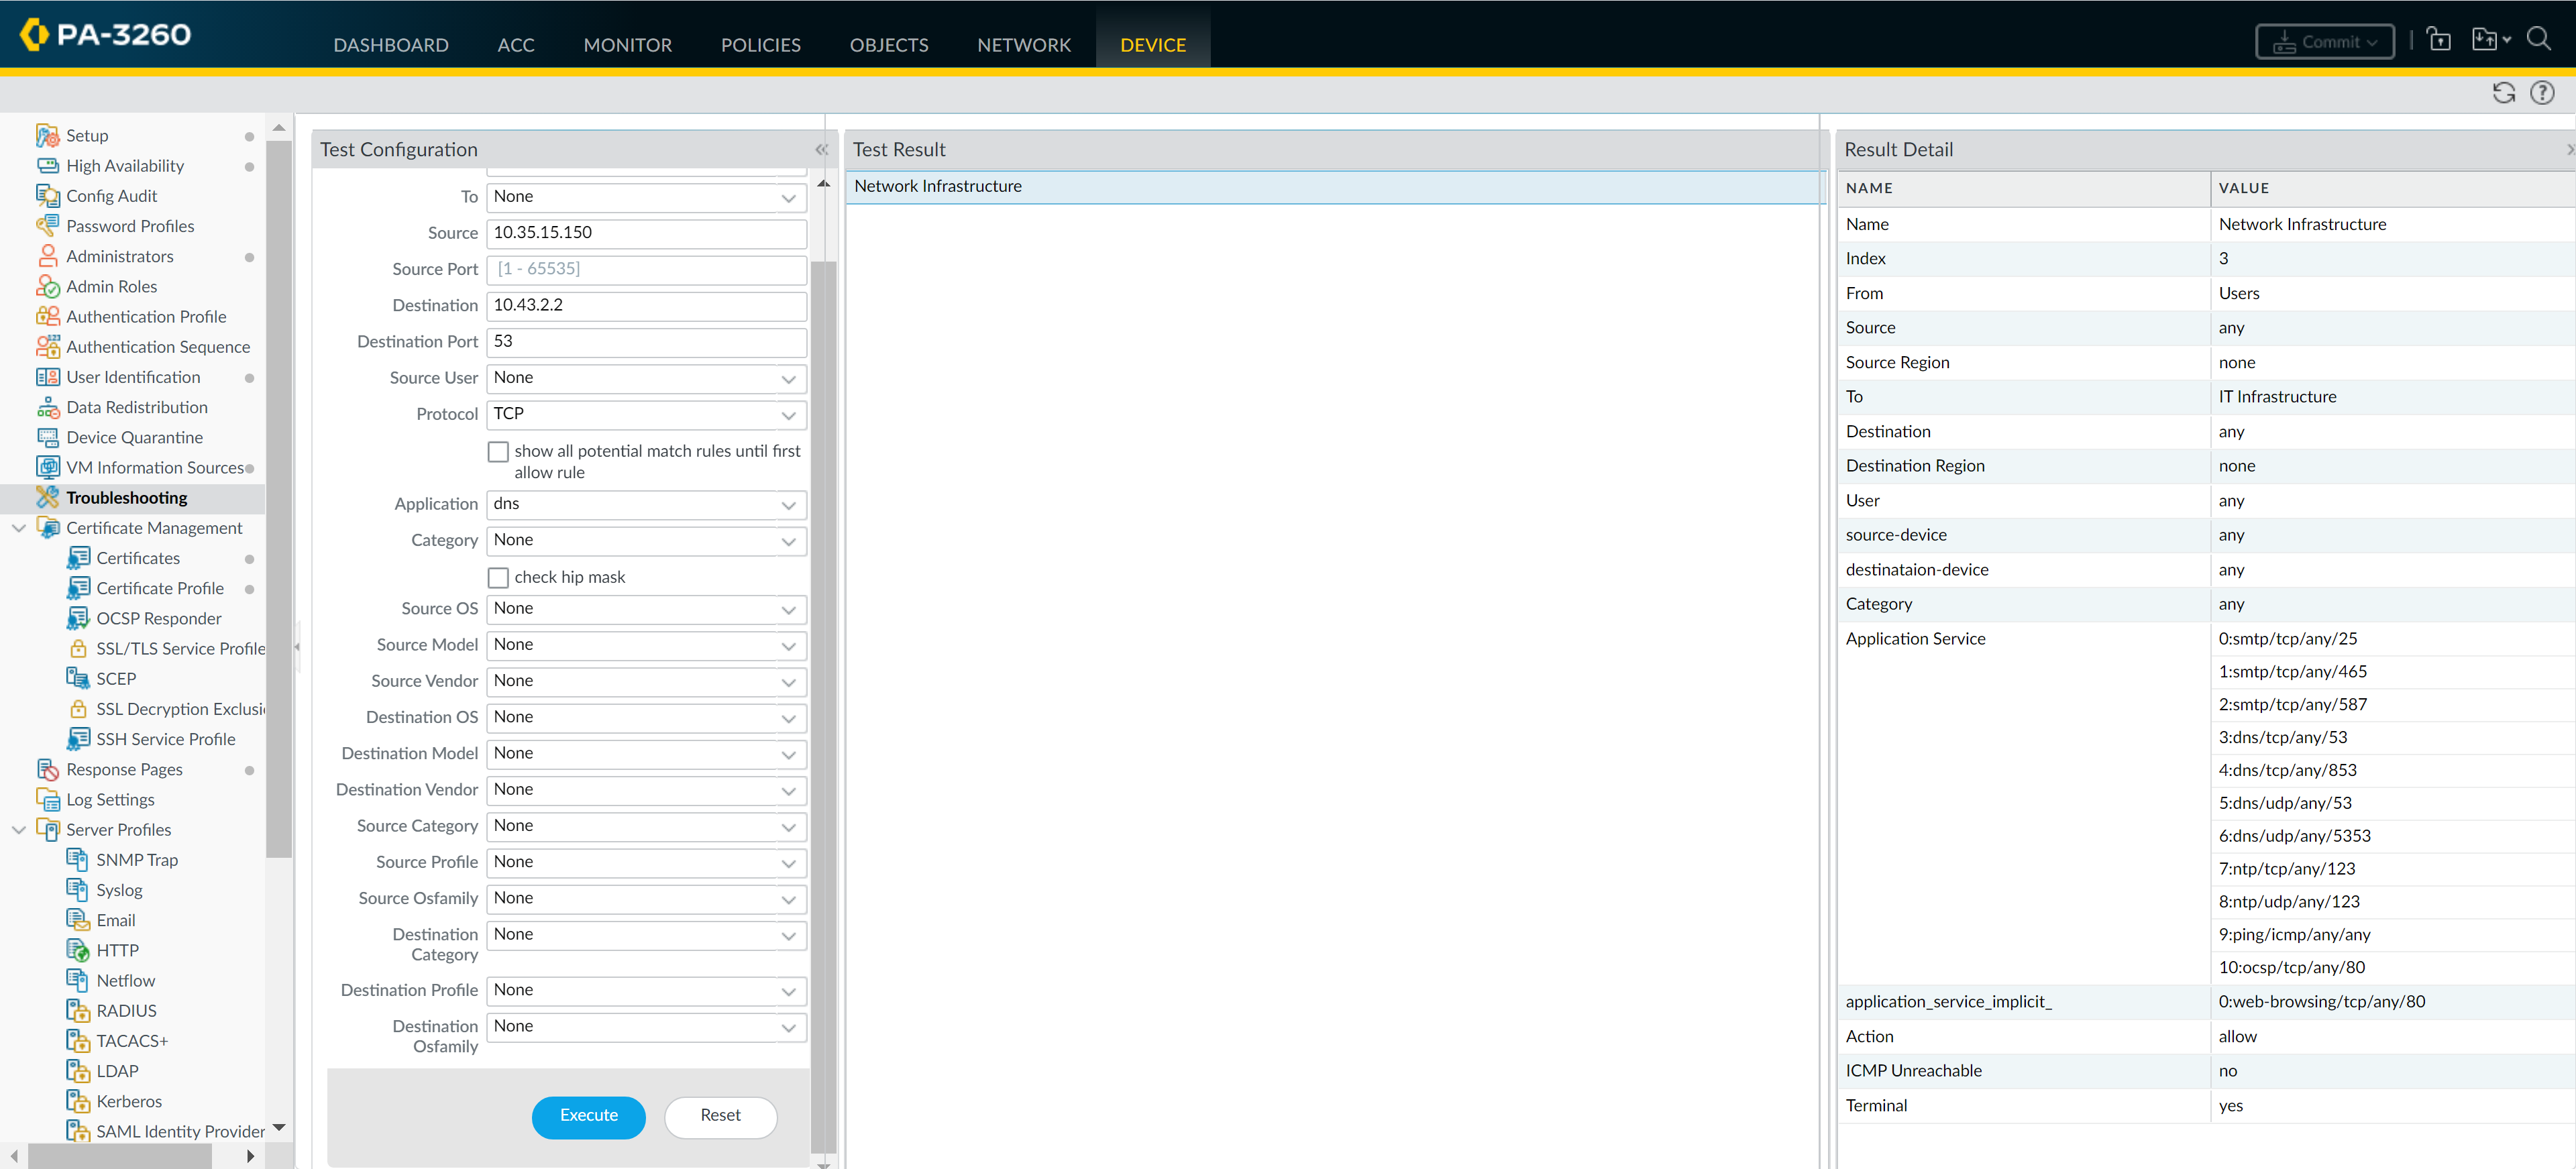
Save your policy rules to the running configuration on the NGFW.Click Commit.To verify that you have set up your basic policies effectively, test whether your Security policy rules are being evaluated and determine which Security policy rule applies to a traffic flow.For example, to verify the policy rule that will be applied for a client in the user zone with the IP address 10.35.14.150 when it sends a DNS query to the DNS server in the data center:- Select DeviceTroubleshooting and select Security Policy Match (Select Test).Enter the Source and Destination IP addresses.Enter the Protocol.Select dns (Application)Execute the Security policy match test.
![]()


