Interact with the ACC
Table of Contents
Interact with the ACC
To customize and refine the ACC display, you
can add, delete, export and import tabs, add and delete widgets,
set local and global filters, and interact with the widgets.
- Add a tab.
- Select theicon along the list of tabs.
![]() Add a View Name. This name will be used as the name for the tab. You can add up to five tabs.Edit a tab.Select the tab, and click the pencil icon next to the tab name, to edit the tab. For example.
Add a View Name. This name will be used as the name for the tab. You can add up to five tabs.Edit a tab.Select the tab, and click the pencil icon next to the tab name, to edit the tab. For example.![]() Editing a tab allows you to add or delete or reset the widgets that are displayed in the tab. You can also change the widget layout in the tab.To save the tab as the default tab, select.
Editing a tab allows you to add or delete or reset the widgets that are displayed in the tab. You can also change the widget layout in the tab.To save the tab as the default tab, select.![]() Export and Import tabs.
Export and Import tabs.- Select the tab, and click the pencil icon next to the tab name, to edit the tab.Select theicon to export the current tab as a .txt file. You can share this .txt file with another administrator.
![]() To import the tab as a new tab on another firewall, select theicon along the list of tabs, and add a name and click the import icon, browse to select the .txt file.
To import the tab as a new tab on another firewall, select theicon along the list of tabs, and add a name and click the import icon, browse to select the .txt file.![]()
![]() See what widgets are included in a tab.
See what widgets are included in a tab.- Select the tab, and click on the pencil icon to edit it.Select the Add Widget drop-down and verify the widgets that have the check boxes selected.Add a widget or a widget group.
- Add a new tab or edit a predefined tab.Select Add Widget, and then select the check box that corresponds to the widget you want to add. You can select up to a maximum of 12 widgets.(Optional) To create a 2-column layout, select Add Widget Group. You can drag and drop widgets into the 2-column display. As you drag the widget into the layout, a placeholder will display for you to drop the widget.You cannot name a widget group.Delete a tab or a widget group/ widget.
- To delete a custom tab, select the tab and click the X icon.
![]() You cannot delete a predefined tab.To delete a widget group/widget, edit the tab and in the workspace section, click the [X] icon on the right. You cannot undo a deletion.Reset the default widgets in a tab.On a predefined tab, such as the Blocked Activity tab, you can delete one or more widgets. If you want to reset the layout to include the default set of widgets for the tab, edit the tab and click Reset View.Zoom in on the details in an area, column, or line graph.Watch how the zoom-in capability works.Click and drag an area in the graph to zoom in. For example, when you zoom into a line graph, it triggers a re-query and the firewall fetches the data for the selected time period. It is not a mere magnification.Use the table drop-down to find more information on an attribute.
You cannot delete a predefined tab.To delete a widget group/widget, edit the tab and in the workspace section, click the [X] icon on the right. You cannot undo a deletion.Reset the default widgets in a tab.On a predefined tab, such as the Blocked Activity tab, you can delete one or more widgets. If you want to reset the layout to include the default set of widgets for the tab, edit the tab and click Reset View.Zoom in on the details in an area, column, or line graph.Watch how the zoom-in capability works.Click and drag an area in the graph to zoom in. For example, when you zoom into a line graph, it triggers a re-query and the firewall fetches the data for the selected time period. It is not a mere magnification.Use the table drop-down to find more information on an attribute.- Hover over an attribute in a table to see the drop-down.Click into the drop-down to view the available options.
- Global Find—Use Global Find to Search the Firewall or Panorama Management Server for references to the attribute (username/IP address, object name, policy rule name, threat ID, or application name) anywhere in the candidate configuration.
- Value—Displays the details of the threat ID, or application name, or address object.
- Who Is—Performs a domain name (WHOIS) lookup for the IP address. The lookup queries databases that store the registered users or assignees of an Internet resource.
- Search HIP Report—Uses the username or IP address to find matches in a HIP Match report.
Set a widget filter.You can also click an attribute in the table (below the graph) to apply it as a widget filter.- Select a widget and click theicon.
![]() Click theicon to add the filters you want to apply.
Click theicon to add the filters you want to apply.![]() Click Apply. These filters are persistent across reboots.The active widget filters are indicated next to the widget name.Negate a widget filter
Click Apply. These filters are persistent across reboots.The active widget filters are indicated next to the widget name.Negate a widget filter- Click theicon to display the Setup Local Filters dialog.
![]() Add a filter, and then click thenegate icon.
Add a filter, and then click thenegate icon.![]() Set a global filter from a table.Hover over an attribute in the table below the chart and click the arrow icon to the right of the attribute.
Set a global filter from a table.Hover over an attribute in the table below the chart and click the arrow icon to the right of the attribute.![]() Set a global filter using the Global Filters pane.Watch global filters in action.
Set a global filter using the Global Filters pane.Watch global filters in action.- Locate the Global Filters pane on the left side of the ACC.
![]() Click theicon to view the list of filters you can apply.
Click theicon to view the list of filters you can apply.![]() Promote a widget filter to a global filter.
Promote a widget filter to a global filter.- On any table in a widget, click the link for an attribute. This sets the attribute as a widget filter.To promote the filter to be a global filter, select the arrow to the right of the filter.
![]() Remove a filter.Click theicon to remove a filter.
Remove a filter.Click theicon to remove a filter.![]()
- For global filters: It is located in the Global Filters pane.
- For widget filters: Click the icon to display the Setup Local Filters dialog, then select the filter, and click the
![]() icon.
icon.![]()
Clear all filters.- For global filters: Click the Clear All button under Global Filters.
- For widget filters: Select a widget and click the icon. Then click the Clear All button in the Setup Local Filters dialog.
![]()
See what filters are in use.- For global filters: The number of global filters applied are displayed on the left pane under Global Filters.
- For widget filters: The number of widget filters applied on
a widget are displayed next to the widget name. To view the filters,
click the icon.
![]()
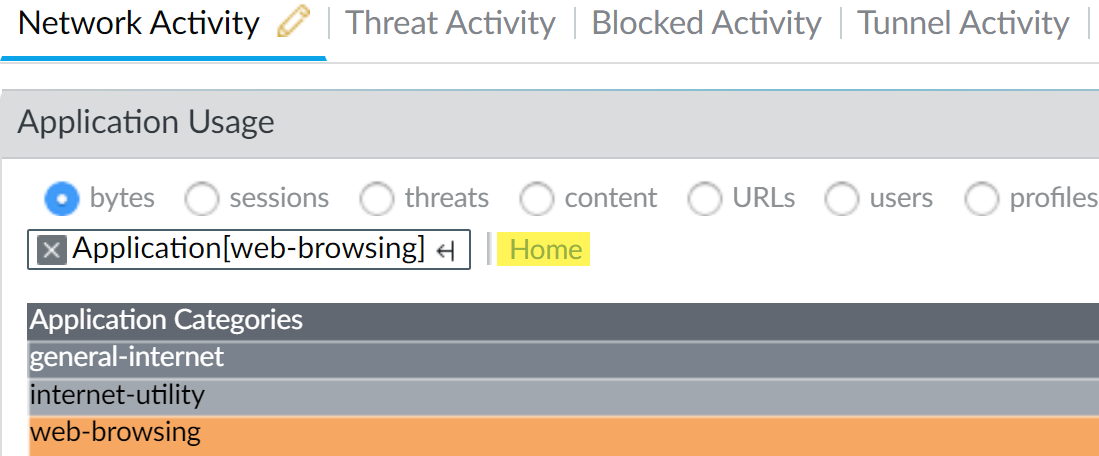
Reset the display on a widget.- If you set a widget filter or drill into a graph, click the Home link to reset the display in the widget.
![]()