Prisma Access
Integrate Prisma Access with Citrix SD-WAN (Strata Cloud Manager)
Table of Contents
Expand All
|
Collapse All
Prisma Access Docs
-
- 6.1 Preferred and Innovation
- 6.0 Preferred and Innovation
- 5.2 Preferred and Innovation
- 5.1 Preferred and Innovation
- 5.0 Preferred and Innovation
- 4.2 Preferred
- 4.1 Preferred
- 4.0 Preferred
- 3.2 Preferred and Innovation
- 3.1 Preferred and Innovation
- 3.0 Preferred and Innovation
- 2.2 Preferred
-
-
- 4.0 & Later
- Prisma Access China
-
-
Integrate Prisma Access with Citrix SD-WAN (Strata Cloud Manager)
To configure the Citrix SD-WAN remote network tunnel in Prisma Access and in Citrix,
use the following workflow.
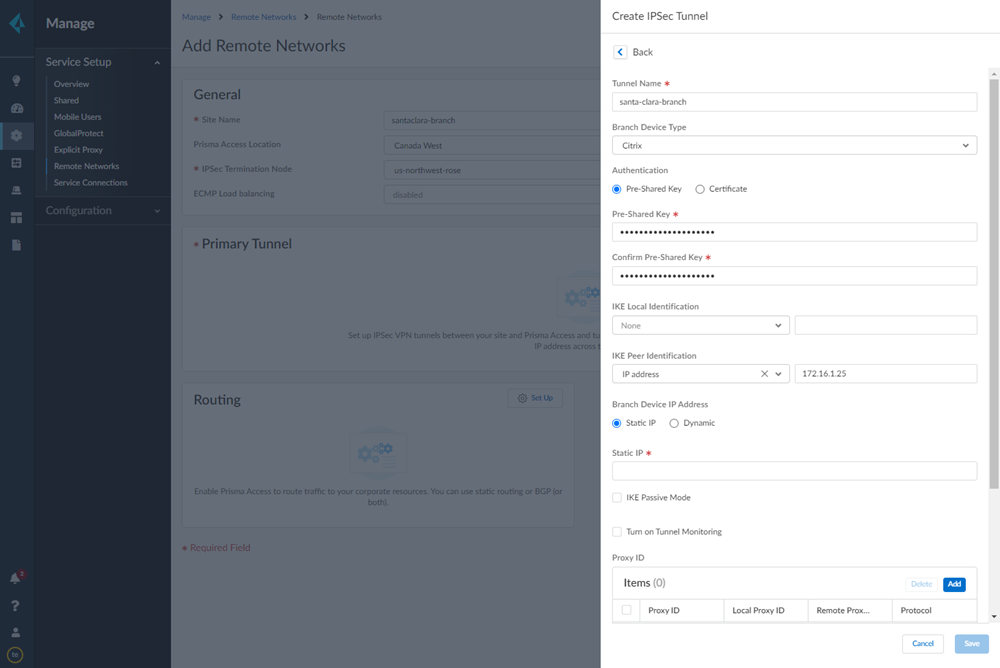
- Follow the steps to Connect a remote network to Prisma Access.
- Choose a Prisma Access Location that is close to the remote network location that you want to onboard.
- When creating the IPSec tunnel, use a Branch Device Type of Citrix.
- Specify an IKE Peer Identification of IP Address and enter the Citrix SD-WAN Public IP address.
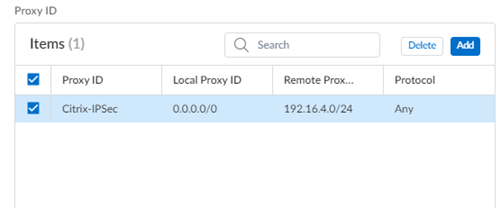
![]() Add a Proxy ID for the Citrix peer to allow traffic from the Citrix SD-WAN through the tunnel. For the Local entry, use the Destination IP/Prefix that you configure on the Citrix side in a later task (in this case, 0.0.0.0). For the Remote entry, use the Source IP/Prefix that you configure on the Citrix side in a later task.The Local route of 0.0.0.0/0 means that all traffic (including internet traffic) from the Citrix SD-WAN that matches the remote subnet address (172.16.4.0/24 in this example) is protected by Prisma Access.
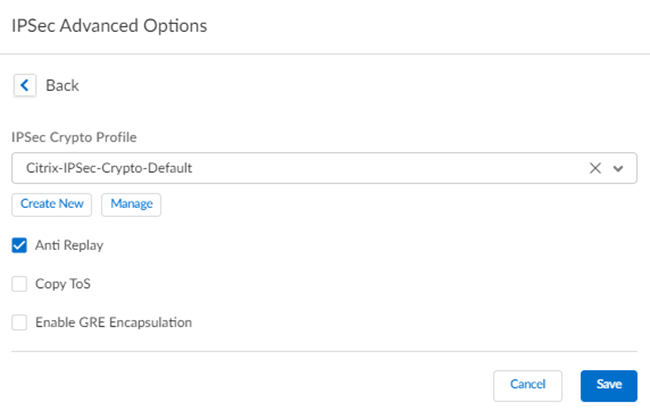
Add a Proxy ID for the Citrix peer to allow traffic from the Citrix SD-WAN through the tunnel. For the Local entry, use the Destination IP/Prefix that you configure on the Citrix side in a later task (in this case, 0.0.0.0). For the Remote entry, use the Source IP/Prefix that you configure on the Citrix side in a later task.The Local route of 0.0.0.0/0 means that all traffic (including internet traffic) from the Citrix SD-WAN that matches the remote subnet address (172.16.4.0/24 in this example) is protected by Prisma Access.![]() Select IPSec Advanced Options and select an IPSec Crypto profile of Citrix-IPSec-Crypto-Default.
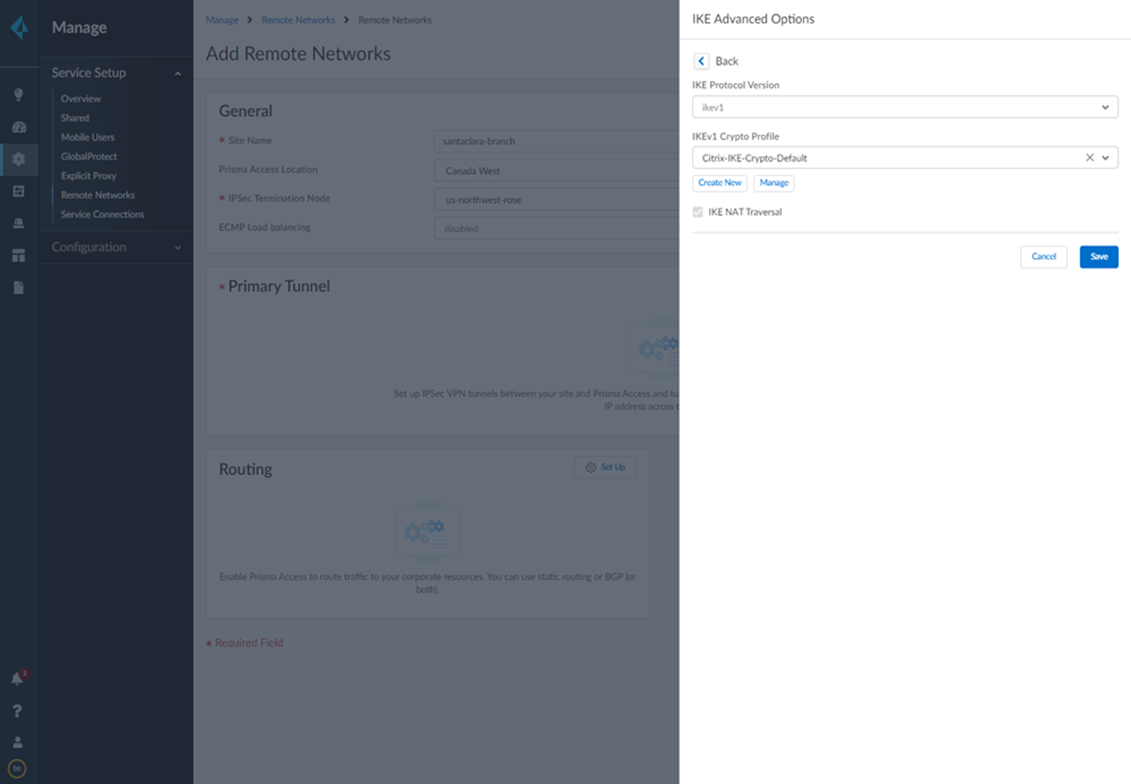
Select IPSec Advanced Options and select an IPSec Crypto profile of Citrix-IPSec-Crypto-Default.![]() Select IKE Advanced Options and select an IKEv1 crypto profile of Citrix-IKE-Crypto-Default.
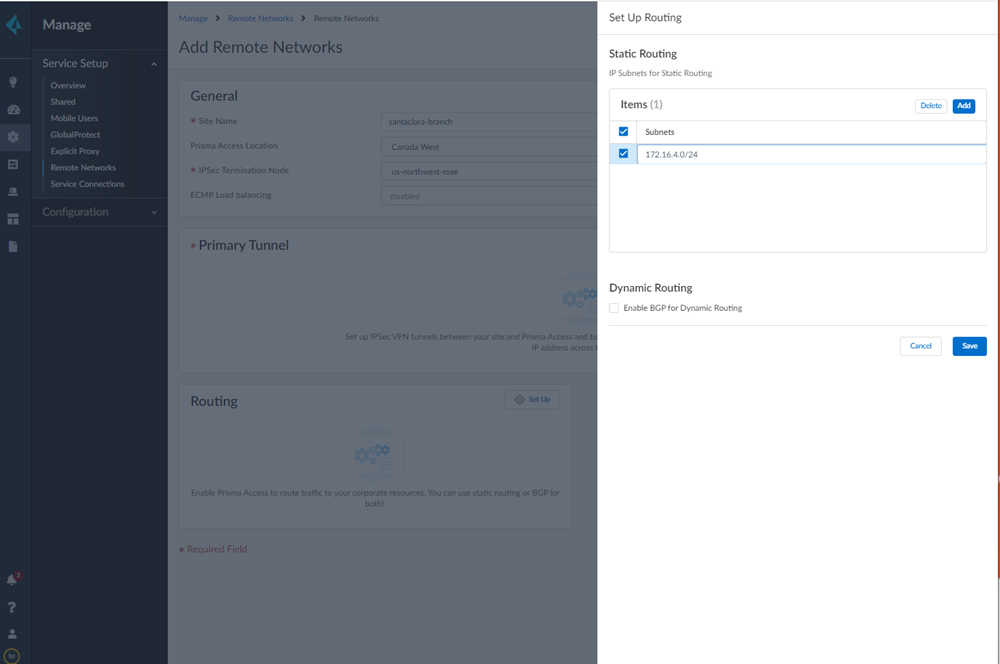
Select IKE Advanced Options and select an IKEv1 crypto profile of Citrix-IKE-Crypto-Default.![]() Set up routing for the remote network.Set Up Routing and Add the IP subnets for Static Routing.Add a Branch IP Subnet.Choose Static Routing and Add a subnet you have reserved for this remote network connection.
Set up routing for the remote network.Set Up Routing and Add the IP subnets for Static Routing.Add a Branch IP Subnet.Choose Static Routing and Add a subnet you have reserved for this remote network connection.![]() Push your configuration changes.
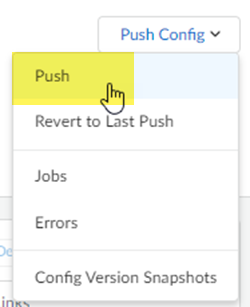
Push your configuration changes.- Return to ConfigurationNGFW and Prisma AccessConfiguration ScopePrisma AccessRemote Networks and select Push ConfigPush.
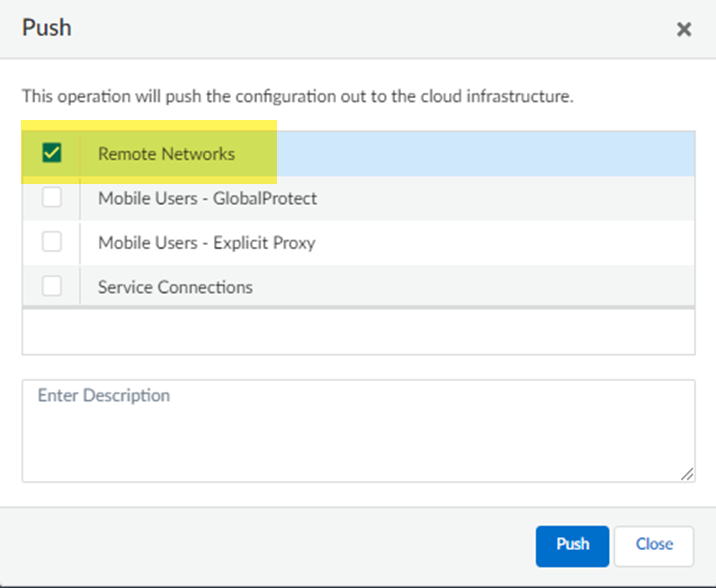
![]() Select Remote Networks.
Select Remote Networks.![]() Push your changes.Make a note of the Service IP of the Prisma Access side of the tunnel. To find this address in Prisma Access (Managed by Strata Cloud Manager), select ConfigurationNGFW and Prisma AccessConfiguration ScopePrisma AccessRemote Networks, click the Remote Networks. Look for the Service IP field corresponding to the remote network configuration you created.Log in to the Citrix SD-WAN web interface, select ConnectionSiteIPsec Tunnels.Choose a Service Type (LAN or Intranet).
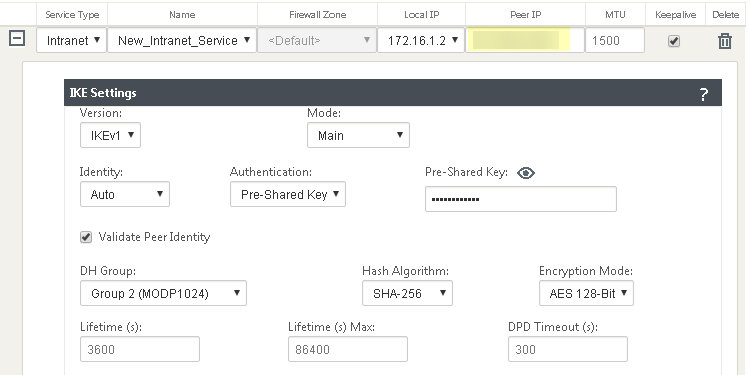
Push your changes.Make a note of the Service IP of the Prisma Access side of the tunnel. To find this address in Prisma Access (Managed by Strata Cloud Manager), select ConfigurationNGFW and Prisma AccessConfiguration ScopePrisma AccessRemote Networks, click the Remote Networks. Look for the Service IP field corresponding to the remote network configuration you created.Log in to the Citrix SD-WAN web interface, select ConnectionSiteIPsec Tunnels.Choose a Service Type (LAN or Intranet).![]() Enter a Name for the service type.Select the available Local IP address.If you specified a service type of Intranet, the configured Intranet server determines which Local IP addresses are available.In the Peer IP field, specify the Service IP that you noted when you configured the remote network in Prisma Access.
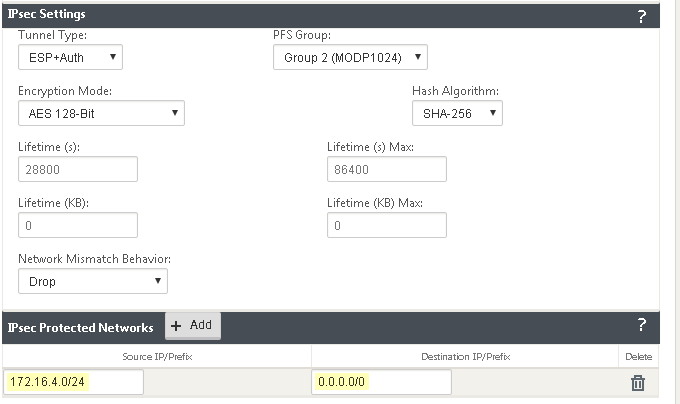
Enter a Name for the service type.Select the available Local IP address.If you specified a service type of Intranet, the configured Intranet server determines which Local IP addresses are available.In the Peer IP field, specify the Service IP that you noted when you configured the remote network in Prisma Access.![]() Specify the IKE and IPSec parameters, matching the parameters you specified in Prisma Access.Note the Source IP/Prefix and Destination IP/Prefix values; those values should match the Remote and Local values, respectively, that you configured for the Proxy ID in Prisma Access.
Specify the IKE and IPSec parameters, matching the parameters you specified in Prisma Access.Note the Source IP/Prefix and Destination IP/Prefix values; those values should match the Remote and Local values, respectively, that you configured for the Proxy ID in Prisma Access.![]() Click Apply.
Click Apply.Troubleshoot the Citrix SD-WAN Remote Network
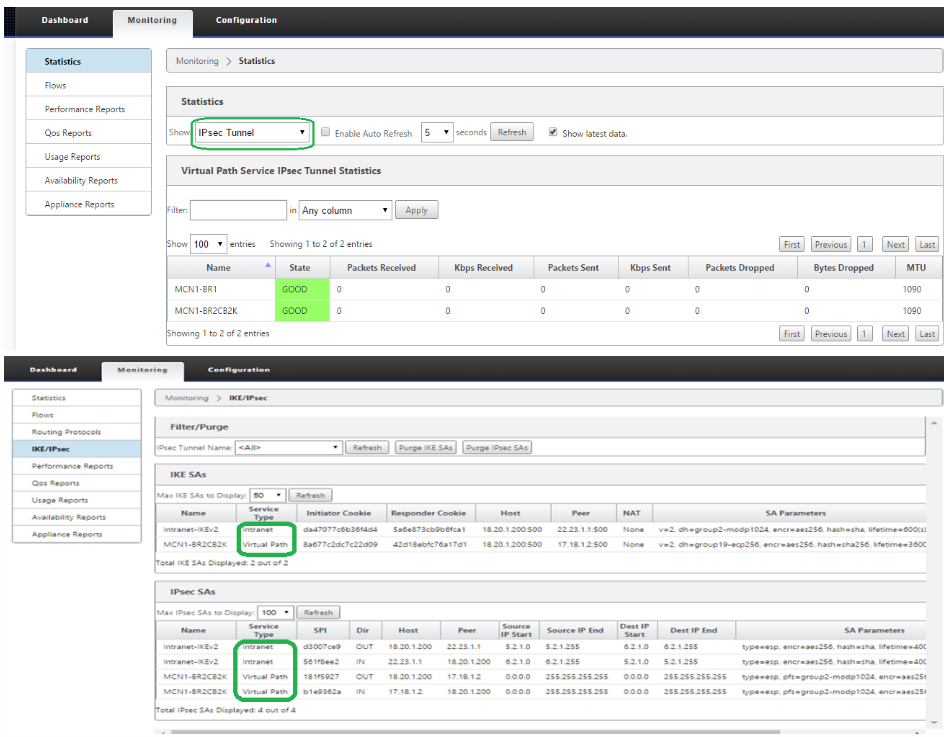
To monitor and troubleshoot IPSec tunnels on the Citrix side of the tunnel, open the Citrix SD-WAN web interface and select MonitoringStatistics and MonitoringIKE/IPSec.![]() In addition, Prisma Access provides logs and widgets that provide you with the status of remote tunnels and the status of each tunnel.
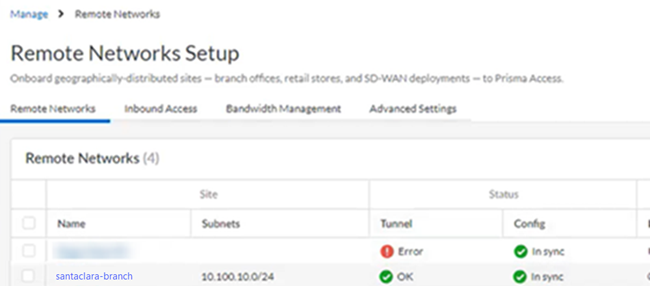
In addition, Prisma Access provides logs and widgets that provide you with the status of remote tunnels and the status of each tunnel.- Go to ConfigurationNGFW and Prisma AccessConfiguration ScopePrisma AccessRemote Networks and check the Status of the tunnel.
![]()
- Go to ActivityLog Viewer and check the Common/System logs for IPSec- and IKE-related messages.To view VPN-relates messages, set the filter to sub_type.value = vpn.The message ignoring unauthenticated notify payload indicates that the route has not been added in the crypto map on the other side of the IPSec tunnel after the IPSec negotiation has already occurred.
![]()
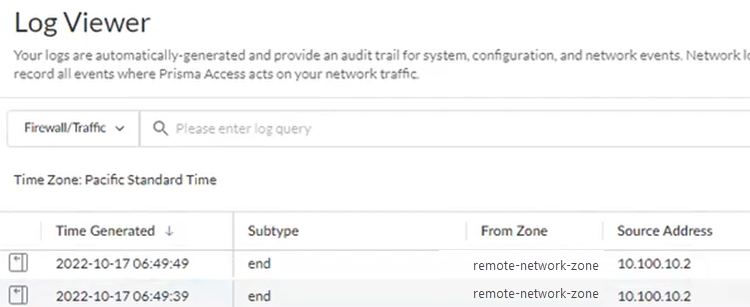
- Check the Firewall/Traffic logs and view the messages that are coming from the zone that has the same name as the remote network.In the logs, the remote network name is used as the source zone.
![]()

