Prisma Access
Configure Mobile Users without Cloud Identity Engine (Strata Cloud Manager)
Table of Contents
Expand All
|
Collapse All
Prisma Access Docs
-
- 6.1 Preferred and Innovation
- 6.0 Preferred and Innovation
- 5.2 Preferred and Innovation
- 5.1 Preferred and Innovation
- 5.0 Preferred and Innovation
- 4.2 Preferred
- 4.1 Preferred
- 4.0 Preferred
- 3.2 Preferred and Innovation
- 3.1 Preferred and Innovation
- 3.0 Preferred and Innovation
- 2.2 Preferred
-
-
- 4.0 & Later
- Prisma Access China
-
-
Configure Mobile Users without Cloud Identity Engine (Strata Cloud Manager)
This procedure assumes that you have a Microsoft Entra ID (formerly Azure Active Directory (Azure AD)) account, can create and
modify enterprise applications, can set up a SAML Service Provider in Microsoft Entra ID, and
can download SAML metadata XML files in Azure.
- Log in to Microsoft Entra ID and open the enterprise application for either GlobalProtect or Explicit Proxy, depending on the deployment type.GlobalProtect has its own app in Microsoft Entra ID; for Explicit Proxy, Palo Alto Networks does not have an existing enterprise application for Explicit Proxy and you must create one.Palo Alto Networks does not control your Microsoft Entra ID setup and the UI might be different than these examples. For more information, refer to the Microsoft Azure documentation.
-
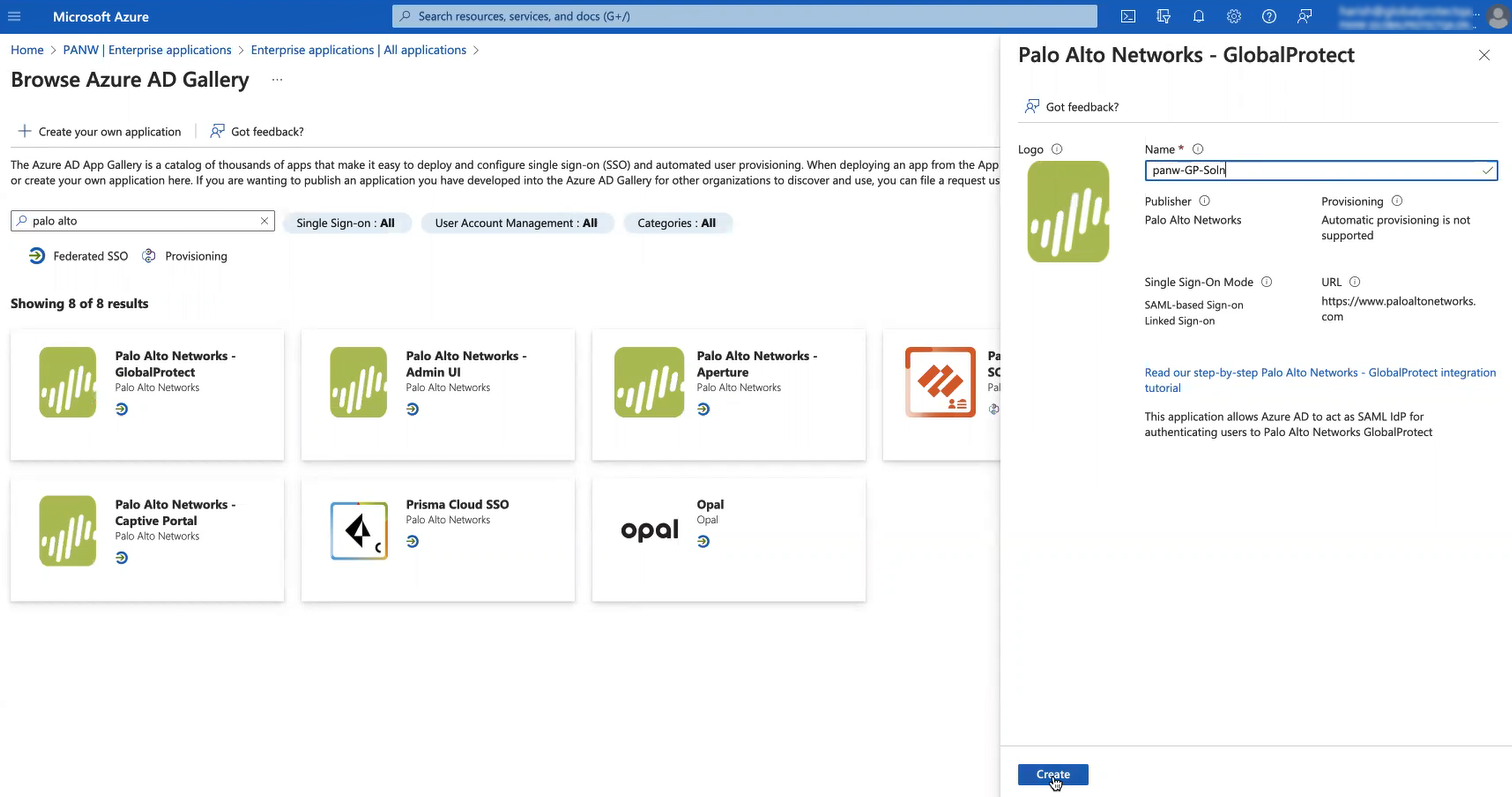
GlobalProtect Deployments—Select HomeEnterprise Applications; then, search for Palo Alto Networks - GlobalProtect and select the Palo Alto Networks - GlobalProtect application. Rename the application if required.
![]()
-
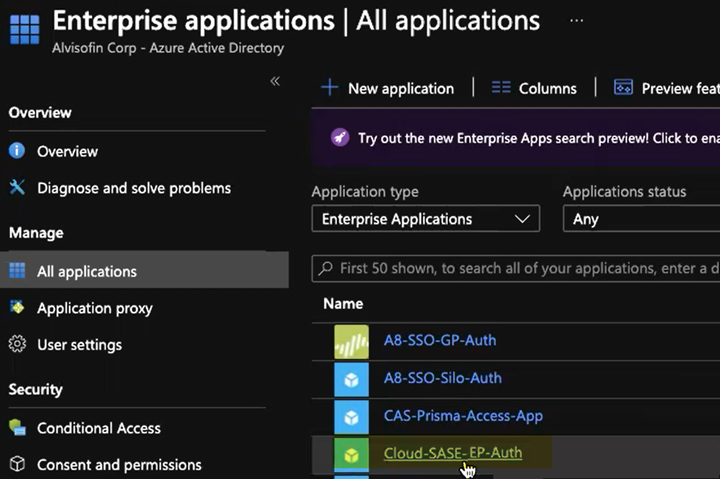
Explicit Proxy Deployments—Select HomeEnterprise Applications and create a New application; then, select Create your own application, give it a Name, select Integrate any other application you don’t find in the gallery, and Create it.
![]() After you create the application, select it.
After you create the application, select it.![]()
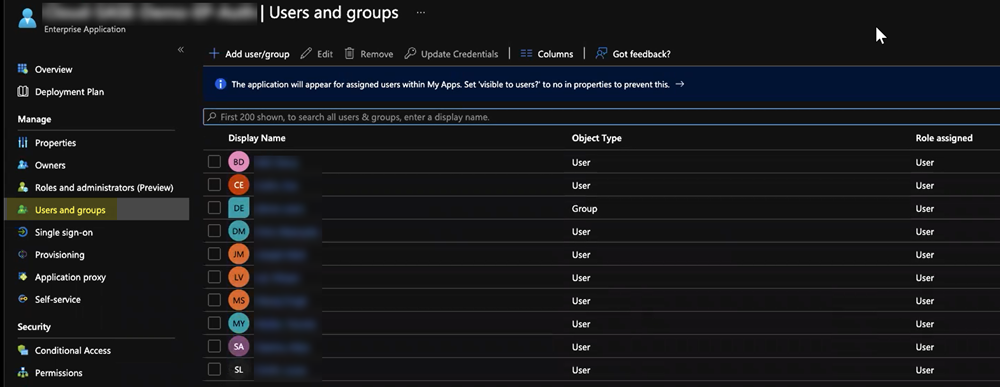
Set up the Microsoft Entra ID application.- Assign Users and groups and Add user/group that require the Microsoft Entra ID authentication.Alternatively, you can select Users and groups from the left navigation pane to Add user/group.
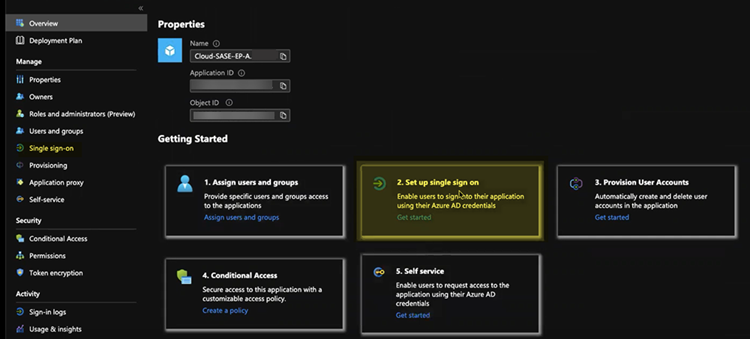
![]() Select Set up single sign on from the button or select Single sign on from the left navigation pane.In the Basic SAML Configuration area, click Edit.
Select Set up single sign on from the button or select Single sign on from the left navigation pane.In the Basic SAML Configuration area, click Edit.![]()
![]() Enter the parameters for your Explicit Proxy or GlobalProtect deployment.
Enter the parameters for your Explicit Proxy or GlobalProtect deployment.- Mobile Users—GlobalProtect Deployments—Enter the following parameters:
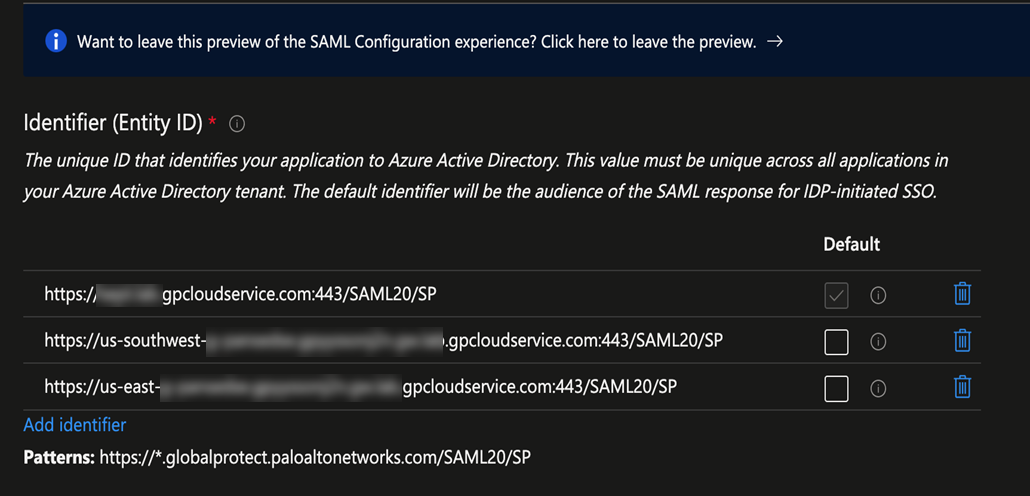
- In the Identifier (Entity ID) area, enter a URL of https://portal-name:443/SAML20/SP, where portal-name is the Mobile Users—GlobalProtect portal name (in Prisma Access select ConfigurationNGFW and Prisma AccessConfiguration ScopePrisma AccessGlobalProtect), and select that as the Default entity ID.
![]() In addition, enter all gateway names in the format of https://gateway-name:443/SAML20/SP.
In addition, enter all gateway names in the format of https://gateway-name:443/SAML20/SP.![]() If you are configuring a standalone GlobalProtect deployment, you can use either the FQDN or IP address of the GlobalProtect portal as the portal-name.
If you are configuring a standalone GlobalProtect deployment, you can use either the FQDN or IP address of the GlobalProtect portal as the portal-name. - In the Reply URL (Assertion Consumer Service URL), re-enter the portal and gateway names, appending ACS to the URL names (https://portal-name:443/SAML20/SP/ACS and https://gateway-name:443/SAML20/SP/ACS, respectively). Specify the portal name as the default.
- Explicit Proxy Deployments—Enter the following parameters:
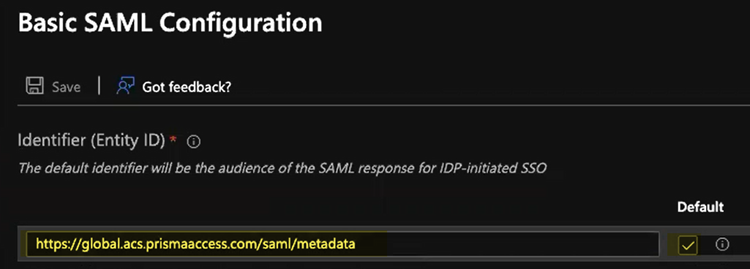
- In the Identifier (Entity ID) area, enter an Entity ID of https://ACS URL/saml/metadata, where the ACS URL is explicit proxy mobile users name (in Prisma Access, select ConfigurationNGFW and Prisma AccessConfiguration ScopePrisma AccessExplicit Proxy) and select that as the Default identifier.
![]()
- In the Reply URL (Assertion Consumer Service URL), enter a SAML Assertion Consumer Service URL of https://global.acs.prismaaccess.com/saml/acs and select that as the Default entity ID.
![]()
- Use https://global.acs.prismaaccess.com/saml/acs as the Sign on URL.
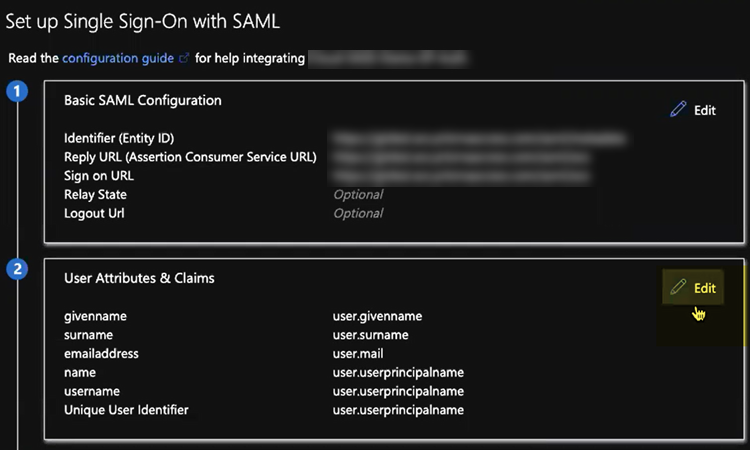
In the Set Up Single Sign-On with SAML pane, select Edit in the User Attributes & Claims area.![]() Enter the following values:
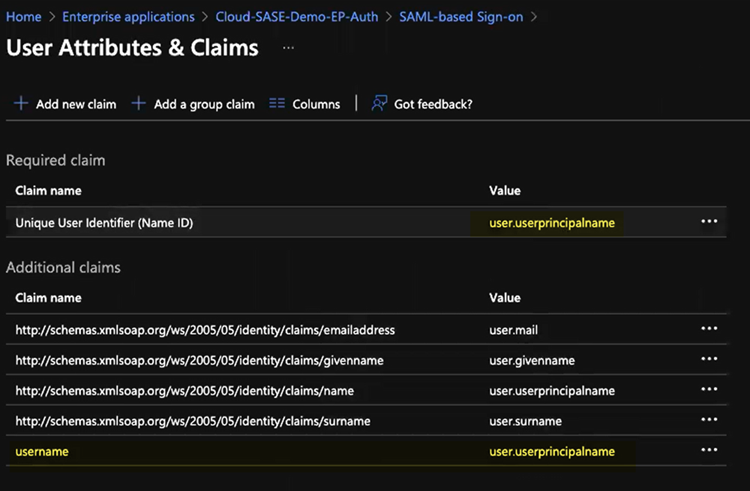
Enter the following values:- Enter user.userprincipalname as the Unique User Identifier (Name ID).
- In the Additional Claims area, add a Claim Name of username and a Value of user.userprincipalname.You must add this claim to ensure correct username-to-IP address mapping for authenticated users.
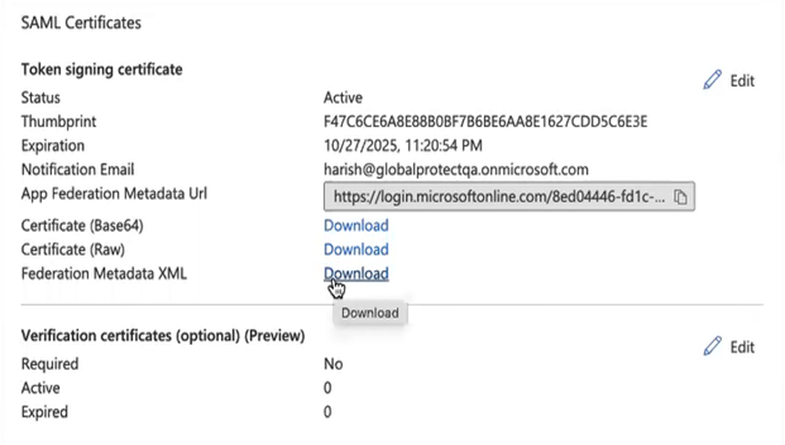
![]() Export the metadata XML file from Microsoft Entra ID and save it to a client system from which you can upload it to Prisma Access by clicking Download in the Federation Metadata XML area.Prisma Access requires this XML file to retrieve the correct SAML attributes from Microsoft Entra ID. You upload the file when you create the SAML IdP profile in Prisma Access.
Export the metadata XML file from Microsoft Entra ID and save it to a client system from which you can upload it to Prisma Access by clicking Download in the Federation Metadata XML area.Prisma Access requires this XML file to retrieve the correct SAML attributes from Microsoft Entra ID. You upload the file when you create the SAML IdP profile in Prisma Access.![]() (For GlobalProtect mobile users only) In Prisma Access, configure an authentication profile for Microsoft Entra ID.The profile defines authentication settings that are common to a set of users.
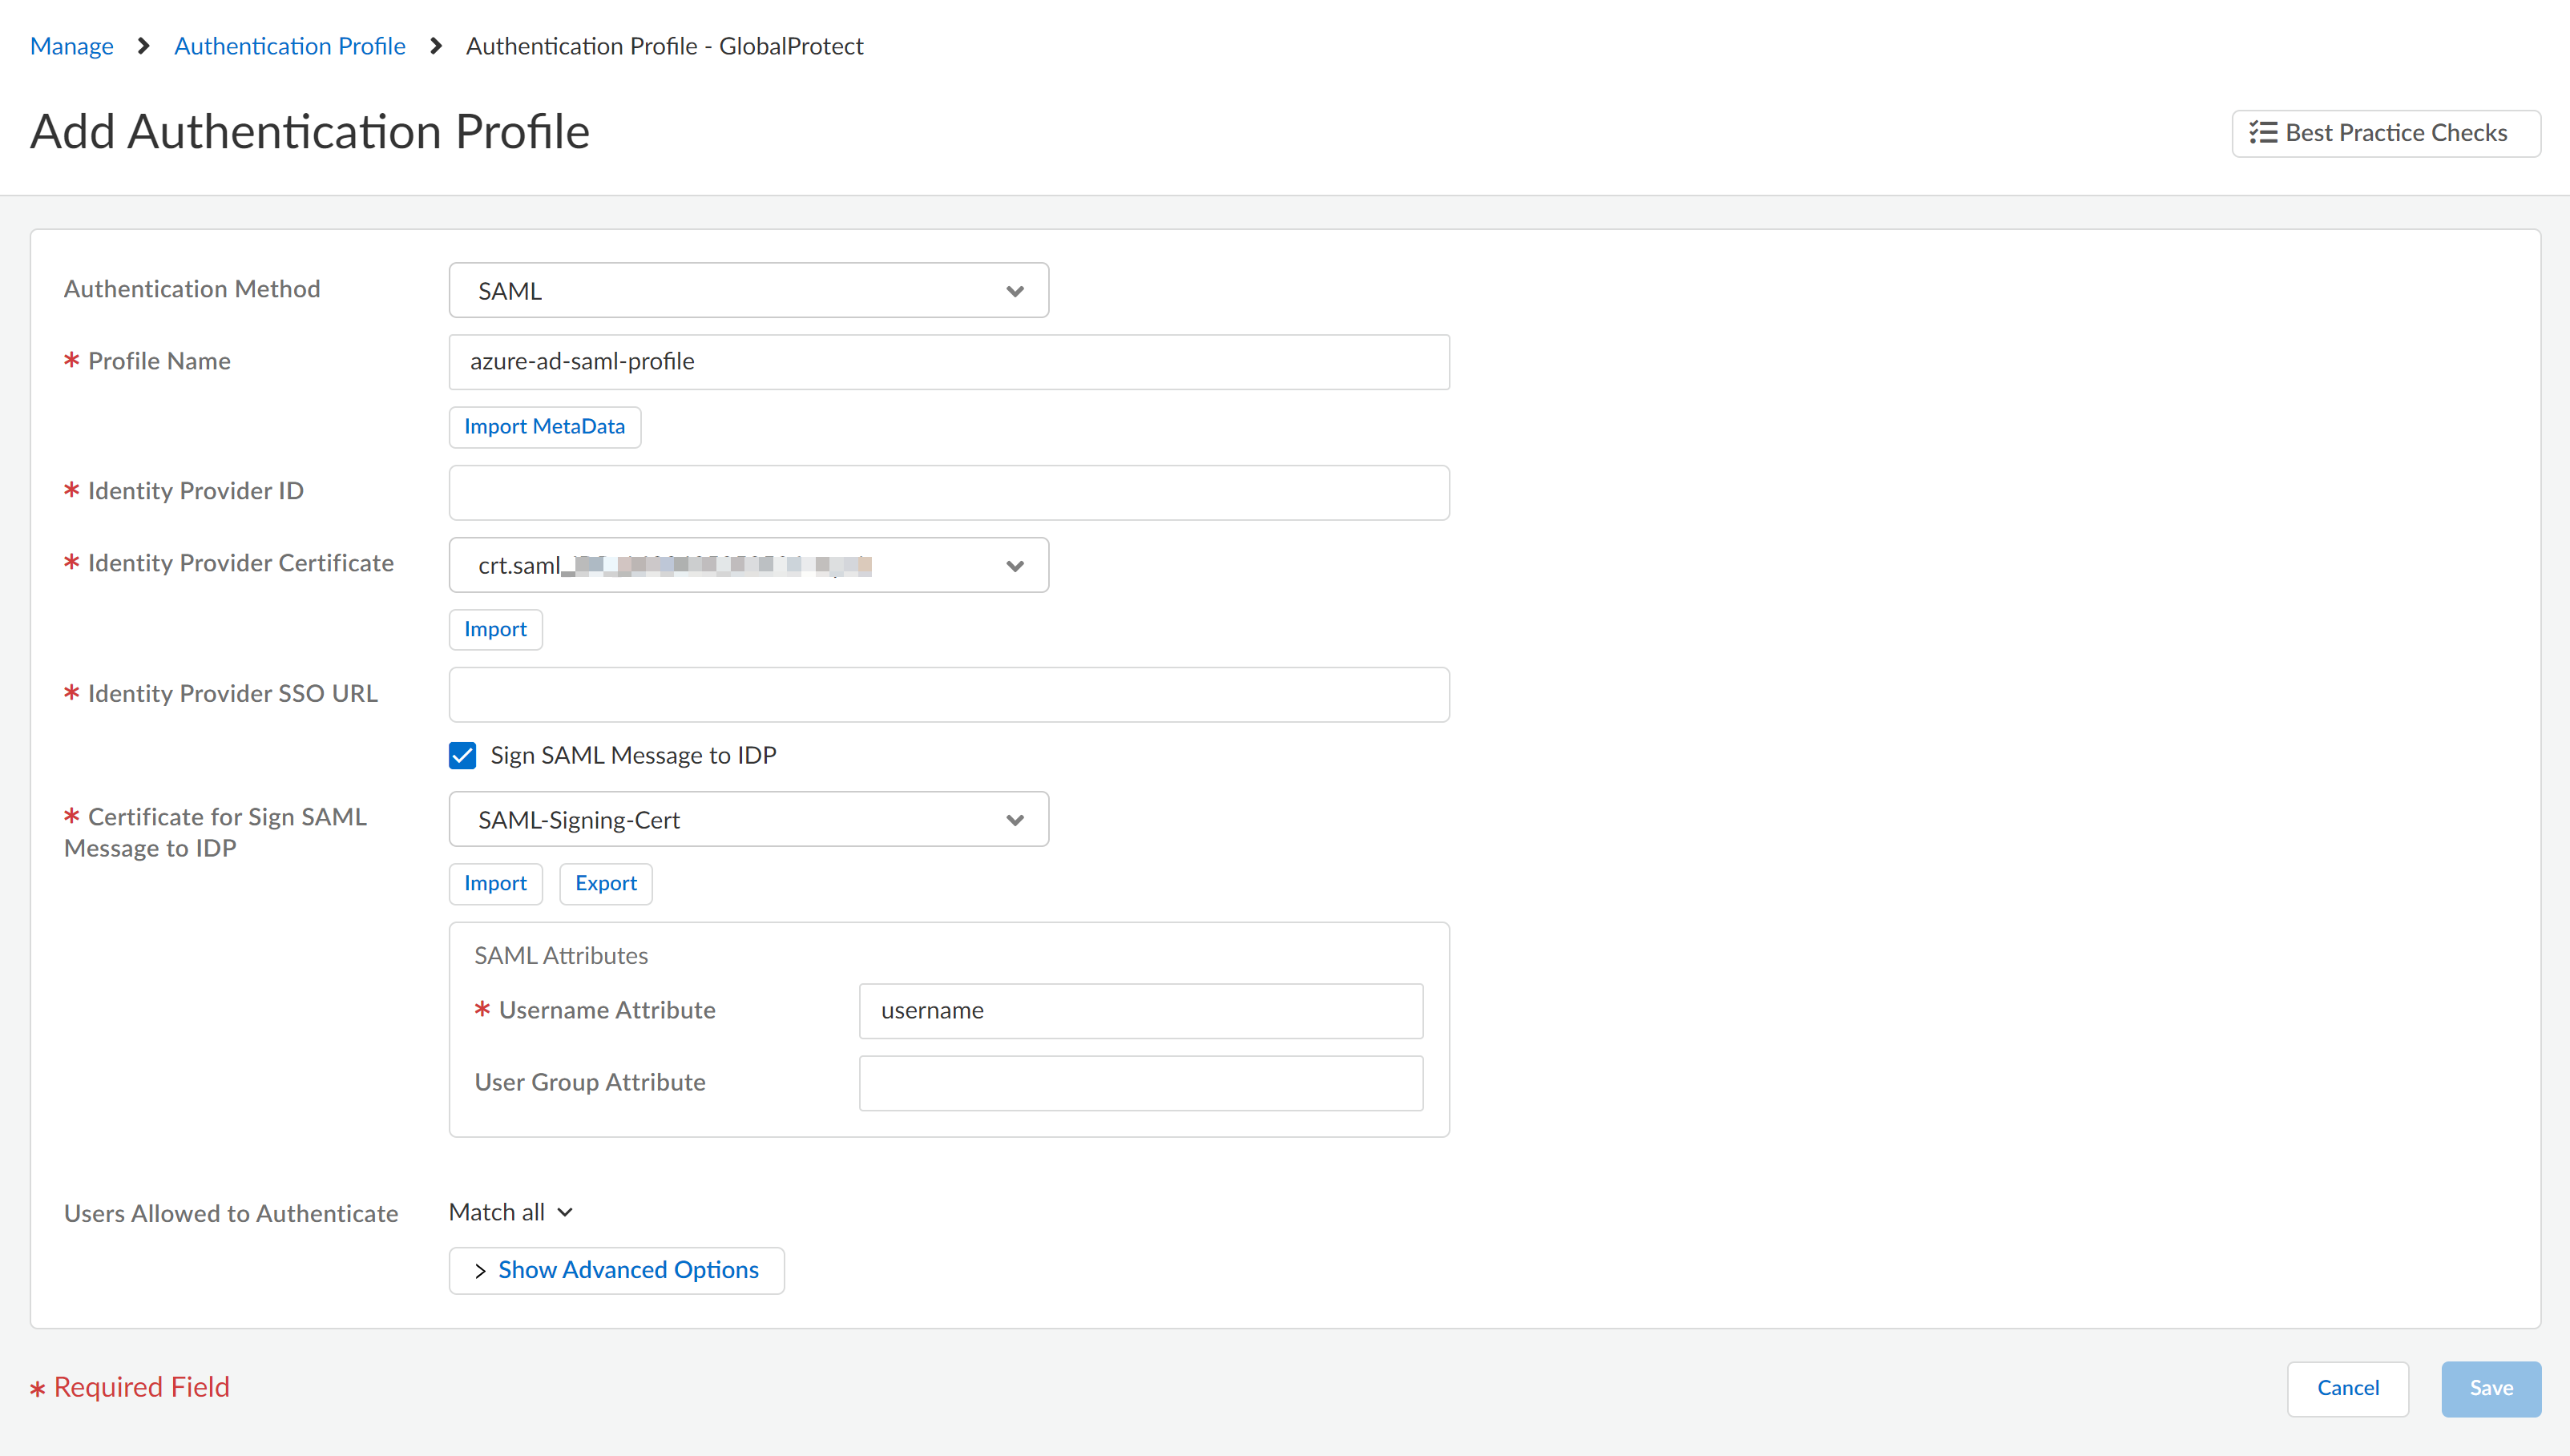
(For GlobalProtect mobile users only) In Prisma Access, configure an authentication profile for Microsoft Entra ID.The profile defines authentication settings that are common to a set of users.- Select ConfigurationNGFW and Prisma AccessIdentity ServicesAuthenticationAuthentication Profiles.Make sure that you are creating the authentication profile for GlobalProtect or explicit proxy mobile users.Add Profile.Select the SAML authentication method.Enter a profile name and Import MetaData that you downloaded in step 3.When you import the metadata, it fills other fields. Save this authentication profile.
![]() Attach the authentication profile to the mobile users.The profile defines authentication settings that are common to a set of users.
Attach the authentication profile to the mobile users.The profile defines authentication settings that are common to a set of users.-
For GlobalProtect mobile users
- Select ConfigurationNGFW and Prisma AccessConfiguration ScopePrisma AccessGlobalProtect and Add Authentication.Enter values.Make sure you select the SAML authentication method and profile you created in step 4.Save the authentication.Move the authentication to the top to prioritize it.
- For explicit proxy mobile users
- Select ConfigurationNGFW and Prisma AccessConfiguration ScopePrisma AccessExplicit Proxy.Edit the User Authentication settings.Import Metadata.Choose file that you downloaded in step 3.Import.Enter a name and Save.Push your changes.Commit and Push your changes.Verify that SAML authentication is working.
- From a mobile user’s endpoint, authenticate from a supported browser.
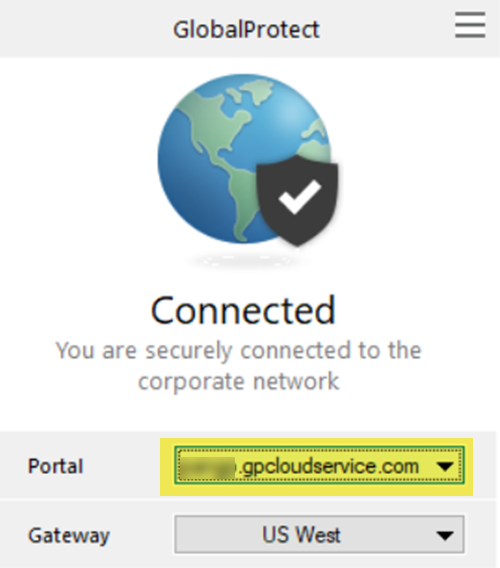
- GlobalProtect Deployments—Open the GlobalProtect app to find the GlobalProtect Portal; then, enter the portal URL in a supported browser.
![]()
- Explicit Proxy Deployments—Navigate from a supported browser to a website that is protected by Explicit Proxy.
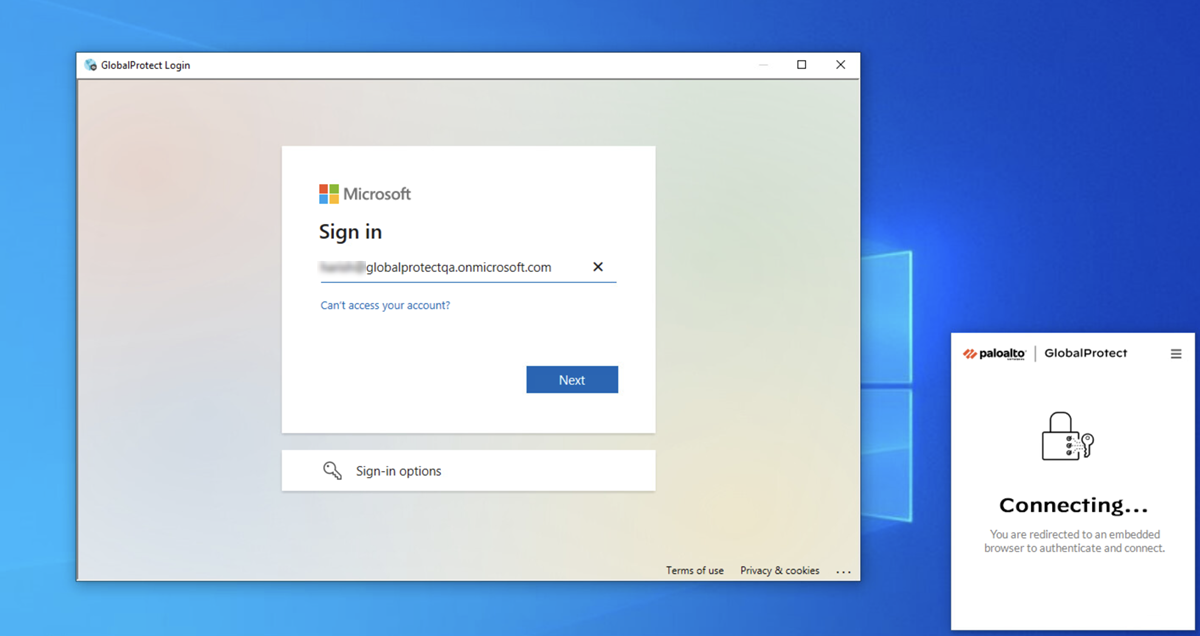
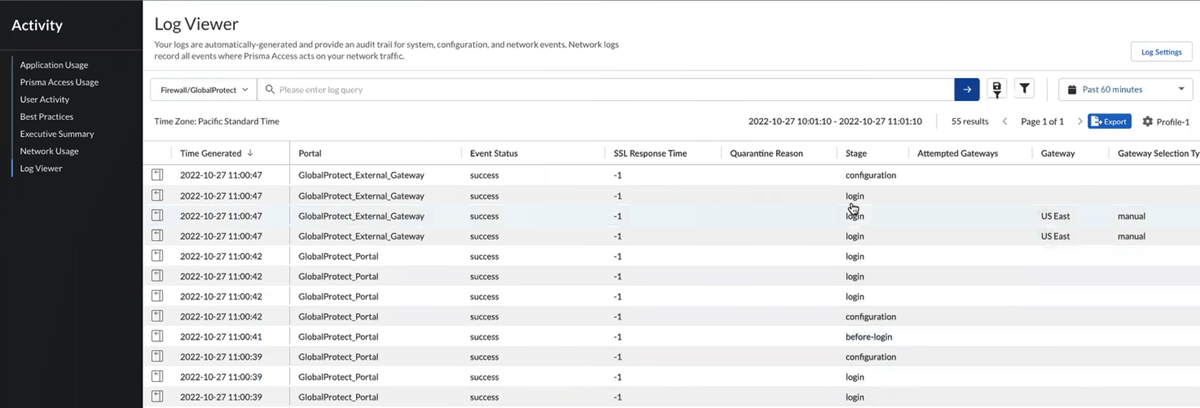
When you are challenged for authentication, verify that you are redirected to Microsoft Entra ID and are presented with a login page.After you successfully authenticate to Microsoft Entra ID, Microsoft Entra ID redirects you to Prisma Access. Prisma Access then validates the SAML responses from Microsoft Entra ID and the mobile user should be allowed to visit the website (for Explicit Proxy deployments) or you can successfully log in to the GlobalProtect portal (for GlobalProtect deployments).![]() View the logs and verify that the mobile user’s username is displayed in the Traffic, URL Filtering, and Authentication logs.
View the logs and verify that the mobile user’s username is displayed in the Traffic, URL Filtering, and Authentication logs.![]()
-

