Prisma Access
Integrate Prisma Access with Microsoft Defender for Cloud Apps
Table of Contents
Expand All
|
Collapse All
Prisma Access Docs
-
- 6.1 Preferred and Innovation
- 6.0 Preferred and Innovation
- 5.2 Preferred and Innovation
- 5.1 Preferred and Innovation
- 5.0 Preferred and Innovation
- 4.2 Preferred
- 4.1 Preferred
- 4.0 Preferred
- 3.2 Preferred and Innovation
- 3.1 Preferred and Innovation
- 3.0 Preferred and Innovation
- 2.2 Preferred
-
-
- 4.0 & Later
- Prisma Access China
-
-
Integrate Prisma Access with Microsoft Defender for Cloud Apps
Learn how to integrate Prisma Access with Microsoft Defender for Cloud
Apps.
| Where Can I Use This? | What Do I Need? |
|---|---|
|
|
Integrate Prisma Access with Microsoft Defender for Cloud Apps to sync unsanctioned
applications and block them inline using Prisma Access automatically. After you
integrate Microsoft Defender for Cloud Apps with Prisma Access, Prisma Access
creates a block Security policy for URLs that are blocked in Microsoft Defender for
Cloud Apps. You can view the list of unsanctioned applications after configuring the
integration settings. You can sync up to 25,000 applications in this
integration.
Complete the following steps to integrate Prisma Access with Microsoft Defender for
Cloud Apps:
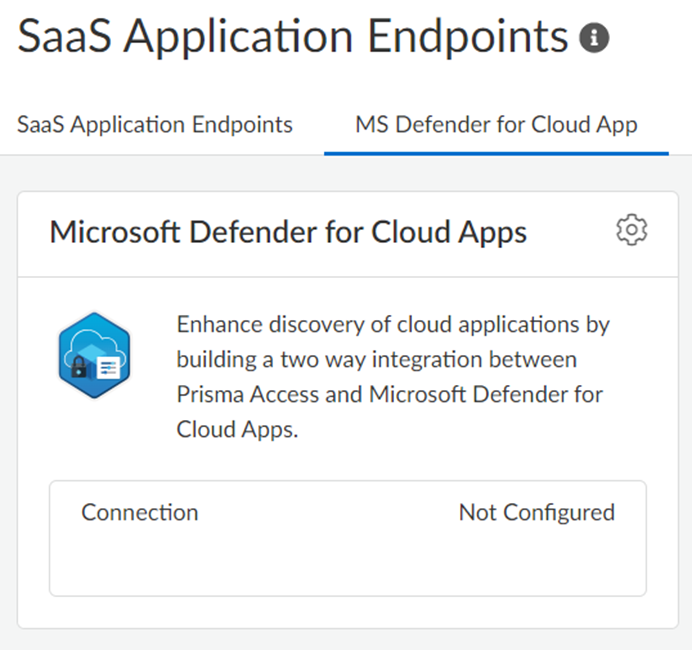
- Enable this functionality.Contact your Palo Alto Networks account representative or partner, who will submit a request.In Strata Cloud Manager, select ConfigurationNGFW and Prisma Access.Set the Configuration Scope to Global, and select Global SettingsSaaS Application Endpoints.Navigate to MS Defender for Cloud Apps.Edit the Microsoft Defender for Cloud Apps settings.
![]()
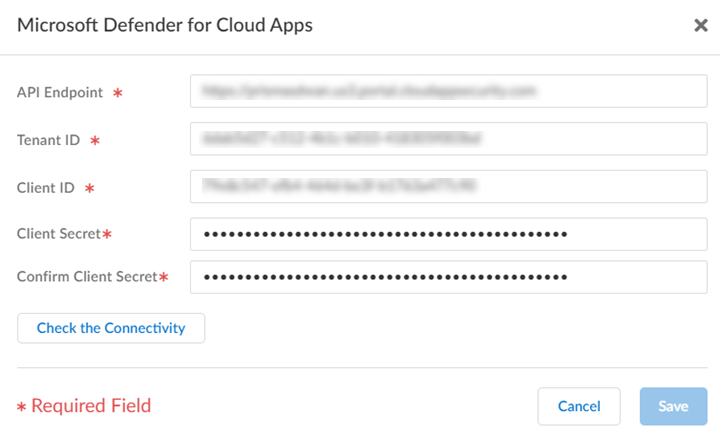
- Enter details in all the required fields.View the Microsoft Defender for Cloud Apps overview to obtain the required details.
![]() Check the Connectivity.
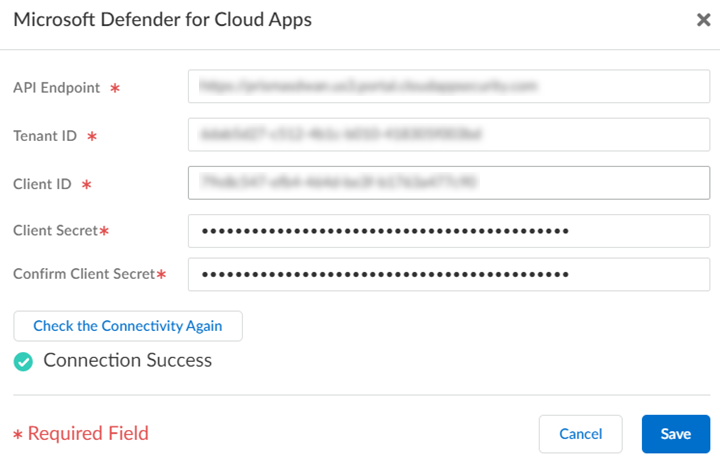
Check the Connectivity.![]() Save the settings after the connection is a success.You can save the settings only after the connection is a success. The integration automatically creates a Security policy and a custom URL category to block the unsanctioned apps.
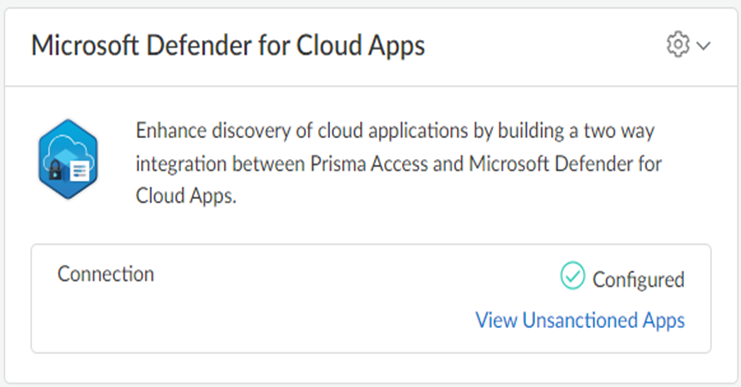
Save the settings after the connection is a success.You can save the settings only after the connection is a success. The integration automatically creates a Security policy and a custom URL category to block the unsanctioned apps.![]() View Unsanctioned Apps.
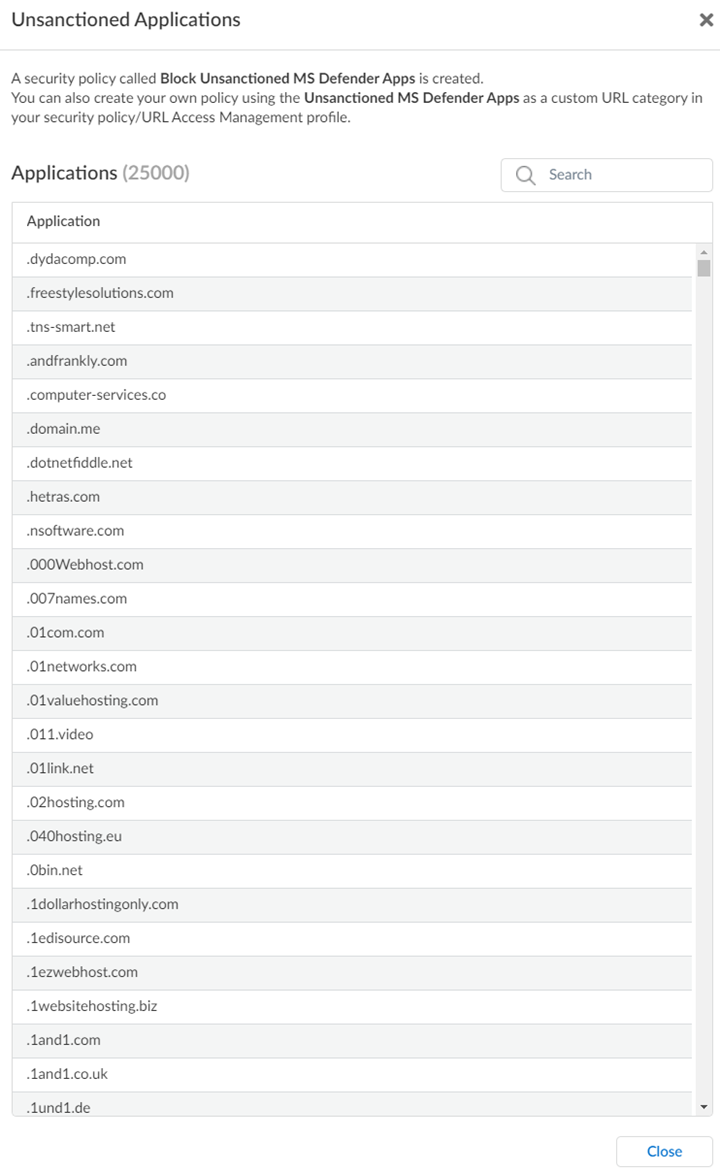
View Unsanctioned Apps.![]() You can view up to 25,000 unsanctioned applications. The latest list of unsanctioned apps appears every time you View Unsanctioned Apps.
You can view up to 25,000 unsanctioned applications. The latest list of unsanctioned apps appears every time you View Unsanctioned Apps.![]() If the list does not appear, reconfigure the integration settings, and check the connectivity again as mentioned in step 5.Enable the Security policy.Prisma Access creates a Security policy after you configure the integration.
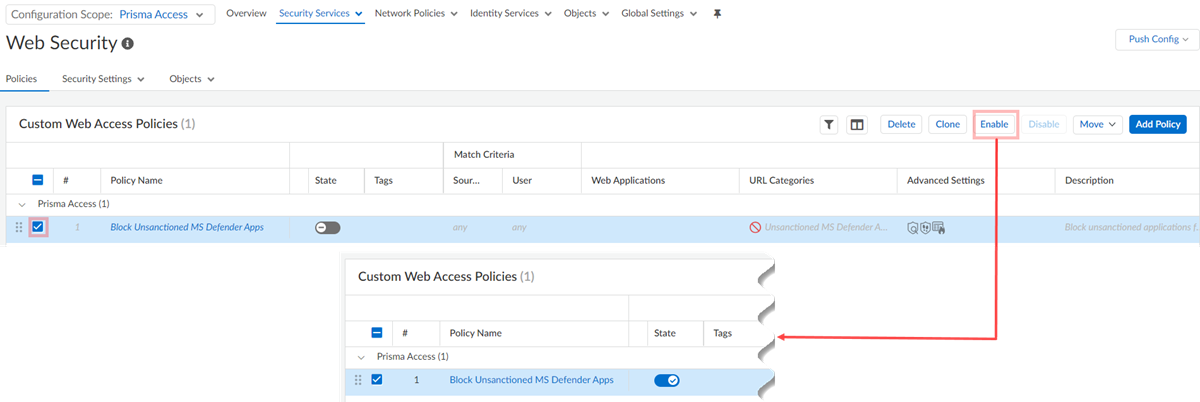
If the list does not appear, reconfigure the integration settings, and check the connectivity again as mentioned in step 5.Enable the Security policy.Prisma Access creates a Security policy after you configure the integration.- Select Security ServicesSecurity Policy.Set the Configuration Scope to Prisma Access.Confirm the Prisma Access web Security policy rules and the pre-rule Security policy rules.A Block Unsanctioned MS Defender Apps web Security policy and pre-rule Security policy, with the same name, are created.
![]()
![]() Prisma Access uses these rules to block the URLs of unsanctioned apps.Select the Security policy rules and Enable them.
Prisma Access uses these rules to block the URLs of unsanctioned apps.Select the Security policy rules and Enable them.![]()
![]() (Optional) Create a Security policy if required and enable it.Select the Unsanctioned MS Defender Apps URL category.Push the changes.(Optional) Customize the Microsoft Defender for Cloud Apps integration settings.
(Optional) Create a Security policy if required and enable it.Select the Unsanctioned MS Defender Apps URL category.Push the changes.(Optional) Customize the Microsoft Defender for Cloud Apps integration settings.- Click the settings and select Customize.
![]() Edit the settings.Check the Connectivity Again.Save the changes.(Optional) Delete the integration.
Edit the settings.Check the Connectivity Again.Save the changes.(Optional) Delete the integration.- Click the settings and select Delete Integration.
![]() Confirm Delete Integration.
Confirm Delete Integration.![]() Delete the Security policy rules created to block the URLs of unsanctioned apps.If you reconfigure the integration, Prisma Access does not create default Security policy rules. However, you can select the Unsanctioned MS Defender Apps URL category for the Security policy rules you create.Push the changes.
Delete the Security policy rules created to block the URLs of unsanctioned apps.If you reconfigure the integration, Prisma Access does not create default Security policy rules. However, you can select the Unsanctioned MS Defender Apps URL category for the Security policy rules you create.Push the changes.![]()

