Prisma SD-WAN
Configure a Layer 3 LAN Interface
Table of Contents
Configure a Layer 3 LAN Interface
Learn to configure a L3 LAN interface in Prisma SD-WAN. The LAN interface's enhanced L3
capabilities allow for simplified topologies and help facilitate an improved branch HA
model.
| Where Can I Use This? | What Do I Need? |
|---|---|
|
|
Prisma SD-WAN extends the capabilities of
the Layer 3 LAN interface to include traffic forwarding. Release 5.1.1
and later enables you to use Layer 3 LAN interfaces for services
such as DHCP Relay, DHCP Server, SNMP
source interface, and so on. The LAN interface's enhanced Layer
3 capabilities allow for simplified topologies and help facilitate an
improved branch HA model. Layer 3 LAN interface can be configured
with a static or dynamic IP address and is used to forward traffic to
and from the LAN. Layer 3 LAN Interface now supports static routing.
When Virtual Routing and Forwarding tables (VRF) is configured
on a sub-interface:
- Select LAN type interface for branch sites.
- Select Peer with the Network for data center sites.
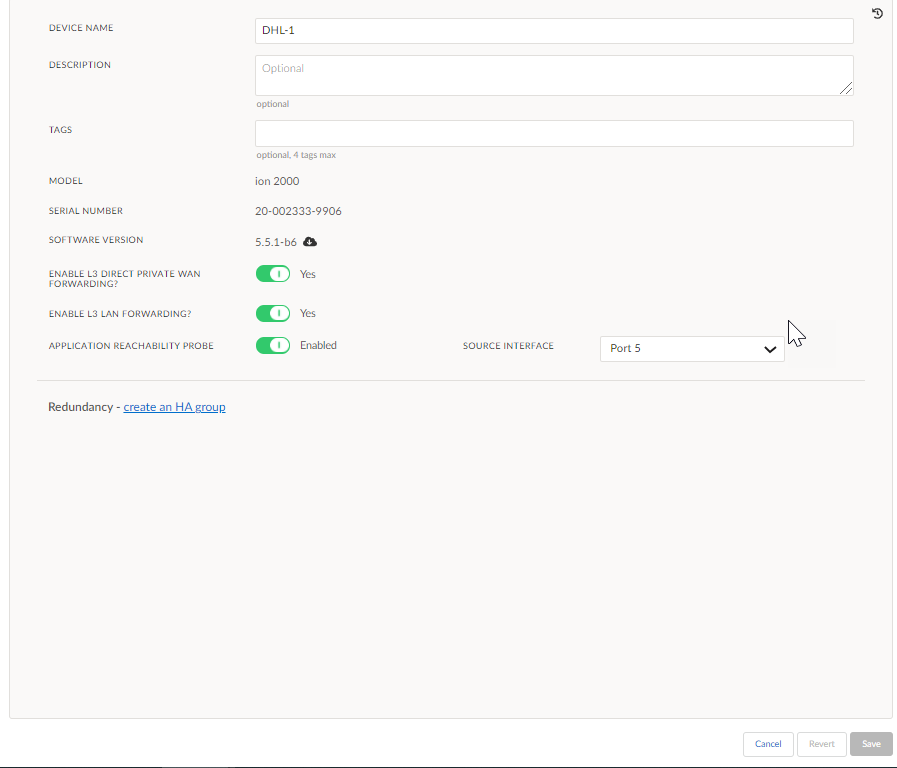
- Select , select the device you want to configure.On the Basic Info screen, toggle Yes for Enable L3 Direct Private WAN Forwarding.
![]() Click Save.Select the Interfaces tab and select a port that connects to the LAN.Select a port that connects to the LAN.In the General section,
Click Save.Select the Interfaces tab and select a port that connects to the LAN.Select a port that connects to the LAN.In the General section,- Enter a Name and (Optional) Description, and add Tags for the port channel interface.For Admin Up, select Up.In the Network Setting section,
- Select Port as the Interface type.For Use This Port For, select LAN.Toggle Scope as Global or Local.For VRF, select Globalor any other custom VRF that is available and associated in the VRF profile. VRF Global is enabled only when the associated device supports VRF.For Security Zone, select a device to bind.Select Enable IPv6 On This Interface to configure IPv6.For IPv6 Configuration, select AutoConf or Static.Autoconf indicates the Global IP address is derived using stateless address autoconfiguration (SLAAC).Choose Static if the IP address is fixed and is manually assigned. Additionally specify the IPv6 Address/Mask, Default Gateway (IPv6), and DNS server(s) (IPv6).In Advanced Options, you can specify, IPv6 Prefix Distribution, for address distribution.IPv6 is supported only for Global VRF.Select IPv4 Configuration as either DHCP or Static.If Static is selected, enter an IP address and mask for the interface.Default Gateway and DNS server configurations are not required for LAN interfaces. This is indicated by using LAN in the Use This Port For field.Select DHCP for dynamic allocation of IP address.If DHCP Relay functions are required, then click the DHCP Relay drop-down and select Yes for Enabled.For Server IPs, add server IP addresses as required.Save.
Related CLIs
- config interface
- ping
- ping6
- debug bounce interface
- debug bw test src interface
- ssh interface
- tcp dump
- tcp ping
- trace route
- inspect interface stats
- inspect wan paths
- dump cgnx infra status
- dump cgnx infra status live
- dump cgnx infra status store
- dump interface config
- dump interface status
- dump interface status interface details
- dump interface status interface module
- dump wan interface config
- dump wan interface summary