Download PDF
GlobalProtect
Use the GlobalProtect App for Linux
Table of Contents
Expand All
|
Collapse All
GlobalProtect Docs
-
-
-
-
- 6.3
- 6.2
- 6.1
- 6.0
-
- 6.3
- 6.2
- 6.1
- 6.0
Use the GlobalProtect App for Linux
| Where Can I Use This? | What Do I Need? |
|---|---|
|
|
GlobalProtect supports two versions of the
GlobalProtect app for Linux: One version if your Linux device supports
a GUI, and CLI version if your Linux device does not support a GUI.
Use the GUI Version of the GlobalProtect App for Linux
To use the GUI version of the GlobalProtect
app for Linux, complete these steps.
- (RHEL/CentOS 7.7 or later only) If the GlobalProtect icon does not show up in the system tray by default, add the extension to enable it.
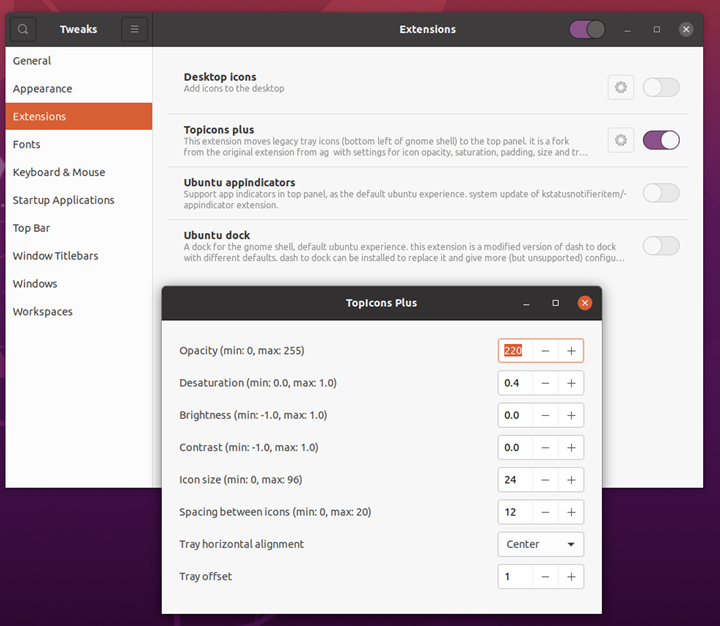
- Install the Topicons Gnome Tweak Tool Extension by running the following commands:sudo apt-get install gnome-shell-extension-top-icons-plussudo apt-get install gnome-tweak-toolReboot the system.From the Application menu, select TweaksExtensionsToggle the Topicons plus extension to enable the GlobalProtect icon to display in the system tray.If you don’t see the Topicons plus extension you may not have rebooted after installing the extension.You can also customize the icon setting such as icon size, alignment, and opacity.
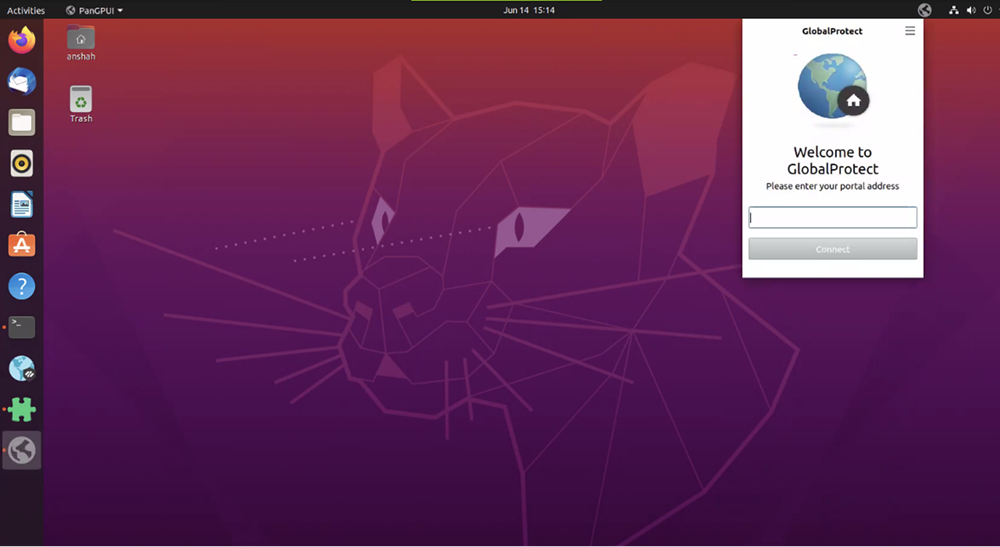
![]() You can now launch the GlobalProtect app from the system tray.
You can now launch the GlobalProtect app from the system tray.![]() In the GlobalProtect window, enter the FQDN or IP address of the GlobalProtect portal, and then click Connect.
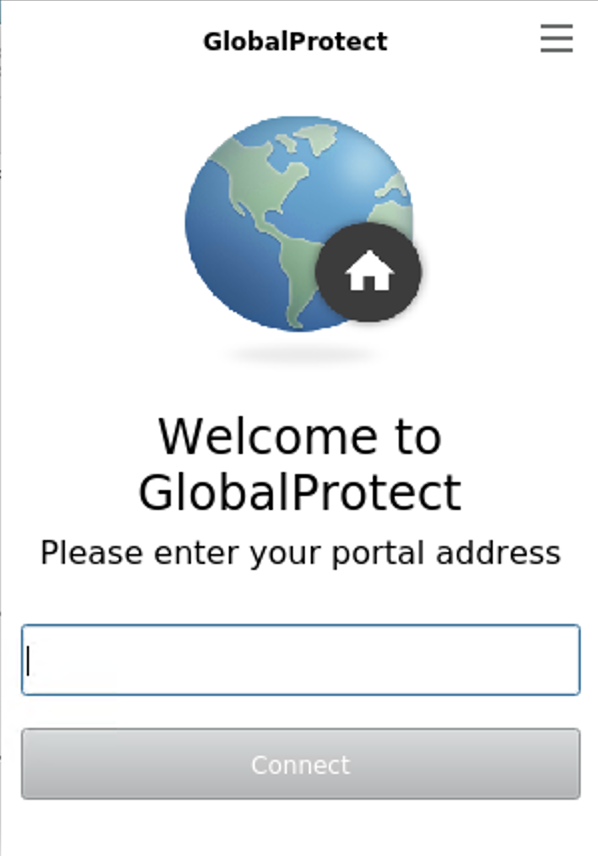
In the GlobalProtect window, enter the FQDN or IP address of the GlobalProtect portal, and then click Connect.![]() After you download and install the GUI version of the GlobalProtect app for Linux, the GlobalProtect app automatically launches.
After you download and install the GUI version of the GlobalProtect app for Linux, the GlobalProtect app automatically launches.- (Optional) If multiple portals are saved on your app, select a portal from the Portal drop-down. By default, the most recently connected portal is pre-selected from the Portal drop-down.
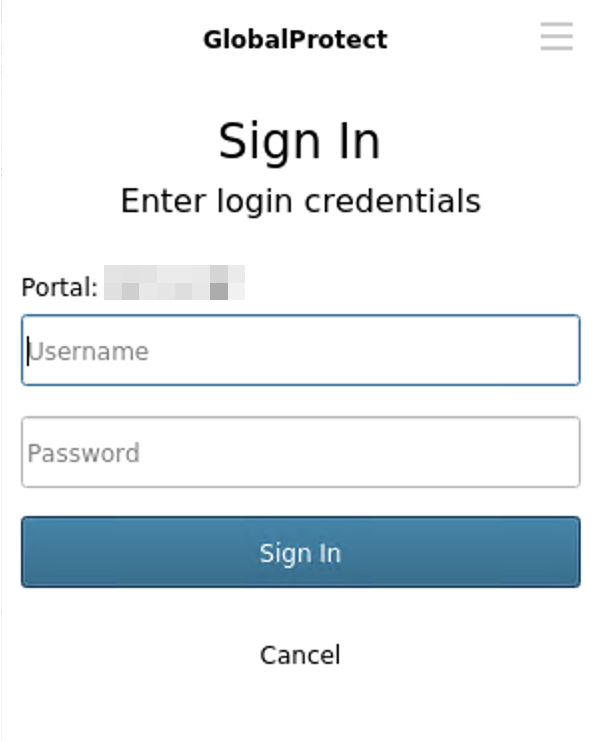
![]() Enter the Username and Password for the portal and then Sign In.In most instances, you can use the same username and password that you use to connect to your corporate network. After you sign in, the GlobalProtect portal shows a status of Connected.
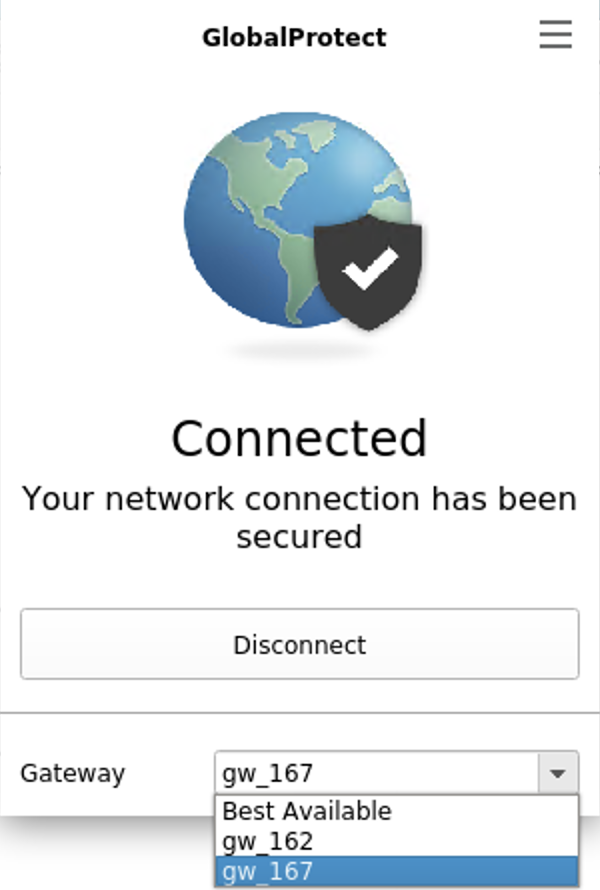
Enter the Username and Password for the portal and then Sign In.In most instances, you can use the same username and password that you use to connect to your corporate network. After you sign in, the GlobalProtect portal shows a status of Connected.![]() (Optional) By default, you are automatically connected to the Best Available gateway, based on the configuration that the administrator defines and the response times of the available gateways. To connect to a different gateway, click the gateway drop-down and then use one of the following options:
(Optional) By default, you are automatically connected to the Best Available gateway, based on the configuration that the administrator defines and the response times of the available gateways. To connect to a different gateway, click the gateway drop-down and then use one of the following options:- Select a gateway manually (external gateways only).This option is only available if your administrator enables manual gateway selection.
![]()
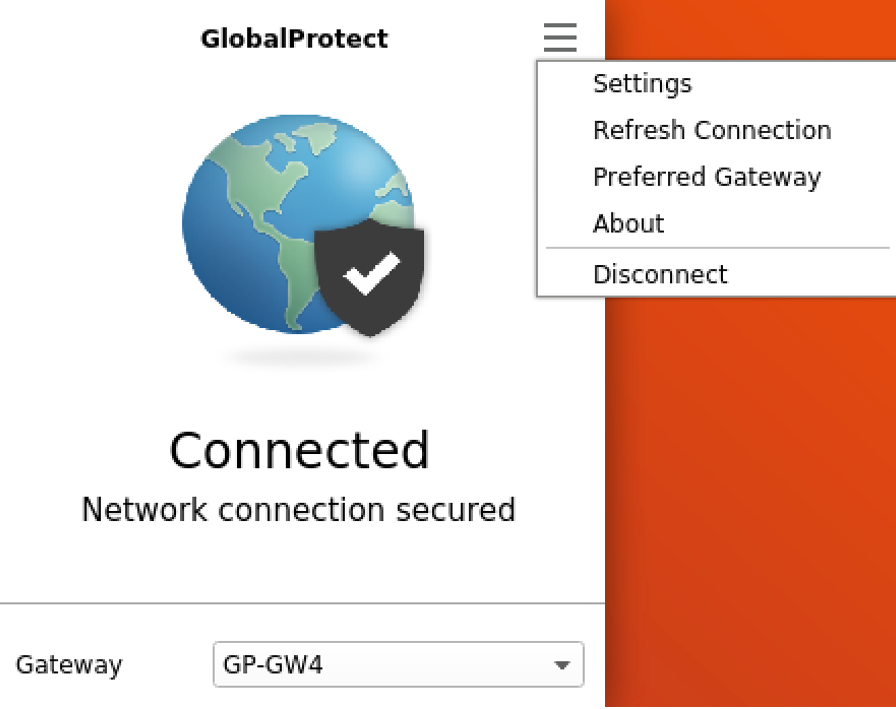
- Assign and automatically connect to a preferred gateway:
- From the menu on the top right of the app’s status panel, select Preferred Gateway to open the GlobalProtect: Preferred Gateway dialog.
![]()
- From the list of available gateways, select the gateway that you want to set as the preferred gateway and then Set as Preferred.
- Close the dialog.
If you no longer want to connect to the gateway automatically, you can also remove the preferred gateway assignment:- From the menu on the top right of the app’s status panel, select Preferred Gateway to open the GlobalProtect: Preferred Gateway dialog.
- From the list of available gateways, select the preferred gateway and then Remove Preferred.
- Close the dialog.
Open the GlobalProtect app.Click the GlobalProtect system tray icon to launch the app interface.View information about your network connection.After you launch the app, select the menu () on the top right of the app’s panel, select Settings to open the GlobalProtect Settings panel, and then select one of the following tabs to view information about your network connection:![]()
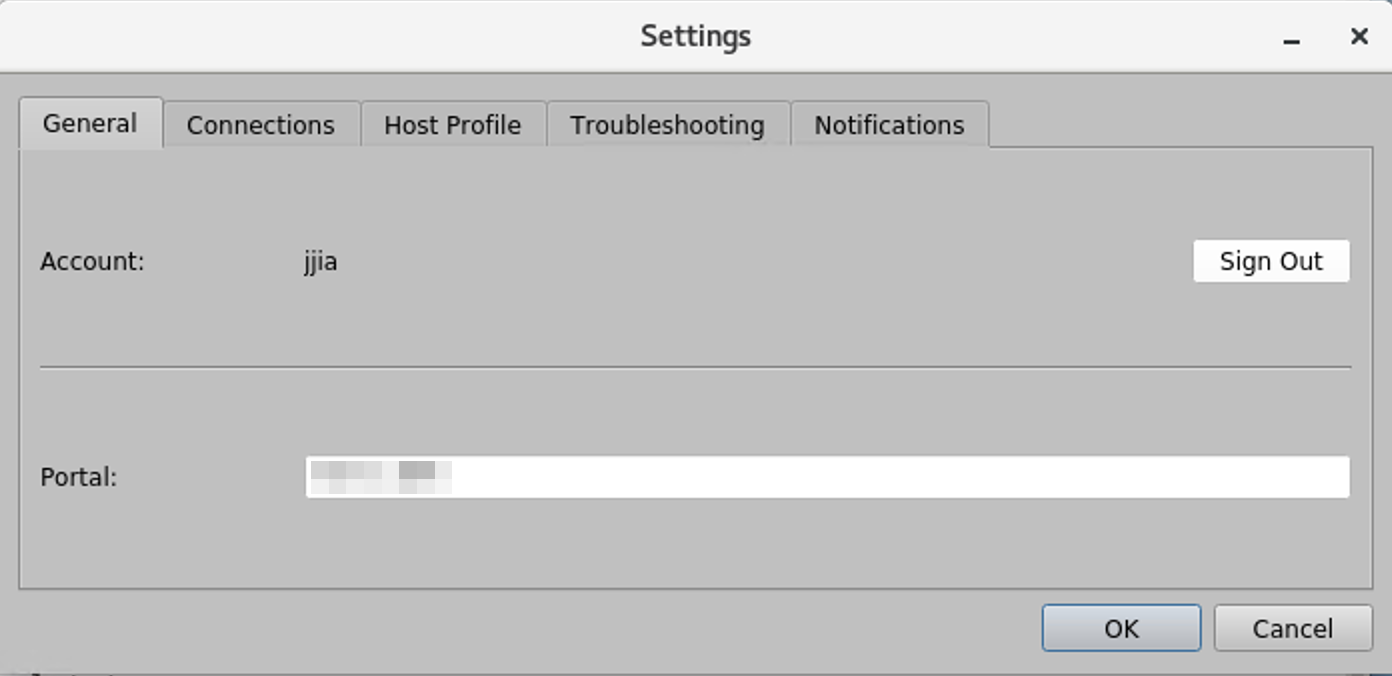
- General—Displays the username and portal(s) associated with the GlobalProtect account. You can also add, delete, or modify portals from this tab.
![]()
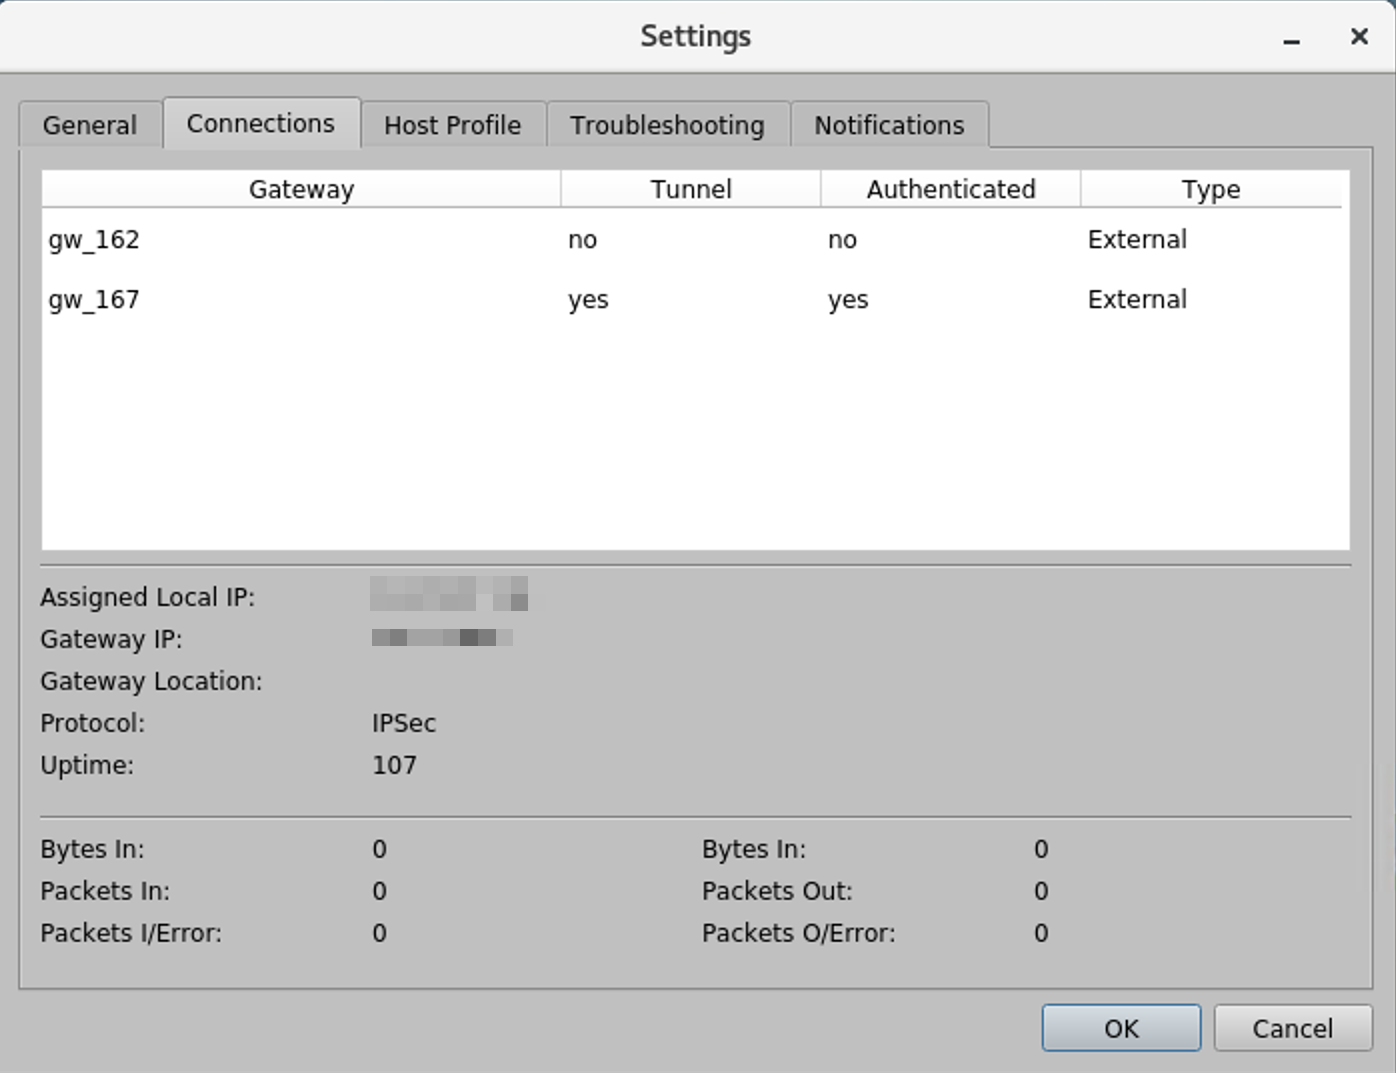
- Connection—Lists the gateways configured for the GlobalProtect app and provides the following information about each gateway:
- Gateway name
- Tunnel status
- Authentication status
- Connection type
- Gateway IP address or FQDN (only available in external mode)
For internal mode, the Connection tab displays the entire list of available gateways. For external mode, the Connection tab displays only the gateway to which you are connected and additional details about the gateway (such as the gateway IP address, location, and uptime).![]()
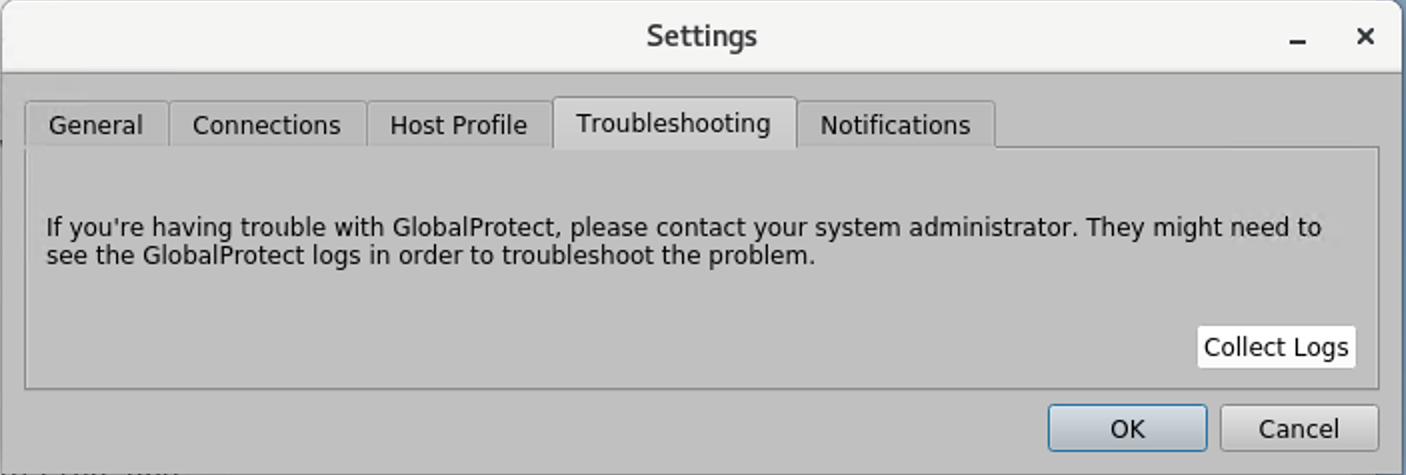
- Troubleshooting—Enables you to Collect Logs and set the Logging Level.In order for the GlobalProtect app to send troubleshooting logs, diagnostic logs, or both to Strata Logging Service for further analysis, you must configure the GlobalProtect portal to enable the GlobalProtect app log collection for troubleshooting. Additionally, you can configure the HTTPS-based destination URLs that can contain IP addresses or fully qualified domain names of the web servers/resources that you want to probe, and to determine issues such as latency or network performance on the end user’s endpoint.
![]()
(Optional) Log in using a new password.If your GlobalProtect administrator configures the GlobalProtect portal agent to Save User Credentials, your credentials are automatically saved to the GlobalProtect app. If your password for accessing the corporate network changes, you must log in to GlobalProtect using your new password.- Launch the GlobalProtect app by clicking the system tray icon. The status panel opens.Select the menu () on the top right of the app’s panel, then select Settings to open the GlobalProtect Settings panel.
![]() On the General tab of the GlobalProtect Settings panel, Sign Out to clear your saved user credentials from the GlobalProtect app.After you clear your user credentials, you can reconnect to GlobalProtect with your new username and password.(Optional) Disconnect from GlobalProtect.If your administrator configures GlobalProtect with the On-Demand connect method, you can disconnect from GlobalProtect by clicking Disconnect on the status panel.
On the General tab of the GlobalProtect Settings panel, Sign Out to clear your saved user credentials from the GlobalProtect app.After you clear your user credentials, you can reconnect to GlobalProtect with your new username and password.(Optional) Disconnect from GlobalProtect.If your administrator configures GlobalProtect with the On-Demand connect method, you can disconnect from GlobalProtect by clicking Disconnect on the status panel.Use the CLI Version of the GlobalProtect App for Linux
Using the command-line interface (CLI) of the GlobalProtect™ app for Linux, you can perform tasks that are common to the GlobalProtect app. The following examples display the output in command-line mode. To run the same command in prompt-mode, enter it without the globalprotect prefix (for more information, see Download and Install the GlobalProtect App for Linux).- Connect to a GlobalProtect portal:Use the globalprotect connect --portal <gp-portal> command where <gp-portal> is the IP address or FQDN of your GlobalProtect portal.For example:
user@linuxhost:~$ globalprotect connect --portal myportal.example.com
Retrieving configuration...
Disconnected
myportal.example.com - portal:local:Enter login credentials
username:user1
Password:
Retrieving configuration...
Discovering network...
Connecting...
Connected
When you use certificate-based authentication, the first time you connect without a root CA certificate, the GlobalProtect app and GlobalProtect portal exchange certificates. The GlobalProtect app displays a certificate error, which you must acknowledge before you authenticate. When you next connect, you will not be prompted with the certificate error message.user@linuxhost:~$ globalprotect connect --portal myportal.example.com Retrieving configuration... Disconnected There is a problem with the security certificate, so the identity of 10.3.188.61 cannot be verified. Please contact the Help Desk for your organization to have the issue rectified. Warning: The communication with 10.3.188.61 may have been compromised. We recommend that you do not continue with this connection. Error details:Do you want to continue(y/n)?y Retrieving configuration... Disconnected 10.3.188.61 - portal:local:Enter login credentials username:user1 Password: Retrieving configuration... Discovering network... Connecting... Connected
You can also specify a username in the command using the --username <username> option. The GlobalProtect app prompts you to authenticate and, if you specified the username option, confirm your username.Import a certificate.When you want to pre-deploy a client certificate to an endpoint for certificate-based authentication, you can copy the certificate to the endpoint and import it for use by the GlobalProtect app. Use the globalprotect import-certificate --location <location> command to import the certificate on the endpoint. When prompted you must supply the certificate password.user@linuxhost:~$ globalprotect import-certificate --location /home/mydir/Downloads/cert_client_cert.p12 Please input passcode: Import certificate is successful.Connect to a gateway:- (Optional) Display the manual gateways to which you can connect using the globalprotect show --manual-gateway command.Connect to a gateway using the globalprotect connect --gateway <gp-gateway> command where <gp-gateway> is the IP address or FQDN of the GlobalProtect gateway.View details about your connection using the globalprotect show --details command.
user@linuxhost:~$ globalprotect show --manual-gateway
Name                Address
------------------------------
gw1                 192.168.1.180
gw2                 192.168.1.181
user@linuxhost:~$ globalprotect connect --gateway 192.168.1.180
Retrieving configuration...
Discovering network...
Connecting...
Connected
Verify the status of and view details about your GlobalProtect connection:Use the globalprotect show --status command to verify the status of your connection.Use the globalprotect show --details command to view the details of your connection.user@linuxhost:~$ globalprotect show --status GlobalProtect status: Connected user@linuxhost:~$ globalprotect show --details Assigned IP address: 192.168.1.132 Gateway IP address: 192.168.1.180 Protocol: IPSec Uptime(sec): 231
Rediscover the network:Use the globalprotect rediscover-network command to disconnect and reconnect from GlobalProtect.user@linuxhost:~$ globalprotect rediscover-network Disconnecting... Retrieving configuration... Retrieving configuration... Discovering network... Connecting... Connecting... Connected GlobalProtect status: ConnectedClear the credentials for the current user:Use the globalprotect remove-user command to clear the credentials used to authenticate with the portal and gateways. After you confirm that the GlobalProtect app should clear your credentials, the GlobalProtect app disconnects the tunnel and then requires you to enter your credentials the next time you connect.user@linuxhost:~$ globalprotect remove-user Credential will be cleared and current tunnel will be terminated. Do you want to continue(y/n)?y Clear is done successfully. user@linuxhost:~$ globalprotect connect --portal 192.168.1.179 Retrieving configuration... Disconnected 192.168.1.179 - portal:local:Enter login credentials username:user1 Password: Retrieving configuration... Discovering network... Connecting... Connected
Resubmit host information to the gateway.Use the globalprotect show --host-state command to view the current host information about your endpoint. Use the globalprotect resubmit-hip command to resubmit information about the endpoint to the gateway. This is useful in cases where HIP-based security policy prevents users from accessing resources because it allows the user to fix the compliance issue on the endpoint and then resubmit the HIP.user@linuxhost:~$ globalprotect show --host-state generate-time: 09/28/2017 11:24:07 categories host-info client-version: 4.1.0 os: Linux Ubuntu 16.04.3 LTS os-vendor: Linux domain: host-name: linuxhost host-id: 4C4C4544-0034-4D10-804C-************ network-interface enp0s31f6 description: enp0s31f6 mac-address: D4:81:D7:D4:5A:A5 wlp2s0 description: wlp2s0 mac-address: 14:AB:C5:DE:D1:0E user@linuxhost:~$ globalprotect resubmit-hip Resubmit is successful.
View any GlobalProtect notifications.Use the globalprotect show --notification command to view notifications.View the GlobalProtect system tray icon.Use the globalprotect launch-ui command to display the system tray icon on your desktop. You can launch the GlobalProtect app by clicking the system tray icon.View the Welcome page.Use the globalprotect show --welcome-page command. The GlobalProtect app displays the Welcome page in a browser if a Welcome page exists or displays a notification if the Welcome page does not exist.View errors.Use the globalprotect show --error command to view errors reported by the app.user@linuxhost:~$ globalprotect show --error Error: Cannot connect to GlobalProtect PortalCollect logs.The app stores the PanGPA and PanGPI log files in the /home/<user>/.Globalprotect directory. Use the globalprotect collect-logs command to enable the GlobalProtect app for Linux to package these logs and other useful information. You can then use the logs to troubleshoot issues or forward them to a Support engineer for expert analysis.user@linuxhost:~$ globalprotect collect-log Start collecting... collecting network info... collecting machine info... copying files... generating final result file... The support file is saved to /home/user/.GlobalProtect/Collect.tgzDisplay the version of the GlobalProtect app for Linux.user@linuxhost:~$ globalprotect show --version GlobalProtect: 6.0.0-23 Copyright(c) 2009-2021 Palo Alto Networks, Inc.

