Device Security
Set up Jamf Pro for Integration
Table of Contents
Expand All
|
Collapse All
Device Security Docs
Set up Jamf Pro for Integration
Set up Jamf Pro for integration with Device Security through
Cortex XSOAR.
| Where Can I Use This? | What Do I Need? |
|---|---|
|
One of the following subscriptions:
One of the following Cortex XSOAR setups:
|
To enable Device Security to integrate with your Jamf Pro instance,
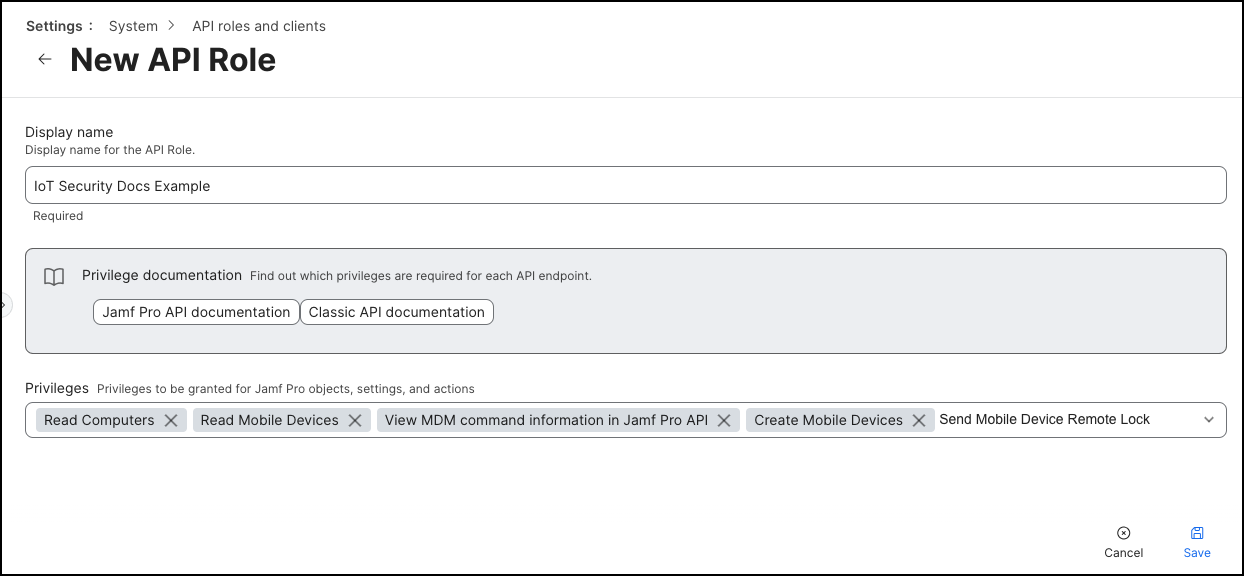
you must create a role with the following privileges:
- Read Computers
- Read Mobile Devices
- View MDM command information in the Jamf Pro API
- Create Mobile Devices
- Send Mobile Device Remote Lock Command
These integration instructions explain how to set up Jamf Pro
version 10.49.0 and later. For more information on configuring client IDs and
client secrets, see the Jamf Pro documentation for
API Roles and Clients,
and select the Jamf Pro version that you're using.
If you're using a version of Jamf Pro earlier than 10.49.0, refer to
the Jamf Pro documentation for
Classic API Authentication Changes
to learn how to configure authentication credentials for your integration.
- Log in to your Jamf Pro Dashboard with an account that has an administrator role.Navigate to SettingsSystemAPI roles and clientsAPI Roles, and create a new role by clicking + New.Configure the API role.
- Display Name: Enter a display name for the API role.
- Jamf Pro API role privileges: Grant the necessary privileges to the API role.
- Read Computers
- Read Mobile Devices
- View MDM command information in the Jamf Pro API
- Create Mobile Devices
- Send Mobile Device Remote Lock Command
![]() Save the API role.Click the Back (arrow) button to return to the API roles and clients page, select the API Clients tab, and create a new client by clicking + New.Configure the API client.
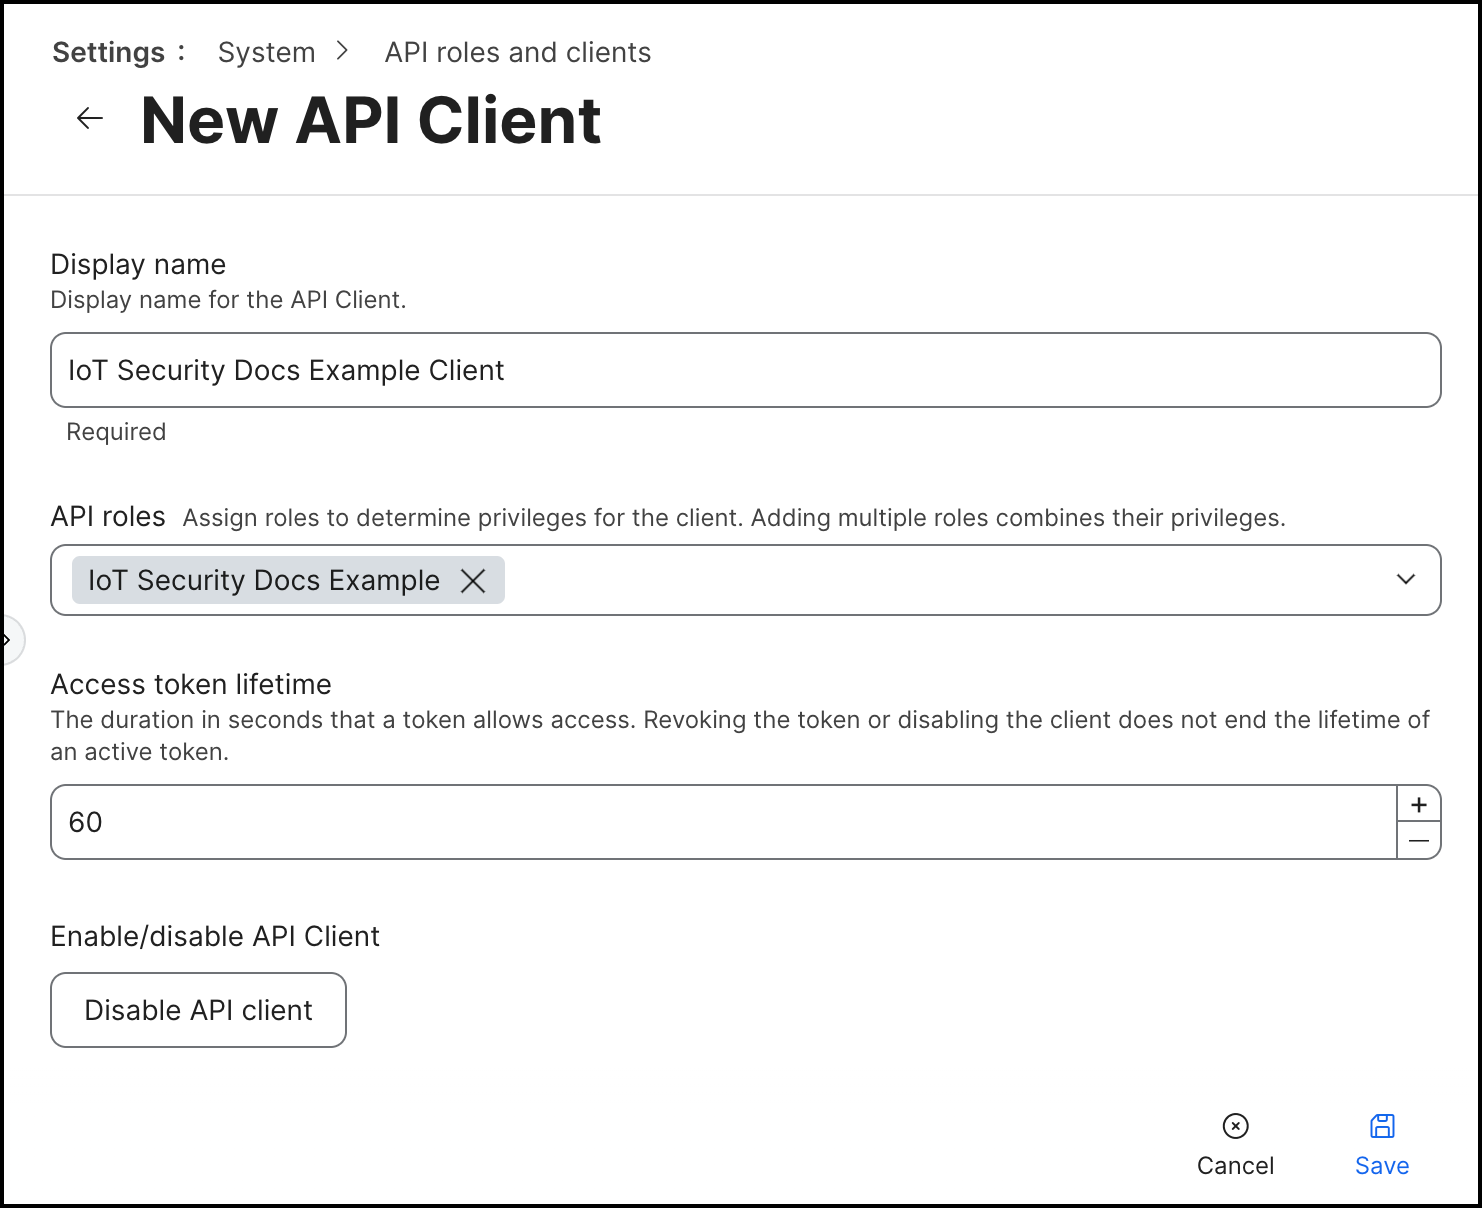
Save the API role.Click the Back (arrow) button to return to the API roles and clients page, select the API Clients tab, and create a new client by clicking + New.Configure the API client.- Display name: Enter a display name for the API client.
- API roles: Select the API role that you created.
- Access token lifetime: Change the default value if you want the access token to expire sooner or later.
- Enable/disable API Client: Click Enable API Client.
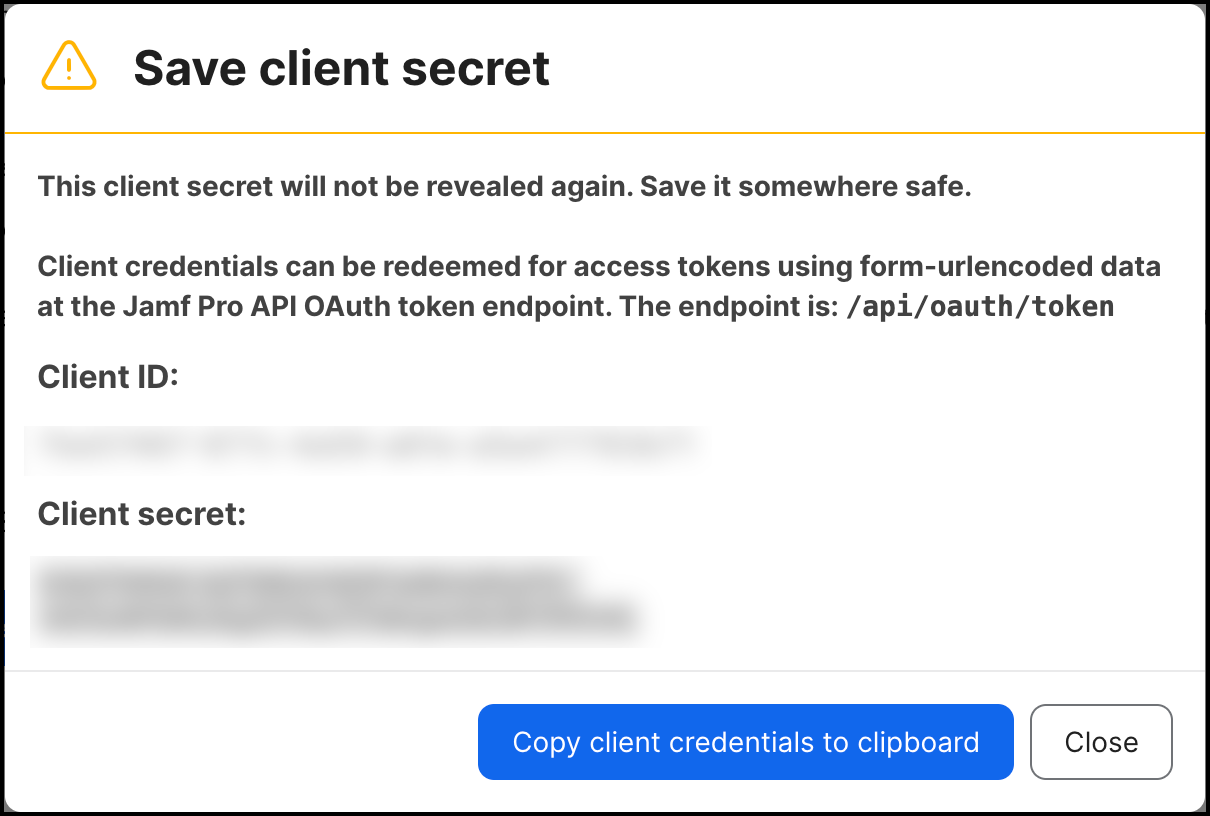
![]() Save the API client to go to the API client details page.On the API client details page, copy the Client ID to a secure location.You will need the client ID to configure your Cortex XSOAR integration instance.Click Generate client secret to generate a client secret, and then copy the client secret to a secure location.You will need the client secret to configure your Cortex XSOAR integration instance. The client secret appears in a pop-up and won't be shown again. If you forget the client secret, you will need to generate a new client secret by rotating the client secret.
Save the API client to go to the API client details page.On the API client details page, copy the Client ID to a secure location.You will need the client ID to configure your Cortex XSOAR integration instance.Click Generate client secret to generate a client secret, and then copy the client secret to a secure location.You will need the client secret to configure your Cortex XSOAR integration instance. The client secret appears in a pop-up and won't be shown again. If you forget the client secret, you will need to generate a new client secret by rotating the client secret.![]()


