Device Security
Vulnerability Details Page
Table of Contents
Expand All
|
Collapse All
Device Security Docs
Vulnerability Details Page
The Vulnerability Details page in the Device Security portal displays a summary of a
detected vulnerability, its impact, and recommended actions.
| Where Can I Use This? | What Do I Need? |
|---|---|
|
One of the following subscriptions:
|
Clicking the CVE (Common Vulnerabilities and Exposures) link in the Vulnerability
column or a number in the Confirmed Instances or Potential Instances column on the Vulnerabilities page opens the
Vulnerability Details page for that vulnerability
(VulnerabilitiesVulnerability OverviewVulnerability Details).
Here you can read a description of the vulnerability, see details about
it, and learn which device profiles it affects. You can also see which devices the
vulnerability affects or potentially affects.
At the top of the Vulnerability Details page are several important attributes:
- The CVE ID links to a page about the vulnerability in the National Institute of Standards and Technology (NIST) database. For example, clicking CVE-2022-4436 opens https://nvd.nist.gov/vuln/detail/CVE-2022-4436.
![]()
- The CVSS (Common Vulnerability Scoring System) score ranks the vulnerability on a scale of 0-10, where 0 is the least severe and 10 is the most.
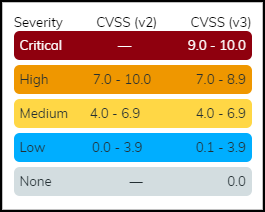
- The Device Security rating system, which is based on the CVSS, categorizes a vulnerability score into one of several severity levels. There are two CVSS versions and both are presented:
![]()
Next is a section describing what the vulnerability is, how it was detected, and the source of
its discovery. It also explains the impact the vulnerability can cause if exploited and
recommended actions you can take to remediate it. Finally, there is a chart that shows
the total number of affected devices grouped by profile and the relative sizes of each
group.
Summary
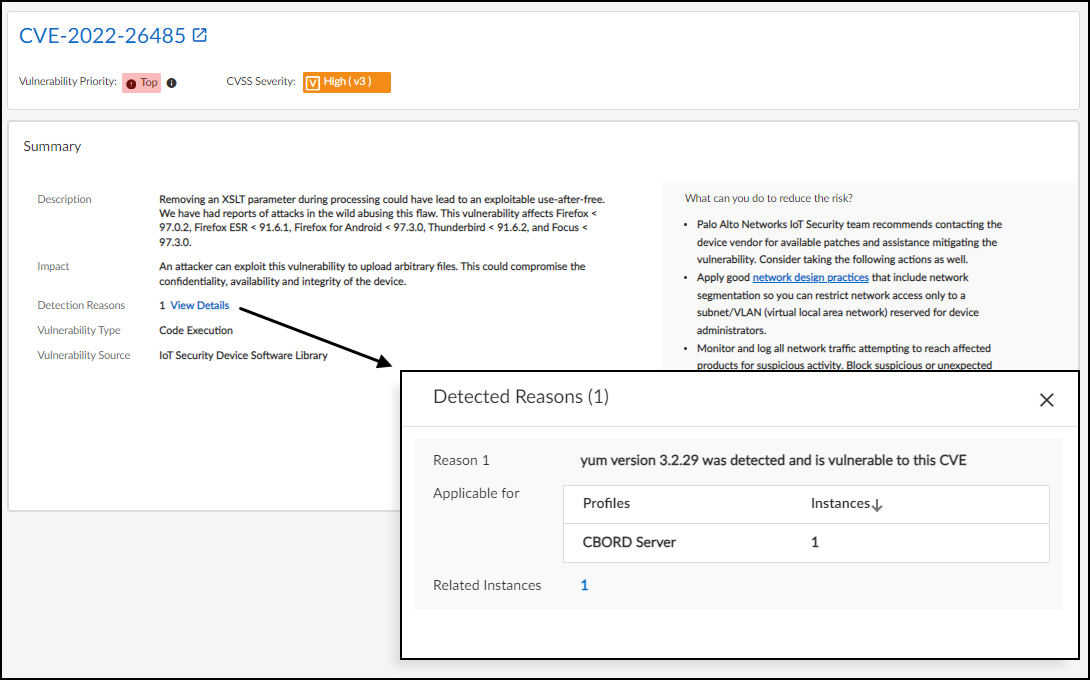
- The Description summarizes the vulnerability.
- The Impact section explains how attackers can exploit the vulnerability and the threat it poses.
- Detection Reasons explain how confirmed vulnerability instances were detected. When you click View Details, a panel appears over the right side of the page showing each detection reason, the device profiles it applies to, and the number of vulnerability instances that were detected for different profiles. (Reasons for the detection of potential vulnerabilities are not shown.)
- The Vulnerability Type identifies the category of the vulnerability, such as code execution, info leak, overflow, and denial of service.
- The Vulnerability Source identifies where the vulnerability was detected. One source of detection is Device Security when it's based on device attributes such as firmware, model, and OS. Another source is Device Security Device Software Library when the detection is based on the software and applications running on a device. Yet another source is one of the third-party vulnerability scanners with which Device Security integrates: Qualys, Rapid7, or Tenable.
- Device Security lists any identified software patches that can remediate the
vulnerability.We recommend that you don't apply patch updates identified by Device Security to your devices until your security or vulnerability management team or the product vendor has qualified them to ensure there are not any unexpected results or side effects.
- On the right side of the Summary section is a list of recommendations. It typically includes various options you can take to reduce the risk that the vulnerability poses or even remediate the issue.
Vulnerability Metrics – In this section, you can see CVE submetric scores, which provide additional insight to
the vulnerability severity level to help you prioritize remediation efforts. For
example, vulnerabilities that can be exploited remotely might require a more urgent
response than other vulnerabilities, even if the others have a higher CVSS score.
- The exploitability metrics include the attack vector (Network, Adjacent, Local, or Physical), attack complexity (High or Low), what privileges are required to launch an attack, and whether human action—other than that of the attacker—is required during the exploit.
- The impact metrics indicate what areas an exploit might affect—confidentiality, integrity, and availability—and what the impact is in these areas—none, low, or high.
- The scope metric indicates if the effects of an exploited vulnerability are limited to the impacted component (Unchanged) or they can extend to other components as well (Changed).
Threat & Compensating Metrics – In this section, you can see
information about the likelihood that the vulnerability will be exploited, the types of
exploits that are known to have occurred, and if there are options to compensate the
threat through the Palo Alto Networks Threat Prevention application.
- The Exploit Prediction Scoring System (EPSS) percentile is a daily estimate of the probability that the vulnerability will be exploited within the next 30 days. To learn more about EPSS, see the EPSS Model.
- The exploit status can be one of the following:
- Unknown – There is no known or weaponized malware exploiting this vulnerability.
- POC – There's known code to exploit the vulnerability to demonstrate a security weakness.
- Weaponized – There's a known exploit that is malicious or works consistently against targets.
- Exploited in the Wild – An exploit of the vulnerability has been publicly reported in the wild, either by threat actors or in the Known Exploited Vulnerability (KEV) catalog.
- By clicking View Details for Exploits Identified, you can see a list of known POC and Weaponized exploits (but not any whose status is Unknown or Exploited in the Wild). For each one, there is a URL (source) where you can learn more, the exploit status, and the date that the exploit was published.
- Advanced Persistent Threat (APT) indicates if any exploits are known to have been used by an APT. By clicking View Details, you can see a list of APTs. For each one, there's the name of the APT, a description about it, the countries they've targeted, the known CVEs they've exploited, and the tactics and techniques they've employed.
- Threat prevention coverage indicates if a vulnerability is covered by the Palo Alto Networks Threat Prevention application or not. By clicking View Details, you can see the name of the vulnerability, its unique threat ID number, the minimum PAN-OS version that supports it, the dates of its first release and latest update, and a URL (reference) where you can learn more.
Impact View – In this section, you can see the number of devices
that the vulnerability affects and their various levels of criticality: critical, high,
medium, low. The level of criticality helps you assess the level of impact your
organization would incur if they were compromised.
- Asset Criticality – In the Asset Criticality tab, a chart and accompanying table show the total number of assets (instances) affected by the vulnerability and the number and percent of affected assets at each level of criticality. The chart provides a visual representation of the data contained numerically in the table. By selecting and clearing the Critical, High, Medium, and Low check boxes in the table, you can show and hide the corresponding segments in the chart.
- Confirmed – In the Confirmed tab, a chart and table show the total number of assets that are confirmed to be vulnerable and those that are potentially vulnerable but not yet confirmed. In addition to the total, they also show the percent of assets that are confirmed and unconfirmed to be vulnerable. You can select and clear the check box for each row to show or hide the corresponding segment in the chart.
- Profiles – In the Profiles tab, a chart shows the total number of affected devices grouped by profile and the relative sizes of each group. When you hover your cursor over a section in the chart, a pop-up appears identifying that profile and the number of devices in it. This is particularly helpful when a vulnerability affects numerous device profiles.

At the bottom of the Vulnerability Details page are two tabs—Active Instances and Addressed
Instances. On each tab a table shows all vulnerable and potentially vulnerable devices,
which are referred to as instances. Here’s an example to clarify the difference between
these two types of devices. If a vulnerability only affects devices running a specific
software version and Device Security identifies the version running on one device as having
this vulnerability but it can't identify which software version is on another, then the
first device is considered as having a confirmed vulnerability but not the second one.
(If Yes appears in the Confirmed column, a device is confirmed as
vulnerable. If the Confirmed column is empty, a device is potentially vulnerable but
it’s not confirmed.)
A vulnerability instance initially appears in the Active Instances tab.

As soon as you change the status of a vulnerability instance to
Resolved, Device Security moves it from the Active Instances tab
to the Addressed Instances tab.

If you later change a resolved instance to Detected, it's automatically
moved back to the Active Instances tab.
To see more information about a device, click the device name in the Instance column to
open the Device Details page for it in a
new browser window or tab.
The status of a vulnerability instance begins in the Detected state. You can leave it there or
set it to a different state to reflect where it's in the remediation process:
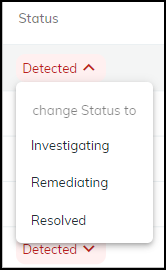
- Detected: This is the state of a newly detected vulnerability instance. It makes sense to keep it in this state if no action has been taken to investigate, remediate, or resolve it.
- Investigating: Consider setting a vulnerability instance in this state after preliminary work on it has started and it’s being verified, researched, and its impact analyzed.
- Remediating: Consider setting an instance in this state while action is being taken to remediate it but has not yet completed.
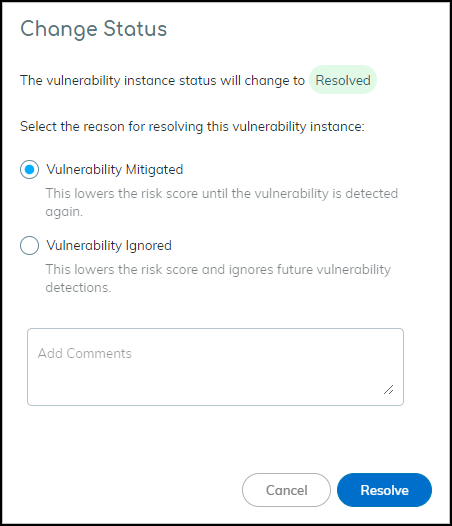
- Resolved: An instance becomes resolved either by mitigating the issue or by ignoring and accepting it.
To change the state of a vulnerability instance, click the entry
in the Status column and choose another state.
When you resolve a vulnerability instance, Device Security prompts
you to provide a reason for its resolution.
To assign a vulnerability instance to someone to work on, select
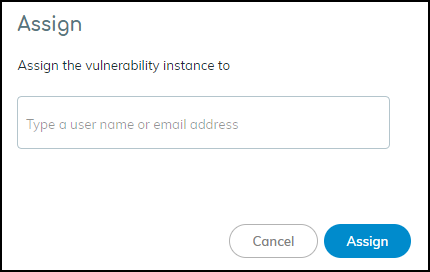
the check box for the instance, and then click MoreAssign. Enter the username
or email address of a user and then click Assign.
The person to whom you assign a vulnerability instance
must have an Device Security user account so that it can send a message
to the appropriate email address.
The user then receives an email message that states that a vulnerability
was assigned to them and provides a link to the vulnerability
for investigation.
To add a note about a vulnerability instance or the work being
done on it, select the check box for the instance, and then click MoreAdd notes.
Enter the note and then click Add.
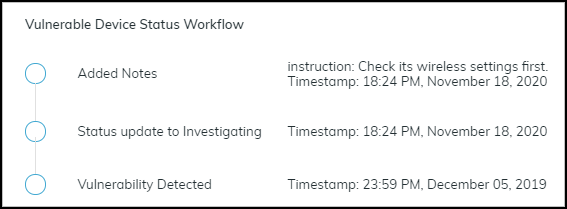
The Vulnerability Responses column displays Added Notes.
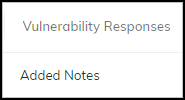
To read the note and any previous status changes that were made,
hover your cursor over “Added Notes”. An historical record about
the response to the vulnerability instance appears in a pop-up window.
