Device Security
Perform a Vulnerability Scan Using Rapid7
Table of Contents
Expand All
|
Collapse All
Device Security Docs
Perform a Vulnerability Scan Using Rapid7
Use Device Security integration with Rapid7 to perform a vulnerability scan.
| Where Can I Use This? | What Do I Need? |
|---|---|
|
One of the following subscriptions:
One of the following Cortex XSOAR setups:
|
Because active scanning can be disruptive
to the services running on a scanned device, only account owners
have permission to perform vulnerability scans by default. Owners
can also set scanning permissions per administrator account, thereby
delegating it to just a few individuals.
By default, vulnerability
scanning is disabled for new administrator accounts. To enable it,
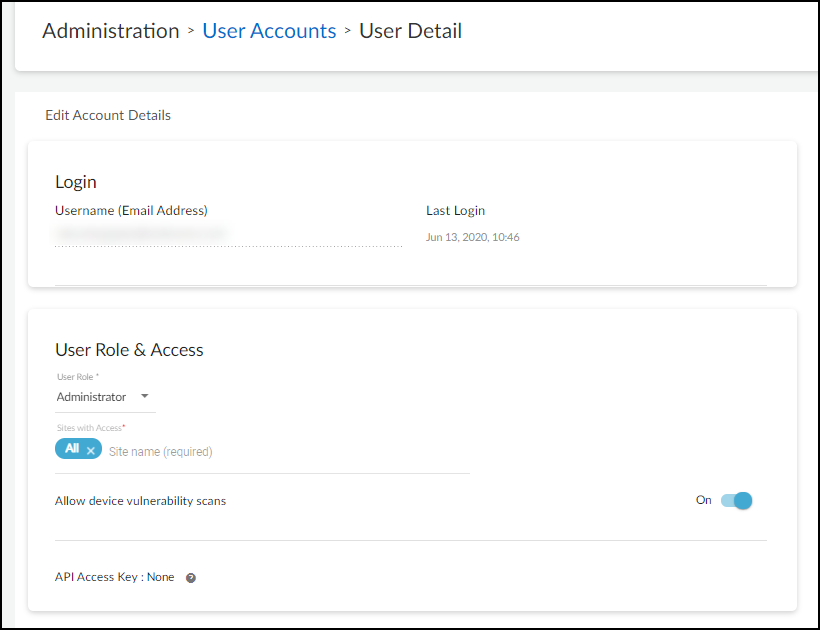
log in to the Device Security portal as an owner, click AdministrationUser Accounts,
and then click the email address (username) of an administrator
for whom you want to enable vulnerability scanning. Slide the Allow
device vulnerability scans toggle from Off to On and
then Save.
The
ability to do vulnerability scanning is only available to owners
and administrators. There is no option to enable vulnerability scanning
for deployment and read-only users.
- Prepare to initiate a Rapid7 vulnerability scan from Device Security.
- Log in as an owner or administrator who has vulnerability scanning enabled.
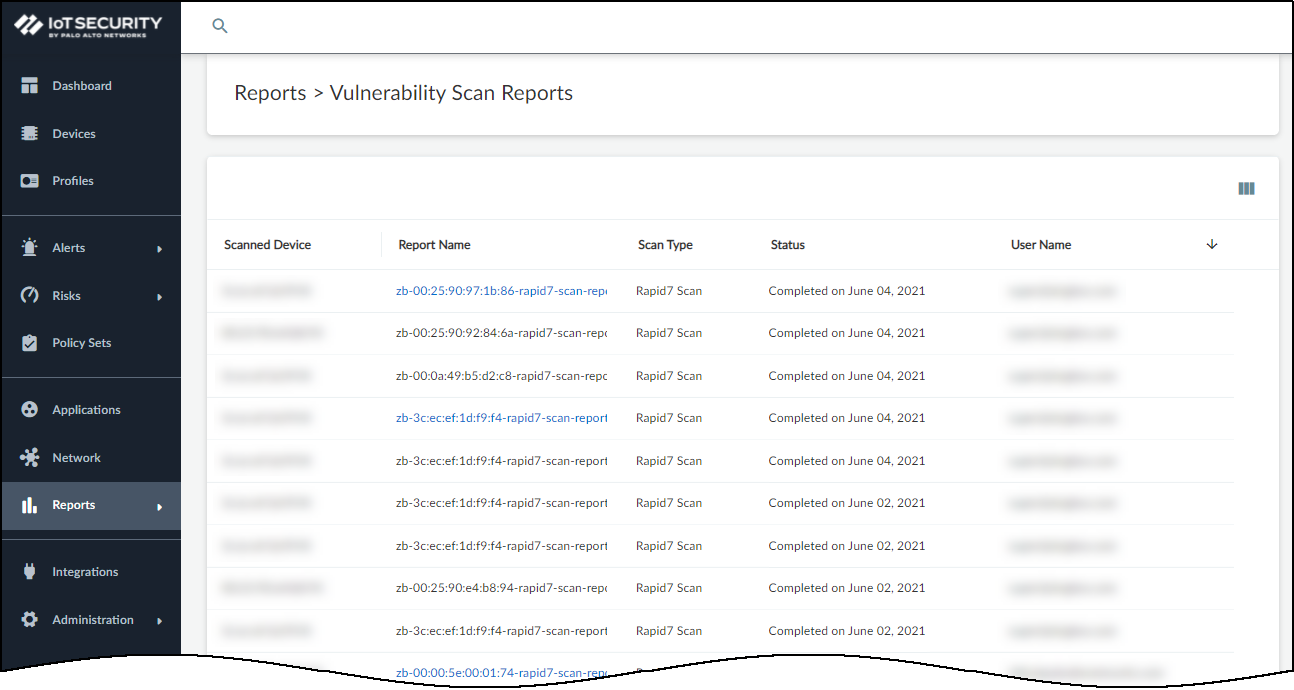
- Because Device Security only supports one vulnerability scan of a device at a time, make sure no other scans of this device are currently in progress.Click ReportsVulnerability Scan Reports and check the Status column. If you see Processing... for the device you want to scan, wait until the current scan finishes before starting a new one.
![]() When you see that the device isn’t already being scanned, you can continue with a new scan.Only initiate a scan of a device that’s not currently active (and will remain inactive until the scan completes).
When you see that the device isn’t already being scanned, you can continue with a new scan.Only initiate a scan of a device that’s not currently active (and will remain inactive until the scan completes). - Click Devices, and then click the entry in the Device Name column for the device you want to scan.
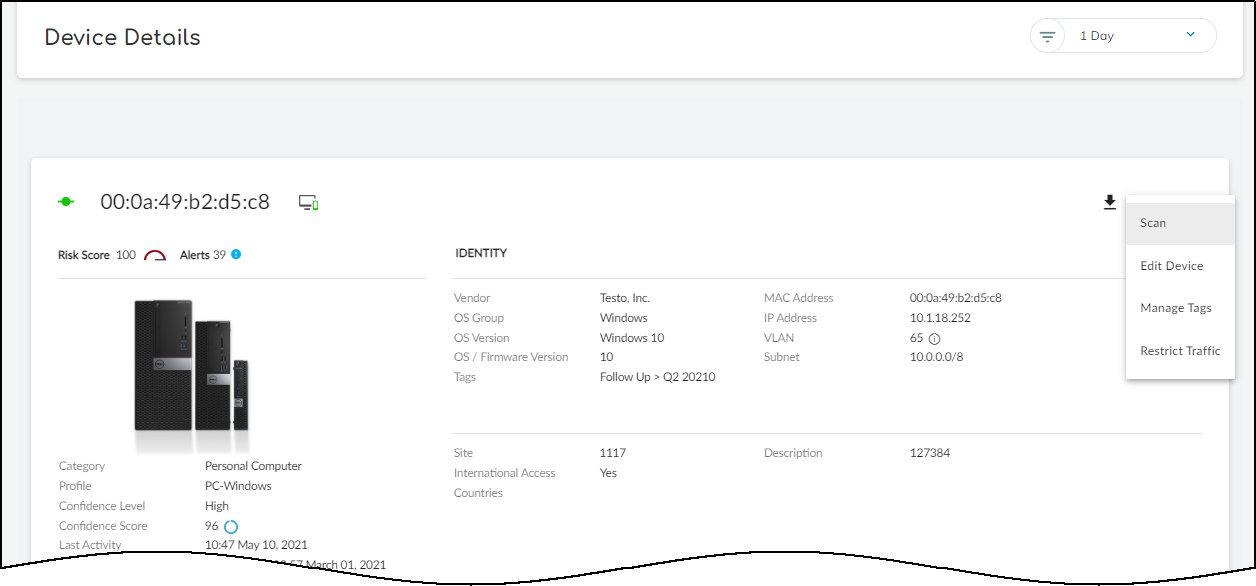
- At the top of the Device Details page, click the Action menu and then click Scan.
![]()
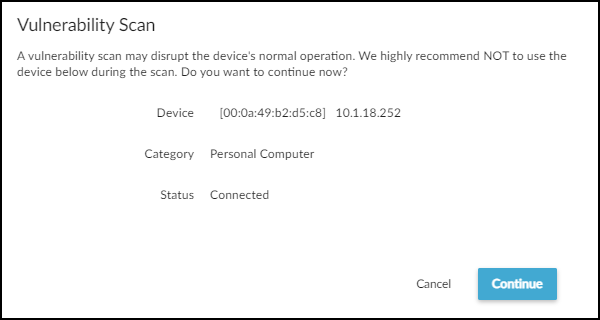
- Read the caution about scanning active devices and, if the device is currently inactive, Continue.
![]()
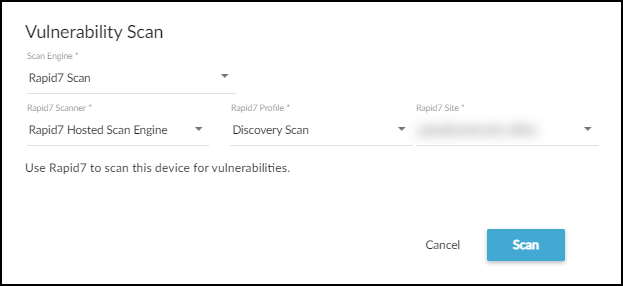
Set parameters for the scan that you want Rapid7 to perform.Engine: Rapid7 scanRapid7 Engine: Choose one of the options in the list, such as these:- Default Engine Pool – This a pool of on-site scan engines over which a scan job is distributed to provide load balancing and fault tolerance. They scan devices on your internal network.
- Local scan engine – This is a single on-site scan engine to scan devices on your internal network.
- Rapid7 Hosted Scan Engine – This is a scan engine that Rapid7 hosts in the cloud. It allows you to scan public-facing devices on your network (example: web and email servers) and see them as an external attacker without access permissions would.The items in this list are called from the Rapid7 API, so your list of scan engines might be different depending on your Rapid7 configuration.
Rapid7 Profile: Choose one of the vulnerability scan profiles, such as these:- Full audit – Use this profile to run a thorough scan for network-based vulnerabilities, patches, and application-layer audits. It scans default ports only. It uses Web Spider to probe websites to learn their directory structures, default directories, files, broken links, and inaccessible links. It then analyzes this data for security flaws and other issues resulting from software defects or configuration errors.
- Full audit without Web Spider – This profile is the same as Full audit except it does not include Web Spider to scan websites.For a complete list of scan profiles (or templates as Rapid7 refers to them), see the Rapid7 scan templates appendix.
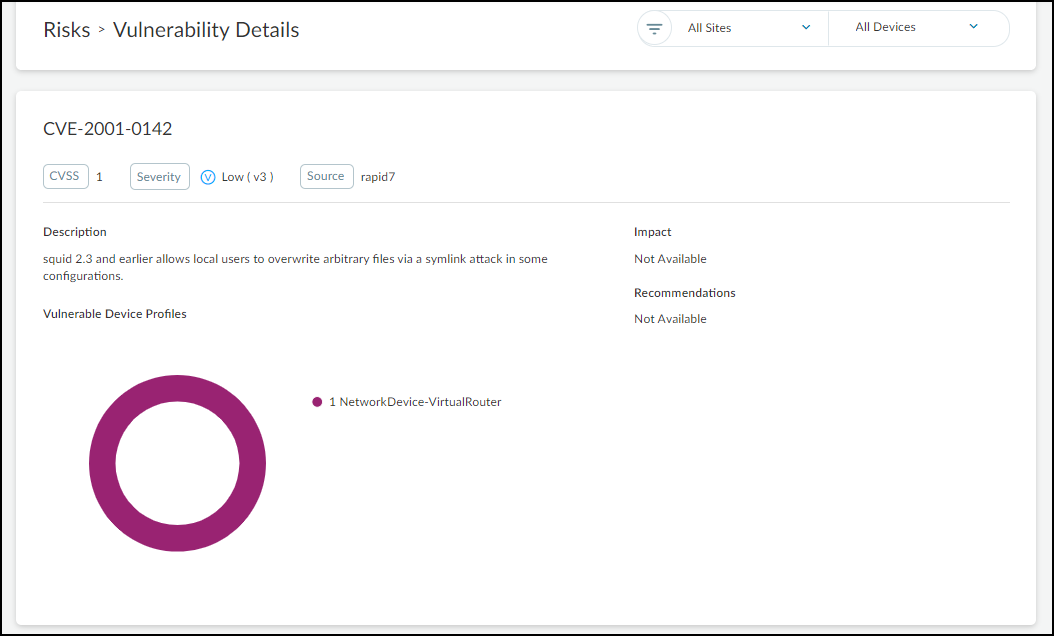
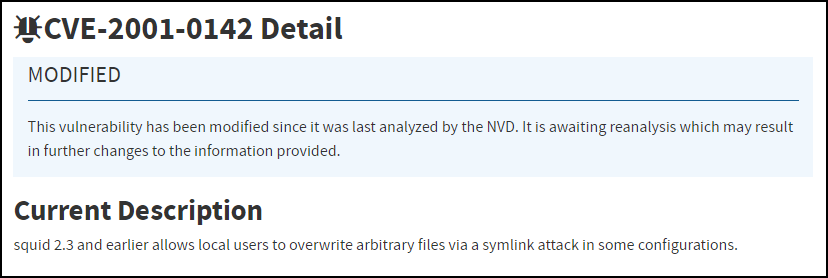
Rapid7 Site: Choose the site where the device to be scanned is located.![]() Click Scan.Depending on the type of scan you choose, it can take anywhere from a few minutes to half an hour, and sometimes even longer. However, it’s common for scans to take 20-30 minutes. If there is an issue, such as the scanner being unable to reach the target device, the effort eventually times out after two hours.After Rapid7 completes the scan, it reports back to Device Security. If there are any discovered Common Vulnerabilities and Exposures (CVEs), IoT Security immediately updates the risk score and CVEs on the Device Details page. Updates to the CVEs on the RisksVulnerabilities page are not made immediately and can take up to 24 hours to appear. Rapid7 provides Device Security with the vulnerability CVE ID number, severity level (CVSS), and service port number. Device Security retrieves a description for the CVE from the National Institute of Standards and Technology (NIST) website. For example, the description for CVE-2001-0142 comes from this NIST page.
Click Scan.Depending on the type of scan you choose, it can take anywhere from a few minutes to half an hour, and sometimes even longer. However, it’s common for scans to take 20-30 minutes. If there is an issue, such as the scanner being unable to reach the target device, the effort eventually times out after two hours.After Rapid7 completes the scan, it reports back to Device Security. If there are any discovered Common Vulnerabilities and Exposures (CVEs), IoT Security immediately updates the risk score and CVEs on the Device Details page. Updates to the CVEs on the RisksVulnerabilities page are not made immediately and can take up to 24 hours to appear. Rapid7 provides Device Security with the vulnerability CVE ID number, severity level (CVSS), and service port number. Device Security retrieves a description for the CVE from the National Institute of Standards and Technology (NIST) website. For example, the description for CVE-2001-0142 comes from this NIST page.![]()
![]() After the scan completes, view the results.You have two options to view the report:Click Devices > device_name and then click the Vulnerability Report Ready icon at the top of the page.
After the scan completes, view the results.You have two options to view the report:Click Devices > device_name and then click the Vulnerability Report Ready icon at the top of the page.![]() orClick ReportsVulnerability Scan Reports and then click the link in the Report Name column for the scanned device whose report you want to see.
orClick ReportsVulnerability Scan Reports and then click the link in the Report Name column for the scanned device whose report you want to see.![]() This downloads the report as a PDF to your computer where you can open it in a PDF viewer.
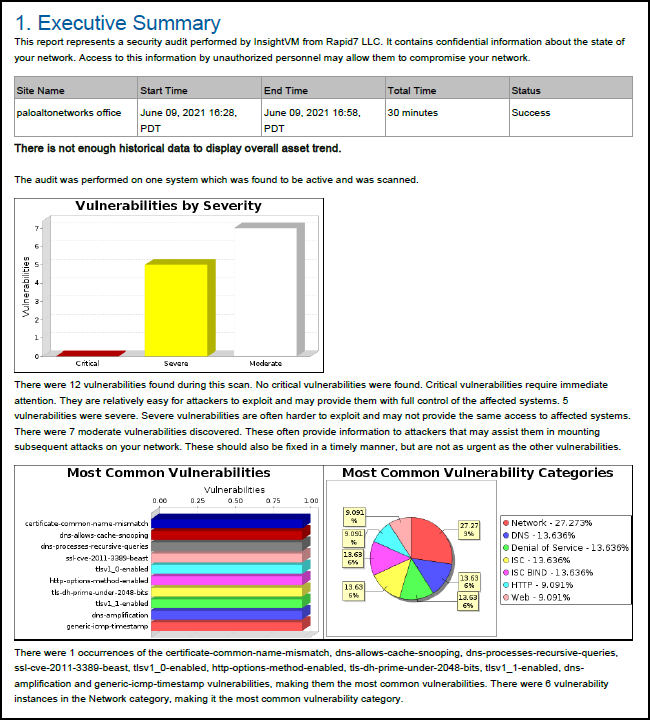
This downloads the report as a PDF to your computer where you can open it in a PDF viewer.![]() The report consists of several major sections, depending on the Rapid7 profile that was used:
The report consists of several major sections, depending on the Rapid7 profile that was used:- Executive Summary
- Discovered Systems
- Discovered and Potential Vulnerabilities
- Discovered Services
- Discovered Users and Groups
- Discovered Databases
- Discovered Files and Directories
- Policy Evaluations
- Spidered Web Sites


