Add a Firewall to a Panorama Node
Table of Contents
Add a Firewall to a Panorama Node
Add a single firewall to be managed by a Panorama™ Node
on Panorama Interconnect.
Add a single firewall to be managed by a Panorama™
Node in order to manage the template stack and device group configuration
from a centralized Panorama Controller. To bulk import multiple
firewalls, see Import Multiple Firewalls to a Panorama Node.
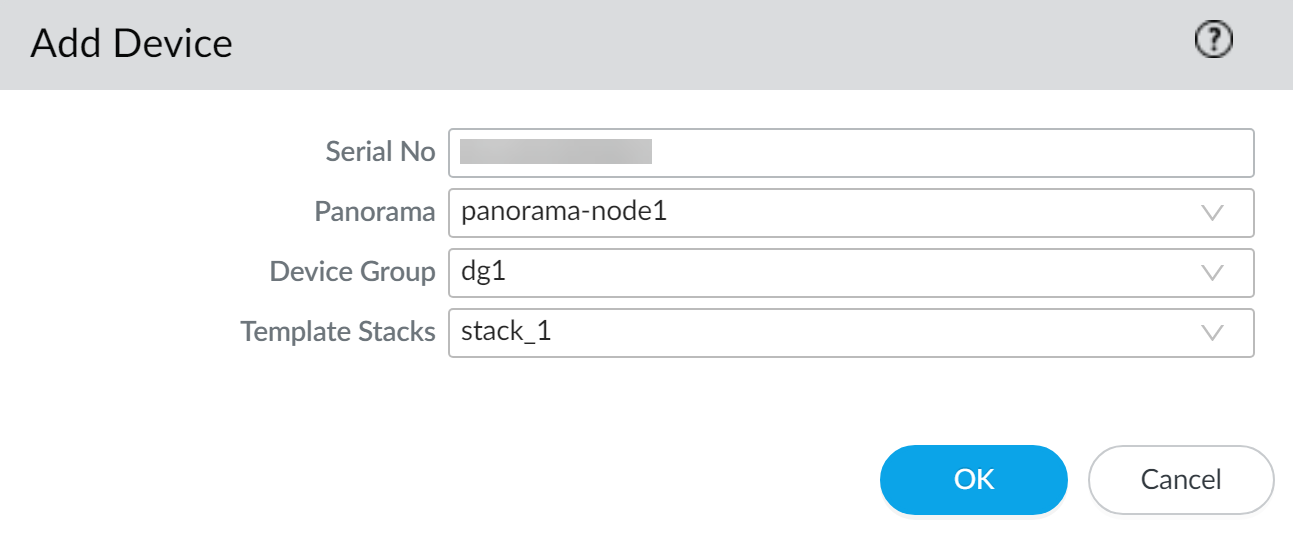
- Perform initial configuration on the firewall so that it is accessible and can communicate with Panorama over the network.Log in to the Panorama web interface of the Panorama Controller.Select and Add the firewall.Enter the firewall information:
- Enter the Serial No of the firewall.
- Select the Panorama Node to manage the firewall.
- Select the Template Stack with which to manage the firewall configuration.
- Select the Device Group with which to associate the firewall.
Click OK to add the firewall as a managed device.![]() Click Commit and Commit to Panorama to finish adding the firewall.Select and Synchronize Config.(Required for firewalls running PAN-OS 10.1 and later releases) Obtain the device registration authentication key required for onboarding new firewalls.
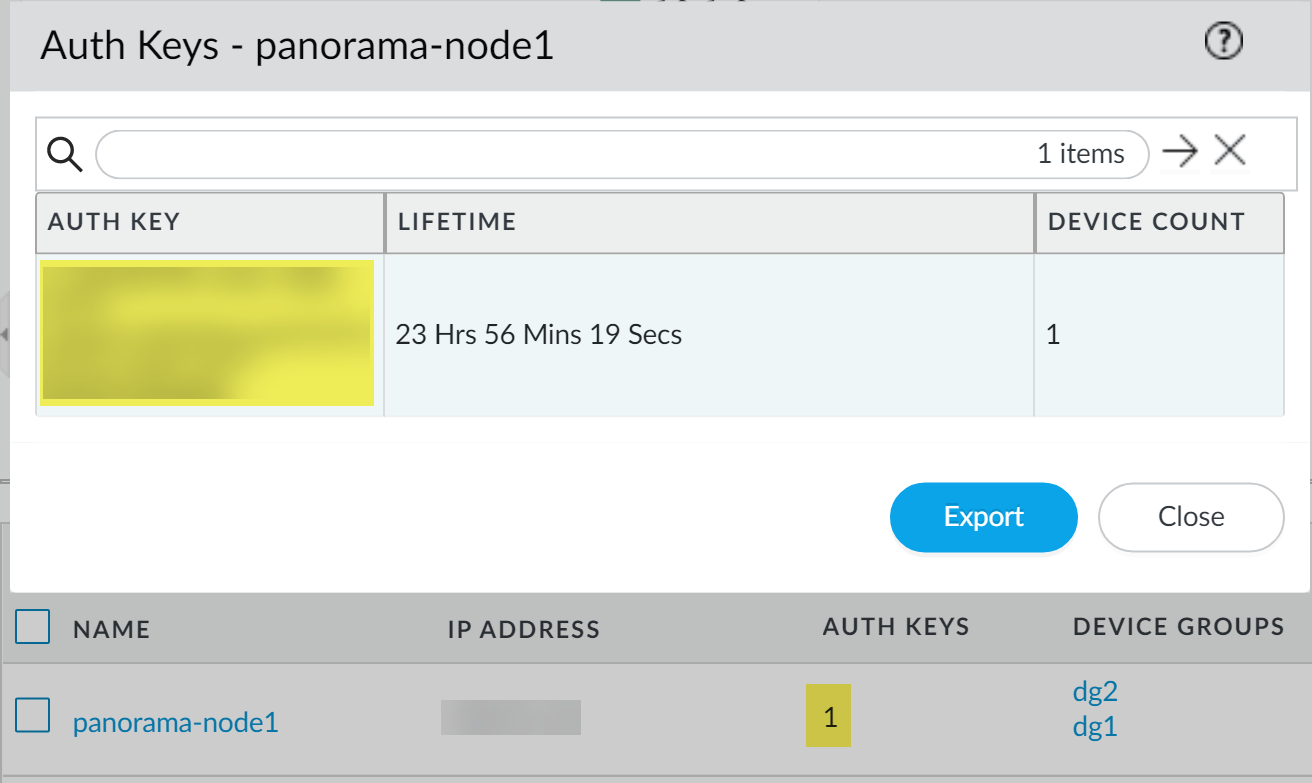
Click Commit and Commit to Panorama to finish adding the firewall.Select and Synchronize Config.(Required for firewalls running PAN-OS 10.1 and later releases) Obtain the device registration authentication key required for onboarding new firewalls.- Select and locate the Panorama Node you added firewalls to.Click the value in the Auth Keys column to display the device registration authentication key.The device registration authentication key is automatically generated for the Panorama Node.Copy the Auth Key.
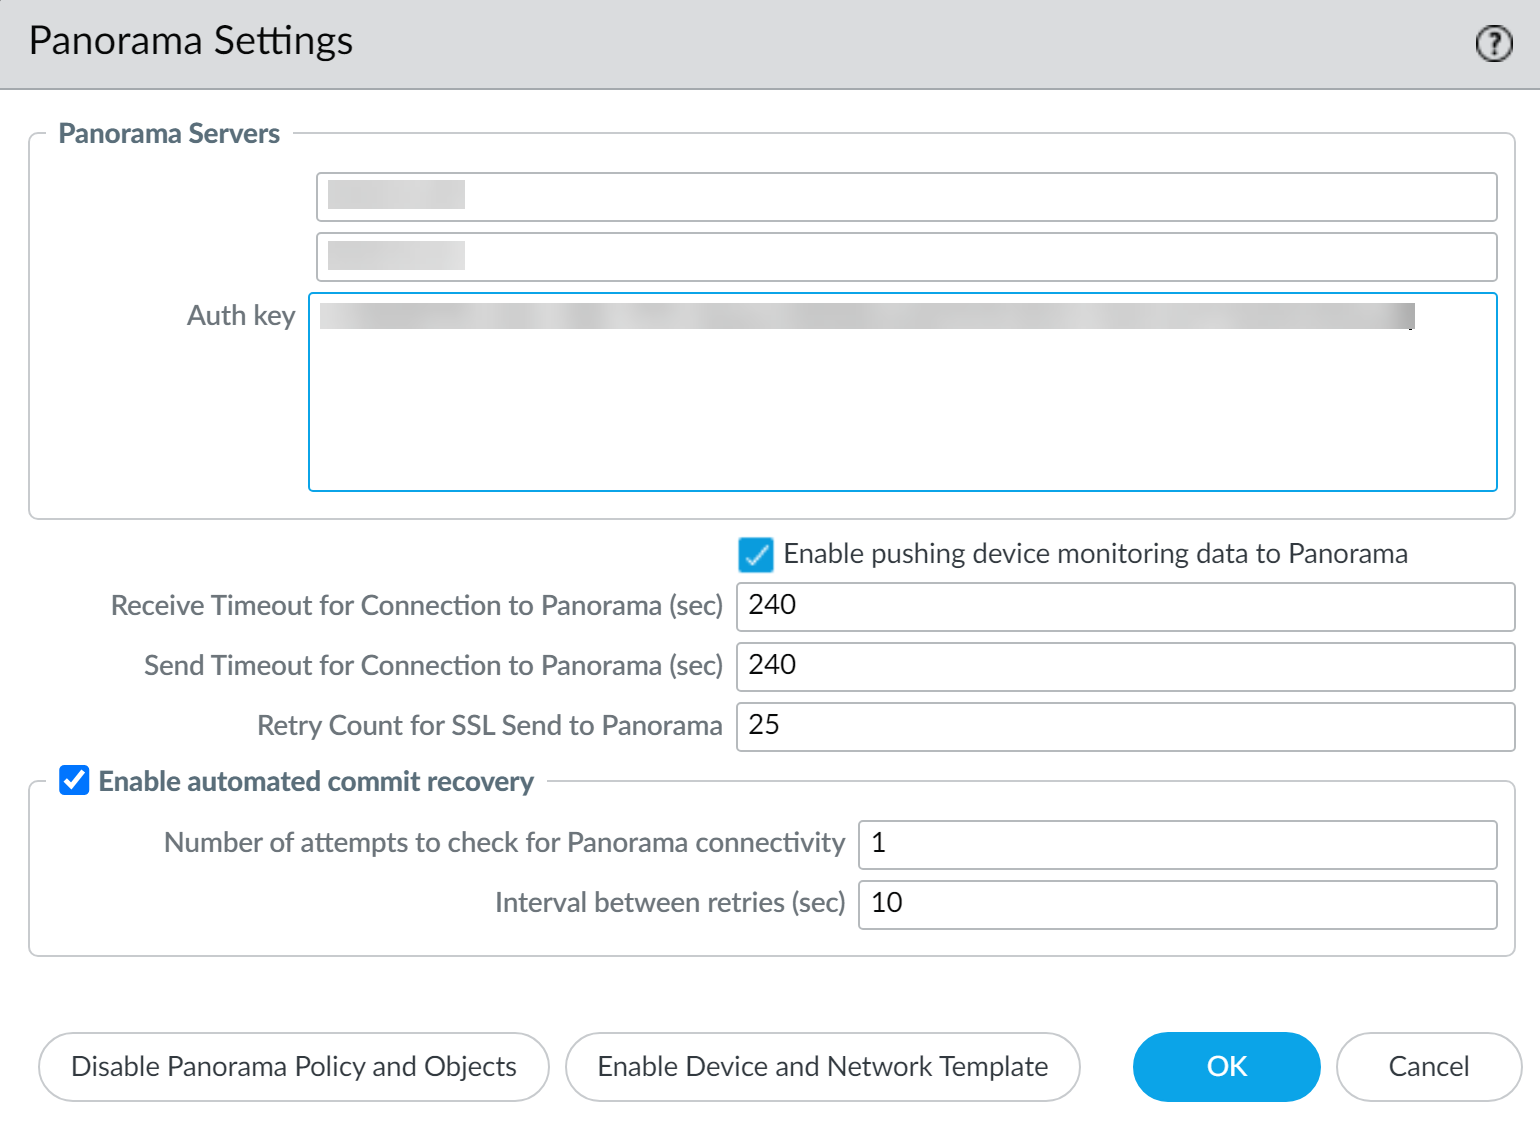
![]() Configure the firewall to communicate with the Panorama Node.
Configure the firewall to communicate with the Panorama Node.- Log in to the firewall web interface.Select and edit the Panorama Settings.Enter the Panorama Node IP address in the first field(Optional) If the Panorama Node is in an HA configuration, enter the IP address of the secondary Panorama Node in the second field.Enter the device registration Auth Key you copied in the previous step.Click OK.Select Commit and Commit your changes.
![]() Verify that the newly added firewall is Connected.
Verify that the newly added firewall is Connected.- Select .Find the firewall you added and verify that the Connection Status column displays Connected.
![]() (HA only) Copy the managed firewalls added to the primary Panorama Node to the secondary Panorama Node.This step is required to successfully push the Panorama Node configuration to managed firewalls for a Panorama Node in an HA configuration.
(HA only) Copy the managed firewalls added to the primary Panorama Node to the secondary Panorama Node.This step is required to successfully push the Panorama Node configuration to managed firewalls for a Panorama Node in an HA configuration.- Select and select the primary Panorama Node you added managed firewalls to.Select Copy Devices.Click OK when prompted to copy the managed firewalls from the primary Panorama Node to the secondary Panorama node.