Prisma Access
Strata Cloud Manager
Table of Contents
Expand All
|
Collapse All
Prisma Access Docs
-
- 6.1 Preferred and Innovation
- 6.0 Preferred and Innovation
- 5.2 Preferred and Innovation
- 5.1 Preferred and Innovation
- 5.0 Preferred and Innovation
- 4.2 Preferred
- 4.1 Preferred
- 4.0 Preferred
- 3.2 Preferred and Innovation
- 3.1 Preferred and Innovation
- 3.0 Preferred and Innovation
- 2.2 Preferred
-
-
- 4.0 & Later
- Prisma Access China
-
-
Strata Cloud Manager
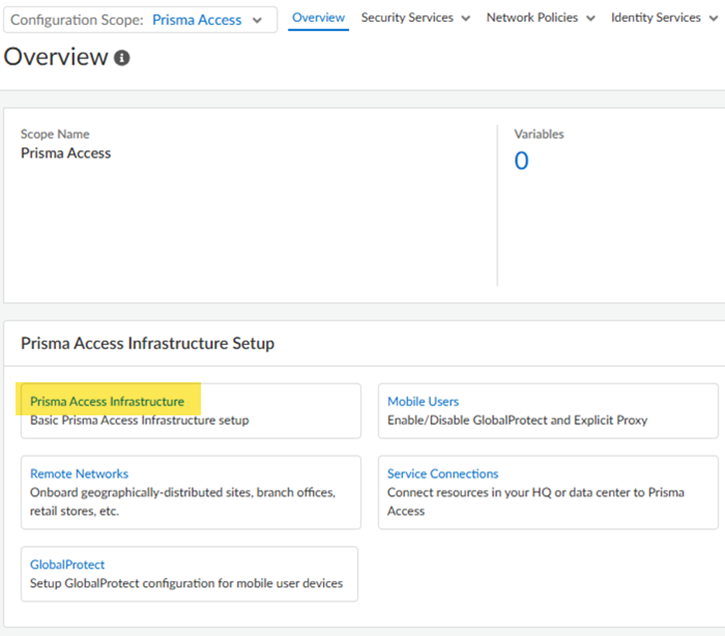
- Create a hypervisor resource profile.You use this profile with the ESXi instance you created to create an environment for SASE Private Location.Optionally, you can create this profile during SASE Private Location setup instead of creating it now.From Strata Cloud Manager, go to ConfigurationNGFW and Prisma Access and select the Prisma Access configuration scope.Configure the Prisma Access Infrastructure.
![]() Click the gear to configure the Prisma Access Private Locations settings and Add Private Location.
Click the gear to configure the Prisma Access Private Locations settings and Add Private Location.![]()
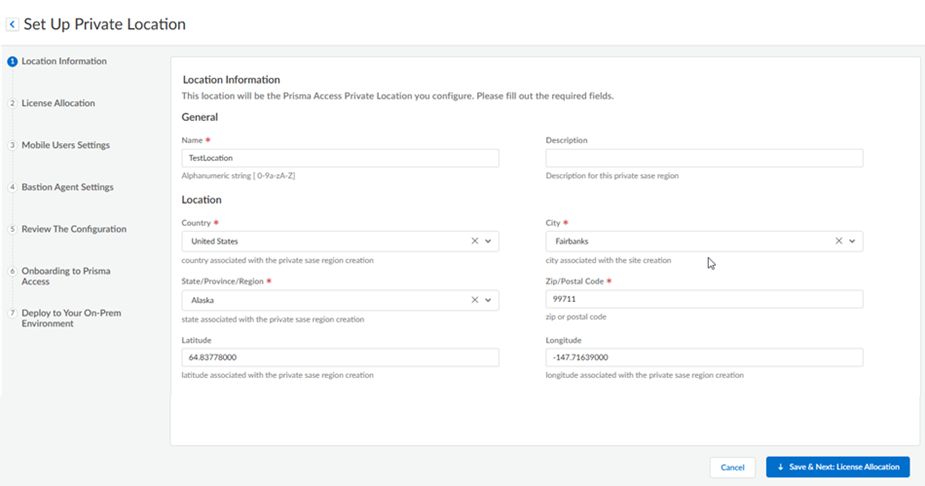
![]() Enter the location details.
Enter the location details.- Enter a unique Name for the private location.
Don’t use spaces or dashes. Make sure that each SASE Private Location has a unique name, even across multiple tenants. You can’t change the name after you perform a Config Push.
- (Optional) Enter a Description for this location.
- Enter the Country, State, and City, and, optionally, the Zip/Postal Code closest to the area where this location will be deployed.
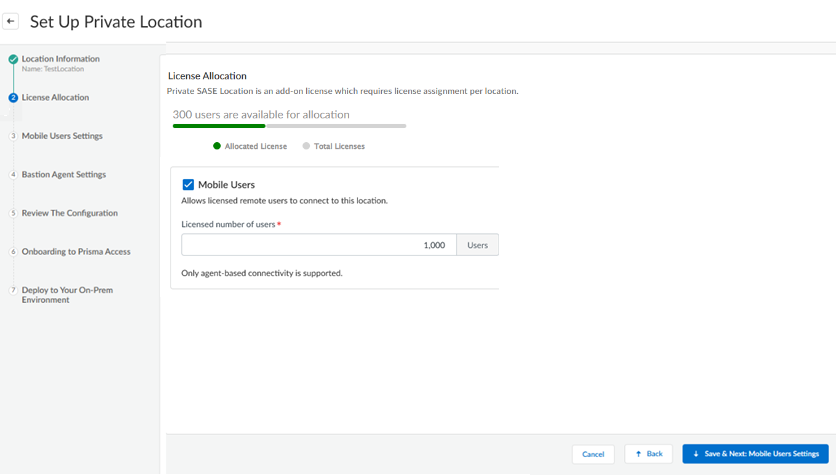
Prisma Access populates the Latitude and Longitude based on the geographic information you enter.Save and Next to save your changes and go to the next section.![]() Enable service capabilities for your SASE Private Location by entering the estimated number of Mobile Users to secure with SASE Private Location.The number depends on the number of mobile users in your Prisma Access license. For example, if you have a mobile user license of 2,000 units, enter a maximum of 2,000 estimated users.Save your changes when complete and go to the next section.
Enable service capabilities for your SASE Private Location by entering the estimated number of Mobile Users to secure with SASE Private Location.The number depends on the number of mobile users in your Prisma Access license. For example, if you have a mobile user license of 2,000 units, enter a maximum of 2,000 estimated users.Save your changes when complete and go to the next section.![]() Configure settings for mobile users.
Configure settings for mobile users.- Specify the Hypervisor Resource Profile to use, or Create New and create a hypervisor resource profile based on your VMware ESXi environment.Specify the DNS Server IP address assignment (either DHCP or Static).If you want to use a static DNS server, enter the primary server and the secondary server.Enter the Load Balancer Configuration.Use the same IP addresses that you configured for the ESXi environment.
- Enter the two IP addresses used for the Virtual
Public IP Address.
![]()
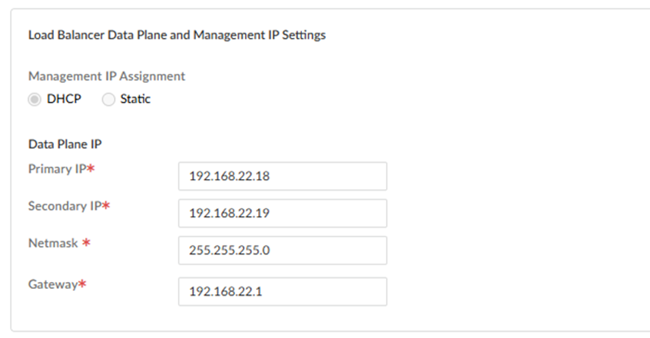
- Enter the load balancer data plane and management IP
settings.The wizard populates the IP assignment type (either DHCP or Static) from the IP Assignment you specified under DNS Server settings.
- If you specified DHCP for IP assignment, enter the Primary IP, Secondary IP, Netmask, and Gateway for the management IP address configuration.
- If you specified Static for IP
assignment, enter the Data Plane
IP and Management
IP addresses, including the
Primary IP,
Secondary IP,
Netmask, and
Gateway.
![]()
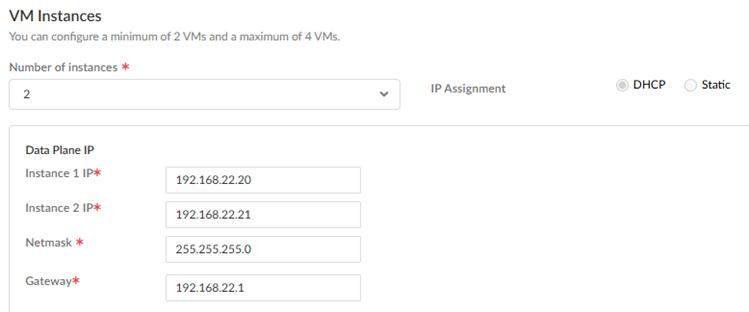
Configure your VM instances.- Enter the Number of instances you have in
your VM. You can have from two to four VM instances.
- If you specified a Static IP address assignment, enter the Primary IP, Secondary IP, Netmask, and Gateway for the management IP configuration.
- If you specified a DHCP IP address
assignment enter the Data Plane IP address information,
including the Primary IP,
Secondary IP,
Netmask, and
Gateway.
![]()
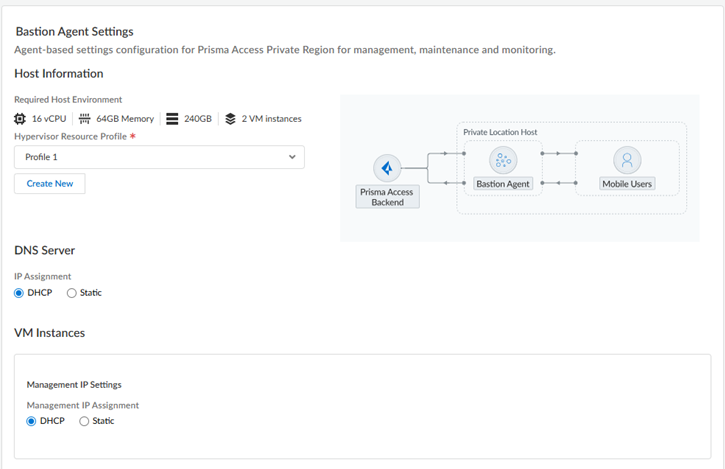
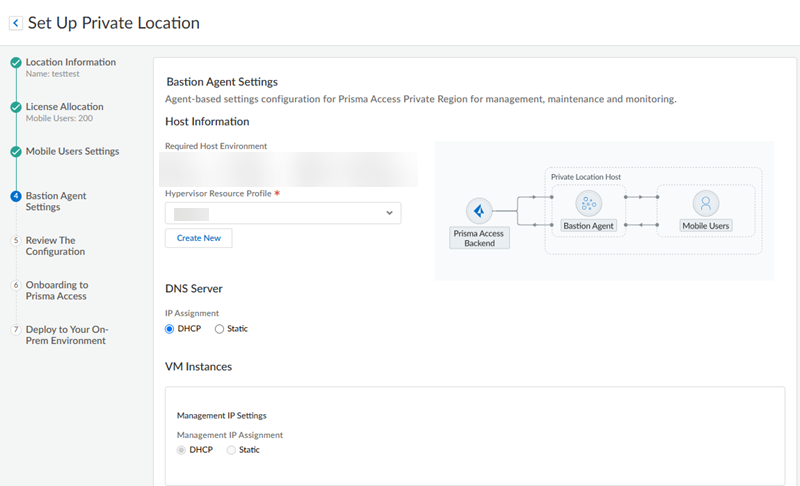
Go to the Next step when complete.Set up a Bastion Agent.Prisma Access uses the bastion host (bastion agent) for remote management, maintenance, and monitoring.- Specify a Hypervisor Resource Profile.Palo Alto Networks recommends that you use the same VM instance that you specified for the hypervisor resource profile.
![]() Go to the Next step when complete.Specify DNS Server settings.If you specified Static for IP assignment, enter the Prisma Server and Secondary Server IP addresses and the Management IP settings, including the Primary IP, Secondary IP, Netmask, and Gateway.
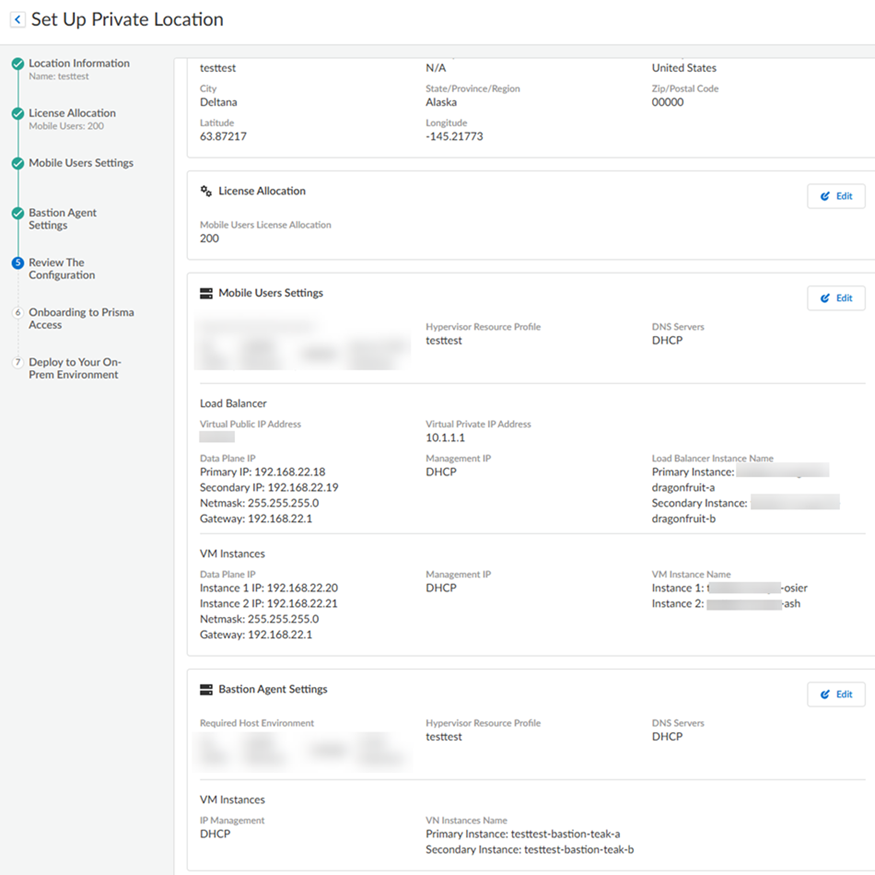
Go to the Next step when complete.Specify DNS Server settings.If you specified Static for IP assignment, enter the Prisma Server and Secondary Server IP addresses and the Management IP settings, including the Primary IP, Secondary IP, Netmask, and Gateway.![]() Review your configuration.If you need to make any changes to your configuration, Edit your choices; otherwise, Save & Next to save your changes and go to the next screen.Prisma Access populated the Load Balancer Instance Name and the VM Instance Name during onboarding.
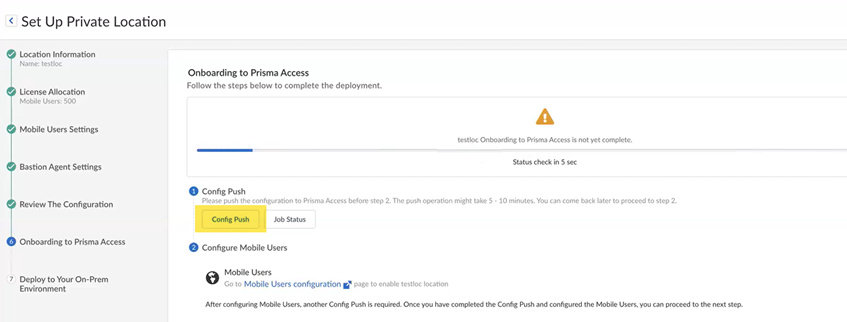
Review your configuration.If you need to make any changes to your configuration, Edit your choices; otherwise, Save & Next to save your changes and go to the next screen.Prisma Access populated the Load Balancer Instance Name and the VM Instance Name during onboarding.![]() Onboard your private location to Prisma Access
Onboard your private location to Prisma Access- Perform a Config Push to push your configuration.
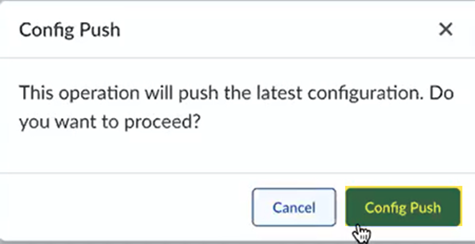
![]() Confirm the Config Push operation.
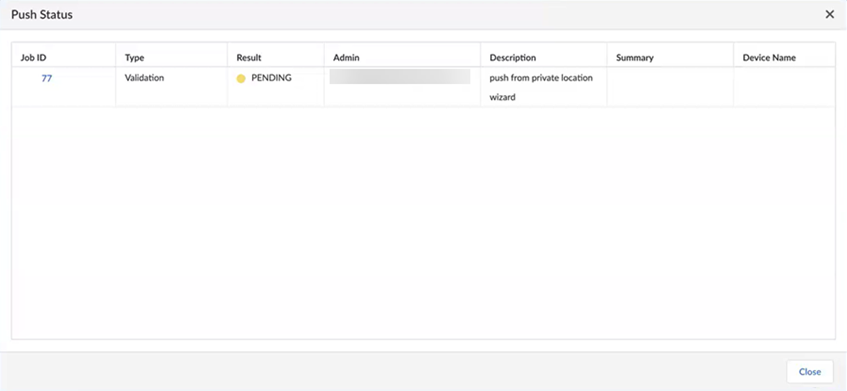
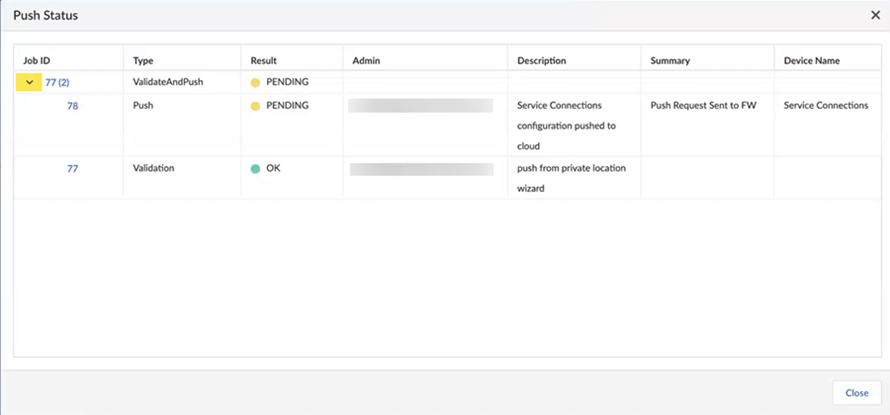
Confirm the Config Push operation.![]() The Push Status window displays. Wait for the job to complete successfully before moving to the next step.
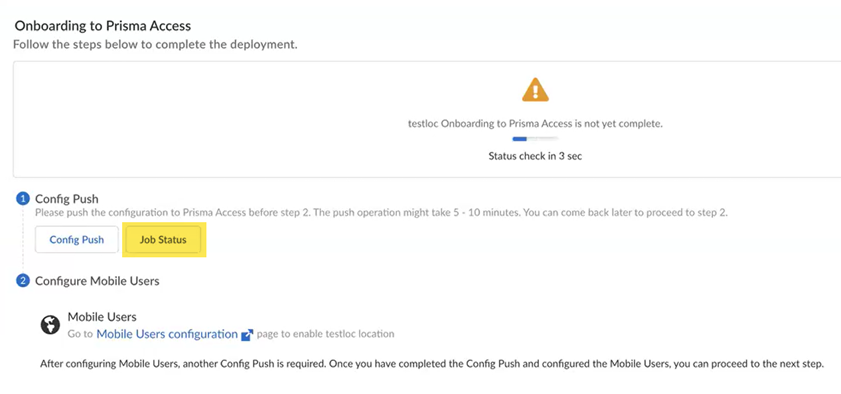
The Push Status window displays. Wait for the job to complete successfully before moving to the next step.![]() (Optional) to check the status of your pending job, click Job Status.
(Optional) to check the status of your pending job, click Job Status.![]() To get more details about the status of your job, click the down arrow on the left side of the screen to see the status of the job types.
To get more details about the status of your job, click the down arrow on the left side of the screen to see the status of the job types.![]() Wait for the Config Push to display with a green check mark.
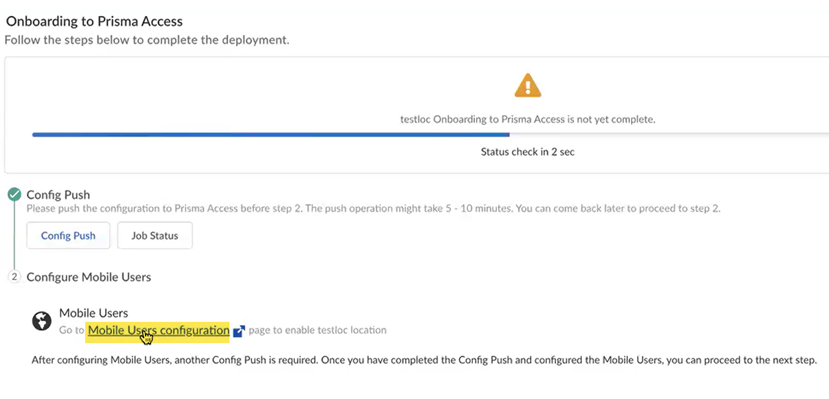
Wait for the Config Push to display with a green check mark.![]() Set up your mobile users deployment in Prisma Access.
Set up your mobile users deployment in Prisma Access.- Select Mobile Users Configuration.
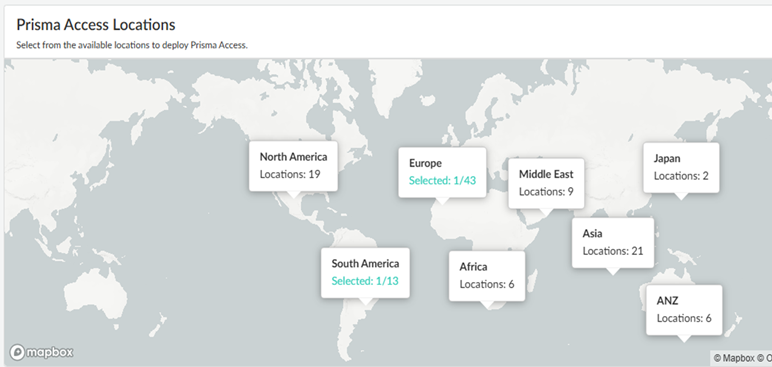
![]() Select a Prisma Access region.Select the region where you deployed the SASE Private Location.
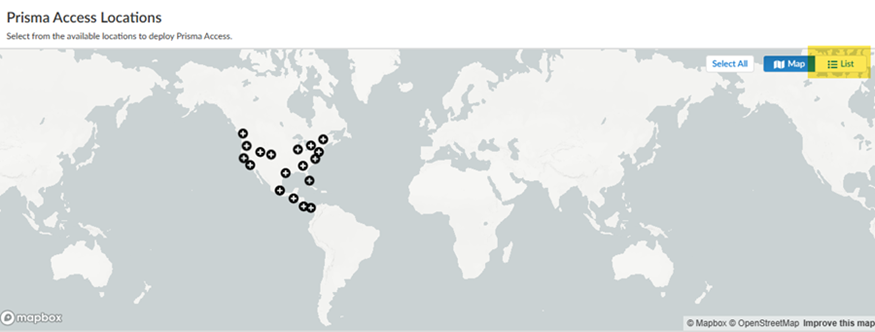
Select a Prisma Access region.Select the region where you deployed the SASE Private Location.![]() Select the SASE Private Location you created and Save your changes.Switch from the Map view to a List view to find the location you created; then select the location.
Select the SASE Private Location you created and Save your changes.Switch from the Map view to a List view to find the location you created; then select the location.![]()
![]() Click the arrow to the left of Prisma Access Locations.
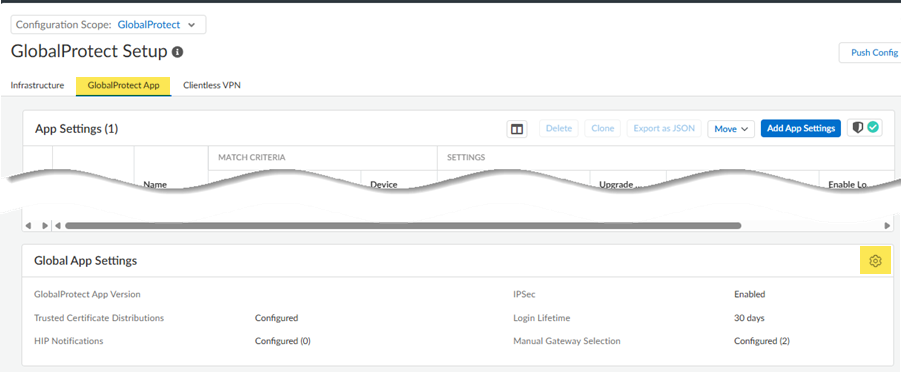
Click the arrow to the left of Prisma Access Locations.![]() Select the GlobalProtect App tab and select the gear to edit the GlobalProtect settings.
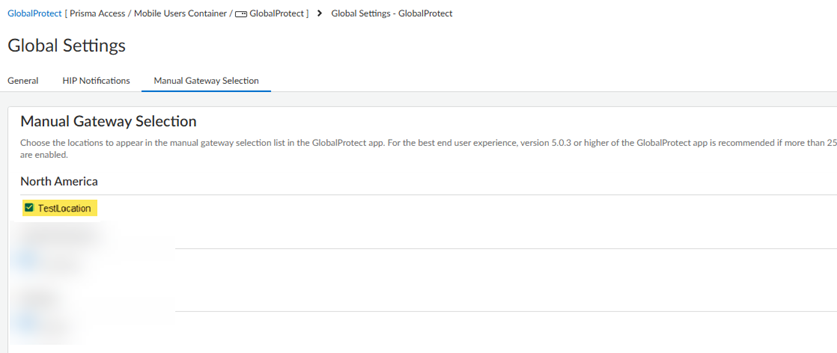
Select the GlobalProtect App tab and select the gear to edit the GlobalProtect settings.![]() Select Manual Gateway Selection, select the SASE Private Location you created, and Save your changes.This step enables your mobile users to manually select this gateway from the GlobalProtect app.
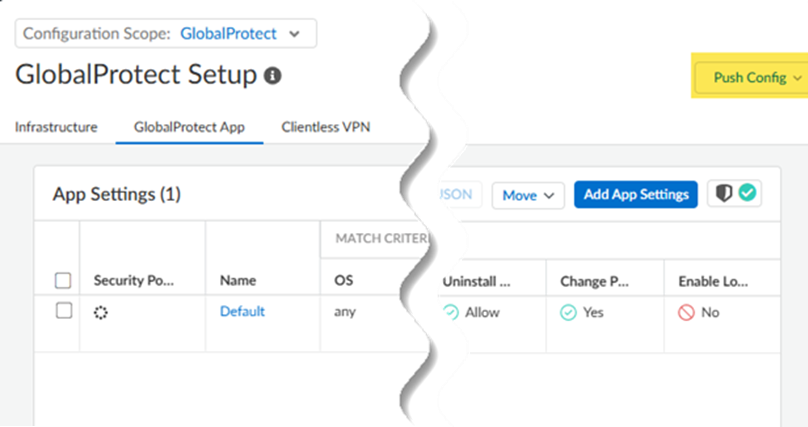
Select Manual Gateway Selection, select the SASE Private Location you created, and Save your changes.This step enables your mobile users to manually select this gateway from the GlobalProtect app.![]() Push Config to save your GlobalProtect configuration changes.
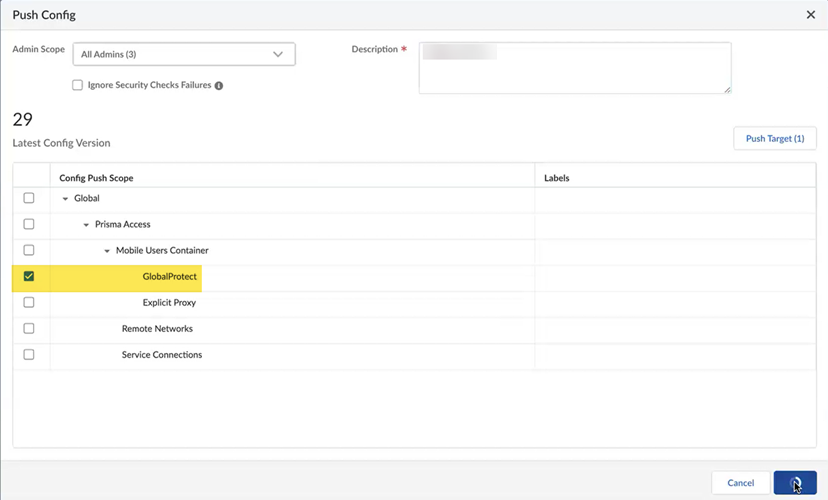
Push Config to save your GlobalProtect configuration changes.![]() Make sure that GlobalProtect in the push scope.
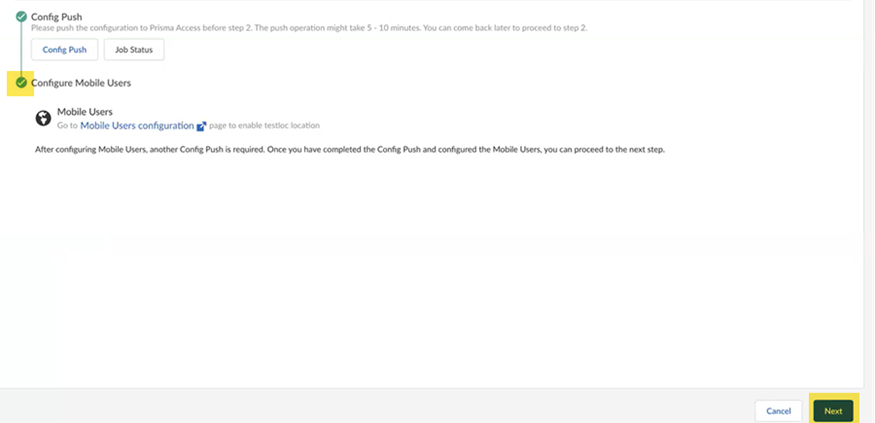
Make sure that GlobalProtect in the push scope.![]() Wait for the second push to complete; then, go to the Next step.When a green check mark displays next to Configure Mobile Users, the second push is complete.
Wait for the second push to complete; then, go to the Next step.When a green check mark displays next to Configure Mobile Users, the second push is complete.![]() Deploy the SASE Private Location to your on-premises environment.
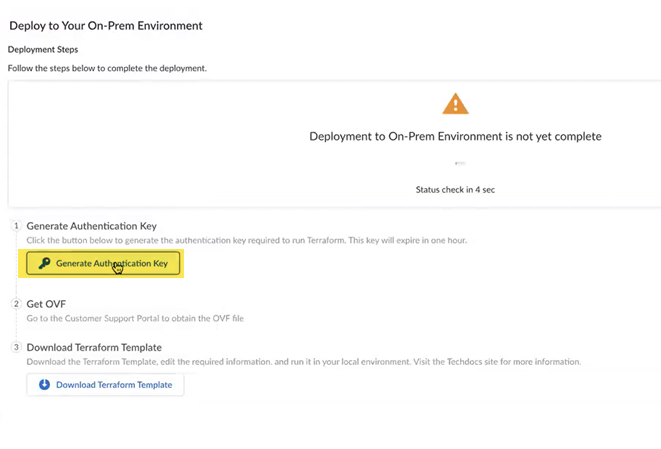
Deploy the SASE Private Location to your on-premises environment.- From the onboarding workflow, Generate Authentication Key and copy its contents.You use this key in the Terraform template. This authentication key is valid for one hour.
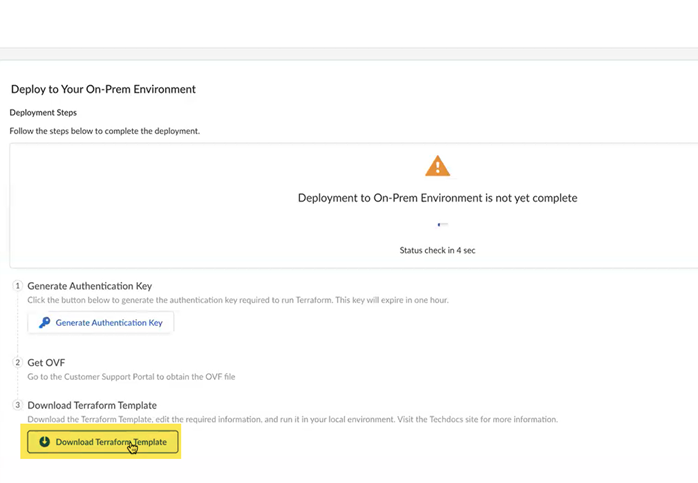
![]() Download Terraform Template and save it to your local device.The Terraform template provides you with access to upgrade your Prisma Access dataplane.
Download Terraform Template and save it to your local device.The Terraform template provides you with access to upgrade your Prisma Access dataplane.![]() Open the Terraform file in a text editing program and edit the following parameters:
Open the Terraform file in a text editing program and edit the following parameters:- Replace <vcenter_hostname> with your ESXi hostname.
- Replace <vcenter_username> with the ESXi username.
- Replace <vcenter_password> with the ESXi password.
- Replace <prismasase_deployment_token> with the authentication key you just downloaded.
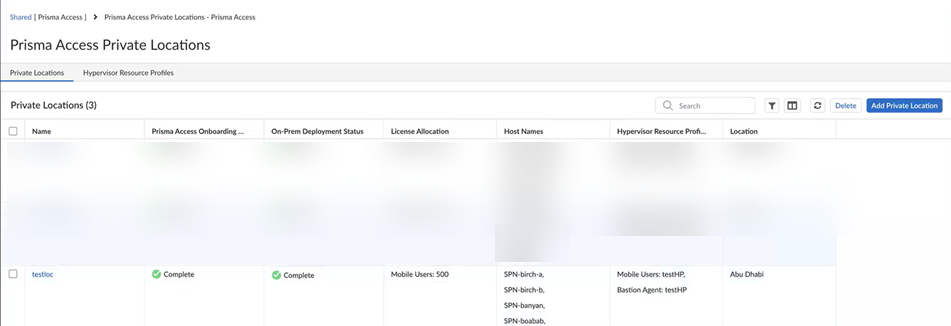
Initialize the Terraform environment by entering the terraform-init command to initialize Terraform and download the required provider.Generate a plan to review the resources that will be created by entering the terraform plan command.Apply the configuration to deploy the SASE Private Location components by entering the terraform apply command.Confirm the deployment when prompted.After successful deployment, the SASE Private Location components are provisioned in your VMware ESXi environment. The components will register with the Prisma Access cloud service and become available for configuration through the Prisma Access management interface.You can verify the deployment status in the Prisma Access management interface, where the newly deployed SASE Private Location will appear as an available region for your tenant.Verify that the SASE Private Location deployment was successfully completed.- Go to ConfigurationNGFW and Prisma Access, select the Prisma Access configuration scope, and then select Prisma Access SetupCheck the Prisma Access Private Locations
- On-Prem Onboarding Status—Shows the progress of the SASE Private Location onboarding. Onboarding is complete when this field displays Complete.
- On-Prem Deployment Status—Shows the progress of the SASE Private Location deployment. Deployment is complete when this field displays Complete.
![]() Configure security policy rules specific to your SASE Private Location using tags.
Configure security policy rules specific to your SASE Private Location using tags.

