SaaS Security
Onboarding an App Using Okta Credentials
Table of Contents
Expand All
|
Collapse All
SaaS Security Docs
Onboarding an App Using Okta Credentials
To access an administrator account through Okta single sign-on (SSO), SSPM requires
your organization's Okta subdomain and an MFA secret key.
| Where Can I Use This? | What Do I Need? |
|---|---|
|
Or any of the following licenses that include the Data Security license:
|
Depending on the app that you're onboarding,
you might be accessing an administrator account through Okta single sign-on (SSO).
To access an administrator account through Okta SSO, SSPM requires your
organization's Okta subdomain and an MFA secret key. Complete the following steps to
get this information. Depending on the app that you're onboarding, you might be
required to provide additional information during onboarding.
- Identify your Okta subdomain.The Okta login URL that Okta assigned to your organization includes your Okta subdomain. The Okta login URL is in the format https://<your_okta_subdomain>.okta.com and often your Okta subdomain is the name of your company. However, your organization can define a custom URL that does not include your Okta subdomain. If you're an Okta administrator, you can identify the subdomain from the Okta administrator dashboard. Your subdomain is displayed in the header of the dashboard.Before you continue to the next step, make note of your Okta subdomain. You will provide this information to SSPM during the onboarding process.Generate and copy an MFA secret key.MFA provides an extra layer of security when accessing the Okta user account. To enable this extra layer of security, you must configure the Okta user account for MFA that uses one-time passcodes. These one-time passcodes are generated from authenticator apps such as Okta Verify or Google Authenticator by using an MFA secret key. The key is a shared secret between Okta and the authentication app. This shared secret enables Okta and the authentication app to generate matching passcodes for verification. Like an authentication app, SSPM will use the MFA secret key to generate one-time passcodes for accessing the Okta user account.In addition to providing SSPM with the MFA secret key, you must also configure your authentication app with the MFA secret key. Configuring the authentication app will enable the app to generate the one-time passcodes that you will need to access the account.If the user account is already configured for MFA, and if you know the MFA secret key value, you don’t need to complete the following steps. You need only provide the MFA secret key to SSPM during the onboarding process. If the user account isn’t configured for MFA, or if you don’t know the MFA secret key, complete the following steps.
- Determine whether you're using the Okta Classic Engine or the Okta
Identity Engine.The steps you follow to get the MFA secret key will differ depending on whether you're using the Okta Classic Engine or the Okta Identity Engine. If you don’t know which Okta engine you're using, you can determine this information from your Okta version number.
- Log in to the Okta Administrator Dashboard.
- Locate the Okta version number, which is displayed at the bottom of the Okta Administrator Dashboard page.
- Determine which engine you're using. If your version number ends with C, you're using the Okta Classic Engine. If the version number ends in E, you're using the Okta Identity Engine.
- Based on the Okta engine you're using, complete the steps for either the
Okta Classic Engine or the Okta Identity Engine.
- If you're using the Okta Classic Engine, complete the
following steps to generate and copy an MFA secret
key:
- Log in to the Okta user account.
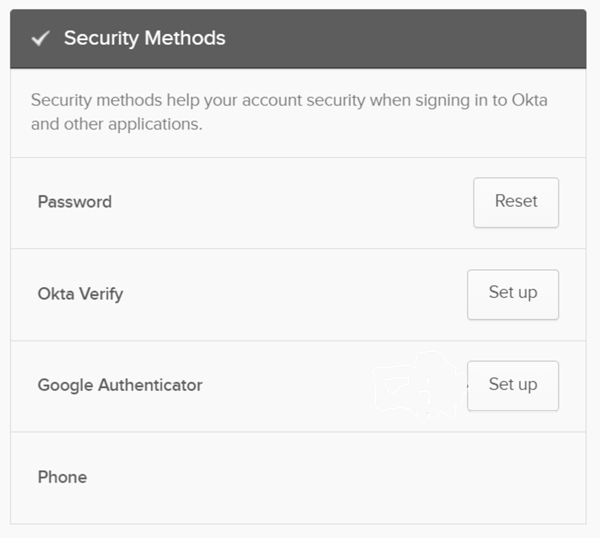
- Locate your profile menu in the upper right corner of the page. From the profile menu, select Settings.
- On the Settings page, locate the section that is labeled
Extra Verification or Security Methods. This section
shows the MFA methods that are available.
![]()
- Decide which authentication app you will use and
download it to your cellphone.Depending on your organization, you can set up MFA for either the Okta Verify or Google Authenticator apps. Decide which of these authentication apps you will configure. This decision might be limited to the authentication apps that your organization allows, which are shown in the Extra Verification or Security Methods section of the Settings page.
- From the Okta settings page, Set
up either Okta Verify or Google
Authenticator. If the Set up
button is disabled, Edit Profile
to enable the action.If Okta Verify or Google Authenticator is already enabled for MFA, but you don’t know the MFA secret key, then you must Remove the current setup, and then Set up the authenticator again.
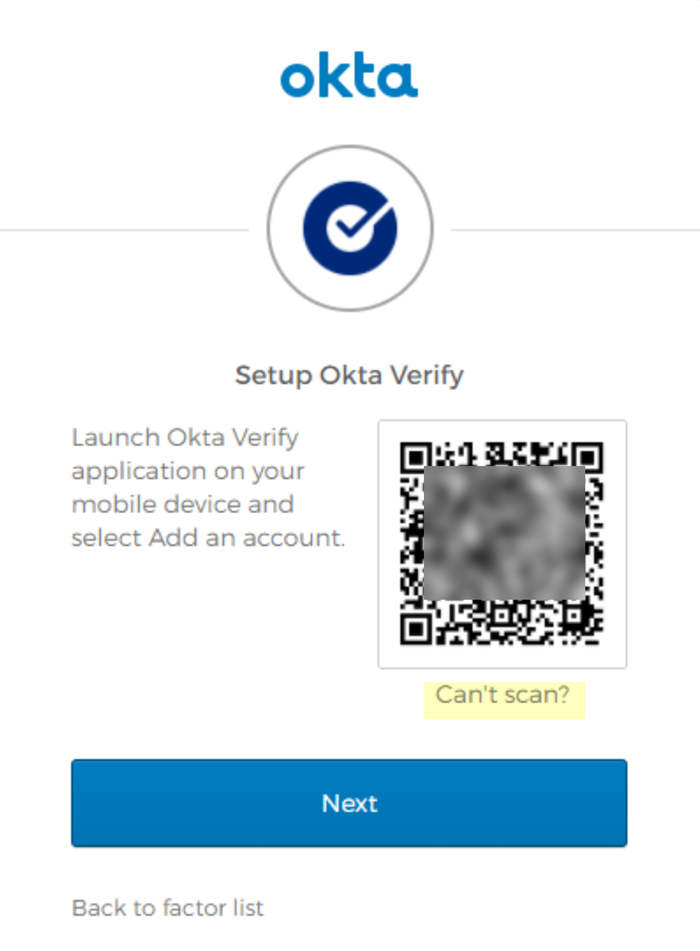
- Follow the onscreen instructions for setting up the
authenticator app, but, when you're presented with a QR
code that contains the MFA secret key, don’t scan it
with your authentication app. Instead, manually record
and enter the QR code.
- On the MFA set-up page that displays the QR
code, click Can't
scan?.
![]()
- If you're using Google Authenticator, continue to the next step. If you're using Okta Verify, you're redirected to a page with setup options. To display the MFA secret key as a character string, Setup manually without push notification.
- Okta displays the MFA secret key as a character
string instead of as a QR code. Copy the key into
a text file.Don’t continue to the next step unless you have copied the MFA Secret Key. You must provide this key to SSPM during the onboarding process.
- On the MFA set-up page that displays the QR
code, click Can't
scan?.
- Configure your authentication app by manually entering
the MFA secret key. If you're using Okta Verify, when you're prompted to scan the QR code, Enter key manually instead.If you're using Google Authenticator, manually enter the MFA secret key into the Google Authenticator app.
- Open the Google Authenticator app.
- Click on the ‘+’ icon.
- Enter a setup key.
- If you're using the Okta Identity Engine, complete the
following steps to generate and copy an MFA secret
key:
- Log in to the Okta user account.
- Locate your profile menu in the upper right corner of the page. From the profile menu, select My Settings.
- On the Settings page, select the option to
Manage security
methods.The Security methods page displays options for MFA.For SSPM integration with the Okta Identity Engine, you can’t use the Okta Verify authenticator app. You can’t use Okta Verify because SSPM requires you to enter the MFA secret key as a character string. When you use Okta Verify with Okta Identity Engine, you can’t obtain the MFA secret key as a character string. Instead, you can use the Google Authenticator app.
- Download the Google Authenticator app to your cellphone.
- From the Security methods page, start the Set
up for Google Authenticator. If Google Authenticator is already enabled for MFA, but you don’t know the MFA secret key, then you must Remove the current setup, and then Set up the authenticator again.
- Follow the onscreen instructions for setting up Google
Authenticator, but, when you're presented with a QR code
that contains the MFA secret key, don’t scan it with
your authentication app. Instead, manually record and
enter the QR code.
- On the MFA set-up page that displays the QR
code, click Can't
scan?.
![]()
- On the MFA set-up page that displays the QR
code, click Can't
scan?.
- Okta displays the MFA secret key as a character string
instead of as a QR code. Copy the key and paste it into
a text file.Don’t continue to the next step unless you have copied the MFA secret key. You must provide this key to SSPM during the onboarding process.
- Manually enter the MFA secret key into the Google
Authenticator app.
- Open the Google Authenticator app.
- Click on the ‘+’ icon.
- Enter a setup key.
- If you're using the Okta Classic Engine, complete the
following steps to generate and copy an MFA secret
key:


