SD-WAN
Create the Predefined Zones
Table of Contents
Create the Predefined Zones
Create the predefined zones in Panorama.
| Where Can I Use This? | What Do I Need? |
|---|---|
|
SD-WAN policy rules use predefined zones for internal path selection and traffic
forwarding purposes. There are two use cases; your use case depends on whether you
are enabling SD-WAN on your current PAN-OS®
firewalls that have existing security policy rules or whether you are starting a
brand new PAN-OS deployment with no previous security policy rules. If
your current firewalls have security policy rules in place, you map your existing
zones to the predefined zones that SD-WAN policies use.
The SD-WAN engine makes use of the predefined zones for forwarding traffic.
Additionally, creating the predefined zones in the Panorama™ templates
provides consistent visibility between the managed firewalls and Panorama:
- Zone Internet—For traffic going to and coming from the untrusted internet.
- Zone to Hub—For traffic going from branch firewalls to hub firewalls and for traffic going between hub firewalls.
- Zone to Branch—For traffic going from hub firewalls to branch firewalls and for traffic between branch firewalls.
- Zone Internal—For internal traffic at a specific location.
- (SD-WAN plugin 2.2.0 and later versions) Zone to PA Hub—For internal traffic to reach Prisma Access hub.(SD-WAN plugin 2.2.0 and later versions) For the Prisma Access hub support, when you enable Zone to PA Hub, you must first ensure that your firewall supports enough zones. Because when the Zone to PA Hub predefined zone is configured, the SD-WAN plugin consumes one zone from the total available zones from the firewall. Therefore, the following lower-end firewall models that support up to 15 zones will have an impact on the available zones when you configure Zone to PA Hub:
- PA-220
- PA-220R
- PA-820
- VM-Series firewalls on public clouds with two virtual CPUs (AWS, Azure, GCP, OCI, Nutanix, IBM) and private clouds (VMware ESXi, KVM hypervisor, and Nutanix)
- PA-410
For example, if you have an existing Security policy with zones assigned to it, you might want to update the zone when you enable Prisma Access hub support as the Prisma Access hub support will consume one zone from the available zones. Otherwise, the traffic using that Security policy will fail.
If you don’t create the predefined zones, the SD-WAN plugin will automatically
create the predefined zones on your branch and hub firewall, but you won’t see
them in Panorama.
There
are two main use cases for predefined zones:
- Existing Zones—You already have pre-existing zones that you created for use in User-ID™ or various policies (security policy rules, QoS policy rules, zone protection, and packet buffer protection). You must map the pre-existing zones to the predefined zones that SD-WAN uses so the firewall can properly forward traffic. You should continue to use your pre-existing zones in all of your policies because the new predefined zones are used only for SD-WAN forwarding. You will map the zones when you add SD-WAN devices to Panorama by creating your CSV file. (If you aren’t using a CSV file, you will map zones when you configure and add existing zones to Zone Internet, Zone to Hub, Zone to Branch, and Zone Internal.)The result of mapping is that a branch or hub firewall can do a forwarding lookup to determine the egress SD-WAN interface and thus the egress zone. If you don’t map pre-existing zones to predefined zones, an allowed session won’t use SD-WAN. The mapping is necessary because existing customers have different zone names in place, and the firewall must narrow all of those zone names down to the predefined zones. You don’t necessarily have to map zones to all of the predefined zones, but you should map existing zones to at least the Zone to Hub and Zone to Branch zones.
- No Existing Zones—You have a brand new deployment of Palo Alto Networks® firewalls and SD-WAN. In this case, you don’t have zones to map; we recommend you use the predefined zones in your PAN-OS policies and User-ID to simplify deployment.
Before you begin configuring your SD-WAN deployment, for both use cases, you will
create the required predefined zones in Panorama named
zone-internet, zone-internal,
zone-to-hub, zone-to-branch, and
(SD-WAN plugin 2.2.0 and later versions)
zone-to-pa-hub. When you onboard your branch and hub
firewalls, you will add SD-WAN devices to Panorama. For
pre-existing customers, the SD-WAN plugin will internally map
pre-existing zones with these predefined zones when executing SD-WAN
policy rules, QoS policy rules, zone protection, User-ID, and packet buffer
protection, and will use the predefined zones for zone logging and visibility in Panorama. For new customers, you are properly set up using the predefined
zones.
The predefined zones are also required in order to automatically set up VPN tunnels between your
SD-WAN hubs and branches when you push the configuration from Panorama to your managed SD-WAN devices.
The zone names
are case-sensitive and must match the names provided in this procedure.
Your commit fails on the firewall if the zone names don’t match
those described in this procedure.
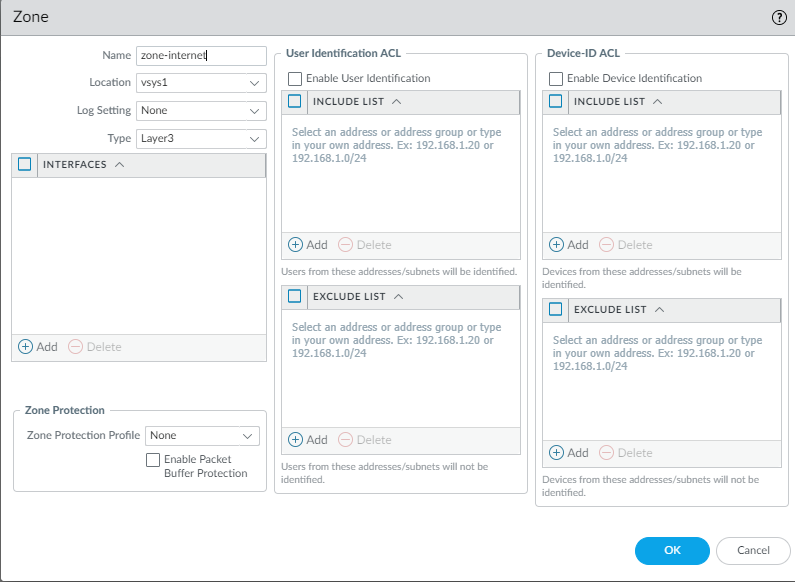
In this example,
we are creating the zone named zone-internet.
- Log in to the Panorama Web Interface.Select and in the Template context drop-down, select the network template you previously created.Add a new zone.Enter zone-internet, for example, as the Name of the zone.For zone Type, select Layer3.Click OK.
![]() Repeat the previous steps to create the remaining zones. In total, you must create the following zones:
Repeat the previous steps to create the remaining zones. In total, you must create the following zones:- zone-to-branch
- zone-to-hub
- zone-internal
- zone-internet
- (SD-WAN plugin 2.2.0 and later versions) zone-to-pa-hub
Commit and Commit and Push your configuration changes.(Required for pre-existing customers) You must modify your security, NAT, and SD-WAN policies by adding the SD-WAN predefined zones to the correct source and destination zones.Commit your changes.