Replace a WF-500-B System Drive
Table of Contents
Replace a WF-500-B System Drive
Learn how to replace a system drive on a WF-500-B appliance.
If the system drive fails,
the appliance attempts to boot the Maintenance Recovery Tool (MRT)
where you can view error messages and drive status. If the MRT is
not bootable, power down the appliance. For assistance in verifying
the status of the drive to determine if it should be replaced, contact Palo Alto Networks Support.
The
system drive on the WF-500-B appliance is located on the back panel
of the appliance (see WF-500-B Back Panel).
Disconnect all power cords before servicing
the WF-500-B appliance.
After you install the
new drive, you will need to obtain a backup configuration that you
saved from the failed appliance to restore your configuration.
To avoid injury to yourself or damage to
your Palo Alto Networks® hardware or the data that resides on the
hardware, read the Product Safety Warnings.
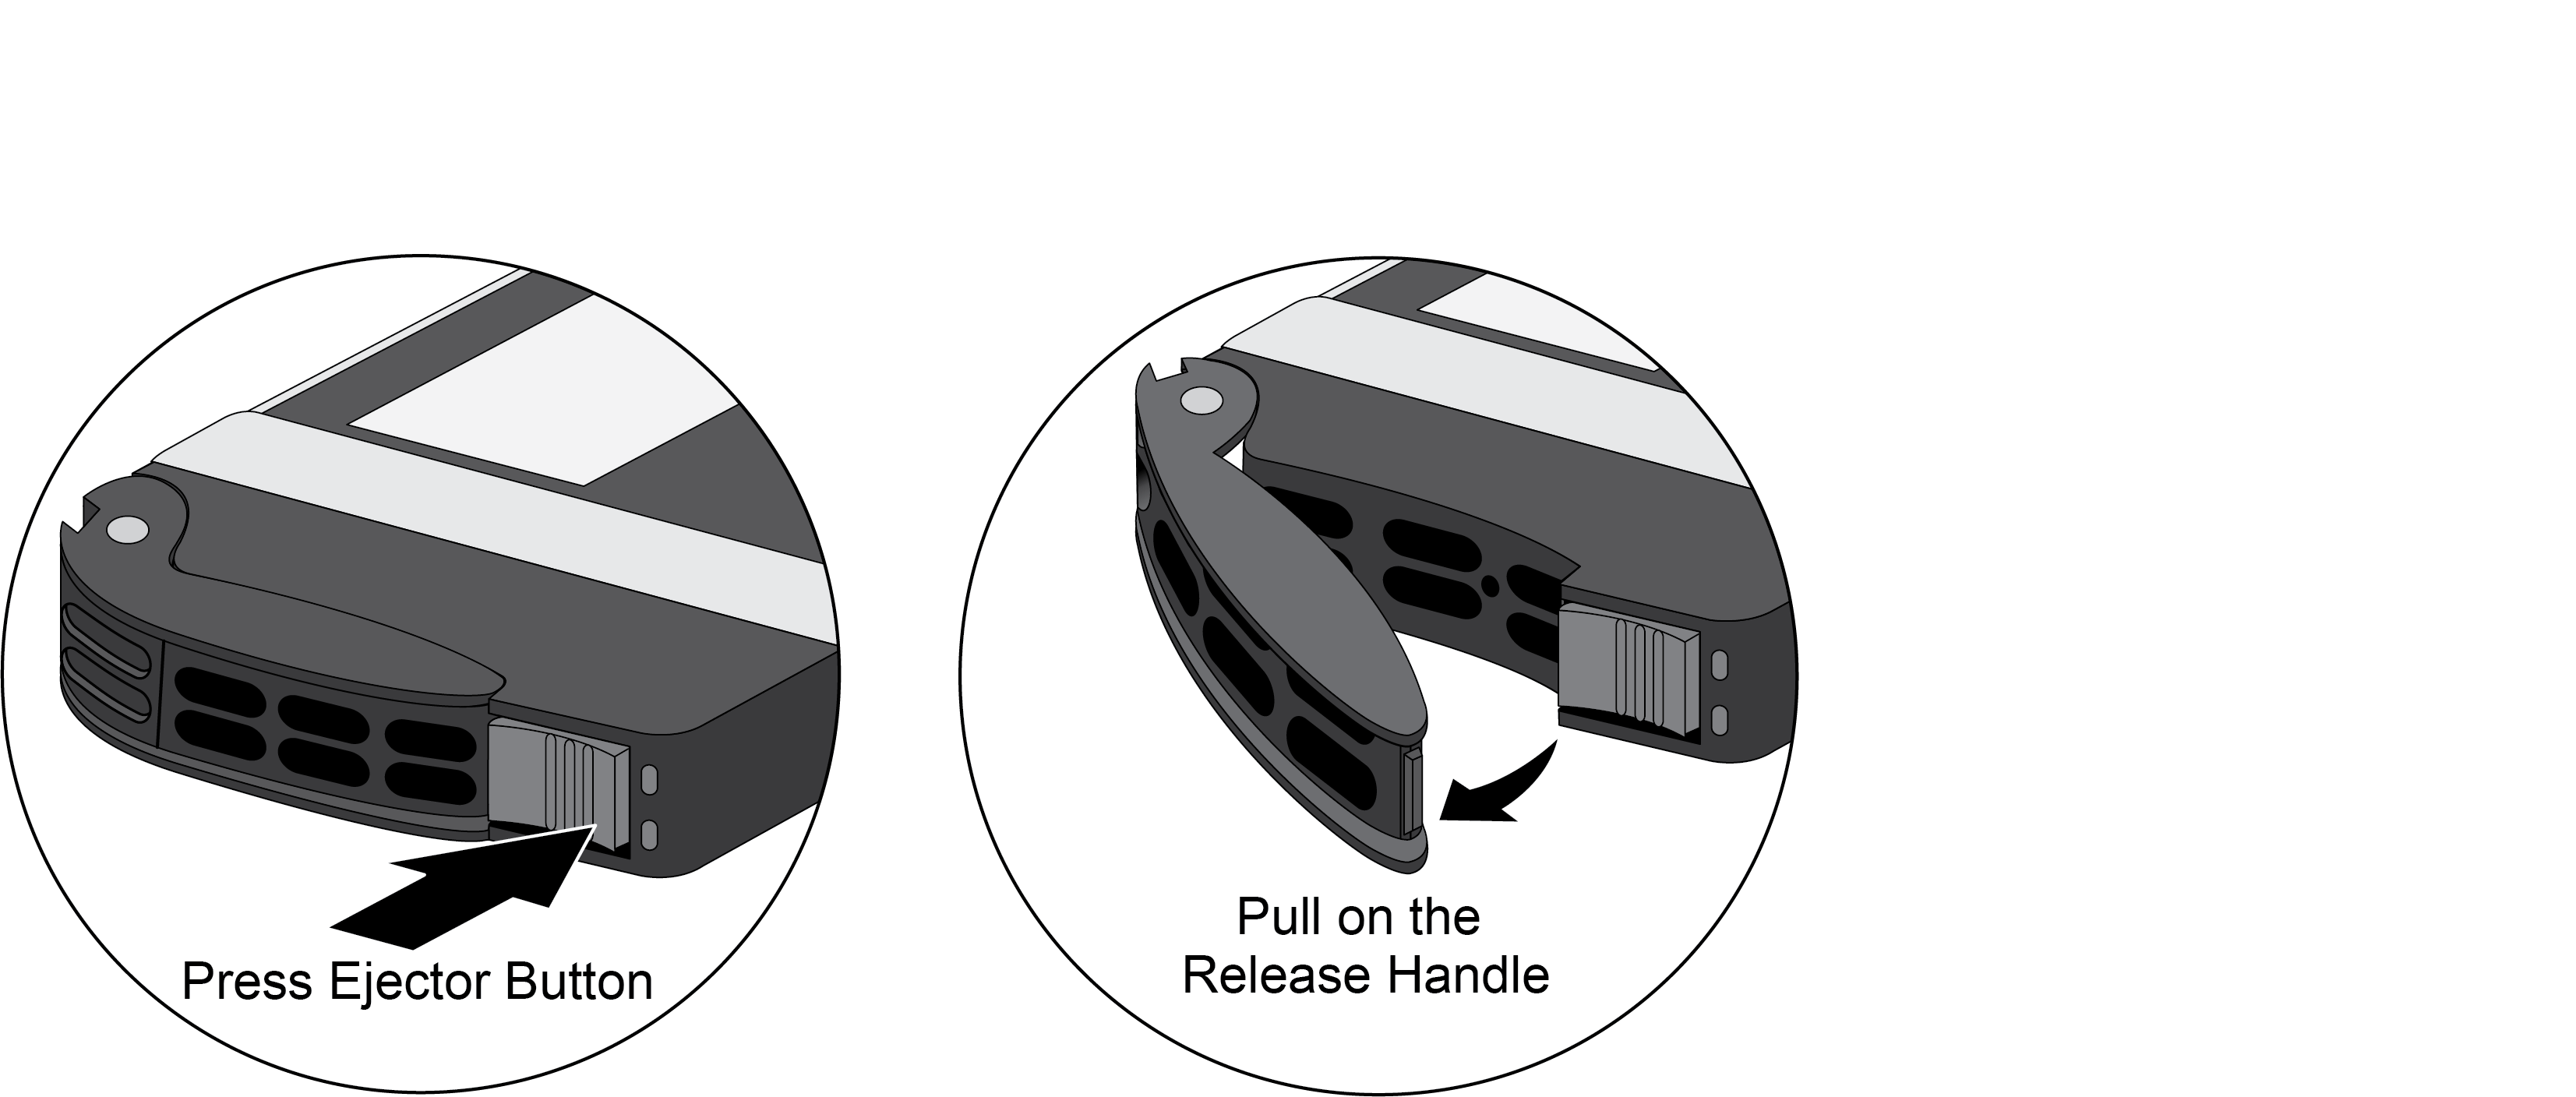
- Power off the appliance by pressing the power button on the front of the appliance and then remove the AC power cords.Press the ejector button on the system drive carrier to release the carrier handle and gently pull the handle toward you to remove the carrier and drive.
![]() Remove the replacement drive from the packaging and place it on an antistatic surface.Install the replacement drive in the drive carrier of the failed drive.
Remove the replacement drive from the packaging and place it on an antistatic surface.Install the replacement drive in the drive carrier of the failed drive.- Place the failed drive next to the replacement drive with the connectors facing the same direction.Remove the four screws that hold the failed drive in the carrier and remove the drive from the carrier.Install the replacement drive in the carrier and secure it using the four screws you removed from the failed drive.
![]() Install the replacement drive in the appliance.
Install the replacement drive in the appliance.- Ensure that the drive carrier lever is in the open position; if it is not, press the ejector button on the drive carrier to release the lever and pull it out until it is fully open.Slide the replacement drive and carrier assembly in to the empty drive bay until it is about 1/4” (.6cm) from being fully inserted.Before fully inserting the drive carrier, ensure that the lever attaches to the locking mechanism on the appliance and then close the lever to seat the carrier.Add the new drive to the RAID 1 pair.
- Run the CLI command request system raid add <drive>. For <drive>, enter A1 or A2, depending on which drive you've replaced.To check the status of the new drive, run request system raid detail. The drive status shows spare rebuilding if the drive is in the process of being added. Once the process is complete, the status changes to active sync.