Device Security
Strata Cloud Manager
Table of Contents
Expand All
|
Collapse All
Device Security Docs
Strata Cloud Manager
From Device Security in Strata Cloud Manager, restrict IoT devices of concern from
accessing the network.
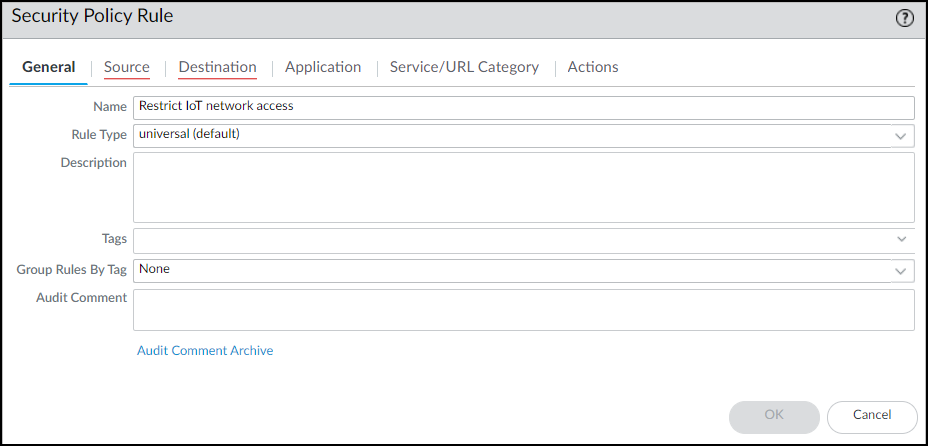
- Configure a Security policy rule that denies traffic from any device whose Device-ID attribute for Category is “Restricted”.These instructions explain how to configure a security policy rule in the PAN-OS web UI. You can also configure it through Panorama.Log in to the web UI on your firewall, click PoliciesSecurity, and then click Add to create a new Security policy rule. On the General tab, enter a name for the rule such as Restrict IoT network access.
![]() On the Source tab, click Add in the Source Device section and then click Device. In the Device Object dialog that appears, enter a name, choose Restricted for Category, and then click OK.
On the Source tab, click Add in the Source Device section and then click Device. In the Device Object dialog that appears, enter a name, choose Restricted for Category, and then click OK.![]() Select the device object you just created as the source device and select Any for the source zone and address.
Select the device object you just created as the source device and select Any for the source zone and address.![]() On the Destination tab, select Any for the destination zone, address, and device.
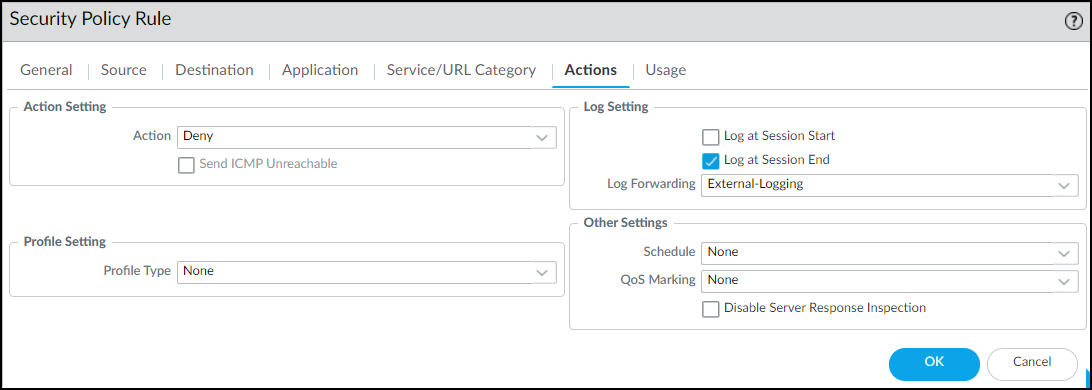
On the Destination tab, select Any for the destination zone, address, and device.![]() On the Actions tab, choose Deny as the action. If the firewall forwards logs to Strata Logging Service, Panorama, or some other external log server, choose a log forwarding profile. Even for a rule that denies traffic, logs provide visibility into what the restricted device was attempting to connect with and are useful during remediation. Click OK to save the Security policy rule configuration.
On the Actions tab, choose Deny as the action. If the firewall forwards logs to Strata Logging Service, Panorama, or some other external log server, choose a log forwarding profile. Even for a rule that denies traffic, logs provide visibility into what the restricted device was attempting to connect with and are useful during remediation. Click OK to save the Security policy rule configuration.![]() Move the rule above other policy rules.
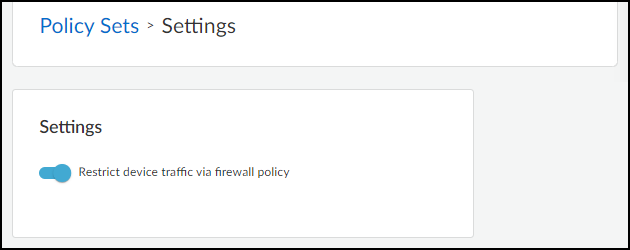
Move the rule above other policy rules.![]() Enable traffic restriction in Device Security in Strata Cloud Manager.Log in to Device Security in Strata Cloud Manager with a superuser role, click PoliciesDevice-ID Policy Configuration, and then toggle Restrict device traffic via firewall policy.
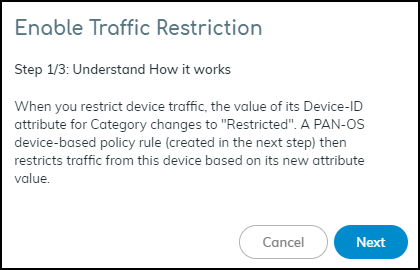
Enable traffic restriction in Device Security in Strata Cloud Manager.Log in to Device Security in Strata Cloud Manager with a superuser role, click PoliciesDevice-ID Policy Configuration, and then toggle Restrict device traffic via firewall policy.![]() A pop-up panel appears. Read how traffic restriction works and then click Next.
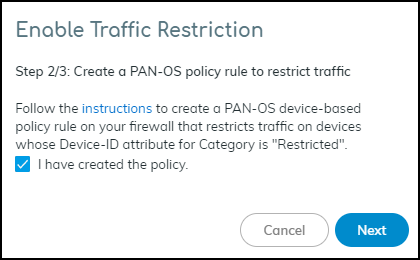
A pop-up panel appears. Read how traffic restriction works and then click Next.![]() Select I have created the policy and then click Next.
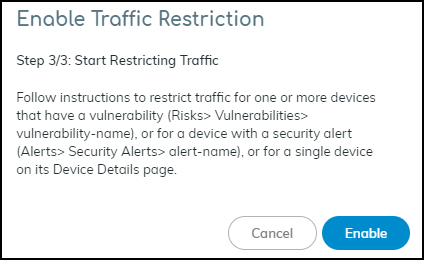
Select I have created the policy and then click Next.![]() Read where to restrict traffic in the Device Security portal and then click Enable.
Read where to restrict traffic in the Device Security portal and then click Enable.![]() Restrict IoT devices.As stated in step 3/3 of the Enable Traffic Restriction panel, there are three places in Device Security in Strata Cloud Manager where you can restrict network traffic: vulnerability instances on a Vulnerability Details page, a Security Alert Details page, and a Device Details page. Each place, or point of restriction, is described below.Vulnerability Instance as the Point of RestrictionTo restrict one or more IoT devices on the Vulnerability Details page, click RisksVulnerabilities and then click a vulnerability name.If the Confidence Level column is hidden, click the Columns icon () and select it. Select one or more vulnerability instances with a high confidence score of 90 or above and then click MoreRestrict Traffic.
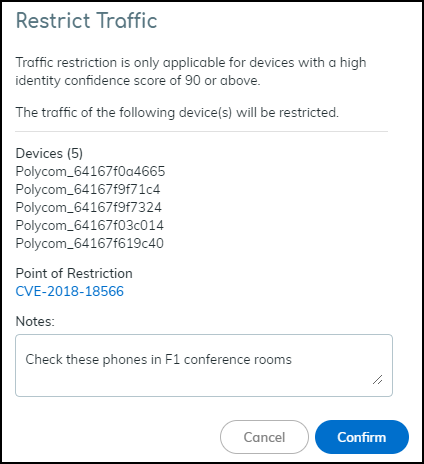
Restrict IoT devices.As stated in step 3/3 of the Enable Traffic Restriction panel, there are three places in Device Security in Strata Cloud Manager where you can restrict network traffic: vulnerability instances on a Vulnerability Details page, a Security Alert Details page, and a Device Details page. Each place, or point of restriction, is described below.Vulnerability Instance as the Point of RestrictionTo restrict one or more IoT devices on the Vulnerability Details page, click RisksVulnerabilities and then click a vulnerability name.If the Confidence Level column is hidden, click the Columns icon () and select it. Select one or more vulnerability instances with a high confidence score of 90 or above and then click MoreRestrict Traffic.![]() Review the list of vulnerable or potentially vulnerable devices whose traffic will be restricted, optionally add a note for future reference, and then click Confirm.
Review the list of vulnerable or potentially vulnerable devices whose traffic will be restricted, optionally add a note for future reference, and then click Confirm.![]() The entry for this device in the Restricted Traffic column changes from No to Yes, indicating that its traffic is being restricted. If you don’t see the Restricted Traffic column, click the Columns icon () and select Restricted Traffic. A new entry appears in the Vulnerability Responses column. Hover your cursor over the entry to see a history of actions taken.
The entry for this device in the Restricted Traffic column changes from No to Yes, indicating that its traffic is being restricted. If you don’t see the Restricted Traffic column, click the Columns icon () and select Restricted Traffic. A new entry appears in the Vulnerability Responses column. Hover your cursor over the entry to see a history of actions taken.![]()
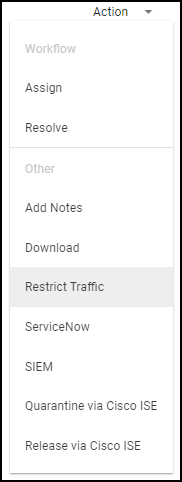
![]() The Device Details page for the traffic-restricted device adds a Restricted Device label next to the device name. If you hover your cursor over the label, a pop-up appears with the time and point of restriction and a link to a vulnerability, security alert, or device details page. In this case, it would be a link to a Vulnerability Details page. The pop-up also includes any notes you made.Security Alert as the Point of RestrictionTo restrict an IoT device with a specific security alert, click AlertsSecurity Alerts and then click an alert name. On the Alert Details page, click ActionRestrict Traffic.
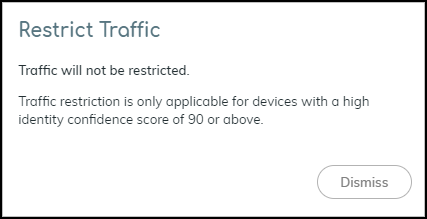
The Device Details page for the traffic-restricted device adds a Restricted Device label next to the device name. If you hover your cursor over the label, a pop-up appears with the time and point of restriction and a link to a vulnerability, security alert, or device details page. In this case, it would be a link to a Vulnerability Details page. The pop-up also includes any notes you made.Security Alert as the Point of RestrictionTo restrict an IoT device with a specific security alert, click AlertsSecurity Alerts and then click an alert name. On the Alert Details page, click ActionRestrict Traffic.![]() If the confidence score of the impacted device is below 90, the following message appears. The confidence score appears in the Impacted Device section on the Alert Details page.
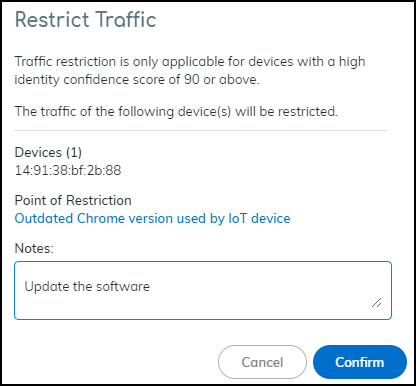
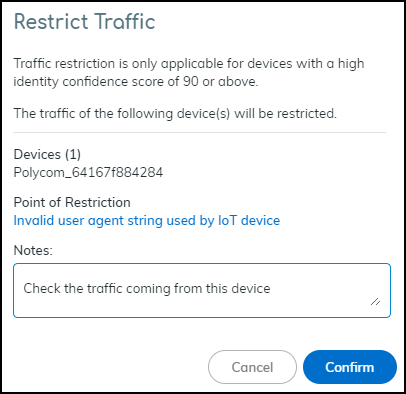
If the confidence score of the impacted device is below 90, the following message appears. The confidence score appears in the Impacted Device section on the Alert Details page.![]() If the confidence score is 90 or above, the Restrict Traffic dialog appears.
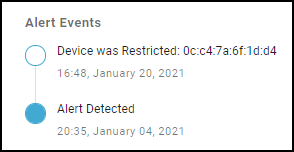
If the confidence score is 90 or above, the Restrict Traffic dialog appears.![]() Review the device whose traffic will be restricted, optionally add a note for future reference, and then click Confirm.A new label appears at the top of the Alert Details page stating Traffic Restricted Yes and a new entry appears in the Alert Events column.
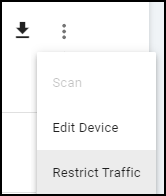
Review the device whose traffic will be restricted, optionally add a note for future reference, and then click Confirm.A new label appears at the top of the Alert Details page stating Traffic Restricted Yes and a new entry appears in the Alert Events column.![]() The Device Details page for the traffic-restricted device adds a Restricted Device label next to the device name. When you hover your cursor over the label, a pop-up appears with the time you started restricting traffic; a link to the point of restriction, which in this case would be to a Security Alert Details page; and any notes you made.IoT Device Details as the Point of RestrictionTo restrict a single IoT device on the Device Details page, click AssetsInventory and then the name of one of the devices in the inventory table. In the Identity section at the top of the Device Details page, click the Action icon (three vertical dots) Restrict Traffic.
The Device Details page for the traffic-restricted device adds a Restricted Device label next to the device name. When you hover your cursor over the label, a pop-up appears with the time you started restricting traffic; a link to the point of restriction, which in this case would be to a Security Alert Details page; and any notes you made.IoT Device Details as the Point of RestrictionTo restrict a single IoT device on the Device Details page, click AssetsInventory and then the name of one of the devices in the inventory table. In the Identity section at the top of the Device Details page, click the Action icon (three vertical dots) Restrict Traffic.![]() Check that the device whose traffic will be restricted is correct, optionally add a note for future reference, and then click Confirm.
Check that the device whose traffic will be restricted is correct, optionally add a note for future reference, and then click Confirm.![]() The Device Security portal adds a Restricted Device label next to the device name on the Device Details page. When you hover your cursor over the label, a pop-up appears with the time you started restricting traffic; a link to the point of restriction, which in this case would be to the same Device Details page you’re already on; and any notes you made.On the Devices page, the entry for this device in the Restricted Traffic column changes from No to Yes, indicating that its traffic is being restricted. If you don’t see the Restricted Traffic column, click the Columns icon () and select Restricted Traffic in the Traffic section.
The Device Security portal adds a Restricted Device label next to the device name on the Device Details page. When you hover your cursor over the label, a pop-up appears with the time you started restricting traffic; a link to the point of restriction, which in this case would be to the same Device Details page you’re already on; and any notes you made.On the Devices page, the entry for this device in the Restricted Traffic column changes from No to Yes, indicating that its traffic is being restricted. If you don’t see the Restricted Traffic column, click the Columns icon () and select Restricted Traffic in the Traffic section.![]()
![]() After investigating and remediating a traffic-restricted device, derestrict traffic for it.To derestrict traffic for a device, repeat the same process as you did to restrict traffic but click Derestrict Traffic.You can derestrict multiple vulnerability instances in bulk. Select one or more instances on the Vulnerability Details page and then click MoreDerestrict Traffic.For other traffic-restricted devices, view the inventory on the Devices page with the Restricted Traffic filter applied. Then click device names one by one to open the Device Details page for each one and click the Action icon (three vertical dots) Derestrict Traffic.
After investigating and remediating a traffic-restricted device, derestrict traffic for it.To derestrict traffic for a device, repeat the same process as you did to restrict traffic but click Derestrict Traffic.You can derestrict multiple vulnerability instances in bulk. Select one or more instances on the Vulnerability Details page and then click MoreDerestrict Traffic.For other traffic-restricted devices, view the inventory on the Devices page with the Restricted Traffic filter applied. Then click device names one by one to open the Device Details page for each one and click the Action icon (three vertical dots) Derestrict Traffic.

