Create a Custom L3 & L4 Vulnerability Signature
Table of Contents
Create a Custom L3 & L4 Vulnerability Signature
You can create custom threat signatures (vulnerability)
based on Layer3 and Layer4 header fields (such as IP flags, acknowledgment
numbers, etc). This enables you to provide user-created vulnerability
signature coverage for old and deprecated TCP/IP stacks used in
embedded / IoT devices that normally would not have any existing
threat signature coverage.
Custom L3 & L4 vulnerability
signatures are expressed through your Zone and Zone Protection profile
configuration. You must specify how the firewall responds when it
detects a threat.
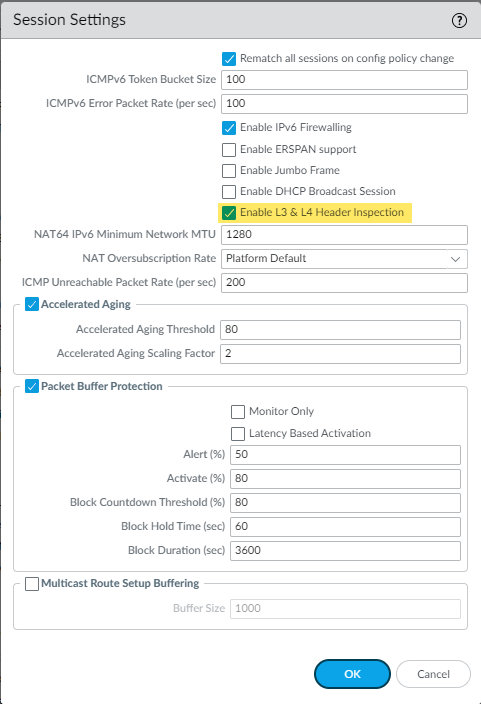
- Log in to the PAN-OS web interface.Select and enable L3 & L4 Header Inspection globally on the firewall.
![]() Create a Zone Protection profile and configure your L3 & L4 header inspection settings.
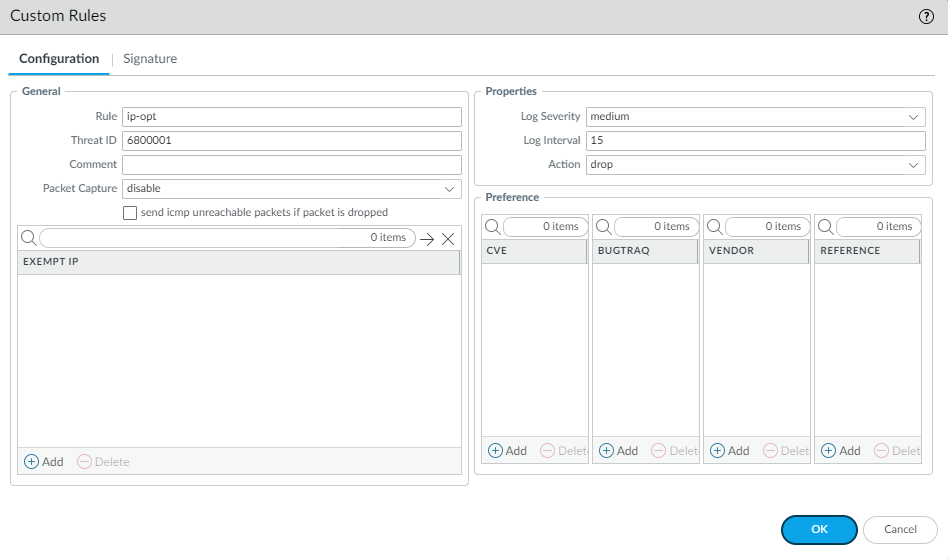
Create a Zone Protection profile and configure your L3 & L4 header inspection settings.- Select and either select an existing profile or Add a new profile.If you are creating a new zone protection profile, enter a Name for the profile and an optional Description.Select L3 & L4 Header Inspection to define your custom vulnerability signatures.Add new custom rules by defining the configuration and signature details for each entry, which are performed in their respective tabs: Configuration and Signature.Under Configuration, fill out the following required fields in the General, Properties, and Reference section.
![]()
- Rule—Specify the custom rule name.
- Threat ID—Enter a numeric ID between 41000 and 45000 or 6800001 and 6900000.
- Comment—Optionally, add a description of the custom rule.
- Packet Capture—Select a packet capture setting.Optionally, select send icmp unreachable packets if packet is dropped to send an ICMP unreachable response to the client upon packet loss.
- Exempt IP—Enter the IP address(es) for which you do not want the custom rule to apply to.
- Log Severity—Select the severity of the threat.
- Log Interval—Indicates how frequently an event is logged.
- Action—Choose the action to take when there is a custom signatures match. Options include alert, drop, reset-client, reset-server, and reset-both. Refer to Security Policy Actions for more information about these action settings.
- Reference—Add references to provide context or related information about the custom threat signature. You can add CVEs, Bugtraq citations, 3rd party vendor IDs, or reference links to additional analysis or background information.
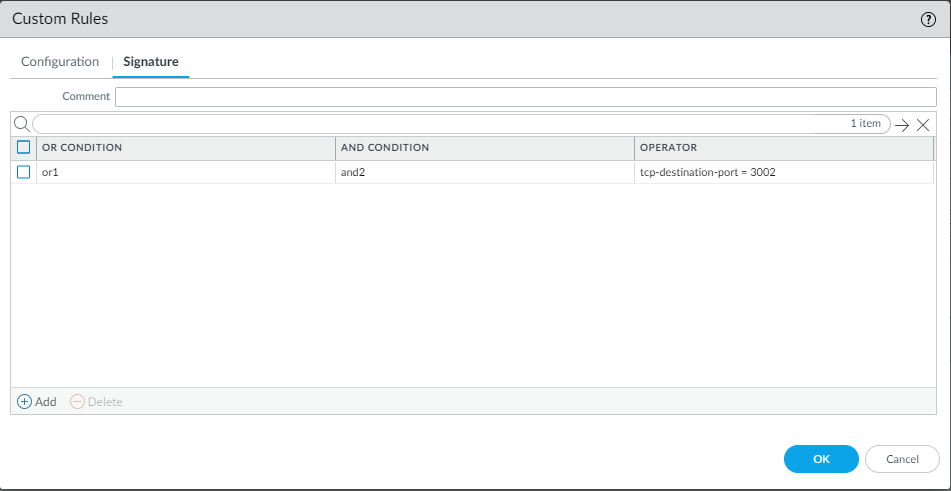
From the Signature tab, provide a name or description of the custom vulnerability under Comment. After specifying a name, select Add to provide the custom signature details.![]()
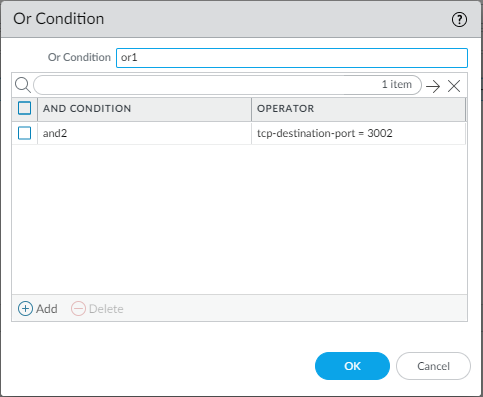
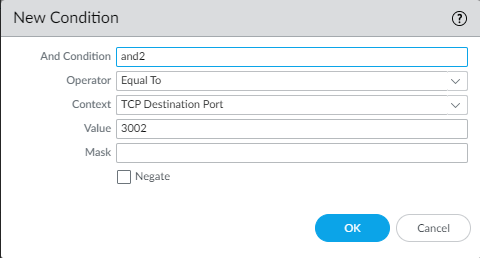
- Specify a matching Or Condition. When finished, select Add to configure an And Condition and the associated values in a new window.
![]()
- If you select a Less Than or Greater Than operator, specify a Context and a Value. The Equal To operator additionally has Mask and Negate options. Click OK when you have finished configuring the new and condition.
![]()
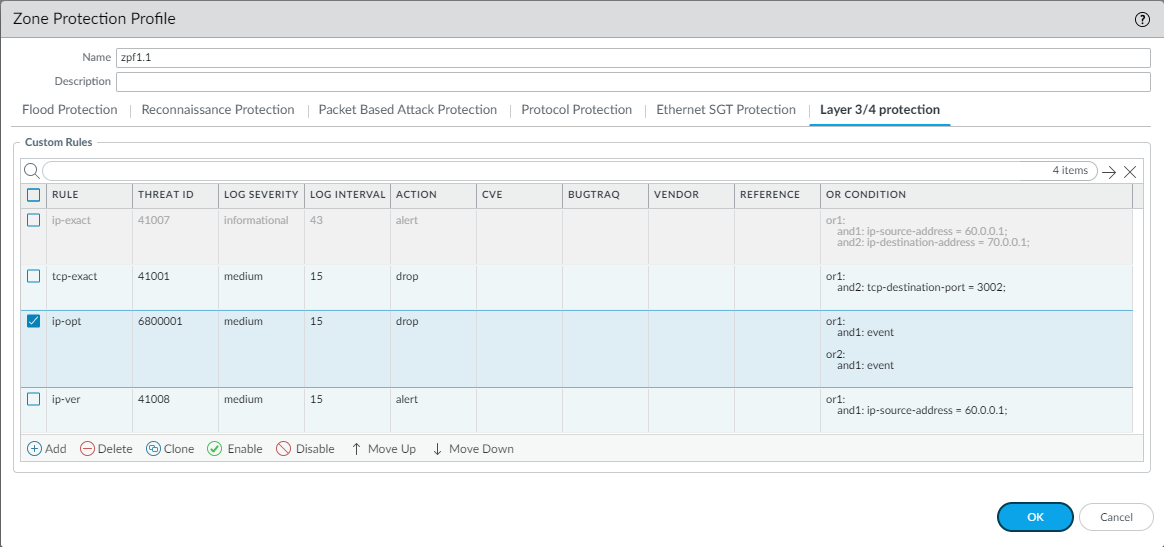
Repeat for each matching condition that you want to add.Click OK and review your signatures. Click OK again to return to the zone protection profile.From the L3 & L4 Header Inspection tab, you can reorder, disable, and clone the custom rule entries as necessary. Click OK to exit the zone protection profile.![]() Apply the Zone Protection profile to a security zone that is assigned to interfaces you want to protect.
Apply the Zone Protection profile to a security zone that is assigned to interfaces you want to protect.- Select and select the zone where you want to assign the Zone Protection profile.Add the Interfaces belonging to the zone.For Zone Protection Profile, select the profile you just created.Select Enable Net Inspection to enable the L3 & L4 header inspection configuration settings.
![]() Click OK.Commit your changes.
Click OK.Commit your changes.