Prisma SD-WAN
Configure PagerDuty Notifier CloudBlade in Prisma SD-WAN
Table of Contents
Expand All
|
Collapse All
Prisma SD-WAN Docs
-
-
- New Features Guide
-
- CloudBlade Integrations
- CloudBlades Integration with Prisma Access
-
-
-
-
- 6.5
- 6.4
- 6.3
- 6.2
- 6.1
- 5.6
- New Features Guide
- On-Premises Controller
- Prisma SD-WAN CloudBlades
- Prisma Access CloudBlade Cloud Managed
- Prisma Access CloudBlade Panorama Managed
Configure PagerDuty Notifier CloudBlade in Prisma SD-WAN
Learn how to configure the PagerDuty Notifier CloudBlade in Prisma
SD-WAN.
| Where Can I Use This? | What Do I Need? |
|---|---|
|
|
The following section provides information about how to configure the
PagerDuty Notifier CloudBlade in Prisma SD-WAN:
- Configure the PagerDuty Notifier CloudBlade to prepare the Prisma SD-WAN controller for integration as follows:
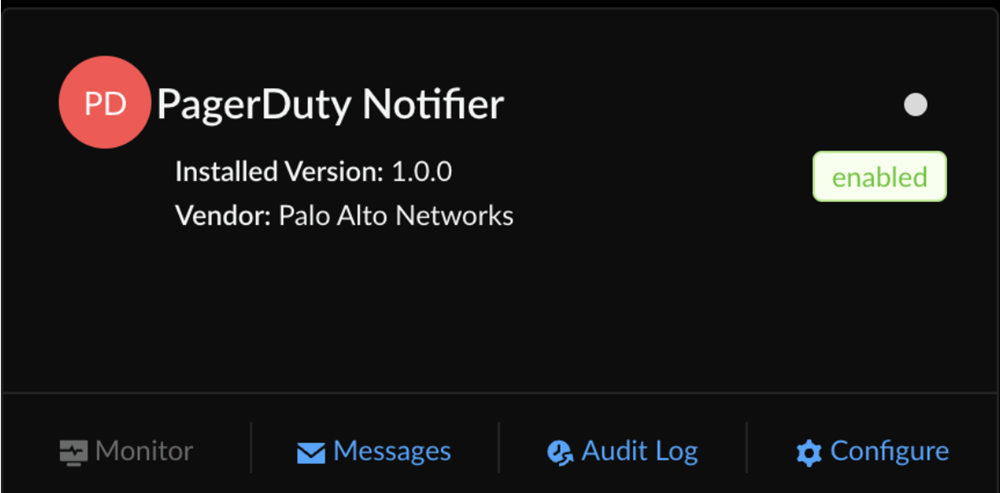
- Go to Strata Cloud ManagerConfigurationPrisma SD-WANCloudBlades.Locate the PagerDuty Notifier CloudBlade.If this CloudBlade does not appear, contact Palo Alto Networks Support.
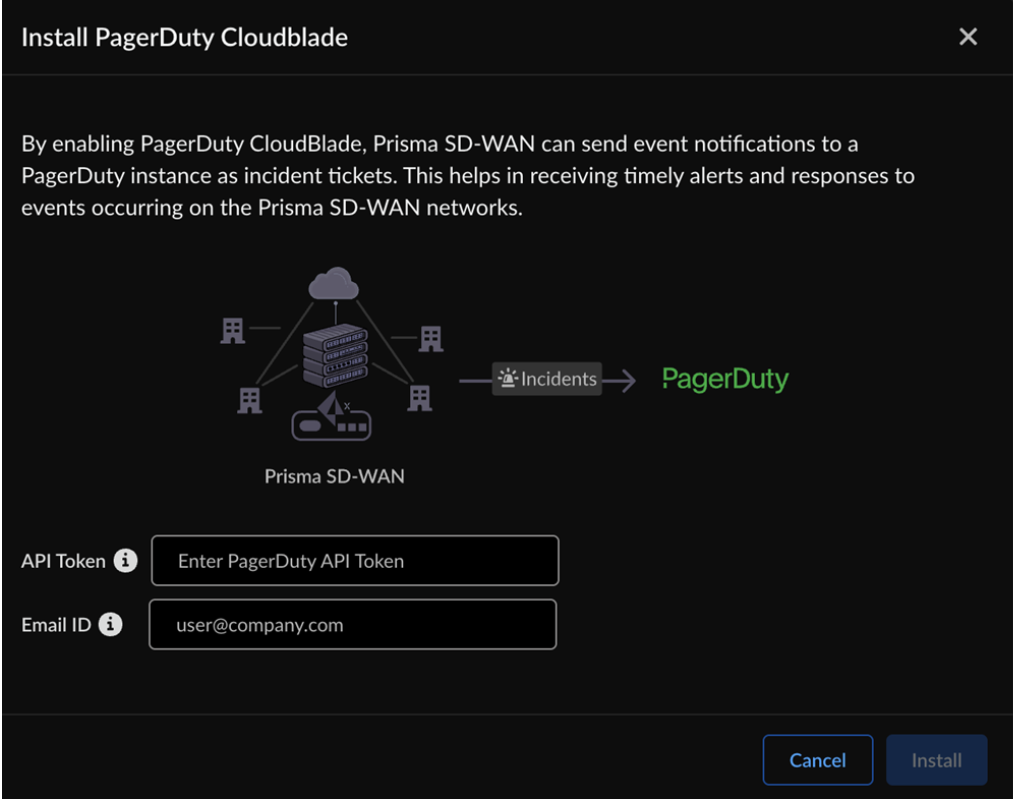
![]() In the PagerDuty Notifier CloudBlade, select Configure and enter the following:
In the PagerDuty Notifier CloudBlade, select Configure and enter the following:- API Token: Enter the API token generated in PagerDuty to authorize Prisma SD-WAN to send event notifications, create incidents or query PagerDuty data.
- Email ID: Enter the email address(s) associated with the PagerDuty account to which the notifications should be sent.
![]() Select Install.The CloudBlade tests the API token and retrieves all required information to function.To verify, go to the Monitoring page and check the Number of PagerDuty Service Directories Reported.Ensure that the count matches the number of service directories created in PagerDuty. The data may take two to five minutes to appear. If it does not appear, contact the Palo Alto support team.Return to the PagerDuty Notifier tile and select Configure.In the General section, enter the following:
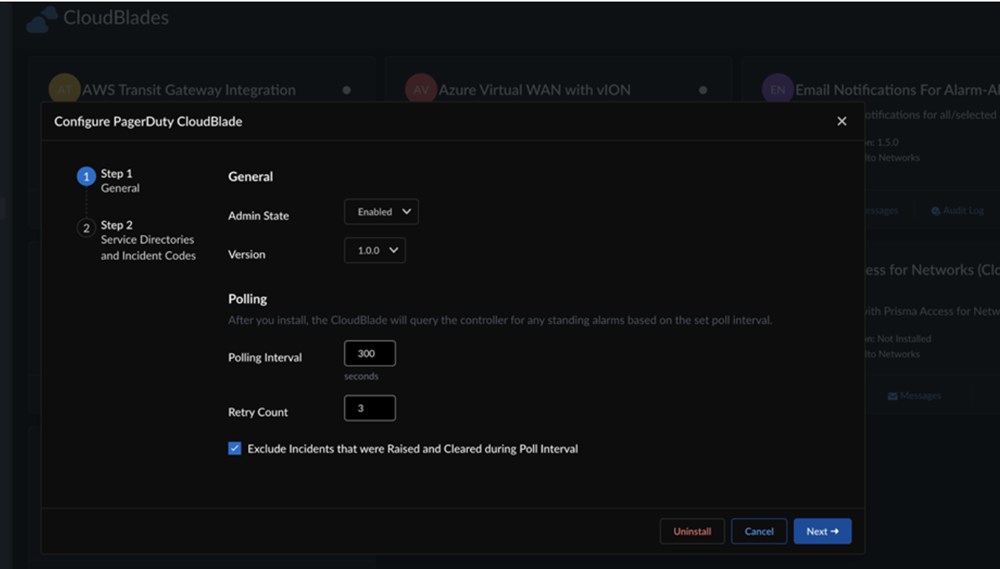
Select Install.The CloudBlade tests the API token and retrieves all required information to function.To verify, go to the Monitoring page and check the Number of PagerDuty Service Directories Reported.Ensure that the count matches the number of service directories created in PagerDuty. The data may take two to five minutes to appear. If it does not appear, contact the Palo Alto support team.Return to the PagerDuty Notifier tile and select Configure.In the General section, enter the following:![]()
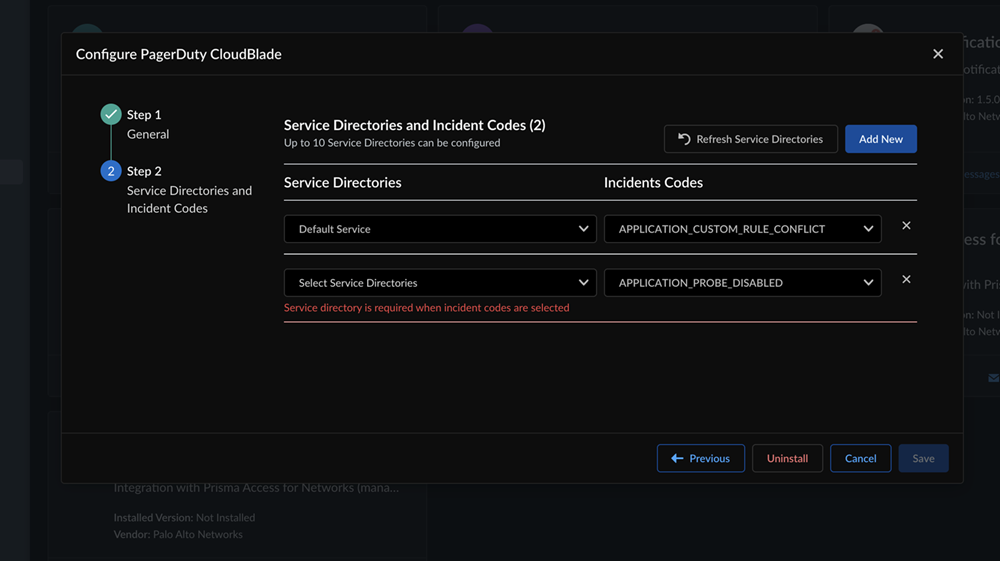
- Admin State: For admin state, select or retain Enabled.Version: Select the version of the CloudBlade to use.Polling Interval: Enter the interval count in seconds for polling events from the controller to report to PagerDuty.The defined range for poll interval is between 300 seconds to 3600 seconds (between 5-60 minutes).After installation, the CloudBlade queries the controller for any standard alerts based on this set interval.Retry Count: Enter the number of retry counts (minimum 3 and maximum 5).The number of retries the CloudBlade performs with PagerDuty to create or resolve an incident.Check the box to exclude events that were raised and cleared during the poll interval and select Next.In the Service Directories and Incident Codes section, select the configured service directories and incident codes from the respective drop downs.Select Add New to add a new row and click on the x mark to delete a row. Up to 10 service directories can be configured, and if none are configured in PagerDuty, this will be empty.
![]() If the Service Directory is deleted in PagerDuty after configuring the CloudBlade, the CloudBlade automatically ignores it.Save your changes.
If the Service Directory is deleted in PagerDuty after configuring the CloudBlade, the CloudBlade automatically ignores it.Save your changes.


