Create a Site Template
Table of Contents
Create a Site Template
Learn to create a site template.
| Where Can I Use This? | What Do I Need? |
|---|---|
|
|
Create a site template using an existing site template.
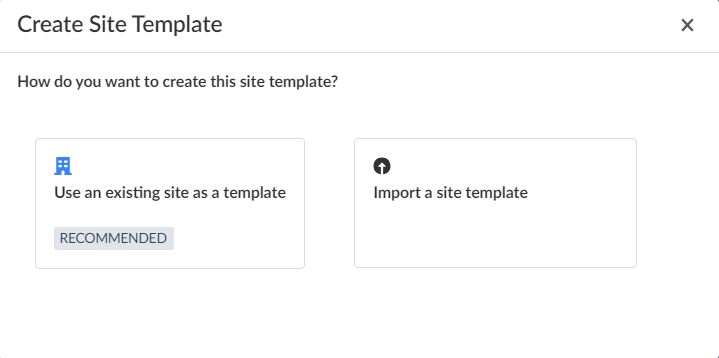
- Navigate to .You can use an existing site as a template (recommended) or Import a Site template.The recommended best practice is to initially creating a site with all essential configurations and validating its functionality. After the site is operational, this site can serve as a foundation for a site template. Importing a site template involves downloading previously utilized templates, adjusting them as per your requirements, and then re-importing the updated versions.
- To use an existing template, click Use an existing site as a template.
![]()
- Alternatively, Import a site template by uploading a Jinja template and the corresponding csv file.
![]() To import, select a Jinja template and the corresponding csv file from your local system and then Save. Ensure your CSV file contains at least one row of data, as the system will validate to ensure the output is correct.After you import the template, you cannot edit the template. To modify the template, download the template, edit and then re-upload the template.When uploading a template, Jinja supports conditional statements to boost flexibility in deployments. This includes IF statements, comparisons, and replacements. If you encounter an error during upload, ensure your Jinja formatting is correct, as the system validates the uploaded CSV content against a successful YAML file format. Few examples of the conditional statements are provided below:
To import, select a Jinja template and the corresponding csv file from your local system and then Save. Ensure your CSV file contains at least one row of data, as the system will validate to ensure the output is correct.After you import the template, you cannot edit the template. To modify the template, download the template, edit and then re-upload the template.When uploading a template, Jinja supports conditional statements to boost flexibility in deployments. This includes IF statements, comparisons, and replacements. If you encounter an error during upload, ensure your Jinja formatting is correct, as the system validates the uploaded CSV content against a successful YAML file format. Few examples of the conditional statements are provided below:
{%- if dhcp2.upper() == "DHCP" %}
    - address_family: ipv6
      broadcast_address:
      custom_options:
      default_lease_time: 43200
{%- if dhcp2_description and dhcp2_description|length != 0 %}
      description: {{ dhcp2_description }}
{%- else %}
      description:
{%- endif %}
      disabled: false
      dns_servers:
      - 2001:db8:a0b:12f0::1
      domain_name:
      gateway:
      ip_ranges:
      - end_ip: 2001:db8:a0b:12f0::220
        start_ip: 2001:db8:a0b:12f0::3
      max_lease_time: 86400
      network_context_id:
      static_mappings:
      subnet: 2001:db8:a0b:12f0::/64
      tags:
      vrf_context_id: Global
{%- endif %}
Enter a Site Template Name and Description.The site name must be unique, duplicate entries will throw an error.Select Site Type, whether branch or DC.Select the Branch Site that you want to clone.Click Next.The template includes a set of attribute keys and its associated values. It comprises a predefined set of variables to facilitate deployment, encompassing essential information like site name, address, serial numbers, software version, and SNMP authentication strings, among others. The objective is to identify any additional variables necessary for unique site configuration within your site deployment. Prisma SD-WAN greatly simplifies site templates by utilizing integrated policy abstraction for items such as Path, QoS, NAT, and Security, along with objects. This minimizes the requirement for creating variables, only necessitating them for distinct items at a branch, such as LAN/WAN IP addresses or circuit settings.For every site template, the following variables are mandatory:- Site Name: site_name
- Software Version: ion_sw_version
- Serial Number: ion_serial_number_1. For HA deployments, the templates includes variable ion_serial_number_2).
The controller will reject site data if these variables are missing from the file.![]() After the site template is created, you can add more variables for any elements that will be unique within your site deployment.Editing Variables: allows to create additional variables for values that should be unique, updating existing values to something new, and deleting default variables if they are unnecessary. The variables within the template are listed in the 'Variables' section, and they are highlighted in green text.
After the site template is created, you can add more variables for any elements that will be unique within your site deployment.Editing Variables: allows to create additional variables for values that should be unique, updating existing values to something new, and deleting default variables if they are unnecessary. The variables within the template are listed in the 'Variables' section, and they are highlighted in green text.- Create variables: Variables serve as repositories for unique
site-specific data. You can customize these variables to align with your
site configuration. The variables in the template appear in the
Variables list highlighted in green text.
- Highlight the variable from the template.
- Make Variable is highlighted. Click Make Variable.
- In the Make Variable dialog, enter a Name for the variable.
- Apply this change to all instances in the template and Update. The selected data appears in the Variables list.
- Save your changes.
- If you want to remove a variable and make it a static value, delete the variable from the variables list. On the confirmation dialog, click OK to delete. The variable becomes a static value and the variable is removed from the variable list.
- Update Static Value:
- Highlight the variable from the template.
- Update Static Value is highlighted. Select Update Static Value.
- In the Update Static Value dialog, enter a static Value for the variable.
- Apply this change to all instances in the template and Update. The selected variable is updated with static value.
- Delete Variables:
- Enter a variable name to search in the search box.
- Delete (X) the variable which will return the original value to the template. For example, when you prefer to hard code your SNMP authentication string directly into the template, rather than using a variable. By removing the variable and updating the value directly, it offers a way to provision the SNMP settings for sites.
- Search Variables: Enter a variable name in the Search box to search.
- Check Syntax: If you have edited the variable, check the syntax of the template file. Green indicates the template has no errors.
Download the Site Variables
Downloading the site variables provides a reference to the necessary data required to deploy new sites at scale using this template. You can also access the site template, and site data (for sites already deployed) from the site templates page.- Select the site template you want to download.On the top-right corner, click the Download icon.
![]() Select Sites Variables. A CSV file containing all the variables defined in the template and their corresponding values are downloaded.If you choose to download the Site Template, it is downloaded in Jinja format. Site Data, for sites deployed using a template, and site variables can also be downloaded and is available in the CSV format. If there is no data, you get a notification that there is no data to export.
Select Sites Variables. A CSV file containing all the variables defined in the template and their corresponding values are downloaded.If you choose to download the Site Template, it is downloaded in Jinja format. Site Data, for sites deployed using a template, and site variables can also be downloaded and is available in the CSV format. If there is no data, you get a notification that there is no data to export.