SaaS Security
Configure Settings on Data Security
Table of Contents
Configure Settings on Data Security
Define internal domains, add trusted users and domains, configure acceptable levels
of asset exposure, and set the time zone and language for SaaS Security.
| Where Can I Use This? | What Do I Need? |
|---|---|
|
Or any of the following licenses that include the Data Security license:
|
Before you start scanning, define any collaborators and the asset exposure level to
trigger incident reports. Then, configure global settings for Data Security to
use when scanning your sanctioned SaaS apps.
- Define Your Internal Domains
- Collaborators
- Exposure Level
- Define Users and Domains
- Enable Data Masking
- Configure Email Alias and Logo
Define Your Internal Domains
Add internal domains to Data Security to determine
if an asset is being shared externally with an untrusted user.
One of the first things you need to do is
to define your internal domains. Data Security uses the list
of internal domains you define to determine if the Collaborators on
an asset are internal to your company, or if the asset shared with
external users. Data Security determines this by matching the
domain name in a collaborator’s email address against the list of
internal domains defined. Depending on your policy rules, Data Security identifies an asset as an incident if shared with external users.
A trusted collaborator overrides untrusted domains.
Similarly, an untrusted collaborator overrides a trusted domain. For example,
you might determine that there is no business reason to trust a file
modification from fax_service@mycompany.com.
Because
Data Security uses the internal domains list to determine the Exposure
Level of an asset during the scan process, you must define
your internal domains list before you begin scanning your
cloud apps. Additionally, you can build in flexibility when you
define your internal domains:
- Wildcard matching—Use of wildcard (*.<domain>) is supported.
- Subdomains—You don't need to explicitly list subdomains; instead, use a wildcard (*.<domain>).
When
you modify the internal domains list, consider that you might need
to update the exposure, depending on the discovery state for a given
asset:
Asset | Rescan required to update exposure? |
|---|---|
Existing, discovered assets | Yes. Rescan to enable Data Security to recalculate exposure. |
Future, undiscovered assets | No. Data Security automatically recalculates
the exposure. |
The Internal Domains list applies to all
cloud apps on Data Security so you must be an administrator
with a Super User role or an Admin role with access to All Apps
to modify this setting.
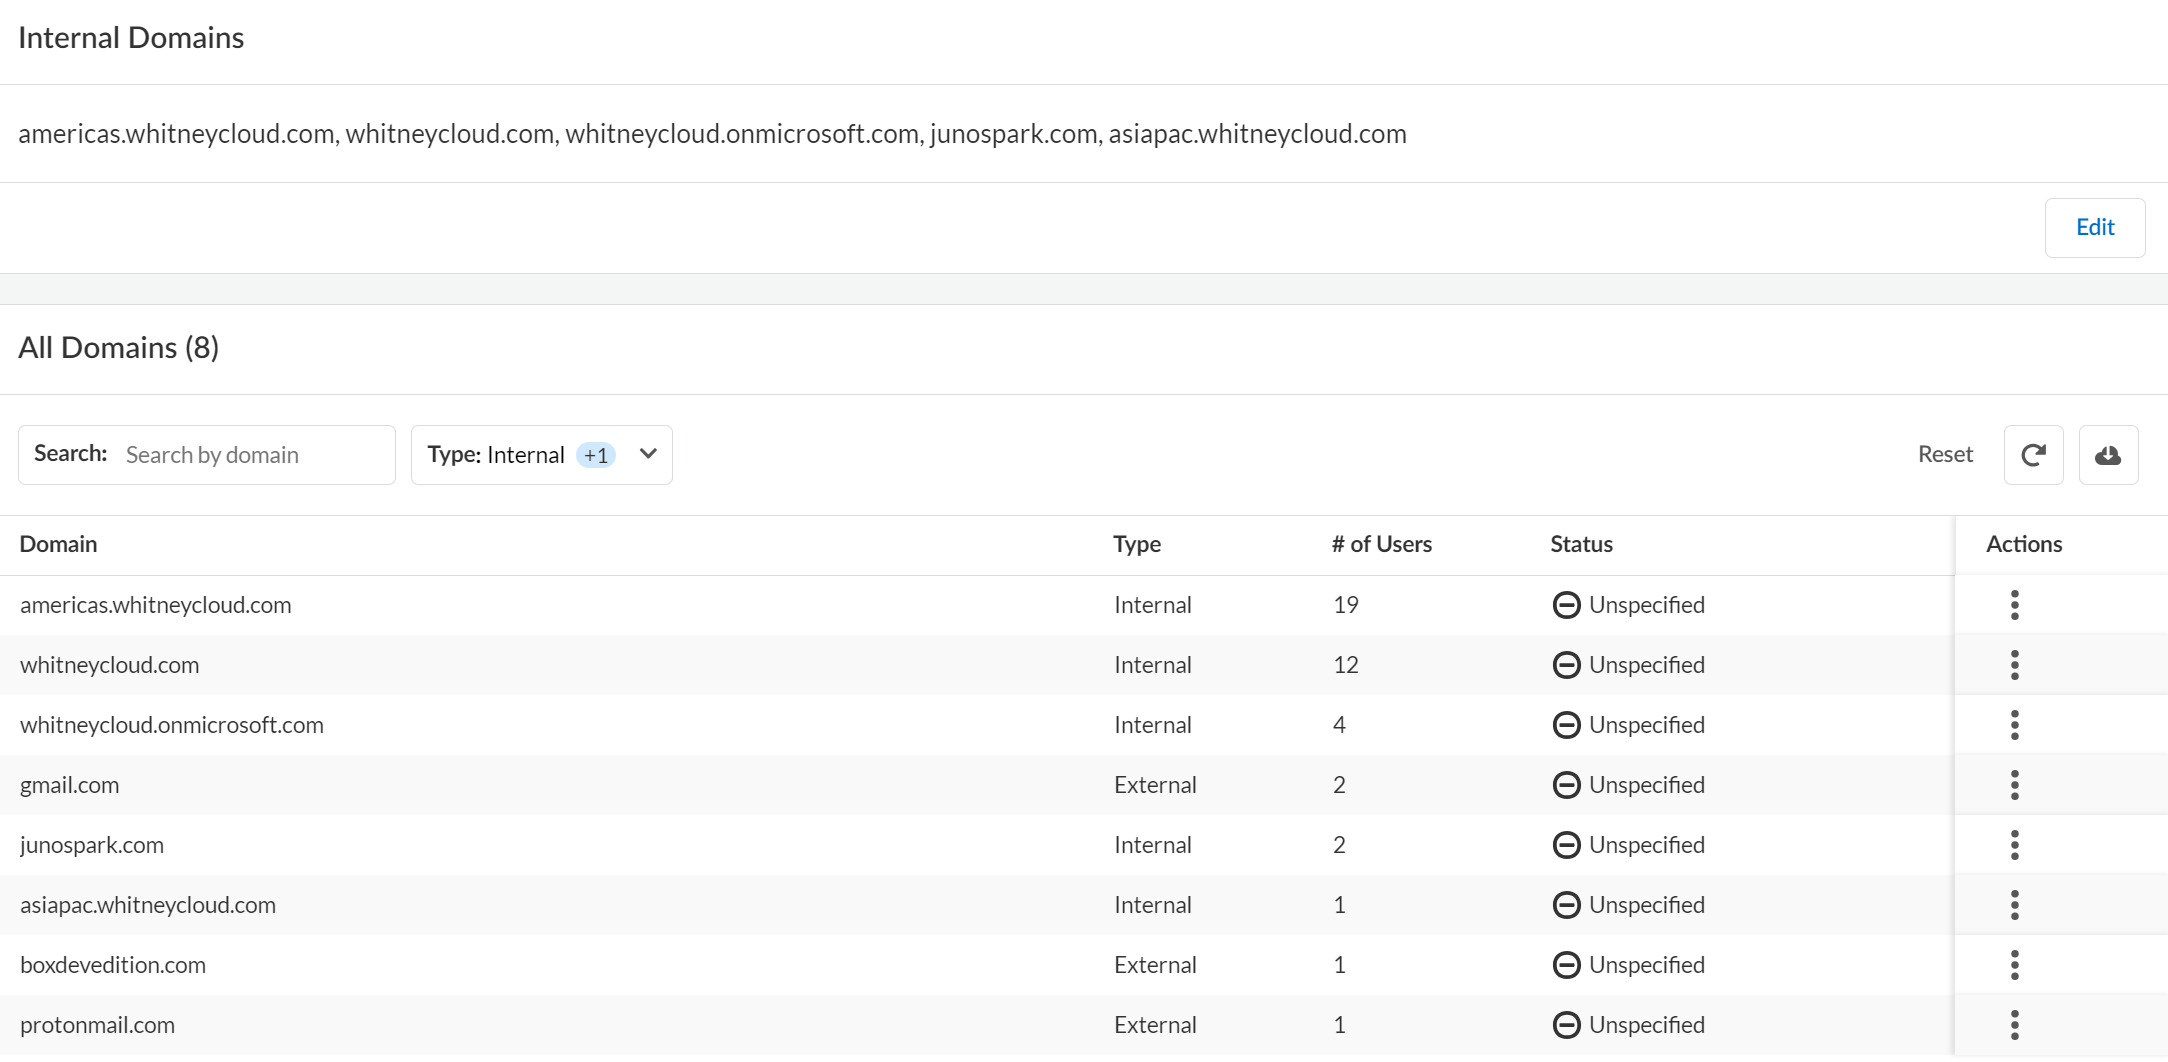
- Log in to Strata Cloud Manager.Select .Enter a comma-separated list of your Internal Domains.
- The internal domain you add here is displayed in the All Domains section only where there is an asset associated with the domain.
- You need to maintain at least one domain at any time. You cannot leave it empty.
To define any of the domains listed under the All Domains section as Trusted or Not Trusted, use the Actions menu against that domain.Save your changes.![]()
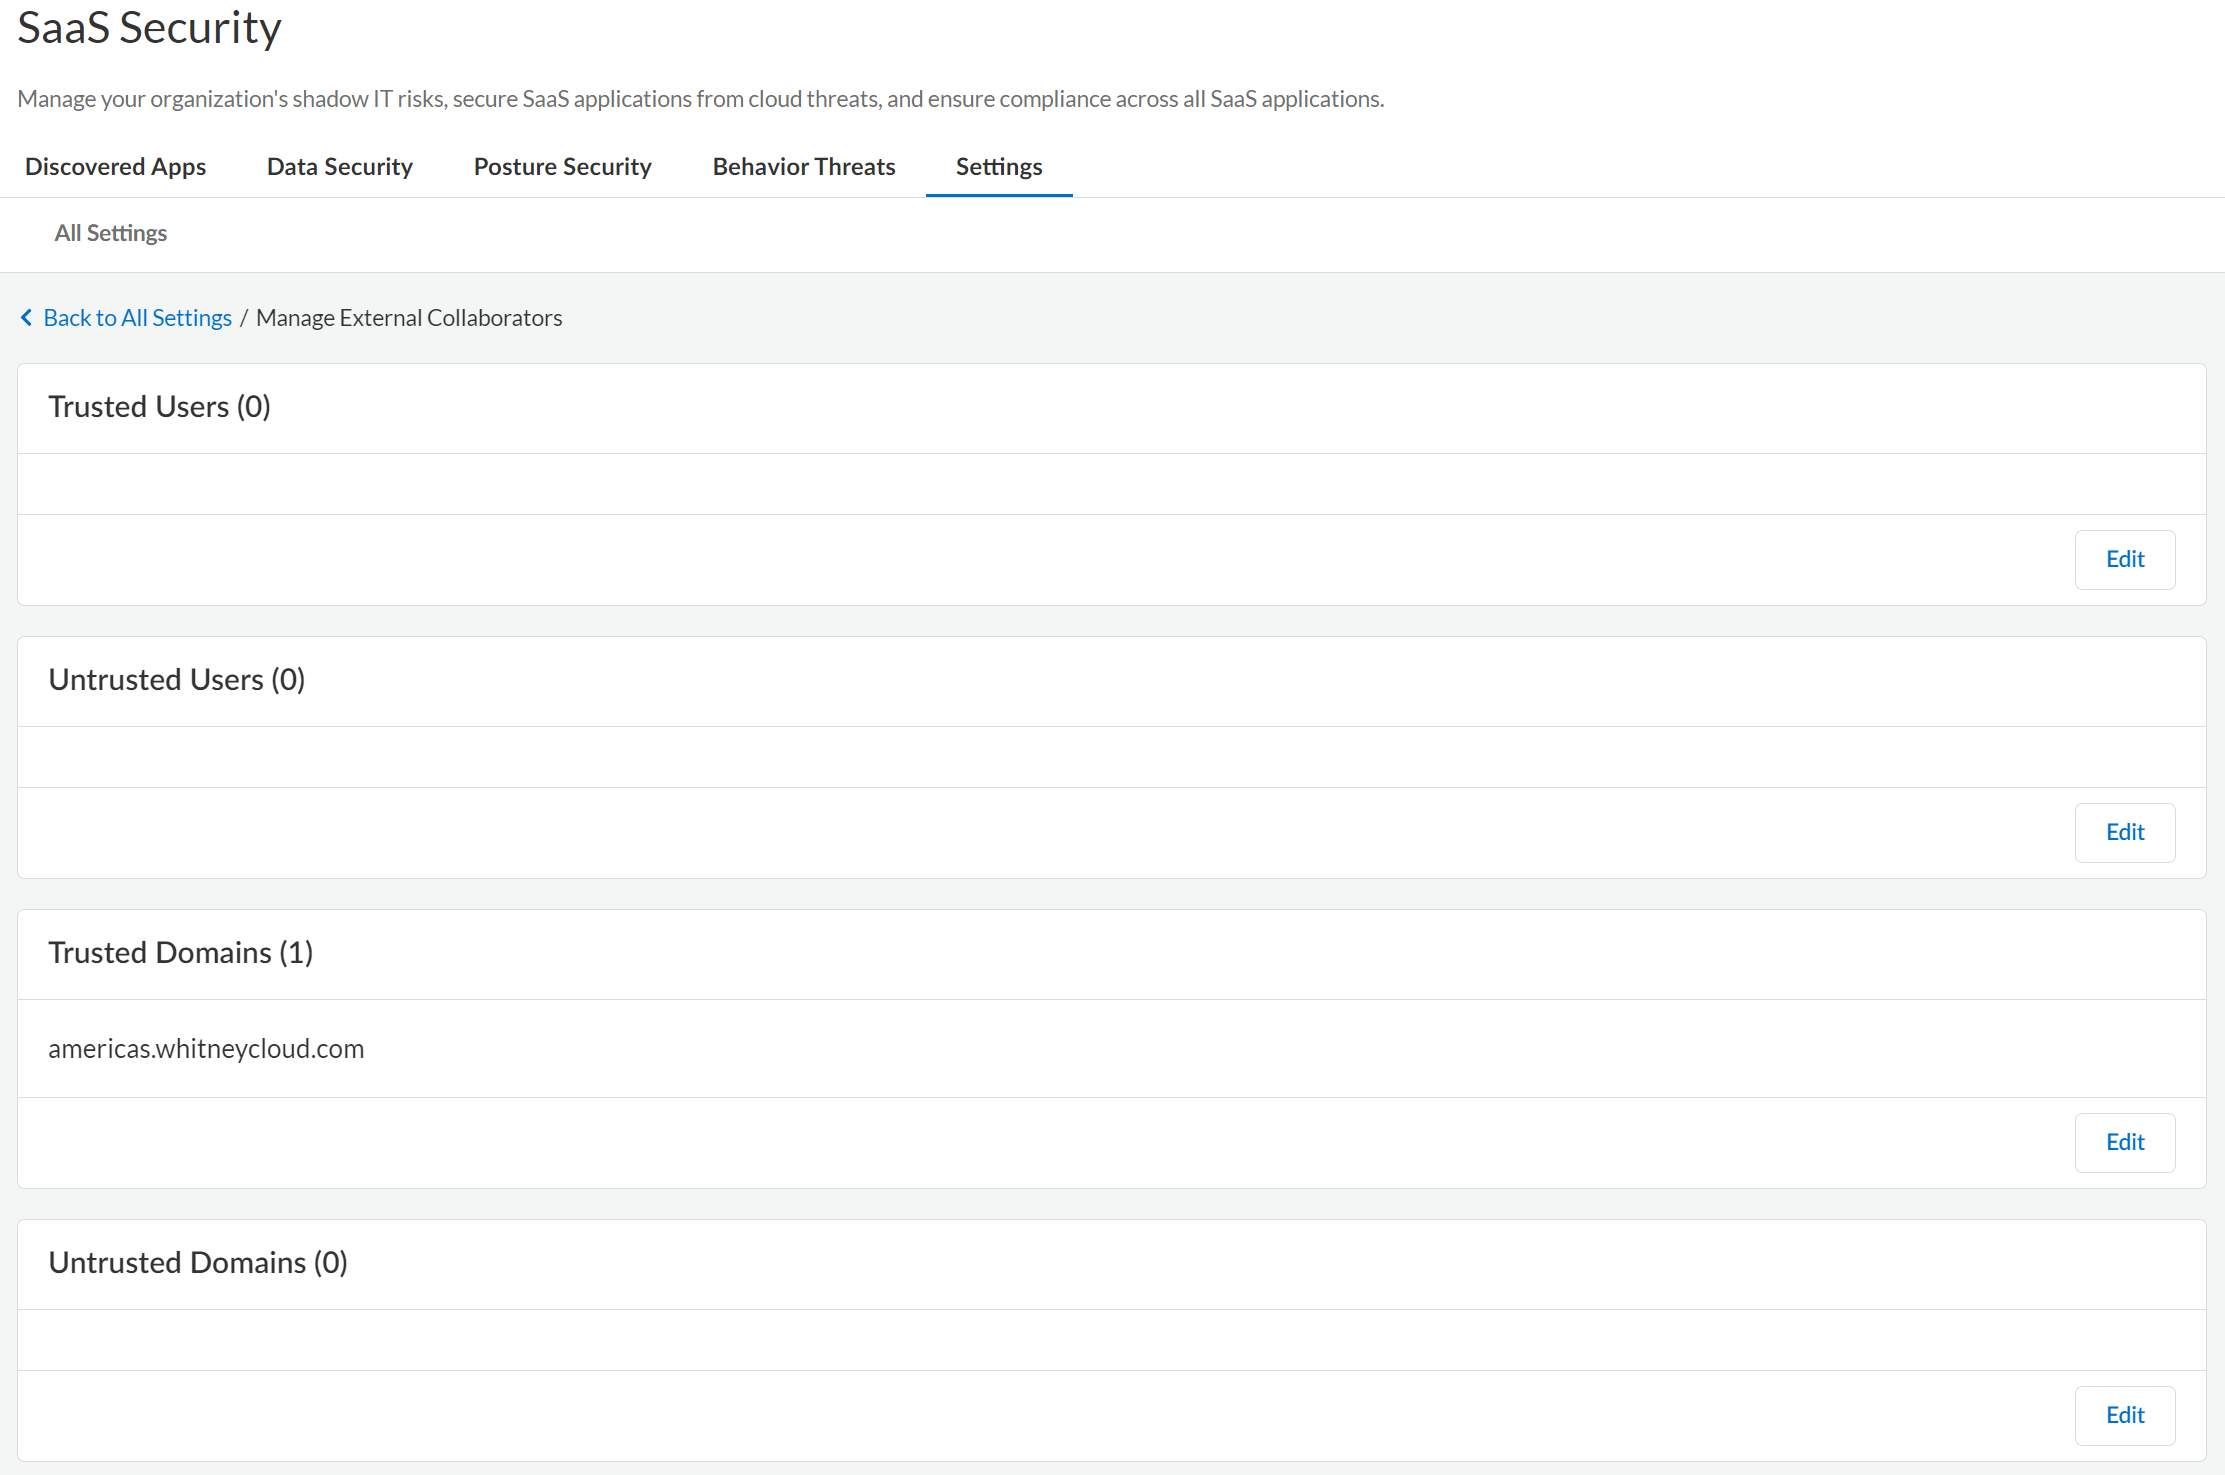
Collaborators
Specify internal and external collaborators, and trusted and untrusted users to configure the incident settings on Data Security.Although different SaaS applications have different terminology for sharing and collaboration, within Data Security, a collaborator is any person who can access, view, preview, download, comment, or edit a managed asset. To provide granular control over what types of sharing pose a risk within your organization, Data Security classifies Collaborators differently:Because Collaborators apply to all cloud apps on Data Security, you must be an administrator with a Super Admin role or an Admin with access to all apps to modify this setting.- Internal vs. External Users—Data Security uses the domain name in the email address associated with the user’s cloud app account to determine whether the user is internal to your organization or not. You must Define Your Internal Domains before you begin scanning your application data so Data Security can properly identify assets shared with users who are external to your organization.
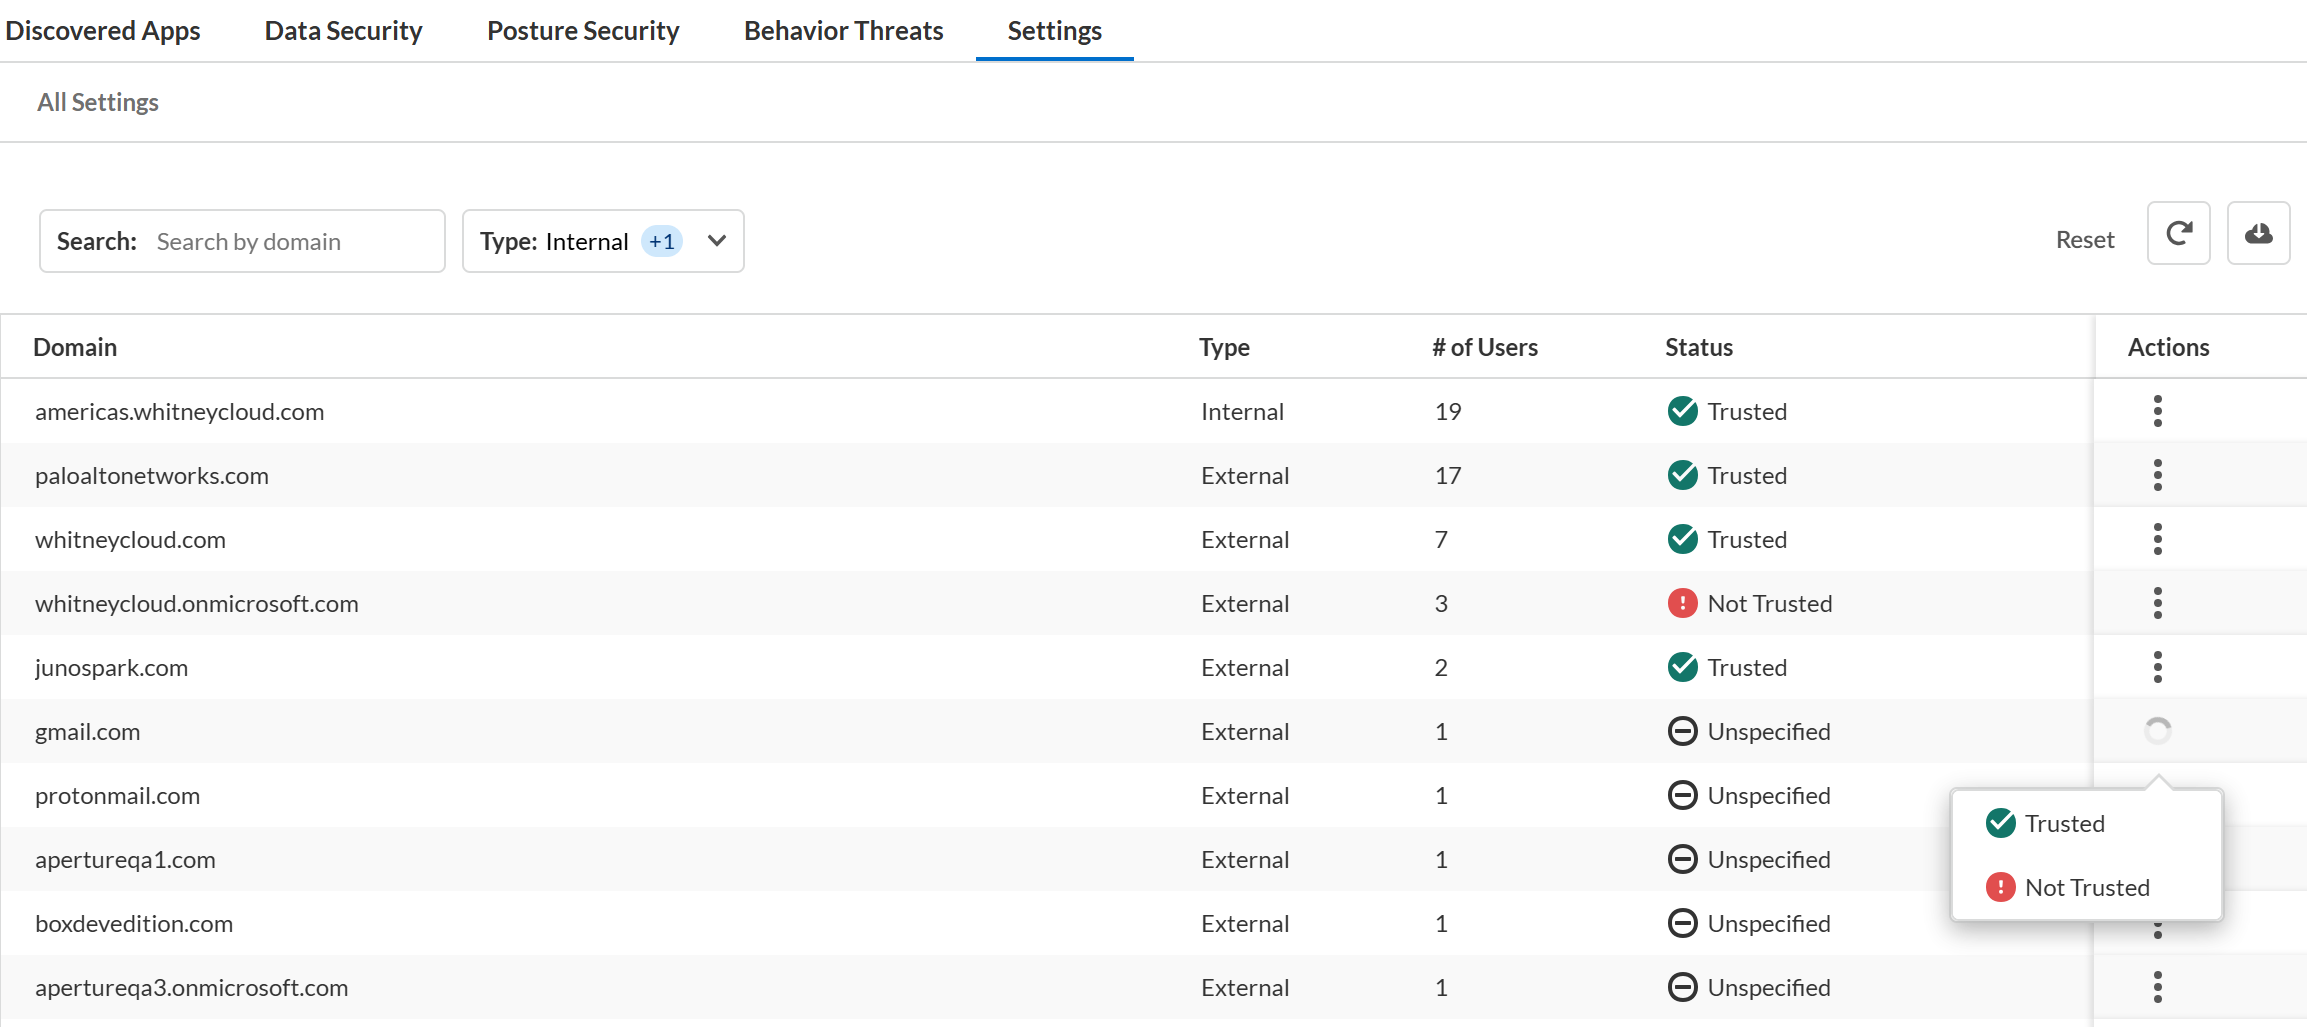
- Trusted vs. Untrusted Users—Using Data Security, you can configure a policy rule to create an incident if an external user has access to an asset. In some cases, sharing with external users—even though they are not part of your organization—does not pose a threat. For example, they might be partners or other trusted third-parties who you can mark as Trusted. Or, if you have entire domains that belong to trusted partners or user groups, you can mark those domains as Trusted so those users with email addresses from that domain are trusted users.When you assess incidents, you can update the domain trust settings in and mark the domain as either trusted or untrusted.
![]() Alternatively, when you view asset details you can explicitly designate an external collaborator as Trusted to exclude from incident discovery or Untrusted to ensure both new and modified assets shared create incidents. Changing trust settings for a user or a domain changes the underlying global policy Data Security uses when scanning assets. Trust settings enable more granular policy control while still allowing you to distinguish between internal and external sharing.
Alternatively, when you view asset details you can explicitly designate an external collaborator as Trusted to exclude from incident discovery or Untrusted to ensure both new and modified assets shared create incidents. Changing trust settings for a user or a domain changes the underlying global policy Data Security uses when scanning assets. Trust settings enable more granular policy control while still allowing you to distinguish between internal and external sharing.![]()
Exposure Level
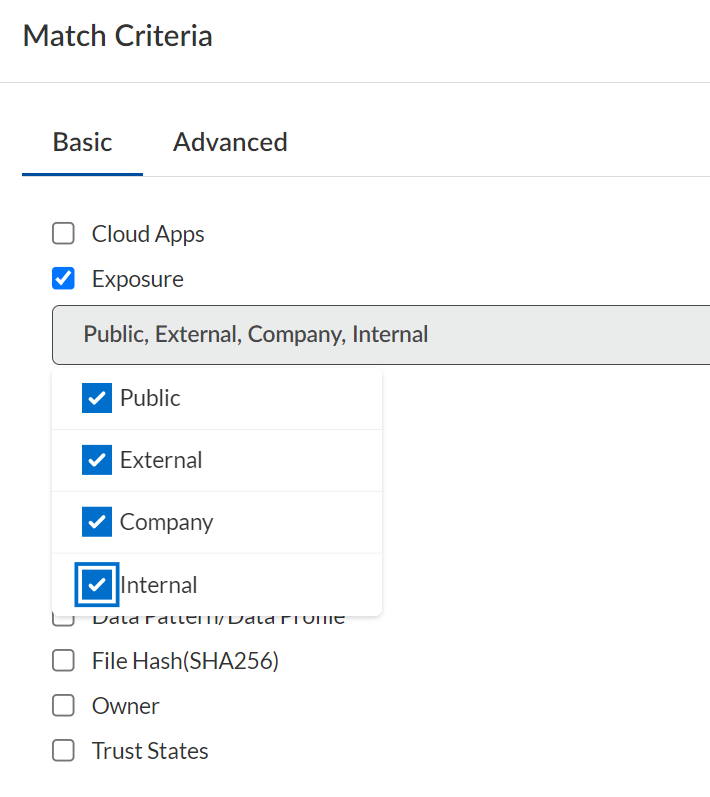
Data Security scans assets for exposure levels to identify how and with whom the asset is shared.Data Security uses an exposure level status to describe how your shared assets display in an application and determines file exposure by analyzing all users who have access to the file. Although every SaaS application has its own settings for controlling how and with whom users may share assets, Data Security provides a mechanism for setting and enforcing acceptable exposure levels consistently across all your managed apps.On Data Security, each policy—both the default rules as well as any custom rules you define—enable you to set a level of exposure identifying an asset as being at risk (except for Sensitive Documents rules, which match documents with predefined characteristics).The exposure level is just one match criteria available in a policy and, therefore, determining the minimum level of exposure posing a threat depends on the other match criteria, and what threat the policy protects against.For example, the WildFire policy scans all your assets for files containing malware. In this case, a file containing malware poses a threat no matter the exposure level. However, if you add a Sensitive Credential policy rule to protect an engineering GitHub repository used for sharing code throughout the company, any external sharing poses a risk, so you should configure the rule to match on Public and External exposures.Data Security scans assets for the following exposure levels:Unknown exposure level is used exclusively to search for assets, not policies, and only applies to AWS S3 buckets.![]() Exposure LevelDescriptionPublicAn asset is Public if it contains either of the following:
Exposure LevelDescriptionPublicAn asset is Public if it contains either of the following:- Public share settings—Assets found on a public repository or publicly indexed on Google.
- Shared links—The owner created a public link, vanity URL, or password-protected link for direct access to the asset.
ExternalThe owner invited one or more users outside of your organization to collaborate on the asset.CompanyThe owner created a company-wide URL giving anyone in the company direct access to the asset.InternalIncludes assets the owner has not shared. Also includes assets the owner has shared, but only with users within the company. These users have an email address in the enterprise domain name.Shared via Custom URLThe owner created a custom link, vanity URL, or password-protected link for direct access to the asset and then shared this asset (directly or indirectly) using the link.This option is for Box assets only and hidden if you're not using Data Security to secure Box applications.Define Trusted and Untrusted Users and Domains
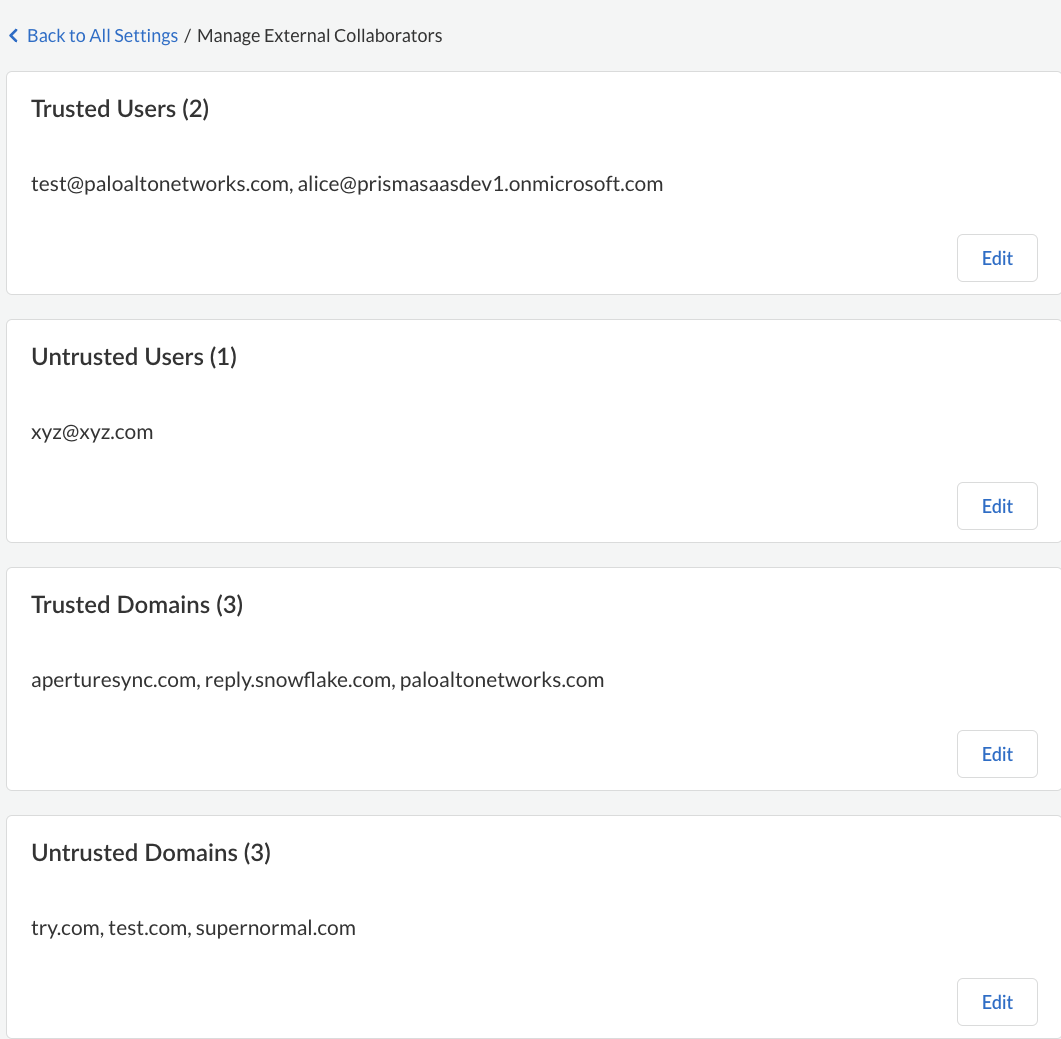
Define users and domains as trusted or untrusted on Data Security to provide more granular control and monitoring of who accesses assets.One of the first things you did when setting up Data Security was Define Your Internal Domains to determine if the user is internal to your organization. If an external user has an email address that does not belong to an internal domain, you can use Data Security to define users and domains as trusted or untrusted to protect your assets and have better granular control over who has access. After you define external users and domains, Data Security reports any assets shared inadvertently or maliciously.Because the Trusted and Untrusted Users and Domains list applies to all cloud apps on Data Security, you must be an administrator with a Super Admin role or Admin with access to all apps to modify this setting.- Log in to Strata Cloud Manager.Select . Define your users and domains as per your need.
![]() Save your setting.
Save your setting.
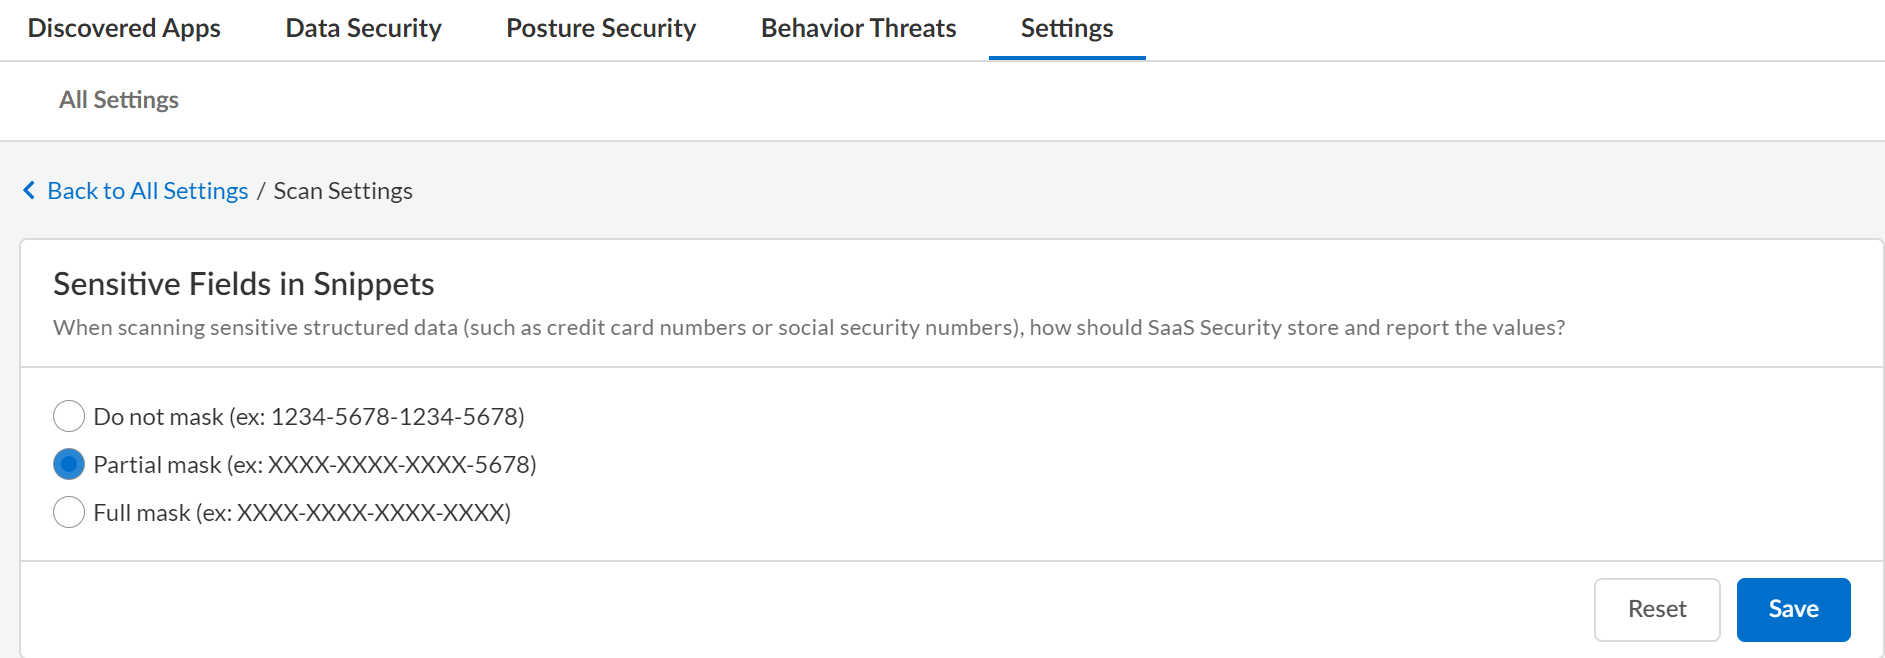
Enable Data Masking
Configure data masking on Data Security to control the exposure of data displayed in an incident snippet.Data Security uses data masking to mask the data in the snippets. Data masking enables you to control how Data Security stores and displays sensitive data, such as credit card numbers or Social Security numbers, to the administrator and other nonprivileged users who can view the snippet of content matched as an incident.By default, Data Security displays the last four digits of the value in cleartext (partial masking). For example, Data Security displays a snippet of credit card number as XXXX-XXXX-XXXX-1234. You can specify that Data Security display values in cleartext (no masking) or fully mask the data to hide all the values.Because the Data Masking setting applies to all cloud apps on Data Security, you must be an administrator with a Super Admin role or Admin role with access to all apps to modify this setting.- Log in to Strata Cloud Manager.Select .For financial and PII policy rules, Data Security displays a snippet of 100 bytes of content before and after the violation.
- Do not mask—Displays all the values in cleartext.
- Partial Mask —Displays only the last four digits in cleartext.
- Full mask—Does not display any values.
Save your changes.![]()
Configure the Email Alias and Logo for Sending Notifications
Customize the email alias and logo on Data Security for policy violation notifications.Data Security is configured with an SMTP service enabling you to send email notifications when a policy violation occurs. When you email a user, the default display name is Data Security and the sender email address is no_reply@paloaltonetworks.com. Although asset owners can reply to this default sender email address, no_reply discourages them. Best practice is to change this default and others to personalize your communications. Use the logo feature to legitimize the email sender so asset owners don't mistake your email as spam.Because General Settings applies to all the cloud apps on Data Security, you must be an administrator with a Super Admin role or an Admin role with access to all apps to modify this setting.- Log in to Strata Cloud Manager.Select .
- Sender Name—Name of the sender of the email message. Best practice is to use a name with imperative, such as Security Administrator or Compliance Auditor.
- Reply-to-Email—Address to use for communications. Best practice is to use a distribution list or an alias with a group of administrators or compliance auditors. Optionally, you can choose an alias that automatically triggers a helpdesk ticket upon reply.
To upload an Email Logo, select . Browse to select the image and Save.![]()