SaaS Security
Enable Group-based Selective Scanning
Table of Contents
Enable Group-based Selective Scanning
Learn how to enable group-based selective scanning.
| Where Can I Use This? | What Do I Need? |
|---|---|
|
Or any of the following licenses that include the Data Security license:
|
The steps to enable group-based selective scanning are the
same for both new customers integrating CIE with Data Security and
legacy customers integrating Azure Active Directory with Data Security.
Group-based selective scanning is the ability to include or exclude specific AD
groups from scans. Sometimes you might want to monitor the assets and accounts of
specific groups of users and not others. If your cloud app supports selective
scanning, Data Security enables you to select which directory groups to
include or exclude from both forward scan and backward scan.
Selective scanning is supported by specific cloud apps. By default, selective scanning is not
enabled, and it’s important that you decide if you want to enable selective
scanning—before you connect a cloud app to Data Security. Otherwise, you
must delete the cloud app instance, then reconnect the cloud app to Data Security to rediscover all assets and events for all users: all assets
and events previously stored will be deleted and incidents reported for users no
longer included in the selected groups are automatically closed.
Before you enable selective scanning,
learn about selective scanning behaviors.
Selective Scanning Behaviors
As you maintain selective scanning and groups in active
directory services, consider how Data Security updates your
scan results, user activities, and incidents.
| Group/User Change | Data Security... |
|---|---|
Remove a user from a group in directory services | Removes assets or user activities. Closes
any related incidents. Takes up to 7 days. |
Remove a group from Selective Scanning | |
Add a user to a group in directory services. | Records new user activities. |
Add a group to Selective Scanning |
Enable Selective Scanning During Onboarding
Enable group-based selective scanning when you onboard the cloud app.
- Log in to Strata Cloud Manager.Choose one of the following:
- New customers (onboarded your apps to Data Security on or after November 1, 2024) and FedRAMP customers: Integrate CIE with Data Security
- Legacy customers (onboarded your apps to Data Security before November 1, 2024): Integrate with directory services
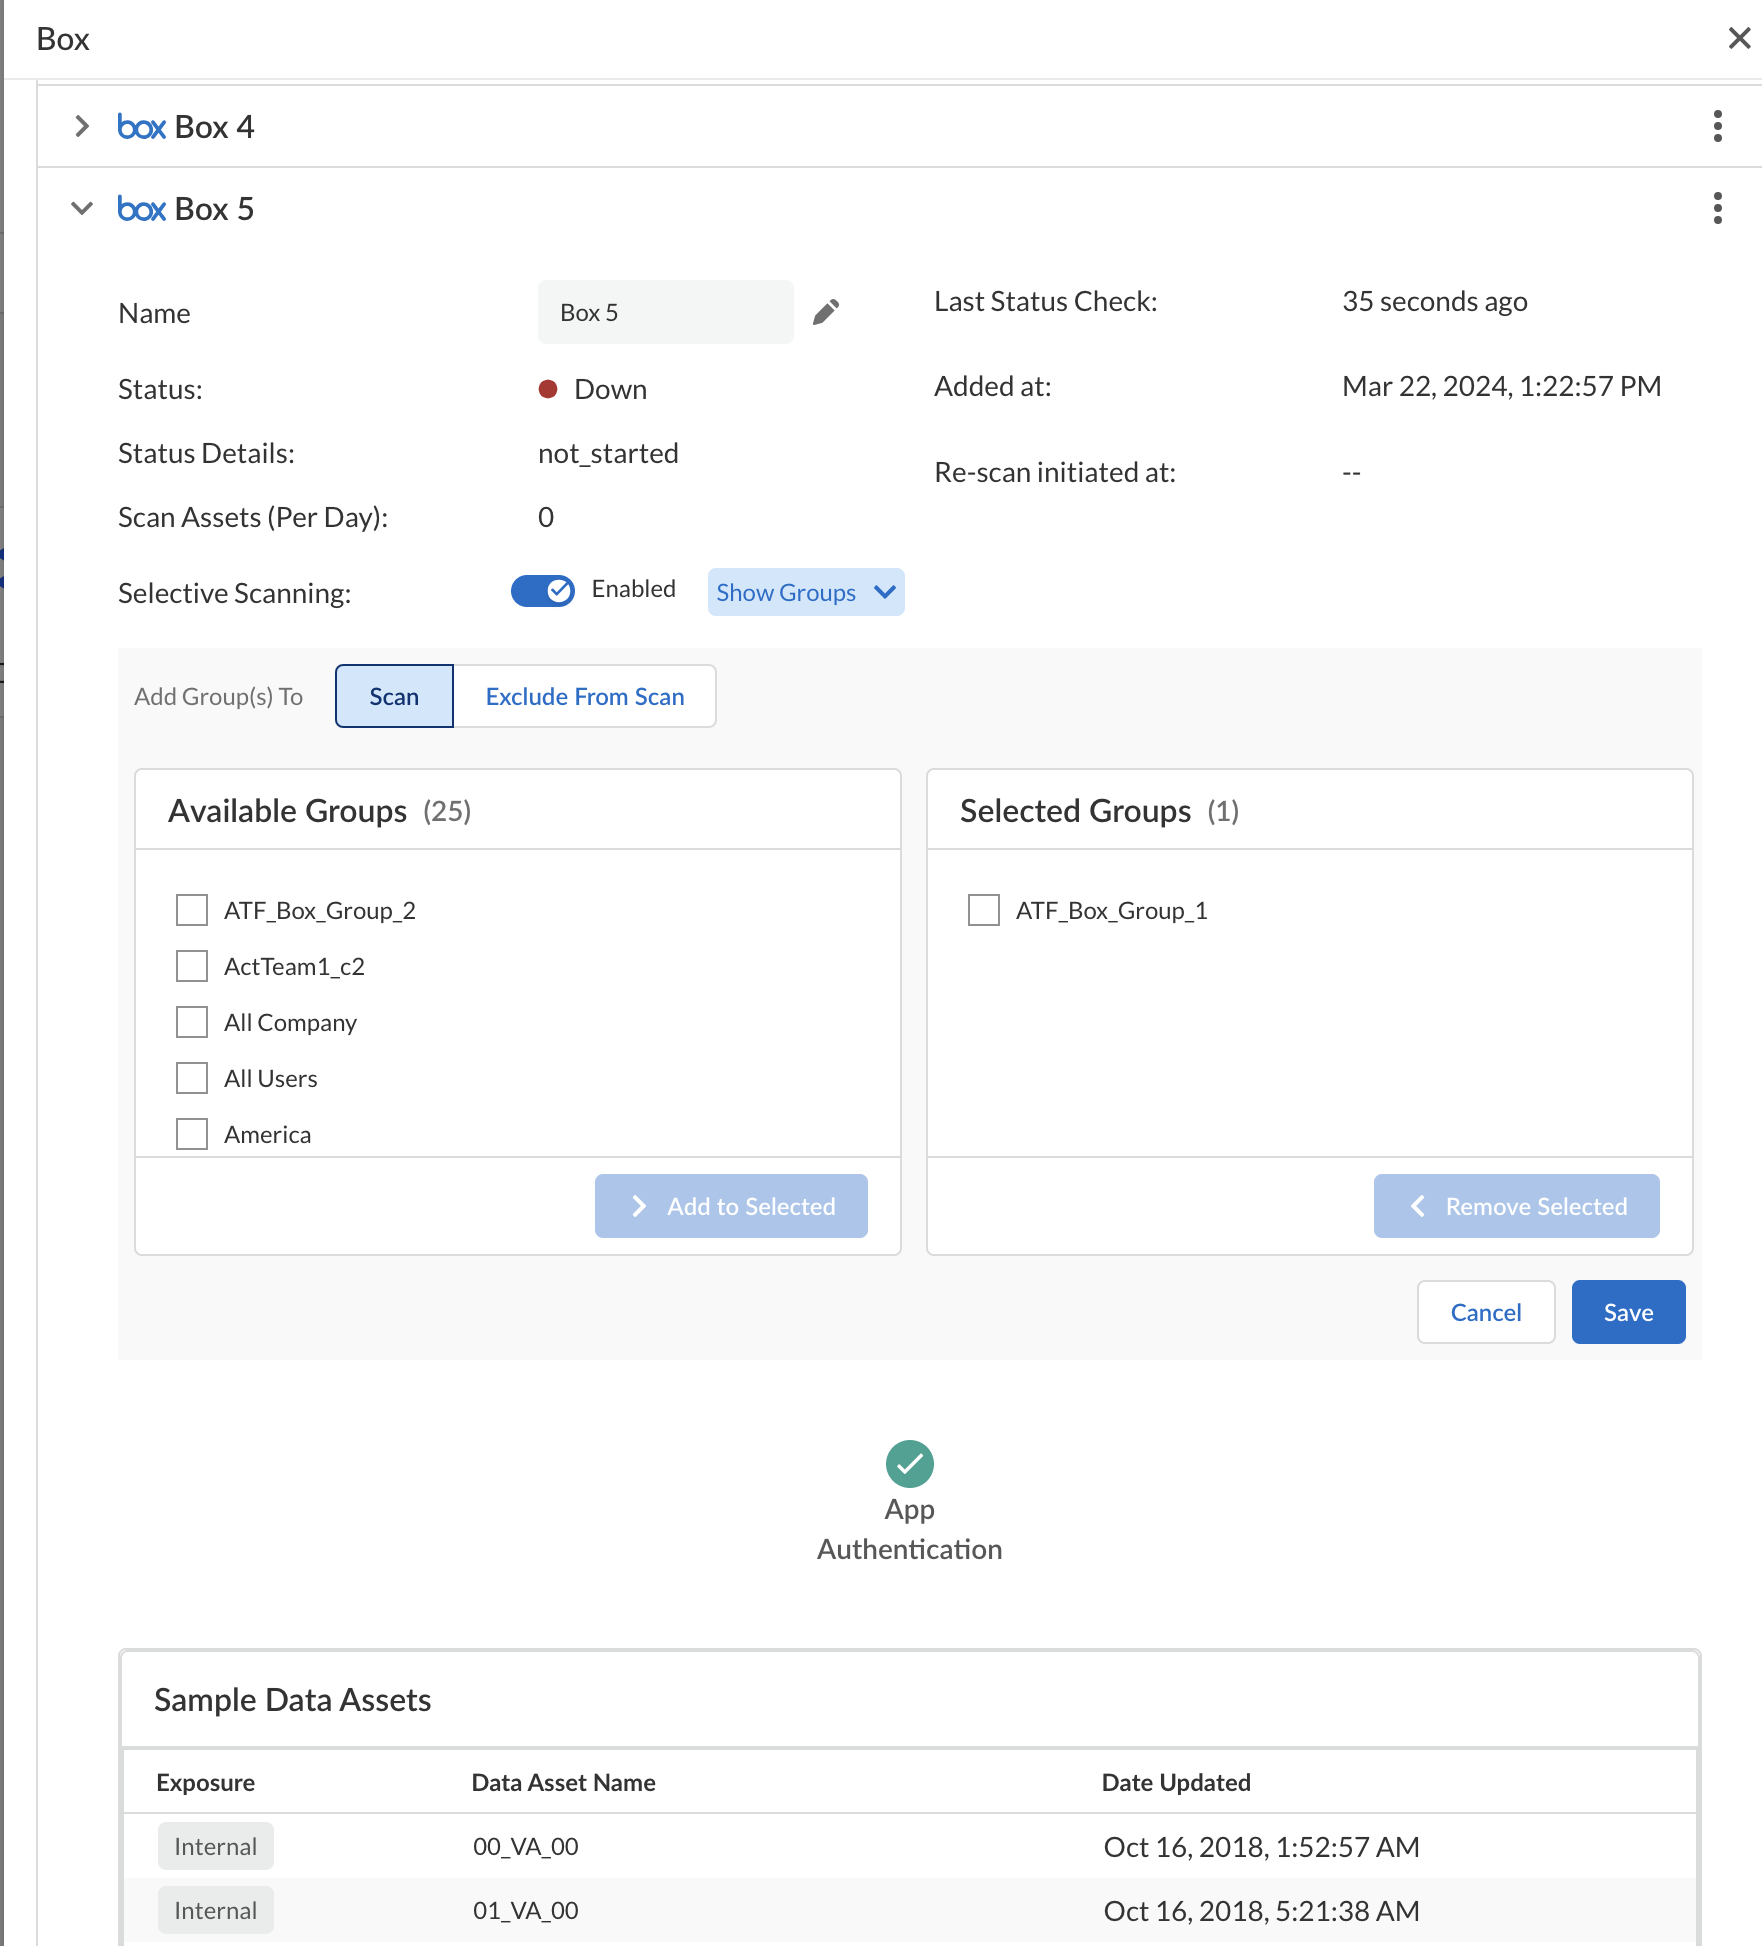
Connect your the cloud app to Data Security.Select Enable selective scanning.You can choose to either Scan or Exclude From Scan your user groups.Choose your groups from the Available Groups list and move them to the Selected Groups list.Select Save to continue.![]() You can perform steps 4 to 7 any number of times and make any changes as long as you have not started scanning your app. However, if you have started scanning, you cannot change the status of selective scanning for your app.Start Scanning your app.In the following screen shot, the instance Box 26 has started scanning and thus all operations related to selective scanning are disabled.
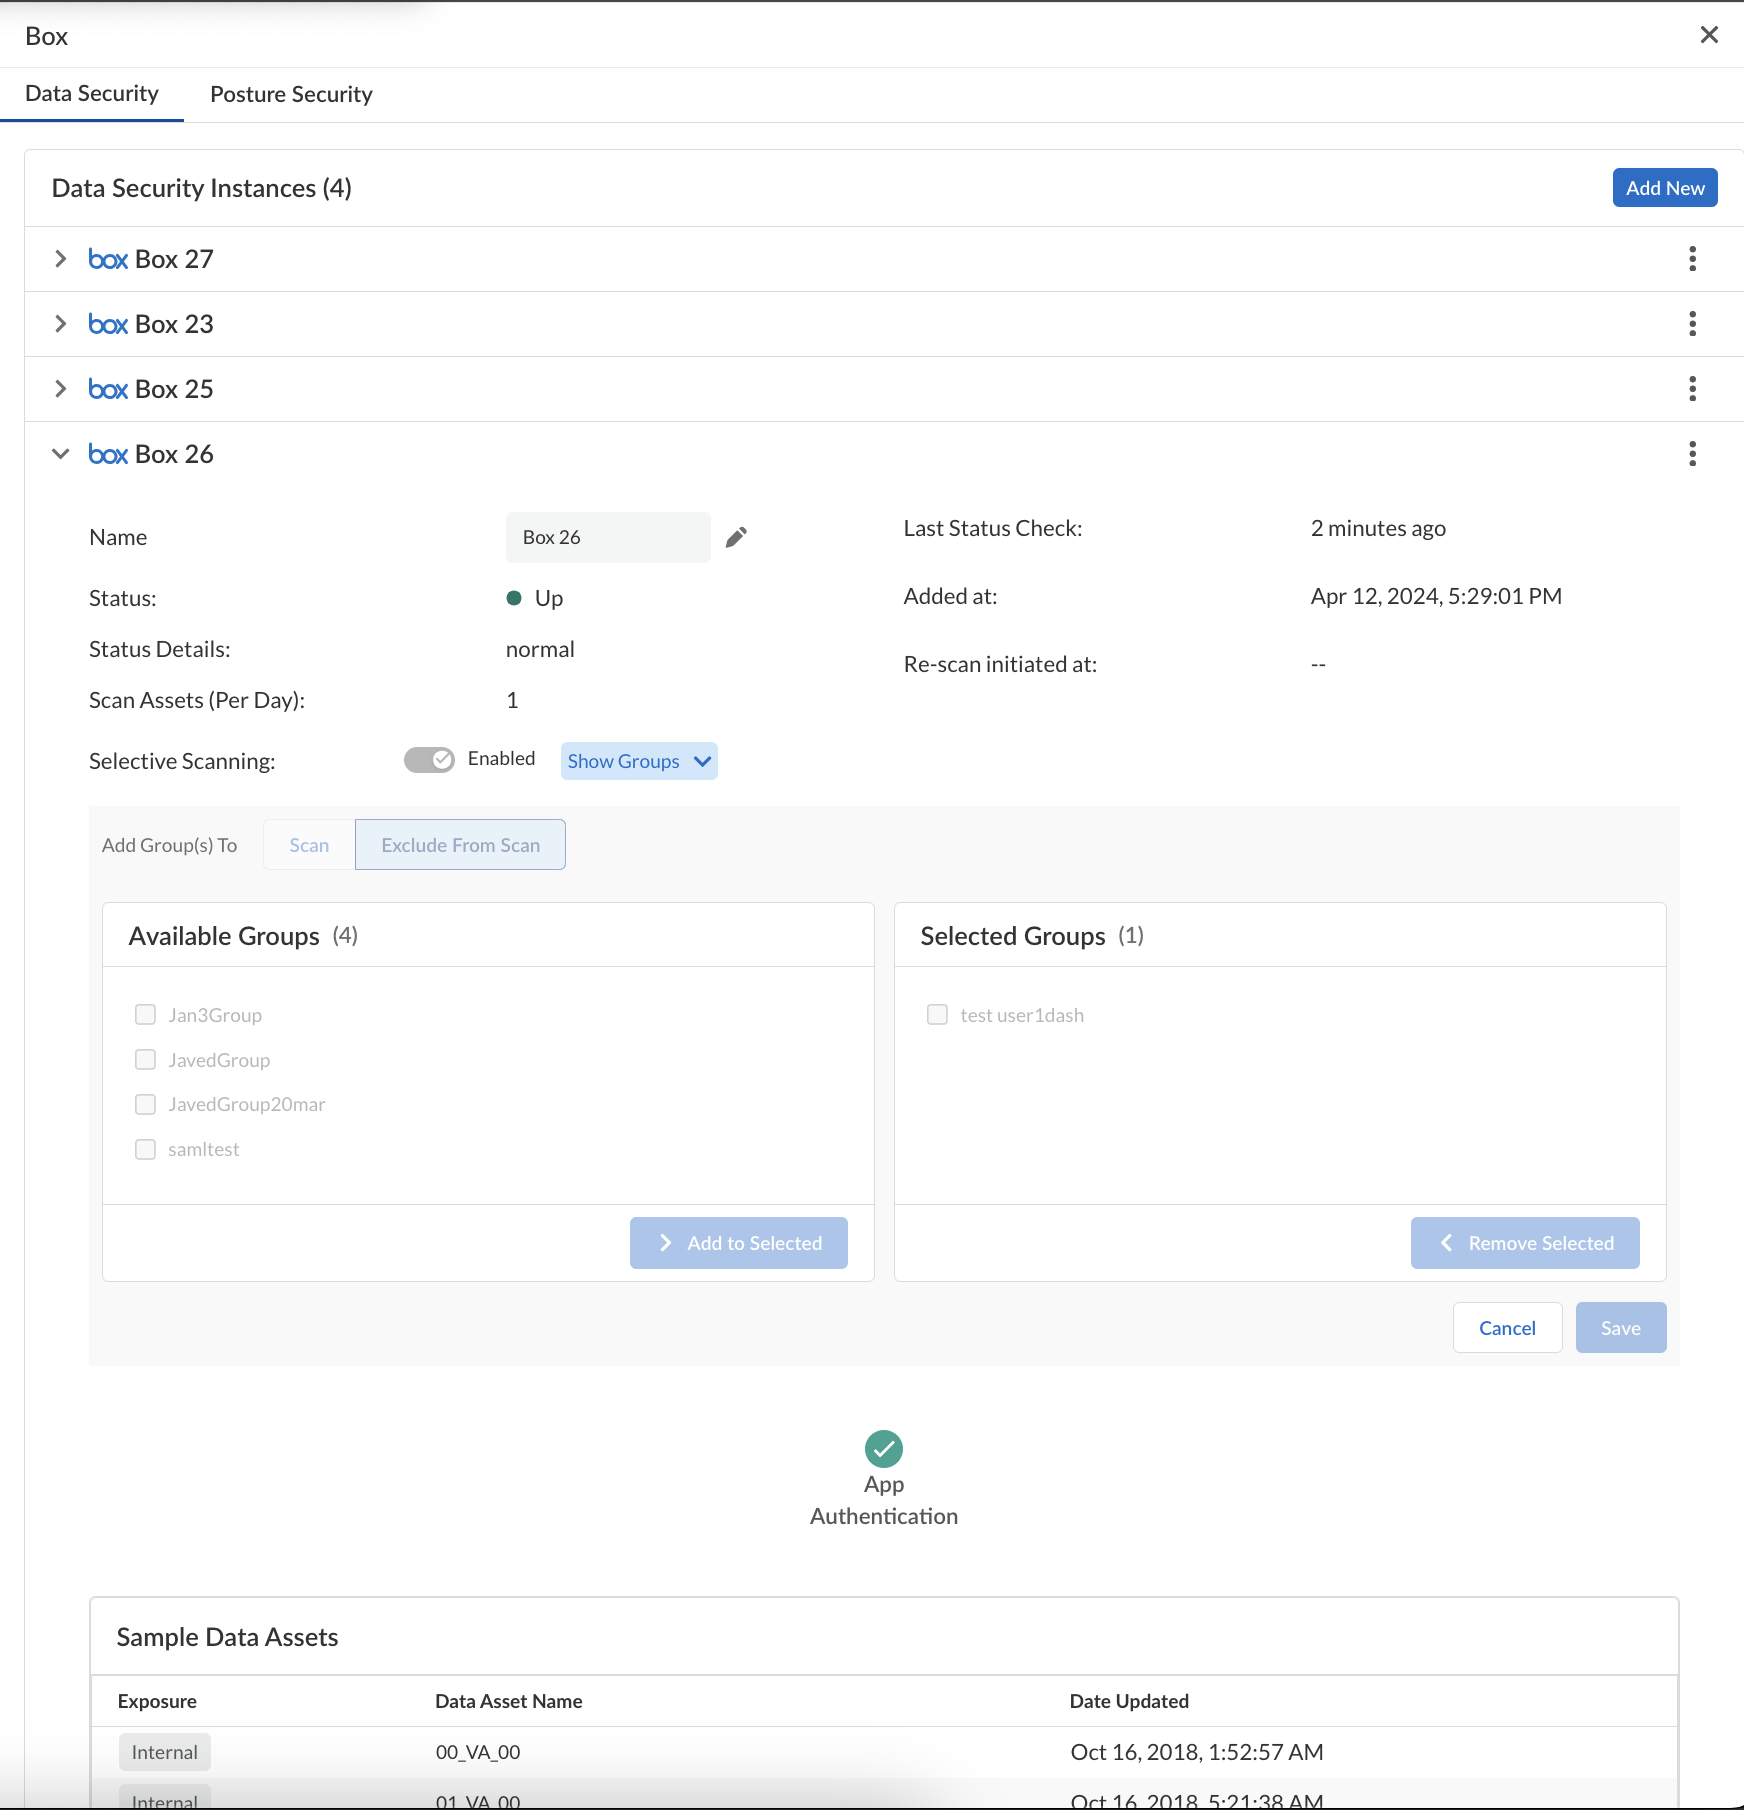
You can perform steps 4 to 7 any number of times and make any changes as long as you have not started scanning your app. However, if you have started scanning, you cannot change the status of selective scanning for your app.Start Scanning your app.In the following screen shot, the instance Box 26 has started scanning and thus all operations related to selective scanning are disabled.![]() It’s easier to enable group-based selective scanning when you onboard the cloud app. If, however, you choose to enable afterward, you must delete the cloud app instance and add it back so Data Security can discover all assets and events for all users.
It’s easier to enable group-based selective scanning when you onboard the cloud app. If, however, you choose to enable afterward, you must delete the cloud app instance and add it back so Data Security can discover all assets and events for all users.