WildFire Phishing Verdict
Table of Contents
WildFire Phishing Verdict
The new WildFire phishing verdict classifies
credential phishing links found in emails separately from emailed
links found to be exploits or malware. When the firewall detects
a link in an email, it forwards the link to WildFire for analysis.
WildFire classifies the link as phishing based on properties and
behaviors the accompanying website displays and assigns the link
the new phishing verdict. Phishing links are logged as WildFire
Submissions to indicate that the firewall detected such a link in
an email.
Firewalls with an active WildFire license that are
connected to the WildFire public cloud and are configured to forward
email links for analysis will automatically start receiving phishing
verdicts after the upgrade to PAN-OS 8.0. Firewalls with both a
WildFire license and a PAN-DB URL Filtering license can block access
to phishing sites within five minutes of initial discovery.
For Firewalls in a WildFire Private Cloud
Deployment:
The WildFire appliance does not support the
new Phishing verdict. However, firewalls connected to a WildFire
appliance that also have an active PAN-DB URL Filtering license
can still benefit from phishing protection. For these firewalls,
continue to step 5 to block users from
accessing newly-discovered phishing sites.
- Check that the firewall has an active WildFire license and is connected to WildFire.Blocking access to phishing sites requires a PAN-DB URL Filtering license, in addition to the WildFire license.
- Select to confirm that the WildFire License is active. If you are also planning to block access to phishing sites, confirm that the PAN-DB URL Filtering license is active.Select and confirm that the WildFire Public Cloud is set to:
wildfire.paloaltonetworks.com
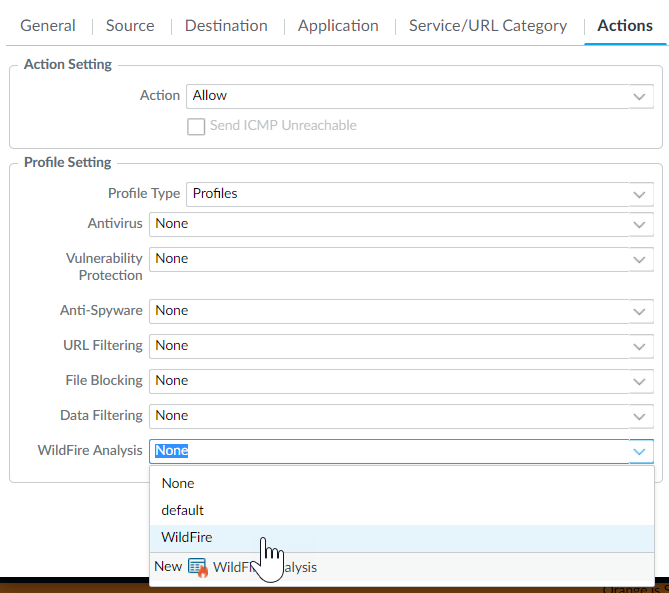
Alternatively, you can connect the firewall to a WildFire regional cloud in the European Union (EU) or in Japan.Verify that the firewall is enabled to forward email links for WildFire analysis.- Select and confirm that at least one profile is configured to forward email-link or any File Types for WildFire analysis.Select and then select a security profile rule to which you want to attach the WildFire Analysis Profile. In the Actions tab, select the WildFire Analysis profile that you want to use under Profile Settings:
![]() Monitor phishing links.
Monitor phishing links.- View links the firewall forwarded that WildFire found
to be phishing links:Select . The Verdict column displays Phishing for entries that record a phishing link. You can add the following filter to display only logs for phishing links:
(verdict eq phishing)
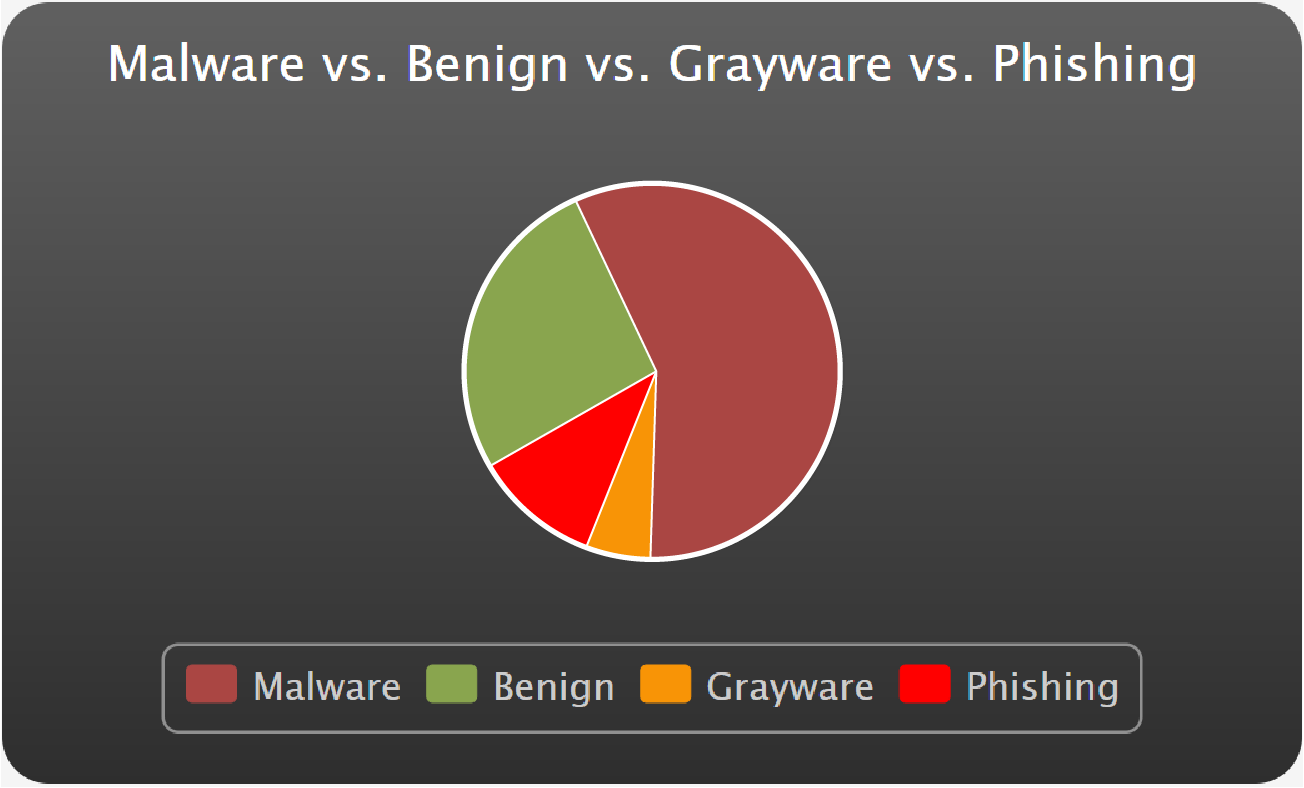
- View phishing activity on the firewall ACC:Select , view WildFire Activity By Type and select phishing.
- View all phishing links WildFire has identified:The WildFire portal displays the total number of WildFire submissions that were found to be phishing links in the last hour and the last 24 hours:
![]()
Select Reports, filter by Verdict, and select Phishing to find the analysis reports for phishing links.If you are submitting links to a regional WildFire cloud for analysis, instead use the WildFire EU portal or the WildFire Japan portal.Forward phishing logs as SNMP traps, syslog messages, or email notifications.- Select and Add or modify a log forwarding profile to define the logs you want to forward.Add a rule to the profile.Set the Log Type to wildfire.Add the Filter ( verdict eq phishing ).Continue to define or update the profile, and click OK to save the profile when you’re done.Apply the new or updated log forwarding settings to traffic:
- Select and Add or modify a security policy rule.
- Select Actions and in the Log Setting section, attach the new or updated Log Forwarding profile to the security policy rule.
- Click OK to save the security policy rule.
(Optional) To prevent users from inadvertently leaking corporate credentials to attackers, block access to phishing sites and block users from submitting usernames and passwords to untrusted and unsanctioned sites.- Select and Add or modify a URL Filtering profile.Select Categories and filter the list of URL categories to find the phishing category.Set the Site Access for phishing websites to Block to prevent users from accessing sites that aim to steal usernames and passwords.Enable the new Credential Phishing Prevention feature to stop users from submitting credentials to untrusted sites, without blocking their access to these sites.Apply the new or updated URL Filtering profile to traffic:
- Select and Add or modify a security policy rule.
- Select Actions and in the Profile Setting section, set the Profile Type to profiles.
- Attach the new or updated URL Filtering profile to the security policy rule.
- Click OK to save the security policy rule.