Restore the Firewall Configuration after Replacement
Table of Contents
Restore the Firewall Configuration after Replacement
To restore the firewall configuration on the
new firewall, you will first perform initial configuration on the
new firewall, including setting the operational mode, upgrading the
PAN-OS software and content release version to match what was installed
on the old firewall. You will then export the device state of the
old firewall from Panorama and import it onto the new firewall.
Finally, you will go back to Panorama to validate that the new firewall
has connected and then sync it with Panorama.
If the firewall belongs to an SD-WAN cluster, you must follow the workflow to replace an SD-WAN device when
there is an RMA.
- Perform initial configuration on the new firewall and verify network connectivity.Use a serial port connection or a Secure Shell (SSH) connection to add an IP address, a DNS server IP address, and to verify that the new firewall can access the Palo Alto Networks updates server.(Optional) Set the Operational mode on the new firewall to match that on the old firewall.A serial port connection is required for this task.
- Enter the following CLI command to access maintenance mode on the firewall:
> debug system maintenance-modeFor Operational mode, select Set FIPS Mode or Set CCEAL 4 Mode from the main menu.Retrieve the license(s) on the new firewall.Enter the following command to retrieve the licenses:> request license fetch(Optional) Match the operational state of the new firewall with that of the old firewall. For example, enable multi-virtual system (multi-vsys) capability for a firewall that was enabled for multi-vsys capability.Enter the commands that pertain to your firewall settings:> set system setting multi-vsys on > set system setting jumbo-frame on
Upgrade the PAN-OS version on the new firewall.You must upgrade to the same PAN-OS installed on the old firewall. You must upgrade the content release versions to the same or later version that is installed on the old firewall.Enter the following commands:- To upgrade the content release version:
> request content upgrade download latest
> request content upgrade install version latest
To upgrade the anti-virus release version:> request anti-virus upgrade download latest > request anti-virus upgrade install version latest
To upgrade the PAN-OS software version:> request system software download version <version> > request system software install version <version>
Go to the Panorama CLI and export the device state bundle from the old firewall to a computer using Secure Copy (SCP) or TFTP (you cannot do this from the web interface).If you manually exported the device state from the firewall, you can skip this step.The export command generates the device state bundle as a tar zipped file and exports it to the specified location. This device state will not include the LSVPN dynamic configuration (satellite information and certificate details).Enter one of the following commands:> scp export device-state device <old serial#> to <login> @ <serverIP>: <path>or> tftp export device-state device <old serial#> to <serverIP>Replace the serial number of the old firewall with that of the new replacement firewall on Panorama.By replacing the serial number on Panorama you allow the new firewall to connect to Panorama after you restore the configuration on the firewall.- Enter the following command in Operational mode:
> replace device old <old SN#> new <new SN#>Enter Configuration mode and commit your changes.> configure # commit
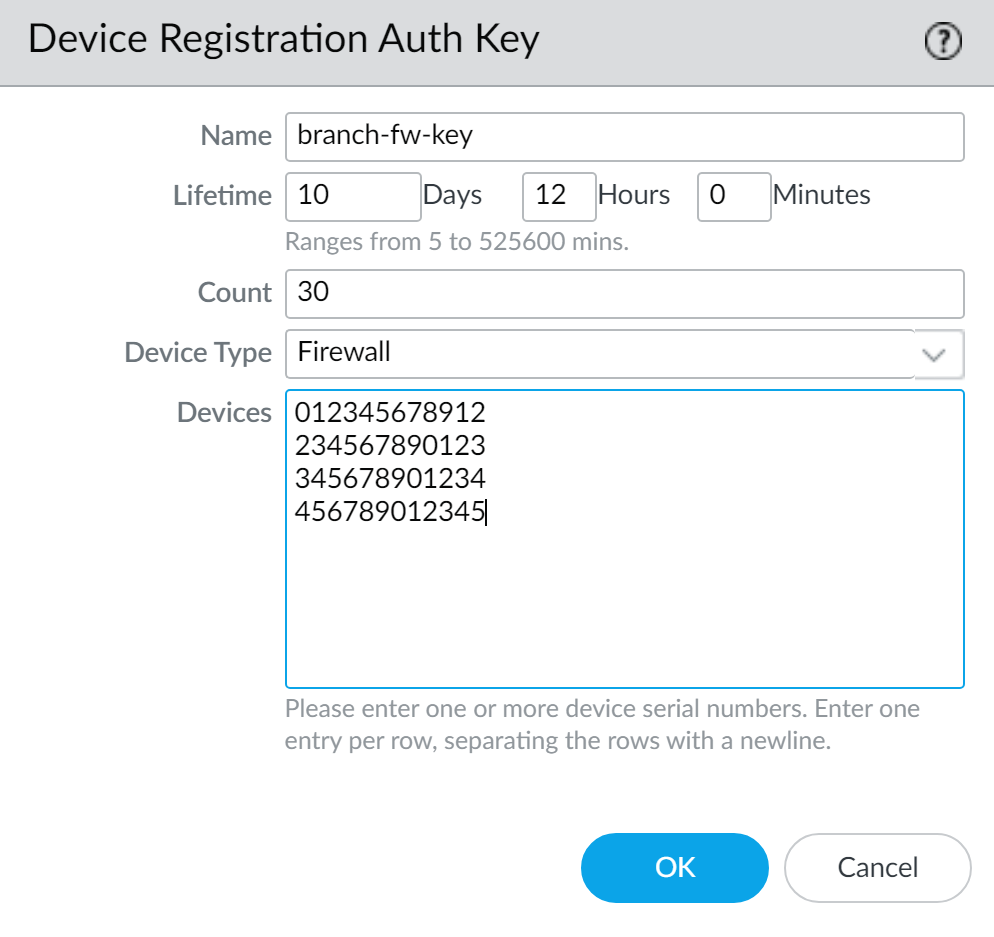
Exit Configuration mode.# exit(Optional) Create a device registration auth key on Panorama.This step is required if no valid device registration auth key is created on Panorama. Skip this step if a valid device registration auth key is already created on Panorama.Exporting the device state bundle does not export the device registration auth key used to add the firewall to Panorama management. When you restore the firewall configuration after replacement, you must create a new device registration auth key to add the new firewall to Panorama.- Log in to the Panorama Web Interface.Select and Add a new authentication key.Configure the authentication key.
- Name—Enter a descriptive name for the authentication key.
- Lifetime—Enter the key lifetime to specify how long the authentication key may be used to onboard new firewalls.
- Count—Specify how many times the authentication key may be used to onboard new firewalls.
- Device Type—Specify that the authentication key is used to authenticate a Firewall.Select Any to use the device registration auth key to onboard both firewalls and Log Collectors.
- (Optional) Devices—Enter one or more device serial numbers to specify for which firewalls the authentication key is valid.
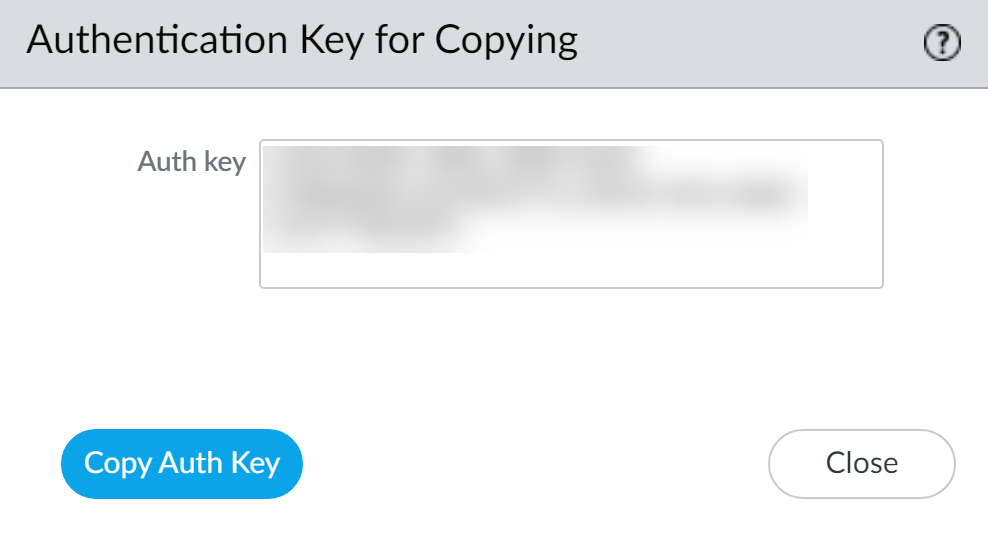
Click OK.![]() Copy Auth Key and Close.
Copy Auth Key and Close.![]() On the new firewall, import the device state and add the device registration auth key.
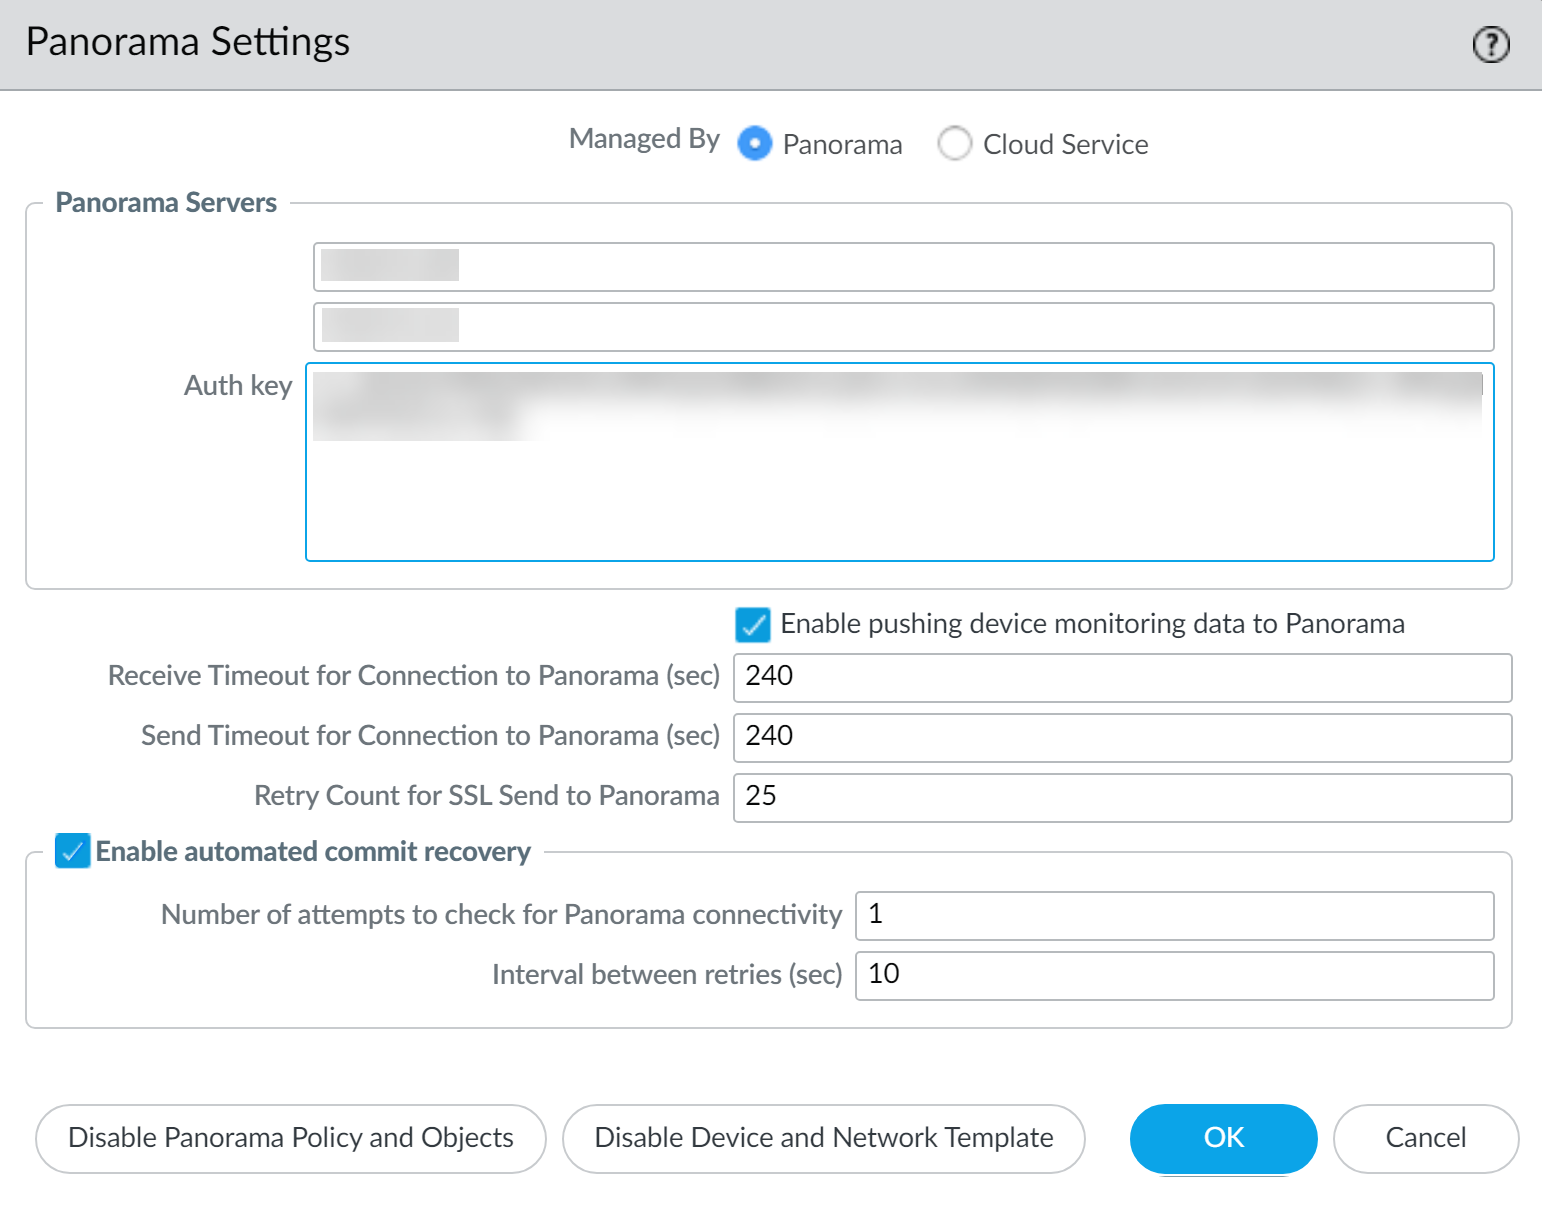
On the new firewall, import the device state and add the device registration auth key.- Log in to the firewall web interface.Select and click the Import Device State link in the Configuration Management section.Browse to locate the file and click OK.Select and edit the Panorama SettingsEnter the Auth key you created on Panorama and click OK.
![]() Commit your changes to the running configuration on the firewall.From Panorama, verify that you successfully restored the firewall configuration.
Commit your changes to the running configuration on the firewall.From Panorama, verify that you successfully restored the firewall configuration.- Access the Panorama web interface and select .Verify that the Connected column for the new firewall has a check mark.Synchronize the firewall with Panorama.
- Access the Panorama web interface, select and Edit Selections in the Push Scope.Select Device Groups, select the device group that contains the firewall, and Include Device and Network Templates.Select Collector Groups and select the Collector Group that contains the firewall.Click OK to save your changes to the Push Scope.Commit and Push your changes.If you need to generate reports for a period when the old firewall was still functional after you installed the new firewall, you must generate a separate query for each firewall serial number because replacing the serial number on Panorama does not overwrite the information in logs.