Increase the System Disk for Panorama on AWS
Table of Contents
Increase the System Disk for Panorama on AWS
Migrate the existing system 81GB system disk to a 224GB system disk for Panorama
deployed on AWS.
To increase the system disk on AWS, add a 224GB system disk to replace the default
81GB system disk. For the minimum resource requirements for the Panorama virtual
appliance, see Setup Prerequisites for the Panorama Virtual
Appliance.
- Save and export your Panorama and firewall configuration to ensure you can recover Panorama if you encounter any issues.
- Before you start with the migration, ensure that the serial console is enabled for the instance type you are using.
![]()
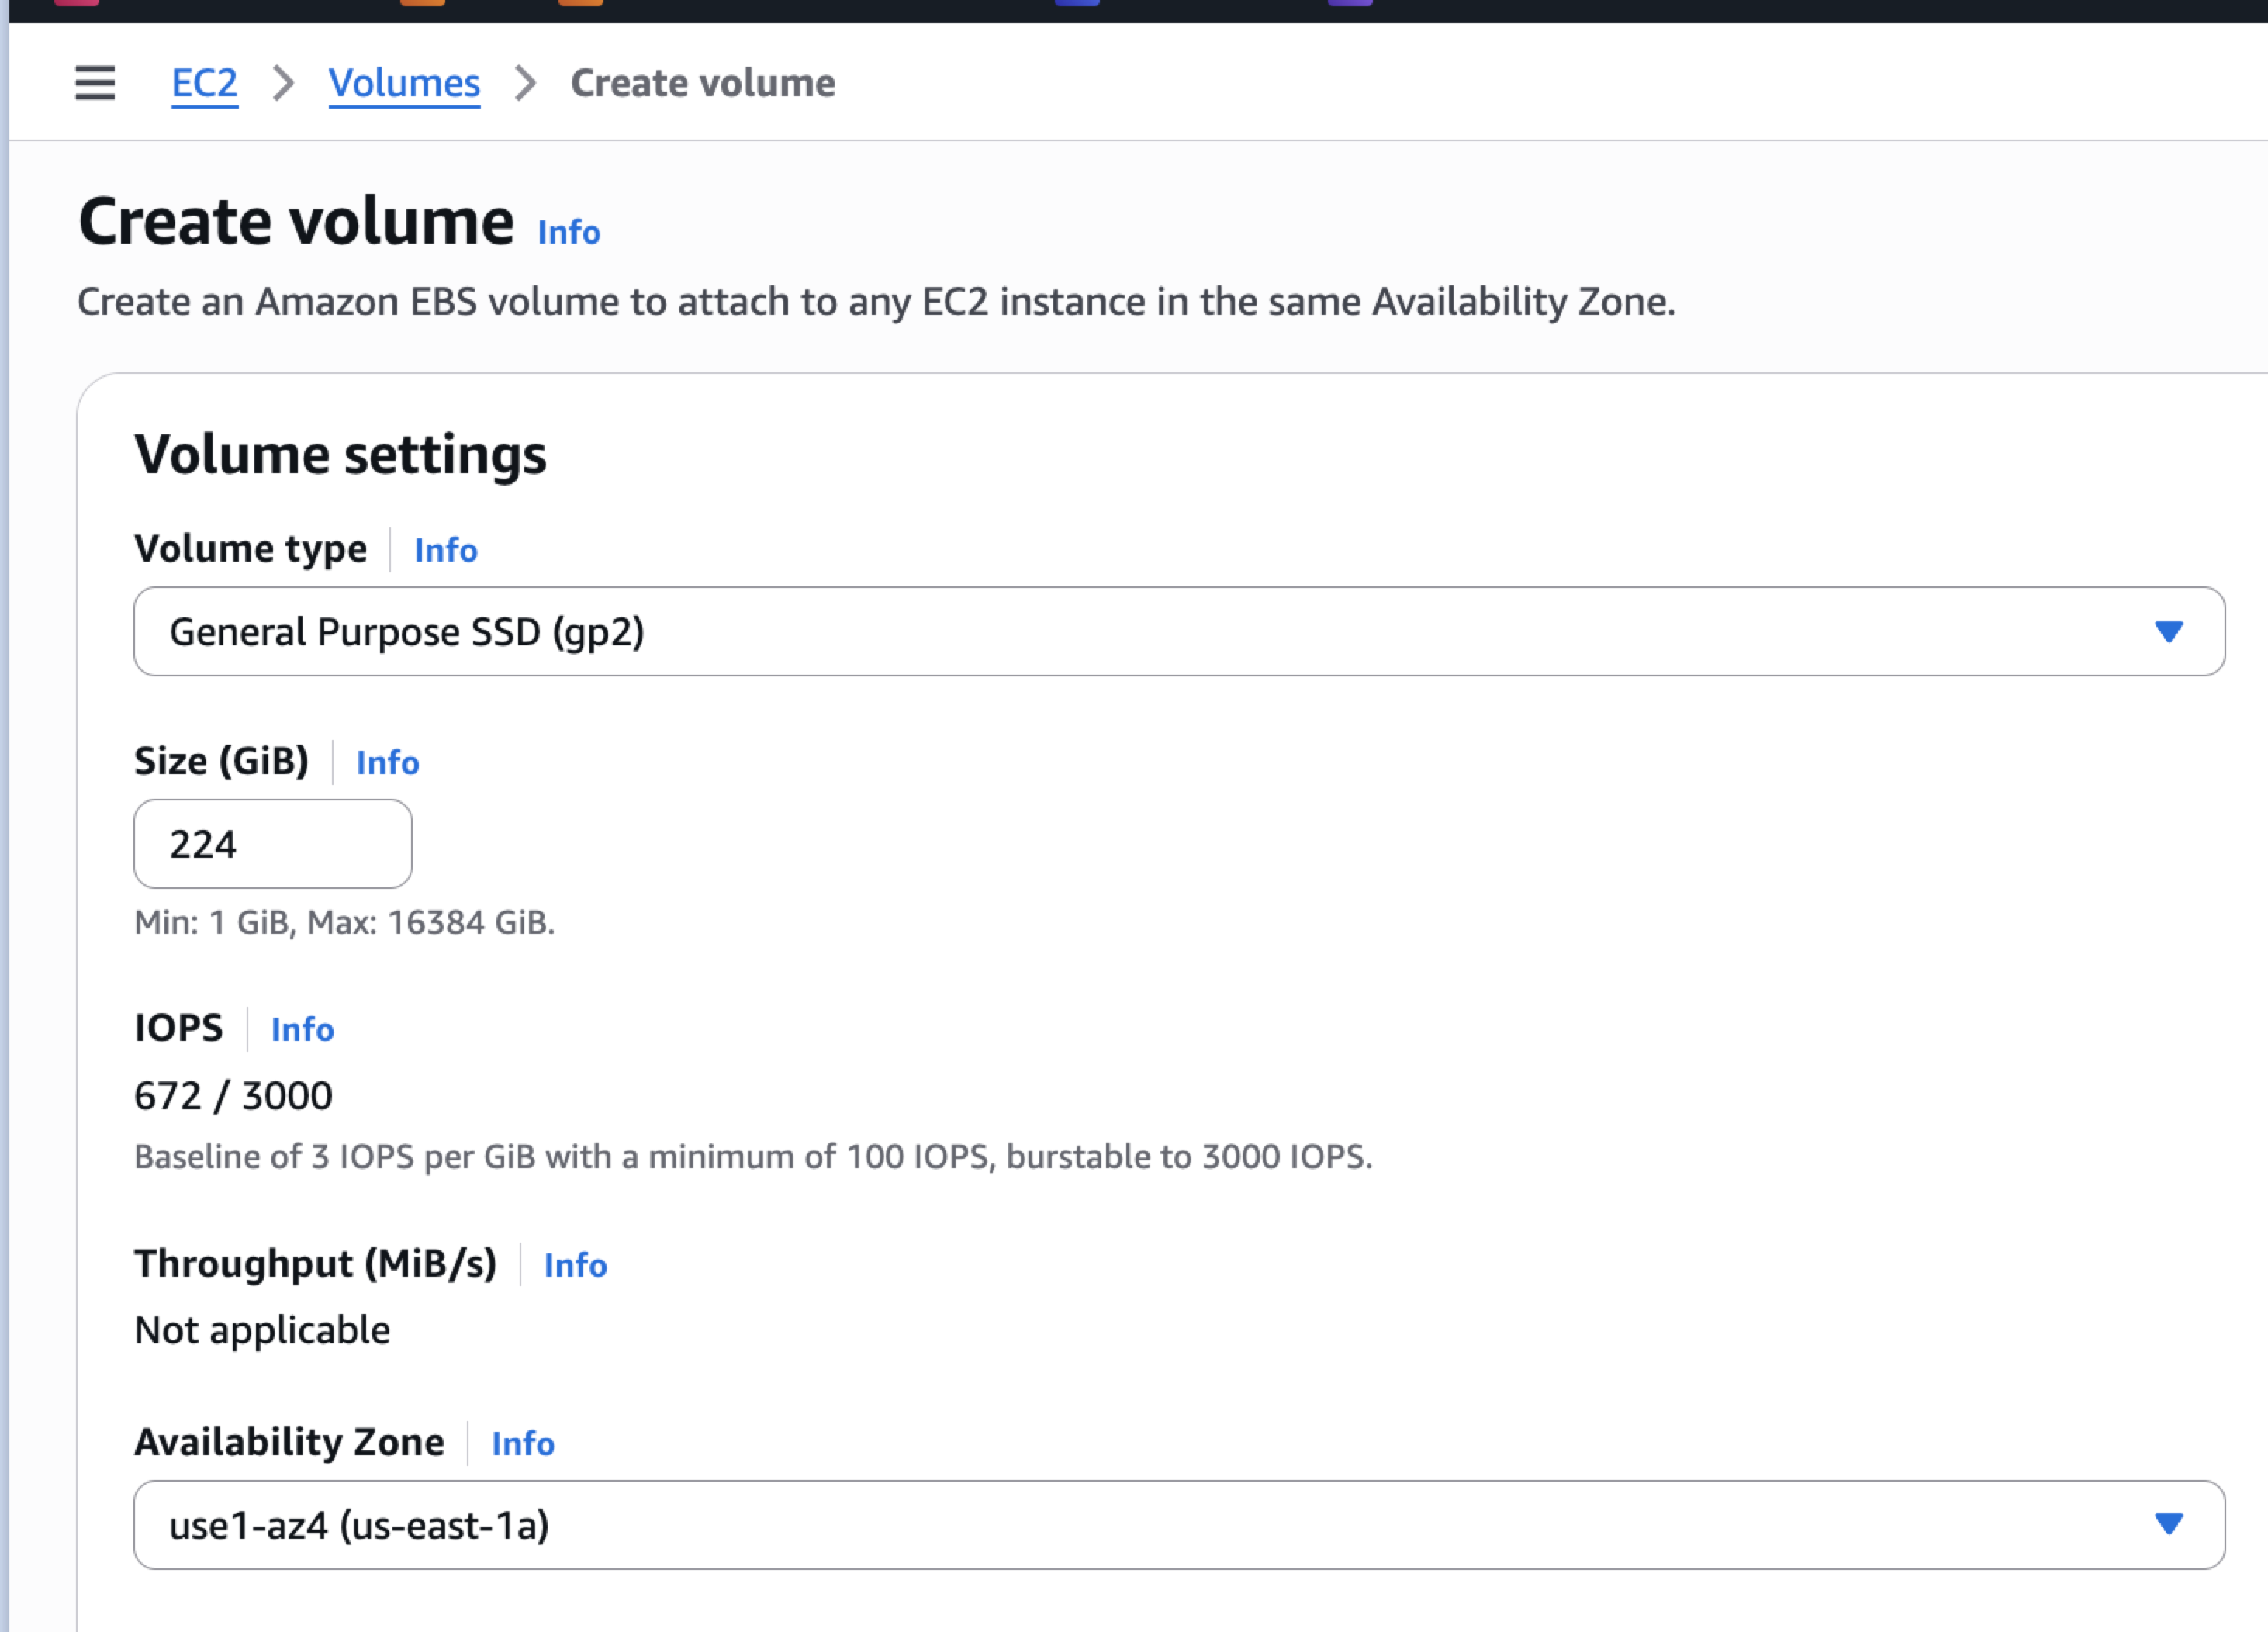
- Log in to the AWS Console.From EC2 > Instances, select the Panorama VM, click Instance state and stop the instance.Create a new volume with type = <based on current panorama volume type> and Size = 224GB in the Panorama’s Availability Zone.Ensure the new volume's type matches your existing EC2 instance. For example, a gp2 EC2 instance requires a gp2 volume type.
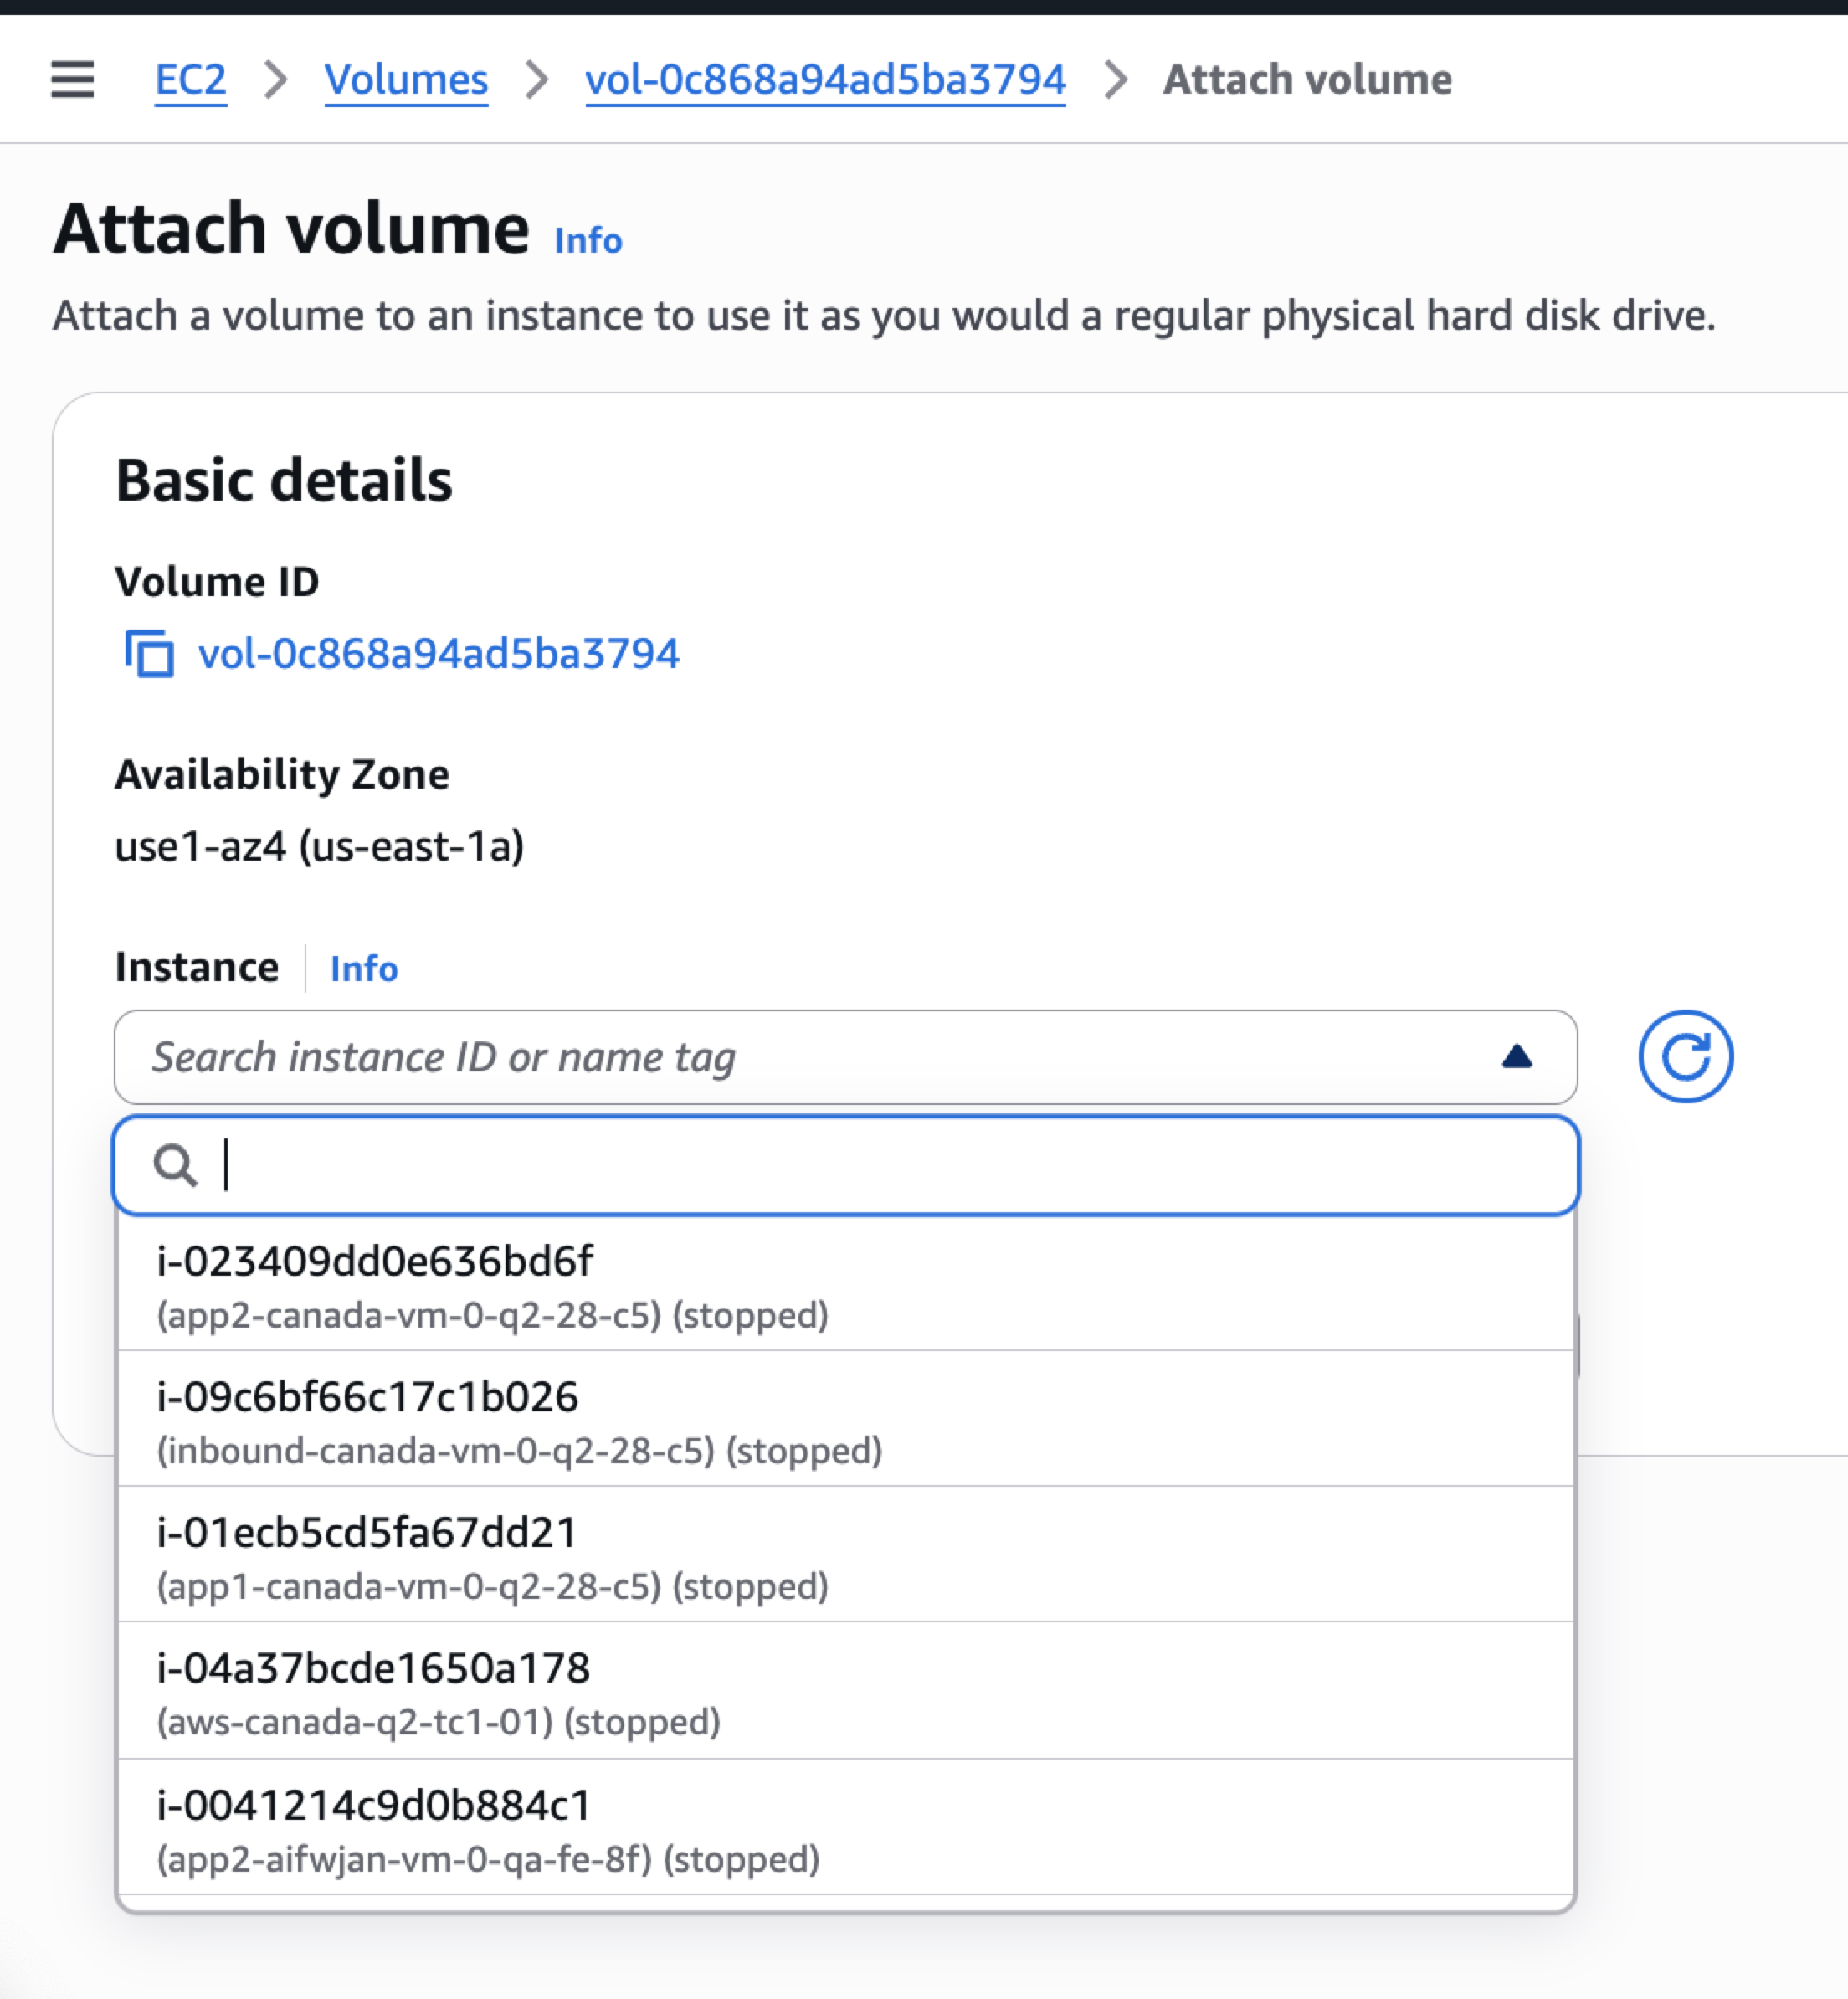
![]() Attach the created volume to the Panorama instance.
Attach the created volume to the Panorama instance.![]()
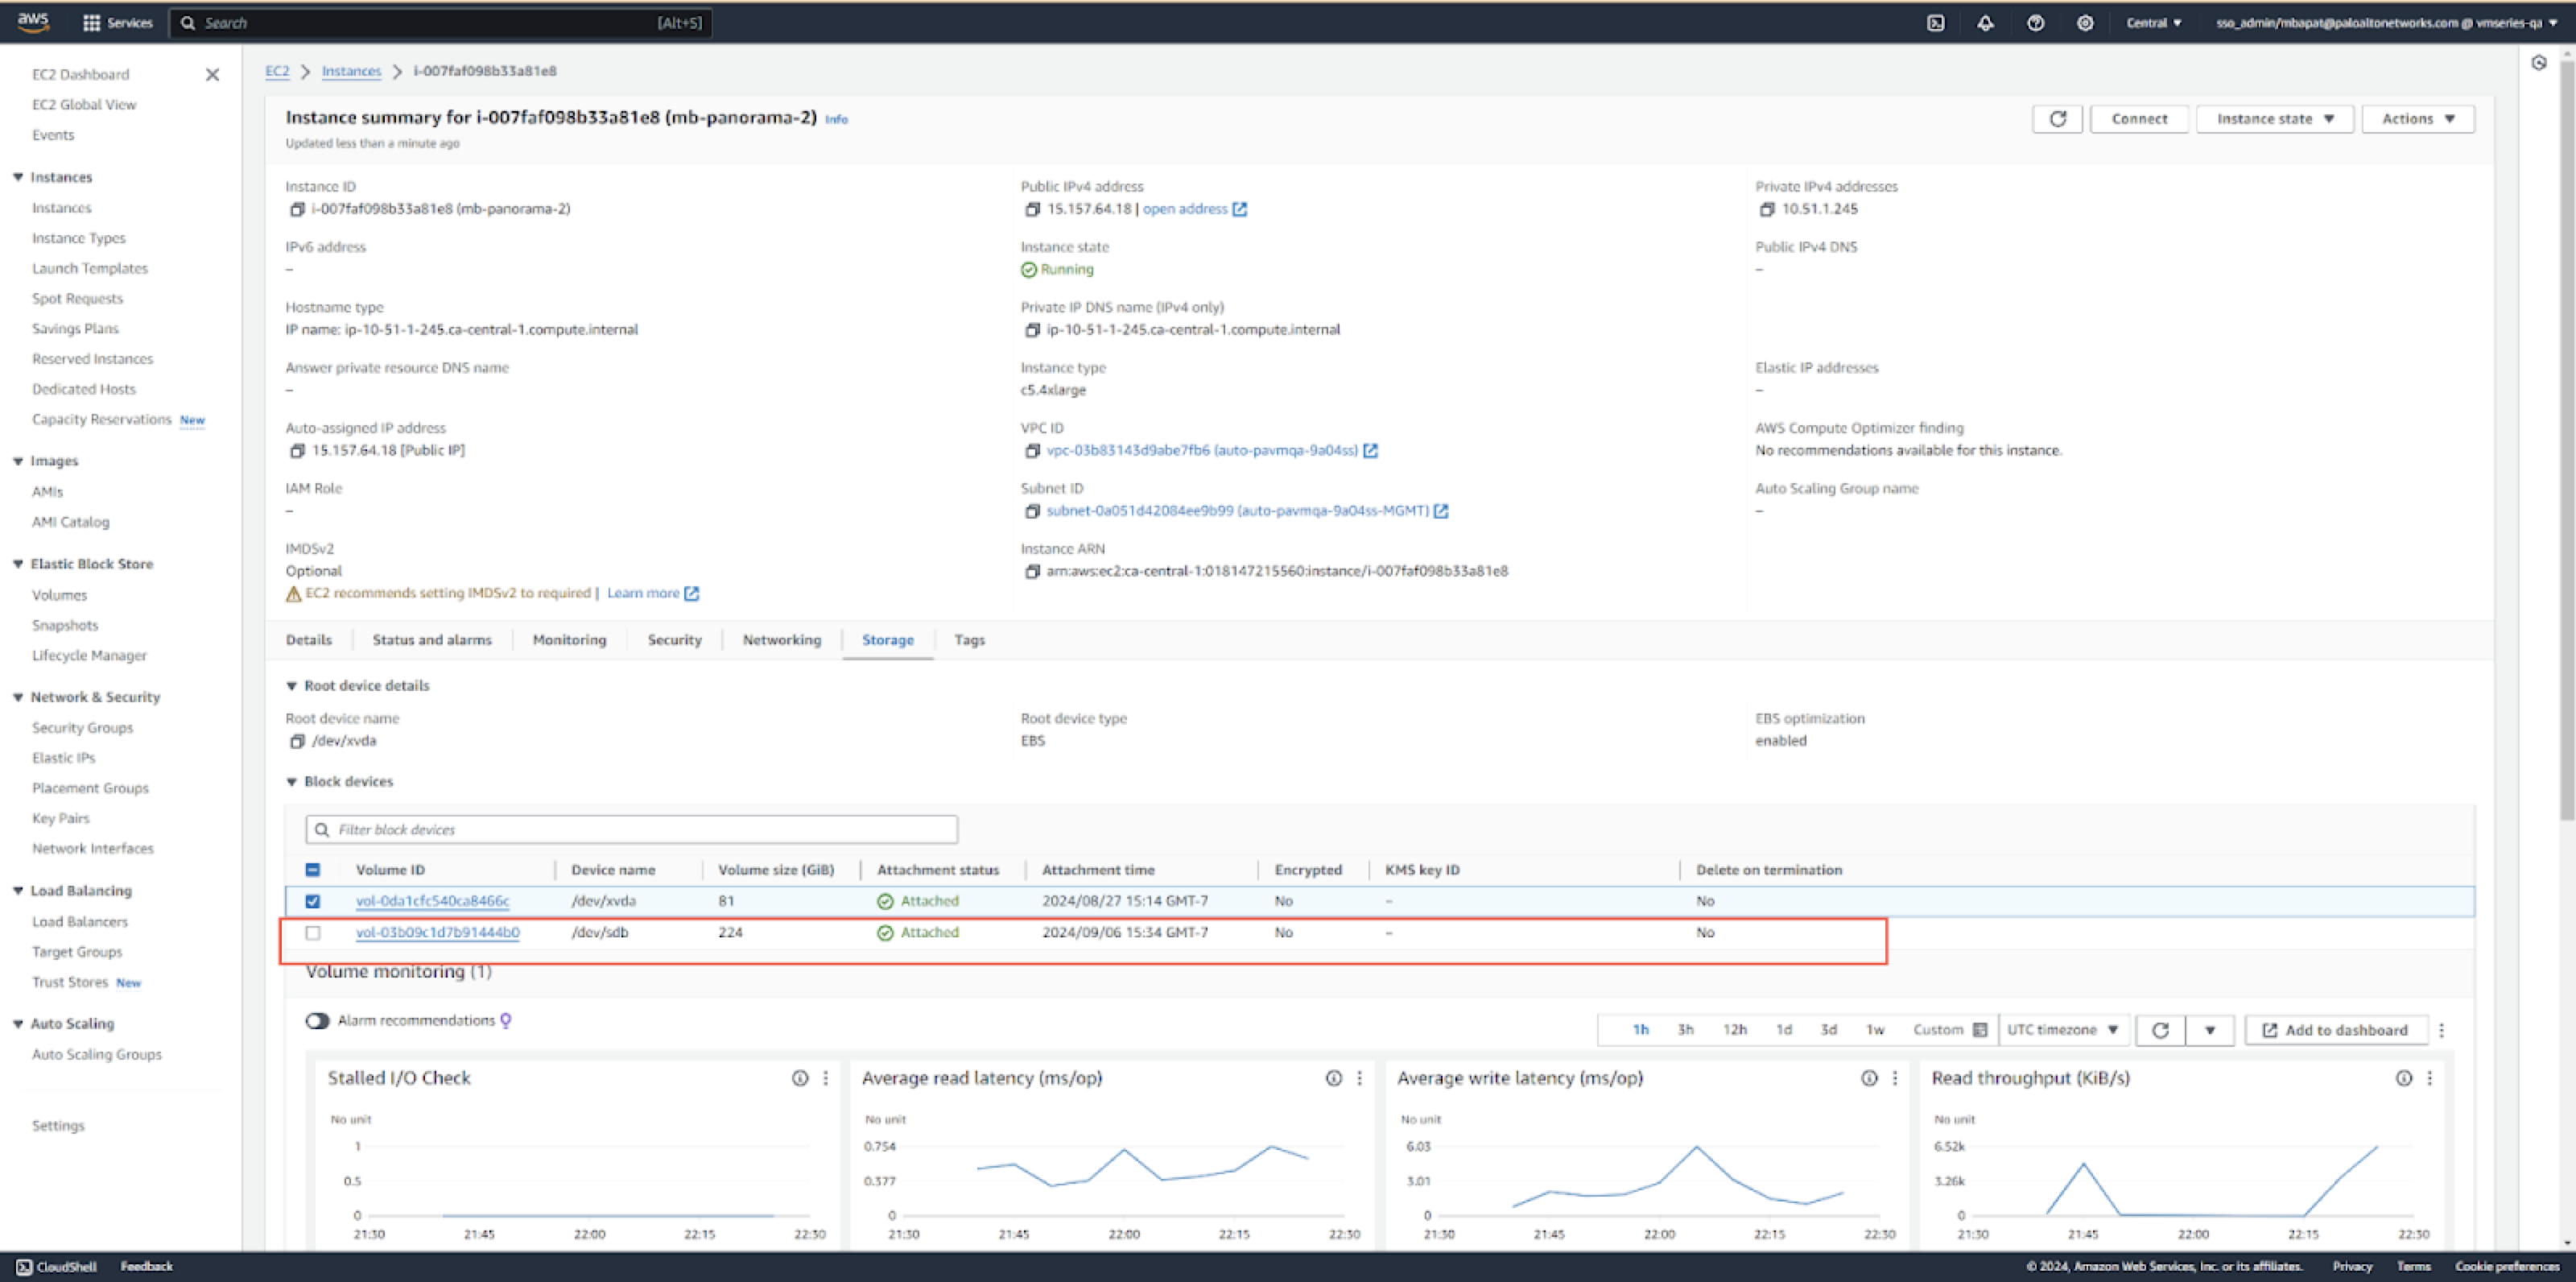
![]() Confirm the instance has the new 224GiB volume attached.
Confirm the instance has the new 224GiB volume attached.- From your EC2 instance, select Instance and then the Panorama instance that has the increased disk size.
- Select the Storage tab and confirm that the disk with increased size is added.
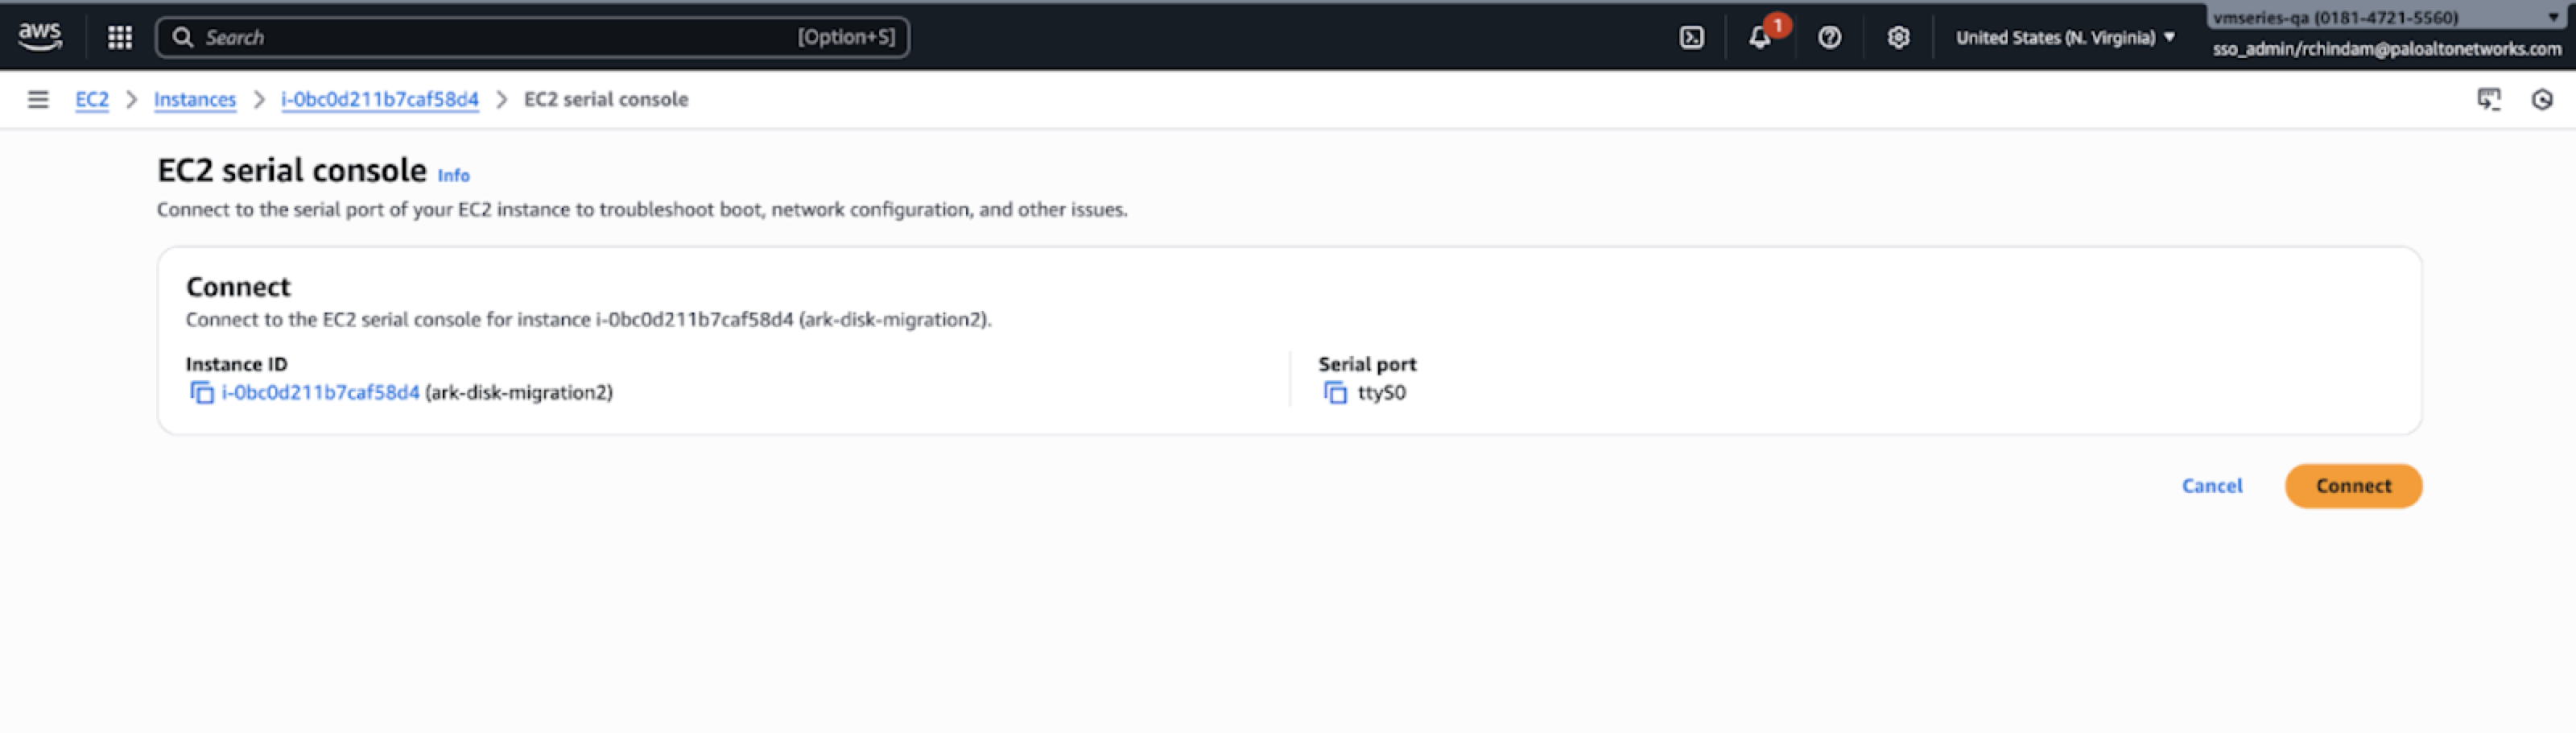
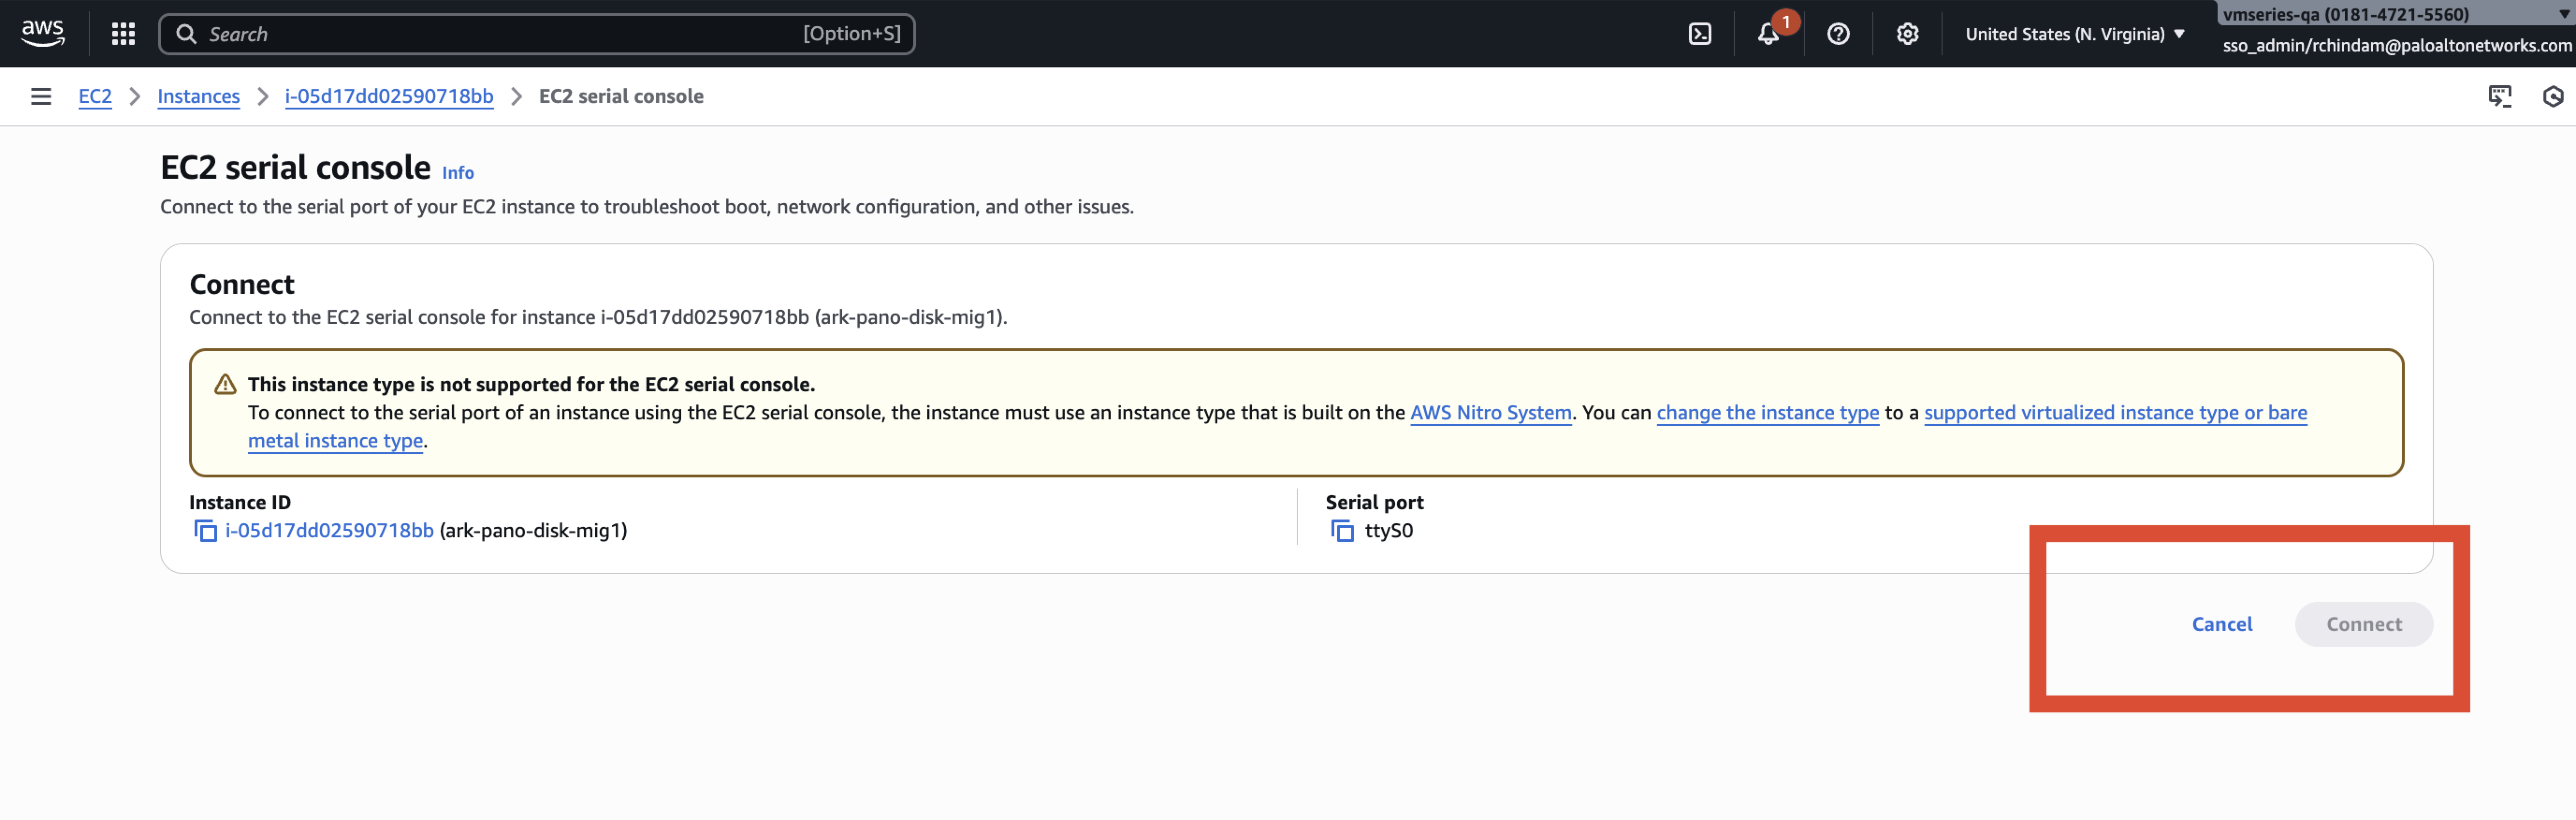
Start the Panorama Instance.After the Panorama VM is up and running, confirm the disk is identified as a data disk using the command:show system disk details![]() admin@Panorama> show system disk details Shows new 224 GB disk as below Name : nvme1n1 State : Present Size : 229376 MB Status : Unavailable Reason : Admin disabledExecute the command request system clone-system-disk target <new-disk>admin@Panorama> request system clone-system-disk target nvme1n1 Legacy logging disk <value> Select target disk admin@Panorama> request system clone-system-disk target nvme1n1 Executing this command will copy data from the system disk and delete all data on the target disk. The system will reboot and start the disk cloning procedure. The command will take at least 20 minutes to complete. Progress information will be available only via the Console. Do you wish to continue? (y or n) Broadcast message from root (Fri Sep 6 16:38:47 2024): The system is going down for reboot NOW!Select Instance state > Monitor and troubleshoot > EC2 serial console and Connect to monitor the EC2 serial console and check the status of disk migration. Disk migration may take approximately 30 minutes. Confirm successful completion of the process.
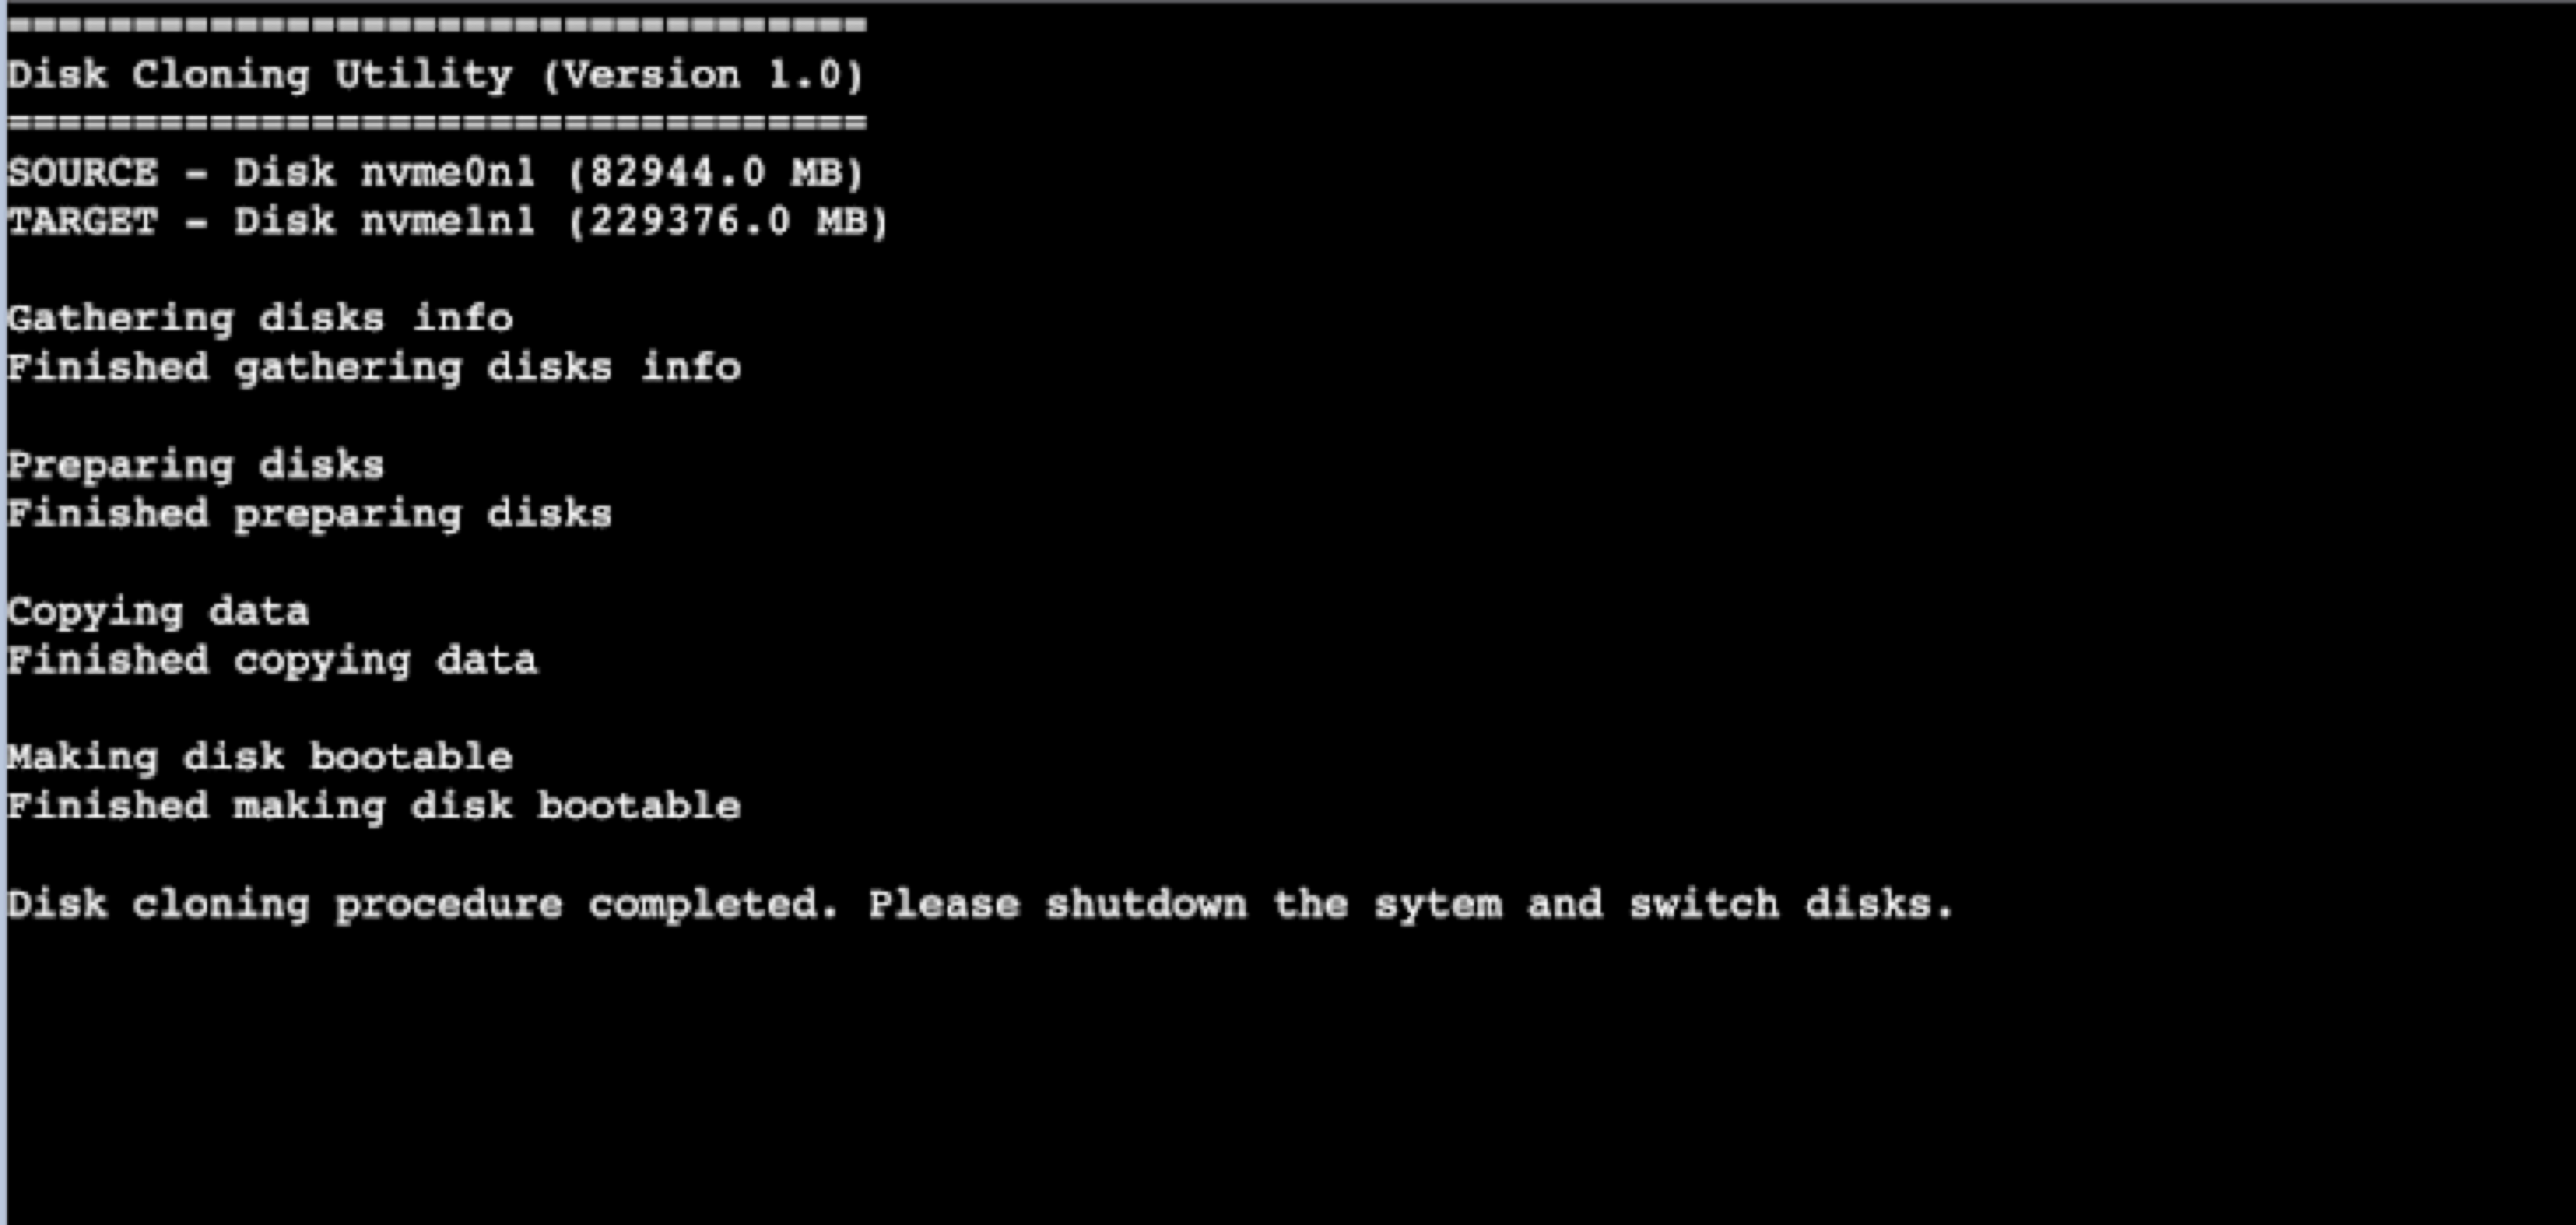
admin@Panorama> show system disk details Shows new 224 GB disk as below Name : nvme1n1 State : Present Size : 229376 MB Status : Unavailable Reason : Admin disabledExecute the command request system clone-system-disk target <new-disk>admin@Panorama> request system clone-system-disk target nvme1n1 Legacy logging disk <value> Select target disk admin@Panorama> request system clone-system-disk target nvme1n1 Executing this command will copy data from the system disk and delete all data on the target disk. The system will reboot and start the disk cloning procedure. The command will take at least 20 minutes to complete. Progress information will be available only via the Console. Do you wish to continue? (y or n) Broadcast message from root (Fri Sep 6 16:38:47 2024): The system is going down for reboot NOW!Select Instance state > Monitor and troubleshoot > EC2 serial console and Connect to monitor the EC2 serial console and check the status of disk migration. Disk migration may take approximately 30 minutes. Confirm successful completion of the process.![]() The following image shows an example of successful completion of the disk migration.
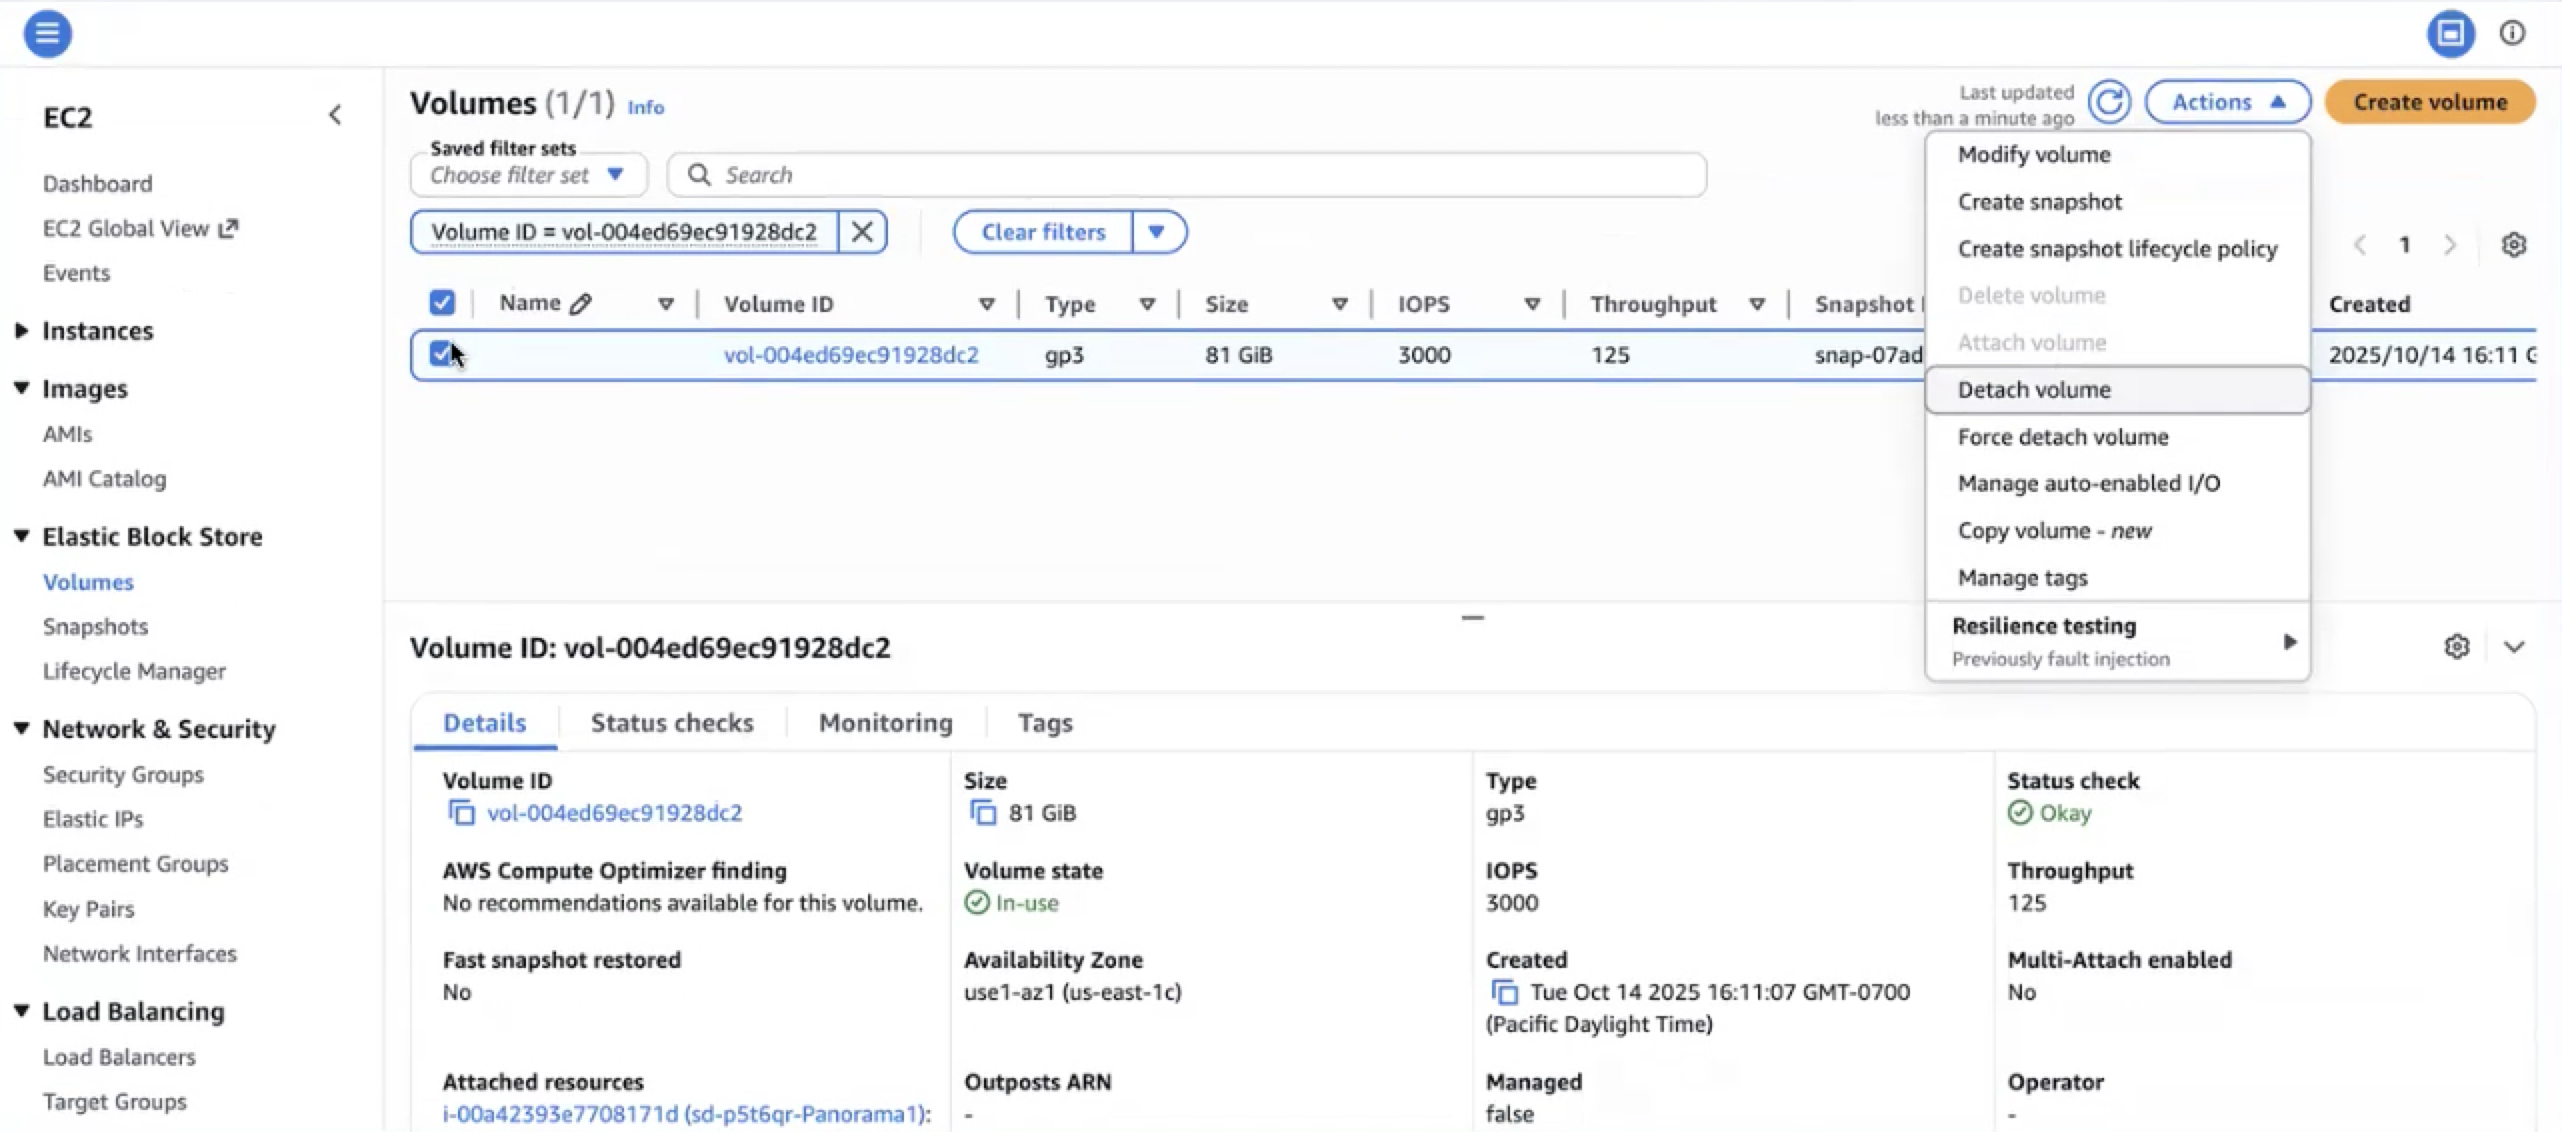
The following image shows an example of successful completion of the disk migration.![]() Stop the Panorama instance after the disk migration is complete.Detach both disks (81GB and 224GB) individually. To detach the disks, select the Volume ID of the disk you need to detach, then Actions > Detach volume.
Stop the Panorama instance after the disk migration is complete.Detach both disks (81GB and 224GB) individually. To detach the disks, select the Volume ID of the disk you need to detach, then Actions > Detach volume.![]() Attach the new 224GB disk as the root volume (/dev/xvdp) to the Panorama instance. To attach the disk, select the Volume ID of the disk you need to attach, then Actions > Attach volume.
Attach the new 224GB disk as the root volume (/dev/xvdp) to the Panorama instance. To attach the disk, select the Volume ID of the disk you need to attach, then Actions > Attach volume.![]() Start the instance.After the Panorama VM is running, execute the command show system disk-partition to confirm it displays root volumes of 224GB.panadmin@Panorama> show system disk-partition Disk /dev/nvme0n1: 224 GiB, 240518168576 bytes, 469762048 sectors Units: sectors of 1 * 512 = 512 bytes Sector size (logical/physical): 512 bytes / 512 bytes I/O size (minimum/optimal): 4096 bytes / 4096 bytes Disklabel type: dos Disk identifier: 0x05ef63be Device Boot Start End Sectors Size Id Type /dev/nvme0n1p1 63 4016249 4016187 1.9G 83 Linux /dev/nvme0n1p2 4016250 36033794 32017545 15.3G 83 Linux /dev/nvme0n1p3 36033795 68051339 32017545 15.3G 83 Linux /dev/nvme0n1p4 68051340 468857024 400805685 191.1G f W95 Ext'd (LBA) /dev/nvme0n1p5 68051403 228074804 160023402 76.3G 83 Linux /dev/nvme0n1p6 228074868 276093089 48018222 22.9G 83 Linux /dev/nvme0n1p7 276093153 276109154 16002 7.8M 83 Linux /dev/nvme0n1p8 276109218 468857024 192747807 91.9G 83 Linux Disk /dev/loop0: 36.3 GiB, 38948306944 bytes, 76070912 sectors Units: sectors of 1 * 512 = 512 bytes Sector size (logical/physical): 512 bytes / 512 bytes I/O size (minimum/optimal): 512 bytes / 512 bytes
Start the instance.After the Panorama VM is running, execute the command show system disk-partition to confirm it displays root volumes of 224GB.panadmin@Panorama> show system disk-partition Disk /dev/nvme0n1: 224 GiB, 240518168576 bytes, 469762048 sectors Units: sectors of 1 * 512 = 512 bytes Sector size (logical/physical): 512 bytes / 512 bytes I/O size (minimum/optimal): 4096 bytes / 4096 bytes Disklabel type: dos Disk identifier: 0x05ef63be Device Boot Start End Sectors Size Id Type /dev/nvme0n1p1 63 4016249 4016187 1.9G 83 Linux /dev/nvme0n1p2 4016250 36033794 32017545 15.3G 83 Linux /dev/nvme0n1p3 36033795 68051339 32017545 15.3G 83 Linux /dev/nvme0n1p4 68051340 468857024 400805685 191.1G f W95 Ext'd (LBA) /dev/nvme0n1p5 68051403 228074804 160023402 76.3G 83 Linux /dev/nvme0n1p6 228074868 276093089 48018222 22.9G 83 Linux /dev/nvme0n1p7 276093153 276109154 16002 7.8M 83 Linux /dev/nvme0n1p8 276109218 468857024 192747807 91.9G 83 Linux Disk /dev/loop0: 36.3 GiB, 38948306944 bytes, 76070912 sectors Units: sectors of 1 * 512 = 512 bytes Sector size (logical/physical): 512 bytes / 512 bytes I/O size (minimum/optimal): 512 bytes / 512 bytes