Prisma Access
Enable ZTNA Connector
Table of Contents
Expand All
|
Collapse All
Prisma Access Docs
-
- 6.1 Preferred and Innovation
- 6.0 Preferred and Innovation
- 5.2 Preferred and Innovation
- 5.1 Preferred and Innovation
- 5.0 Preferred and Innovation
- 4.2 Preferred
- 4.1 Preferred
- 4.0 Preferred
- 3.2 Preferred and Innovation
- 3.1 Preferred and Innovation
- 3.0 Preferred and Innovation
- 2.2 Preferred
-
-
- 4.0 & Later
- Prisma Access China
-
-
Enable ZTNA Connector
Learn how to configure a ZTNA Connector in Prisma Access.
| Where Can I Use This? | What Do I Need? |
|---|---|
|
|
Before you can set up ZTNA Connector, you must enable it within Prisma Access. Before
you enable ZTNA Connector, do the following:
- Review the ZTNA Connector Requirements and Guidelines.
- Identify your Application IP and Connector IP address blocks. You must reserve a separate address pool to reserve for use within Prisma Access internally to route traffic to the connectors and private applications you’ll be onboarding. Prisma Access resolves the FQDNs of the applications you onboard to ZTNA Connector to the IP addresses in the Application IP address block. Similarly, Prisma Access uses the Connector IP address block to route traffic from the remote network or mobile user to the appropriate ZTNA Connector.Configure the connector IP address blocks carefully. Once you have added them, you can only update or delete them after you delete all the existing connectors or connector groups.When configuring, updating, or deleting the ZTNA Connector application and connector pools, you must do a commit and push to all the Prisma Access components.You should reserve at least a /16 subnet for the address pool. Use RFC 1918 or RFC 6598 addresses. You can specify an RFC 1918 address pool during ZTNA Connector setup instead of RFC 6598; however, you cannot change the address pool type back to RFC 6598 after you specify RFC 1918.
Enable ZTNA Connector (Strata Cloud Manager)
Learn how to configure a ZTNA Connector in Prisma Access.
Use the following workflow to enable ZTNA Connector in Cloud Managed Prisma
Access.
You must define separate IP address blocks for your connectors and your
applications and the blocks cannot overlap with:
- Each other
- The Prisma Access infrastructure subnet
- The GlobalProtect IP address pool
- If you are using service connections with ZTNA Connector, subnets advertised from a data center to the Prisma Access service connection using static routes or BGP
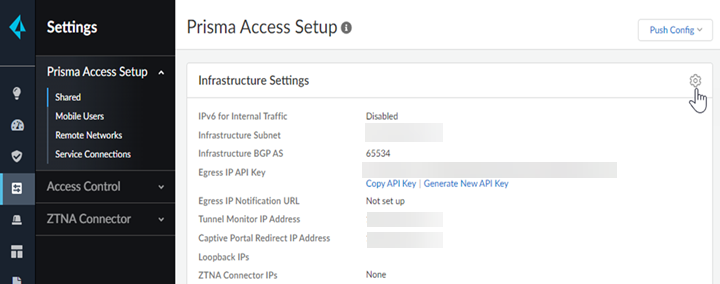
- Configure the IP address blocks that Prisma Access will use internally to route traffic to the ZTNA Connector and the private apps you onboard.
- Select ConfigurationNGFW and Prisma AccessConfiguration ScopePrisma AccessPrisma Access InfrastructureInfrastructure Settings.
![]()
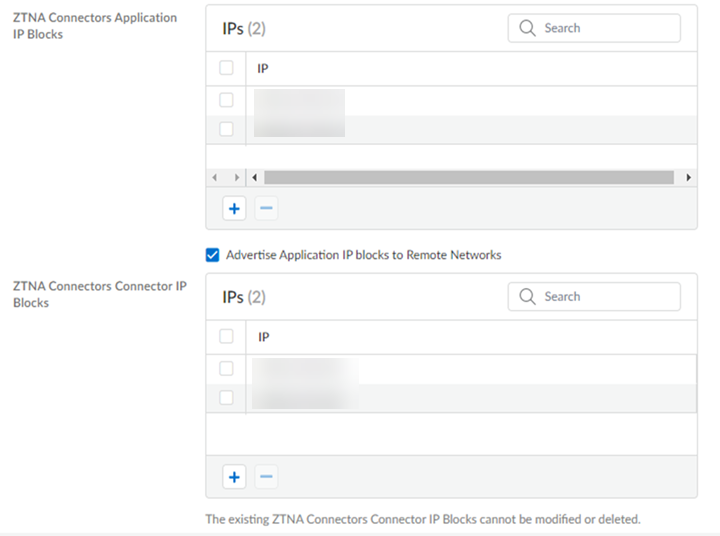
- Add ZTNA Connectors Application IP Blocks.You can add a single Application IP Block, or multiple blocks depending on your deployment. You can also Advertise Application IP blocks to Remote Networks to provide remote network access.Use RFC 1918 or RFC 6598 addresses. You can specify an RFC 1918 address pool during ZTNA Connector setup instead of RFC 6598. However, you can change the address pool type back to RFC 6598 after you specify RFC 1918 only for application blocks. For connector IP address blocks, you can change the address pool type only when you delete all the connectors and connector groups.
- Add ZTNA Connectors Connector IP Blocks that Prisma Access will use internally to route traffic between mobile
users, remote networks and the connector VMs in your data centers.Configure the connector IP address blocks carefully. Once you have added them, you can only update or delete them after you delete all the existing connectors or connector groups.You can add a single Connector IP Block, or multiple blocks depending on your deployment.
![]()
- Click Save to save the IP address block configuration and then Commit and push the configuration.
Launch ZTNA Connector from Strata Cloud Manager.- Select ConfigurationZTNA Connector.
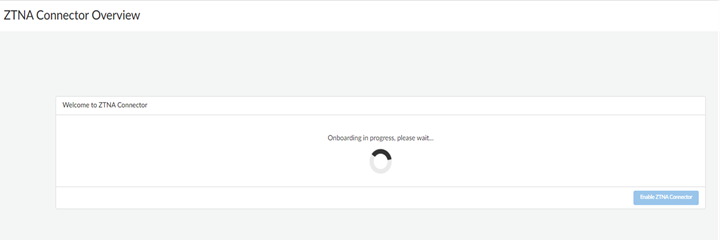
- Prisma Access begins setting up the infrastructure for the ZTNA
Connector. This may take a few minutes.
![]()
- When onboarding finishes, the ZTNA Connector Overview displays.
![]()
- Select ConfigurationNGFW and Prisma AccessConfiguration ScopePrisma AccessPrisma Access InfrastructureInfrastructure Settings.
Enable ZTNA Connector (Panorama)
Learn how to configure a ZTNA Connector in Prisma Access (Managed by Panorama).
You must define separate IP address blocks for your connectors and your
applications and the blocks cannot overlap with:
- Each other
- The Prisma Access infrastructure subnet
- The GlobalProtect IP address pool
- If you are using service connections with ZTNA Connector, subnets advertised from a data center to the Prisma Access service connection using static routes or BGP
- Configure the IP address blocks that Prisma Access will use internally to route traffic to the ZTNA Connector and the private apps you onboard.
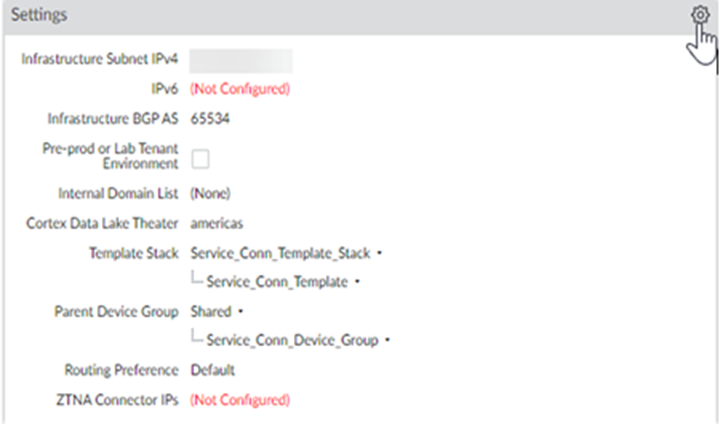
- Select PanoramaCloud ServicesConfigurationService Setup and Edit the
Settings.
![]()
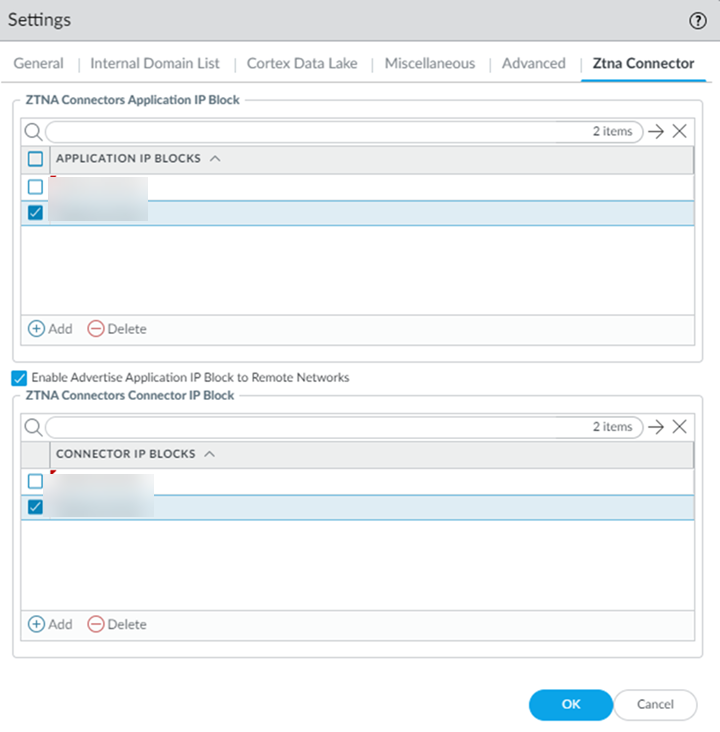
- On the ZTNA Connector tab
Add an Application IP
Block.You can add a single Application IP Block, or multiple blocks depending on your deployment.You can also Enable Advertise Application IP Block to Remote Networks.Use RFC 1918 or RFC 6598 addresses. You can specify an RFC 1918 address pool during ZTNA Connector setup instead of RFC 6598. However, you can change the address pool type back to RFC 6598 after you specify RFC 1918 only for application blocks. For connector IP address blocks, you can change the address pool type only when you delete all the connectors and connector groups.
- Set the Connector IP Blocks that Prisma Access will use internally to route traffic between mobile users, remote networks and the connector VMs in your data centers.Configure the connector IP address blocks carefully. Once you have added them, you can only update or delete them after you delete all the existing connectors or connector groups.You can add a single Connector IP Block, or multiple blocks depending on your deployment.
![]()
- Click OK to save the IP address block configuration and then Commit and push the configuration.
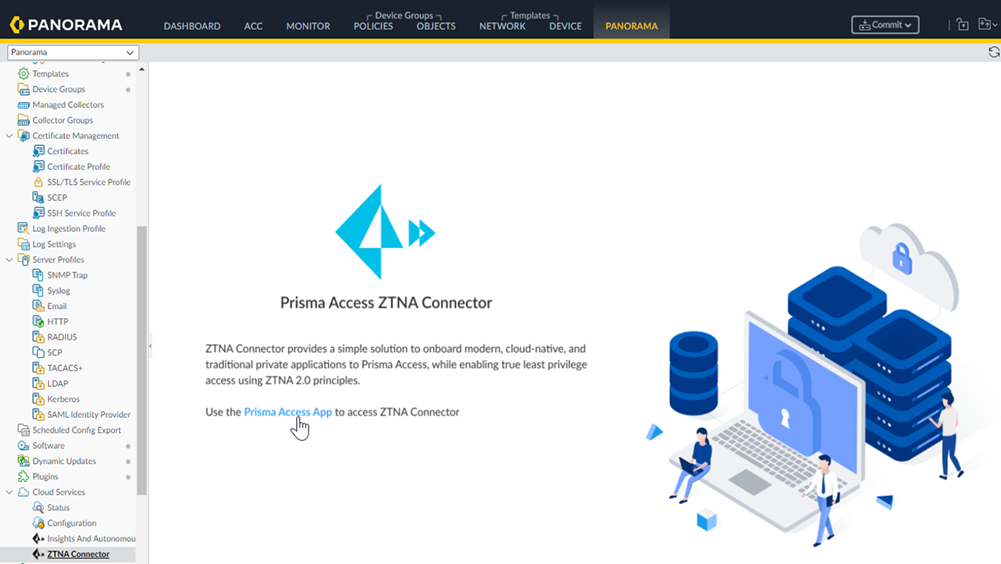
Launch ZTNA Connector from the Cloud Services Plugin on Panorama.- SelectPanoramaCloud ServicesZTNA Connector.
- Click Strata Cloud Manager to launch ZTNA Connector in Strata Cloud Manager on the hub.
![]()
- From Strata Cloud Manager, select SettingsZTNA Connector.
- Prisma Access begins setting up the infrastructure for the ZTNA
Connector. This may take a few minutes.
![]()
- When onboarding finishes, the ZTNA Connector Overview displays.
![]()
- Select PanoramaCloud ServicesConfigurationService Setup and Edit the
Settings.

